Table of Contents
Advertisement
Quick Links
Advertisement
Table of Contents

Related Manuals for Fantasea FE 330


Summary of Contents for Fantasea FE 330
-
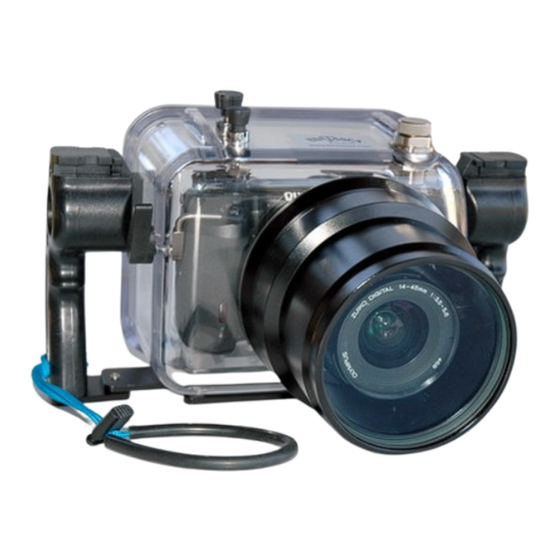
Page 1: Manual For Fantasea Fe 330 Camera Housing For The Olympus E330 Camera
Manual for Fantasea FE 330 Camera Housing For the Olympus E330 Camera... -
Page 2: Table Of Contents
Table of Contents MANUAL FOR FANTASEA FE 330 CAMERA HOUSING FOR THE OLYMPUS E330 CAMERA -----------------------------------------------------------------------------------------------------------1 INTRODUCTION ------------------------------------------------------------------------------------------------3 GENERAL SPECIFICATIONS -------------------------------------------------------------------------------4 FEATURES AND ACCESSORIES INCLUDED WITH THE HOUSING----------------------------4 ---------------------------------------------------------------------------------------------------------4 EATURES ----------------------------------------------------------------------------------------4 CCESSORIES NCLUDED FUNCTIONS [CONTROL DETAILS] -----------------------------------------------------------------------5 -------------------------------------------------------------------------7 AINTENANCE OF THE... -
Page 3: Introduction
INTRODUCTION For the first time, the comfort and flexibility of continuous live views directly on the LCD is available to digital SLR users. This ground-breaking innovation enables framing of shots without the need to look through the viewfinder. Users can therefore see what’s going on around them while they shoot, which is a significant advantage for sports photographers as well underwater photography. -
Page 4: General Specifications
GENERAL SPECIFICATIONS • Test Pressure Fantasea Housings are individually tested to 300 feet • Closure Design Air Lock • Body Material Polycarbonate • Overall Size 210 x 270 x 200 mm (LxWxH) • Total Weight Approximately 2.46 Kg (Housing only) •... -
Page 5: Functions [Control Details]
FUNCTIONS [CONTROL DETAILS] Pressure Release Plug IGURE CAMERA HOUSING IN THREE VIEWS Shutter: Main Trigger [Shutter] Depress halfway to set the and fully depress to activate shutter. Exposure Compensation: Set exposure compensation press button to choose amount of compensation. On/Off and Mode Dial: Dual purpose button—sets camera on or off and can target a mode by twisting the button. - Page 6 Drive and AEL/AFL button: Dual purpose button to operate 2 buttons: Drive—sets the single-frame/sequential shooting, remote control and self timer AEL/AFL button—locks focus and exposure settings prior to shooting. OK button: Selects [confirms] selection. Used to set and confirm changes to the multi control settings of the multipurpose button [button #8].
-
Page 7: Maintenance Of The Gasket Seal
Maintenance of the Gasket Seal Each housing is individually inspected and hydrostatically tested in the factory. The design of the compression gasket seal is among the most reliable in the industry and the watertight integrity is excellent. This special gasket design provides a perfect seal even if there is any movement between the body and lid due to change of ambient pressure. - Page 8 BEING DAMAGED, DISCARD IT IMMEDIATELY. A spare gasket is supplied with your housing, or a replacement gasket can be obtained from Fantasea. If the gasket is contaminated or suspected of being contaminated, clean it with a cotton cloth that is free of all chemicals or contamination. After cleaning inspect the gasket again.
-
Page 9: Exclusive Pressure Release Plug
Exclusive Pressure Release Plug The body and lid are uniquely designed with a "no clip" closure arrangement. Our testing has shown that this arrangement allows the water to exert an even pressure on the O-ring, thus increasing the reliability of the watertight seal. To open the housing, the pressure release plug must be first unscrewed and then pulled all the way out. -
Page 10: Opening Levers
Opening Levers After unscrewing and pulling out the pressure release plug, the lid can be opened. To overcome the friction of opening, two levers are used to push against the lid with a cam action. On some models these opening levers are bolted to the body. On the other models, they are detachable levers. Be sure they are inserted all the way flat to the Important! housing before turning to avoid damaging the... -
Page 11: Mounting The Camera In The Housing
Mounting the Camera in the Housing Remove the Lens Cap and Wrist Strap: Make sure the camera lens to body orientation is set so the LCD screen is at top view with lens at the extended position. Attach the Plastic Slide Plate: Attach the plastic slide plate to the camera's tripod mounting fixture with a coin, screw driver or the end of the universal tool supplied [Figure 3]. -
Page 12: Close Housing
Taking up Main Dial, slide the camera into the body along the guide rail inside the bezel [Figure 6]. Make sure the camera body reaches the limit and test the function of the on the body OF BUTTONS of the housing. 6: S IGURE LIDING... - Page 13 8: R IGURE EPLACING THE 5. Inspect the gasket seal for proper closure. A complete seal can be visually confirmed by looking for the black line made by the gasket around the complete circumference of the housing. If the gasket is in good contact, a thin black line, about 0.5- 1mm in width should be visible where the gasket is in Note! contact with the lid.
-
Page 14: Use & Care Of Housing
Use & Care of Housing Pre Dive Function Check Just before entering the water, review the steps that you have carried out to properly close the housing. Most importantly check that the housing is closed. Take a visual check of the gasket seal. It is also useful to switch on the camera and check that controls e.g. -
Page 15: Traveling
It is recommended to have annual maintenance of all Fantasea housings. It is likewise recommended to use an authorized Fantasea Service Center for this purpose. Please contact Fantasea Line by email: service@fantasea.com or visit the Fantasea Customer Service section on the web site www.fantasea.com. -
Page 16: Warranty
Warranty The FE 330 includes a one-year limited warranty for defective parts which the manufacturer will replace. See separate insert page regarding the unique FE 330 anti flooding program by DEPP and the FE 330 Accessory Products page.
Need help?
Do you have a question about the FE 330 and is the answer not in the manual?
Questions and answers