Table of Contents
Advertisement
Quick Links
Advertisement
Table of Contents

Subscribe to Our Youtube Channel
Related Manuals for Fantasea FL-18


Summary of Contents for Fantasea FL-18
- Page 1 FL-18 Housing Operator's Manual For Nikon Coolpix L15, L16 & L18 Digital Cameras...
-
Page 2: Table Of Contents
......................9 ENERAL ESCRIPTION OF AMERAS L15, L16 & L18 F ................10 IKON OOLPIX EATURE IGHLIGHTS USING THE FANTASEA FL-18 HOUSING ....................11 ..........................11 PENING THE OUSING ............................11 NSERTING AMERA ..........................12 HECKING THE RING ..........................13... -
Page 3: General Information
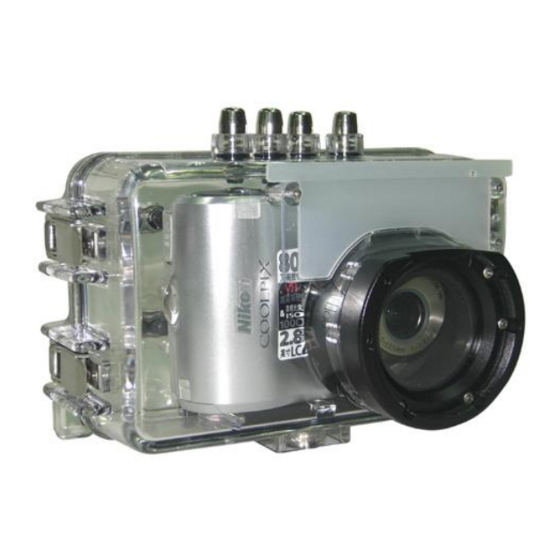
GENERAL INFORMATION The Fantasea FL-18 Housing Fantasea has specially designed the FL-18 housing for the Nikon Coolpix L15, L16 and L18 cameras. This housing is ideal for outdoor and underwater photographers who enjoy the cameras automatic exposure features for capturing fast action pictures easily and creatively. The FL-18 housing ensures easy handling and accurate access to camera functions through the critical placement of push-button controls and a compact design. - Page 4 Top/Front Side of Housing 3. Playback 2. Power On/Off 4. Shooting Mode 1. Shutter Release 5. Removable Flash Diffuser 7. Buckles to Secure Housing 6. Lens Port Numbered description below refers to corresponding numbers on above graphic. Shutter Release This is a two stage shutter-release button. First lightly press the shutter-release button halfway, stopping when you feel minimal resistance.
- Page 5 Playback Press the Playback button in shooting mode to enter the playback mode. Shooting Mode Press the Shooting Mode button in playback mode to enter the shooting mode. Press the Shooting Mode button in shooting mode to display the shooting mode selection menu. In this menu, use the multi-selector to choose a shooting mode: Easy-Auto Mode Movie...
- Page 6 Lens Port Refer to the section "Inserting Camera" for useful information. Buckles to Secure Housing Refer to the section "Using the Fantasea FL-18 Housing" on how to open and close the camera housing. Back Side of Housing Buttons 8. Menu 9.
- Page 7 9. Zoom In/Out Use the Zoom buttons to activate optical zoom. Press "W" to zoom out, increasing the area visible in the frame, or "T" to zoom in, so that the subject fills a larger area of the frame. When the camera is zoomed to the maximum magnification (3x), holding "T"...
- Page 8 13. OK Button Push this button to confirm a selection. 14. Self-Timer The camera is equipped with a ten-second timer for self portraits. When using the self-timer, mount the camera on a tripod or rest it on a flat and stable surface. ...
-
Page 9: General Description Of Cameras
GENERAL DESCRIPTION OF CAMERAS The new Nikon Coolpix L15, L16 and L18 are quality compact digital cameras that combine high performance with operating ease, as well as support advanced features. Built on a custom application of Nikon’s innovative EXPEED digital image processing concept and incorporating the precision optics of a Nikkor lens, the Coolpix L15, L16 and L18 are built to realize optimum performance and maximum image quality. -
Page 10: Nikon Coolpix L15, L16 & L18 Feature Highlights
NIKON COOLPIX L15, L16 & L18 FEATURE HIGHLIGHTS New easy Auto mode and Scene modes for carefree shooting Easy Auto mode makes it easier to turn on the camera and shoot without worrying about settings. Easy access to 15 different scene modes and 3 movie modes also ensures shooting that is tuned to give the best results to match the moment. -
Page 11: Using The Fantasea Fl-18 Housing
1. Release all four latches at the same time, and lift off back half to open housing. INSERTING CAMERA Since the Fantasea FL-18 is specifically designed for the Coolpix L15, L16 and L18 digital cameras, inserting the camera into the housing is quite simple. -
Page 12: Checking The O-Ring
1. It is recommended to make some camera settings prior to inserting camera into the housing. Please refer to the Coolpix owner's manual for menu options and personal Notes: preferences. 2. Take a few test shots: it is recommended to turn the camera "on"... -
Page 13: Closing The Housing
CLOSING THE HOUSING 1. Place housing back over front and align the complete mating surface of the housing and the O- ring, forming a proper seal. 2. Position all four latches over latch hooks in ready position. 3. Close one of the bottom latches first, maintaining pressure on the other side. Proceed by closing the other side's top latch. -
Page 14: Viewing The Subject
VIEWING THE SUBJECT The L15, L16 and L18 cameras do not have a standard eyepiece, but underwater photographers and outdoor photographers will appreciate the large 2.8 inch LCD viewing monitor (3.0 inch on the L18) for composing photographs. The LCD monitor allows you to see your subject in sharp focus and framed properly. Hold the camera housing in your outstretched arm at a position that is both comfortable and also allows you to easily see the LCD monitor, for best compositional options. -
Page 15: Battery Life
BATTERY LIFE AA-Size Battery Compatibility AA-Size is one of the most widely available battery sizes in the world - in alkaline, lithium, rechargeable or other forms. AA compatibility enables use anywhere in the world. There are certain things that users can do to help with battery life. The most important is to set the camera to turn the LCD off after a short time, during periods of non-use. -
Page 16: Using The Flash
USING THE FLASH The Coolpix has a built-in flash, which will illuminate nearby underwater subjects. For subjects that are farther away, an accessory slave flash is recommended (see below). A built-in flash diffuser is supplied which will help achieve a wider and softer light source thereby providing more coverage and less likelihood of backscatter (the unattractive snowstorm affect of the flash reflecting off the suspended particles in the water). -
Page 17: Lens Accessories
LENS ACCESSORIES The Fantasea FL-18 features a threaded 46mm lens port. This threaded port is designed to work with some of the wide-angle and macro adapters that are currently on the market. Fantasea Line offers the following lens accessories: FWAL-02 Wide Angle Lens: an accessory Wide Angle Lens which fits over the housing port and can be installed and removed during the course of the dive. -
Page 18: Shooting Techniques
SHOOTING TECHNIQUES EXPOSURE MODES (PRE-SET BEFORE CAMERA INSERTION) There are several exposure modes for photographers to choose from, depending on the situation. Underwater, it is recommended that you shoot in the Auto mode on the camera, in which ambient light and artificial light will be automatically controlled by the camera according to the lighting conditions. -
Page 19: Camera Standby Mode
CAMERA STANDBY MODE You can access the camera's menu to select the length of the inactivity period. Inactivity period is the length of time before the camera goes into standby mode. Options are 30 seconds, one minute, five minutes, and 30 minutes. -
Page 20: Care & Maintenance
8. Never dive with the Fantasea FL-18 housing to a depth greater than 200 ft/60 meters. 9. It is recommended that you select the shortest time option on the menu, for placing the camera into standby during periods of inactivity. - Page 21 12. It is recommended to have all Fantasea housings serviced once a year at an authorized Service Center. This includes visual inspection and possible changing of all seals, gaskets and O-rings.
Need help?
Do you have a question about the FL-18 and is the answer not in the manual?
Questions and answers