Table of Contents
Advertisement
Quick Links
Advertisement
Table of Contents

Related Manuals for Fantasea FP-5000


Summary of Contents for Fantasea FP-5000
- Page 1 Manual for the FP-5000 Housing For Nikon Coolpix P5000 & P5100 Digital Cameras...
-
Page 2: Table Of Contents
FP-5000 ........................3 ANTASEA HOUSING FP-5000 U ..........................3 ANTASEA N ........................11 ENERAL AMERA ESCRIPTIO USING THE FANTASEA FP-5000 HOUSING ................... 13 THE H ..........................13 PENING OUSING ............................13 NSERTING AMERA ..........................14 HECKING THE ..........................14 LOSING THE OUSING VIEWING THE SUBJECT ........................... -
Page 3: General Information
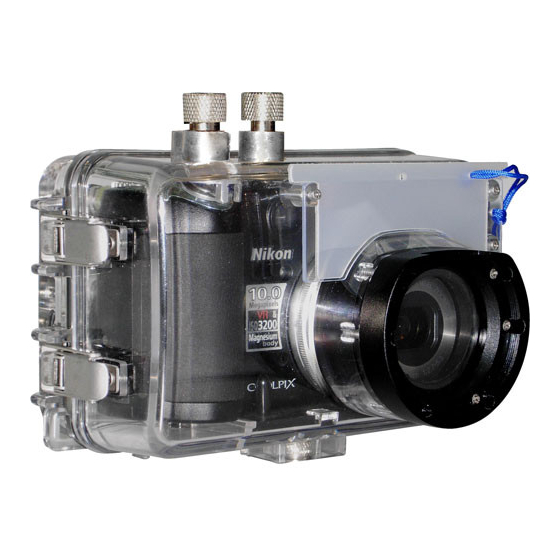
GENERAL INFORMATION THE FANTASEA FP-5000 HOUSING Fantasea has specially designed the FP-5000 housing for the Nikon Coolpix P5000 and P5100 cameras. This housing is ideal for outdoor and underwater photographers, who enjoy the camera’s automatic exposure features for capturing fast action pictures easily, and manual exposure features for capturing the widest variety of creative superior underwater images. - Page 4 The Flash Diffuser is used to diffuse the internal flash's intensity. See the section on "Accessory Slave Flash" for additional information. Lens Port: Refer to the section "Inserting Camera" for useful information. Buckles to Secure Housing: Refer to the section "Using the Fantasea FP-5000 Housing" on how to open and close the camera housing.
- Page 5 Top Side of Housing 5. Zoom In/Out and 4. Mode Dial Shutter Release 6. Power On/Off Numbered description below refers to corresponding numbers on above graphic. Mode Dial: To select a mode, align the mode icon with the mark next to the mode dial. The P5000 and P5100 cameras offer the following modes: ...
- Page 6 Zoom In/Out and Shutter Release: Push this button to activate the shutter release control, and swivel it to the sides in order to activate the zoom control. Zoom In/Out Use the Zoom button to activate optical zoom. Swivel to "W" (Wide) to zoom out, increasing the area visible in the frame, or to "T"...
- Page 7 Back Side of Housing Buttons 7. Command Dial 13. Function 8. Flash Mode 14. Monitor 9. Exposure Multi- Compensation Selector 15. Playback Buttons 10. Focus 16. Menu 17. Delete 12. OK button 11. Self-Timer Numbered description below refers to corresponding numbers on above graphic. 7.
- Page 8 Choose the function performed by function button in P, A, S and M modes. In these modes, press down the function button to display the chosen function options, rotate command dial to highlight desired option and release function button. ...
- Page 9 11. Self-Timer: The camera is equipped with a ten second timer and a three second timer for self-portraits and to reduce blur. When using the self-timer, mount the camera on a tripod or rest it on a flat and stable surface. ...
- Page 10 17. Delete: Press Delete to delete the picture currently displayed in the monitor in full-frame playback. Press the multi-selector up/down arrows to choose "Yes", and press "OK". In Shooting Mode, press this button to delete the last picture taken. When the confirmation dialog shown at right is displayed, press the multi-selector up/down arrows to choose "Yes", and press "OK".
-
Page 11: General Camera Description
GENERAL CAMERA DESCRIPTION With the release of the COOLPIX P5000 and P5100, Nikon offers a camera with a range of features that enable the user to explore creativity behind photography. The latest addition to their COOLPIX line of cameras is a lightweight solid model with an impressive imaging performance of 10.0 megapixels on the P5000 and 12.1 megapixels on the P5100, which enables the photographer to capture images with incredible detail, even after enlargement. - Page 12 NIKON COOLPIX P5000 and P5100 FEATURE HIGHLIGHTS Superb Image Quality Excellent imaging quality is a priority for the COOLPIX P5000 and P5100, from the 10.0 effective megapixels on the P5000 and 12.1 effective megapixels on the P5100, of outstanding resolution produced by their 1/1.8-inch RGB CCD and improved high-performance image-processing engine, to its powerful 3.5x Zoom-Nikkor lens and lens shift VR.
-
Page 13: Using The Fantasea Fp-5000 Housing
1. Release all four latches at the same time, and lift off back half to open housing. INSERTING CAMERA Since the Fantasea FP-5000 is specifically designed for the Coolpix P5000 and P5100 digital cameras, inserting the camera into the housing is quite simple. -
Page 14: Checking The O-Ring
CHECKING THE O-RING Prior to each closure of the housing the O-ring should be visually inspected. If there is any debris present, including dirt, sand, dust, hair, grease or other matter, it must be cleaned to insure a proper watertight seal. Cleaning the O-ring is a simple matter of wiping it with a damp, soft cloth to remove the foreign matter. - Page 15 4. Inspect the O-ring for proper closure. A complete seal can be visually confirmed by the O-ring around the complete circumference of the housing. 5. Always take the first dive without your camera in the housing just to make sure there is no leakage from damage to the housing.
-
Page 16: Viewing The Subject
VIEWING THE SUBJECT The P5000 and P5100 cameras feature a large 2.5 inch LCD viewing monitor for composing photographs. The LCD monitor will allow you to see your subject in sharp focus and framed properly. Hold the camera housing in your outstretched arm at a position that is both comfortable and also allows you to easily see the LCD monitor, for best compositional options. -
Page 17: Battery Life
BATTERY LIFE Rechargeable Lithium-ion battery EN-EL5 The P5000 and P5100 cameras make use of a Rechargeable Lithium-ion battery EN-EL5, which is capable of shooting approximately 250 shots on a single charge. There are certain things that users can control to help extend battery life. It is recommended to set the camera to turn the LCD off after 30 sec of non use. -
Page 18: Using The Flash
USING THE FLASH The Coolpix has a built-in flash, which will illuminate nearby underwater subjects. For subjects that are farther away, an accessory slave flash is recommended (See Below). A built-in flash diffuser is supplied which will help achieve a wider and softer light source thereby providing more coverage and less likelihood of backscatter (the unattractive snowstorm affect of the flash reflecting off the suspended particles in the water). -
Page 19: Lens Accessories
LENS ACCESSORIES The Fantasea FP-5000 features a 46mm threaded lens port. This thread port is designed to work with some of the wide-angle and macro adapters that are currently on the market. Fantasea Line offers the following lens accessories: FWAL-01 Wide Angle Lens: an accessory Wide Angle Lens which fits over the housing port and can be installed and removed during the course of the dive. -
Page 20: Shooting Techniques
SHOOTING TECHNIQUES EXPOSURE MODES (PRE-SET BEFORE CAMERA INSERTION) There are several exposure modes [16 different Scene modes] for photographers to choose from, depending on the situation. Underwater it is recommended that you shoot in the Manual mode on the camera in which you can manually control ambient light and artificial light according to the lighting conditions. -
Page 21: Camera Standby Mode
CAMERA STANDBY MODE You can access the camera's menu to choose the length of the period of inactivity before the camera goes into standby mode . Options are 30 seconds, one minute, five minutes, and 30 minutes. This feature allows you to conserve battery power by placing the LCD monitor on standby [sleep mode]. -
Page 22: Care & Maintenance
8. Never dive with the Fantasea FP-5000 housing to a depth greater than 200 ft/60 meters. 9. It is recommended that you select the shortest time option on the menu, for placing the camera into standby during periods of inactivity. - Page 23 12. It is recommended to have annual maintenance of all Fantasea housings. This includes visual inspection and possible changing of all seals / gaskets / o-rings. It is recommended to use an authorized Fantasea Service Center for this purpose.
Need help?
Do you have a question about the FP-5000 and is the answer not in the manual?
Questions and answers