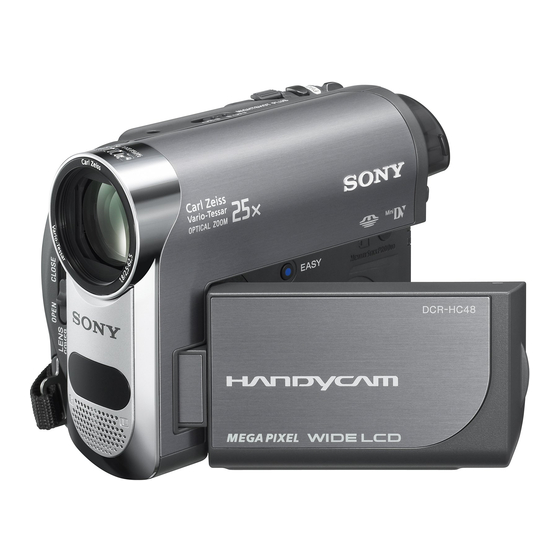
Sony DCR-HC48 Operating Manual
Digital video camera recorder
Hide thumbs
Also See for DCR-HC48:
- Operating manual (116 pages) ,
- Specifications (2 pages) ,
- Service manual (81 pages)
Table of Contents
Advertisement
Quick Links
Advertisement
Table of Contents

Related Manuals for Sony DCR-HC48


Summary of Contents for Sony DCR-HC48
- Page 1 Digital Video Camera Recorder Getting Started Operating Guide Using the Menu Dubbing/Editing DCR-HC48 Using a Computer Troubleshooting Additional Information Quick Reference Spanish Quick Guide/ Gufa rapida en espaSol Mini [IL'f vi_eol_igit_' lilfoLITHIUM C_ssete s_lEs © 2007 Sony Corporation...
- Page 2 To reduce fire or shock hazard, do not expose the unit to rain or moisture. CAUTION¸ T Oa_DUC_ THERISKOF _1_CTRICS_OCK _O USER-SERVICEABLE _ ARTS I_SlDE. REFERSER_ClN6 rO OU_UnE_ SERVICEPERSOnnEL the iiser to the presence unhlsulated "dangerous voltage" within the product's This symbol is intended to alert...
-
Page 3: Important Safeguards
IMPORTANT SAFEGUARDS Cleaning For your protection, please read these safety instructions completely before operating Unplug tile set fi'om the wall outlet belore the appliance, attd keep this manual for cle_uling or polishing it. Do not use liquid cleaners future reference. or _,erosol clemlers. - Page 4 _?ORTANT SAFEGUARDS ( go_i_ed} Lightning SafetyCheck For added protection t_>r t his _t during _L lighming Upon conlpletion of _uly selvice or repairs to tile slornl, or wllen it is lefi unatlended and unused fi)r set. ask the service technician to l_erlbrnl routine long periods ol time.
-
Page 5: Read This First
If you have any questions about this product, you may call: Sony Customer hfformation Center 1-800- 222-SONY (7669). Replace the battery with the The number below is for the FCC related specified type only. Otherwise, fire matters only. - Page 6 Read this fl_st (Co_ti_e_} Note Type of cassette youcan use in your camcorder Tbis equipment has been tested and Ii)und to comply with the linlits Ior a Class B digital Youcatt use mitti DV cassettes marked device, pursuanl to Part 15 of the FCC Rules. with Your camcorder is trot Mirli_...
- Page 7 Memory Stick Duo Adaptor About menu items, LCD panel, viewfinder, a nd lens sony • A meuu item that is gra_ed e/it is Rot awdlable under the currem recording or playback conditions. Using thecamcorder • The LCD screen and the viewfiuder are manufactured using extremely high- •...
- Page 8 About t heCarlZeisslens • Your camcorder is equipped with a Carl Zeiss lens. which was developed jointly by Carl Zeiss. in (;ermany, and Sony Corporation. and produces superior images. It adopts the MTF measurement system lk_rvideo cameras and offers a quality typical of a Carl Zeiss lens.
-
Page 9: Table Of Contents
Table of Contents IMPORTANT SAFEGUARDS ..3 Searching quickly for a desired scene (Zero set memory) ..30 Read this first ........Searching for a scene by date of recording (Date search) ... 31 Playing picture on a TV ... Step 1: Checking supplied items... - Page 10 What you can do with Windows computer ........Installing the "First Step Guide" and software ........Viewing "First Step Guide" ... 66 Using a Macintosh computer ..66 Troubleshooting ......67 Warning indicators and messages ............ Using your camcorder abroad ..
-
Page 11: Step 1: Checking Supplied
Gd[h_g S[ade# Step 1: Checkingsupplieditems Rechargeable battery pack NP-FH40 Make _,ure that you bave I-ollowing items (p. 12, 80) supplied with your camcorder. The number in the parentheses indicates im tuber of that item supplied. AC Adaptor (1) (p. 12) CD-ROM "Handycam Application... -
Page 12: Step 2: Charging The Battery
Step 2: Chargingthe battery pack Battery pack POWER switch DC IN jack Power cord AC Adaptor To the wall outlet You can charge the "InfoLITHIUM" Connect the power cord to the AC battery pack (H series) (p. 80) after Adaptor and the wall outlet. attaching it to your camcorder. - Page 13 To remove yourcamcorder fromthe Notes Handycam Station • When inserting the camcorder into lhe Handycam Sk_tion, close the DC IN jack cover, Turn off tile po'_x er. then remove tile • Disconnect tile AC Adaptor h'om tile DC IN camcorder from the Handycam Station...
- Page 14 Step 2: gha(g)_) the batte(y pack (go_ti_e_} To checkthe remaining battery (Battery Info) NP-FH40 lsupplied) Set tilePOWER switch to OFF (CHG), then NP-FH50 press DISP/BATT INFO. NP-FH70 17(} NP-FH 1 O0 Recording time Approximate time (rain.) available x,_ hen you use a fully charged battery pack. DISP/BATT INFO button NP-FH40...
-
Page 15: Step 3: Turningthe Poweron And Setting The Date And Time
Step 3: Turningthe poweron and setting the date and time Set the date and time when using this NP-FH70 37(1 camcorder %r the first time. If you do trot NP-FH 100 set the date attd time, the [CLOCK SET] screett appears every time you turn on your * When the LCD backlight turns on. -
Page 16: Changing The Language Setting
St÷p 3: Tur_i_g t hepowero_ a_ s÷t_i_g lh÷da_¢a_d_im÷{8o_i_÷dl ¸ Set [M] (month), then touch r_K] repeat for [D] (day), hour and You can change the on-screen displays to minute. show messages in a specified language. Touch _ -+ [MENU] -+ For midnight, set it to 12:00 AM. -
Page 17: Step 4: Making Setting
Step 4: Making setting adjustmentsbefore recording Notes • Do not press the buttons on the L('[) hame accidentally when you open or a_/jusl tile L_'D Slide Ihe LENS (?OVER swilch te OPEN. panel, "_" Tips • It you rotate tile LCD panel 180 degrees to tile lens side, you can close the LCD panel with the LCD screen lacing ollI. -
Page 18: Step 5: Insertinga Tape Or A "Memory Stick Duo
Step 4: Na_io# settio# Step 5: Insertinga adiustmeots before r÷ce_dio_ tape or a "Memory Stick Duo" Faten the __ripbelt and hold your camcorder correctly. • MnilP_ ( U c_ln nllnl casgeltes only (p. 78). Slide and hold the F- OPEN/ EJECT lever in the direction of the arrow and open the lid. - Page 19 The cassette compartment automatically slides back in. Insert the "Memory Stick Duo" into the "Memory Stick Duo" slot (J Notes in the right direction until it clicks. • Do not force the cassette compartment closed by pressing the Access lamp portion marked _ while it is sliding in, It may cause a...
-
Page 20: Easyrecording/Playback (Easyhandycam)
Recordi_g/Playba& EasyRecording/Playback (EasyHandycam) With this Easy Hand_cmn operation, most of the camera settings are autonmtically optimall_ a@lsted, which frees you from detailed a@lstments. The screen font size increases fl_r easy viewing. Open the lens cover (p, 17). I [] 11 the POWER _,w itchi_ et'_ _, It() (CHG),... - Page 21 Slide the POWER switch [] to turn on the PLAY/EDIT lamp. Touch the buttons on the screen [] as follows. Movies Still images Touch _, then touch Touch _ --* _/ to start playback. to select a picture. O GUIDE (p. 28) GUIDE (p.
-
Page 22: Recording
Recording Open the lens co','er (p. 17). PHOTO POWER switch REC START/ REC START/ STOP [] STOP [] ]Movies are recorded ()it a tape. Slide the POWER switch in the direction of the arrow repeatedly to turn on the CAMERA-TAPE lamp. - Page 23 Still images are recorded on Ihe "Memory Stick Duo." Slide the POWER switch in the direction of the arrow repeatedly to turn on the CAMERA-MEMORY lamp. Press and hold PHOTO lightly to adjust the focus, then press it fully. Flashing _Lighls A shutter sound...
-
Page 24: Zooming
Rec0rdi_ {C0_ti_H÷d} "_° Tips • You can _t [DIGITAL ZOOM] (p. 41) if you want to zoom to a level greater than 25 ×. You can magnil} images up to 25 times tile original size with tile power z()om lever or the zoom buttons on tile LCD frame. -
Page 25: Adjusting The Exposure For Backlit Subjects
WIDE SELECT POWER switch Selecting the aspectratio for mowes To adjust tile exposure for backlit subjects, press BACK LIGHT to display r_l. To (_) Set the POWER switch to CAMERA- cancel the back light function, press BACK TAPE. LIGHT again. repeatedly Press WIDE SELECT... -
Page 26: Playback
Playback Slide the POWER switch in the direction of the arrow repeatedly to turn on the PLAY/EDIT lamp..If Ihe POWER s_ ilch is set Io OFF (CHG)_ slide it owE_ while pressing the green bulton. J,_5_ g_ o_ O\ rAPE Touch _, then touch _ to start playback. - Page 27 Touch The most recently recoMed image is displayed. Swilch Ihe playback media* Previous/Next Go to tile index screen display "10 is displayed on file tape playback screen. To display picturesona "Memory StickDuo"ontheindexscreen Touch [_7. Touch one of the pictures to back to the single disphly mode.
-
Page 28: Using Pb Zoom
?_ayback {go_ti_e_} Usingthe guide functions(USAGE GUIDE) You can easily' select tile desired setting You can magnify tile recurded picture l"ron/ screens by using the guide functions abuut 1.1 to 5 times tile original size. (USAGE GUIDE/. Magnification can be adjusted with tile puwer level"... -
Page 29: Searching For The Starting
Searchingfor the starting point Unavailable settings during Easy Handycam During Easy H:md_cam operation, some items are unavailable. If an attempted setting is not available, but still desired. [END SEARCH] will not work once you touch [SET] to display an on-screen eject the cassette after you have recorded on instruction. -
Page 30: Searching Manually (Edit Search)
SearcN_g for the starting point {go_ti_ue_} The last 2 seconds (approx.) of the most recently recorded scene are played back. Then. your camcorder is set to standby. You can search for the start point to start the next recording while viewing the pictures oil the screen. -
Page 31: Point
Press _I_IREW. Press SEARCH M. on the Remote Commander. The lape stops automatically v,'hen the tape counter reaches "O:O0:(XL" Tile tape counler returns to tile tin/e Press I_1_1 (previous)/l_l_l(next) code display, and tile zero set memory select a recording date. display disappears. - Page 32 Playingthe pictureon a TV You cau connect your catncorder to the input.jack of a TV or a VCR using the A/V cennectiug cable ([_) or the A/V connectittg cable with S VIDEO ([_). Cotntect your camcorder to the wall outlet using the supplied AC Adapter lk_r this operatiott/p. 12).
- Page 33 To setthe aspect ratio accordingto theconnected T V(16:9/4:3) Change the aspect ratio of the image according to tile screen size of your TV. (_) Slide the POWER switch repeatedly to turn on the PLAY/EDIT lamp. @ Touch [gMgff0]--+ [MENU] ---+ (STANDARD SET) ---+ [TV TYPE] ---+ [I 6:9] or [4:3] ---+ [_.
-
Page 34: Using The Menu Items
Usingthe menuitems Slide the POWER switch in the direction of the arrow repeatedly to turn on the respective lamp. CAMERA_TAPE lmnp: _ settings on a tape CAMERA-MEMORY lamp: _ settings on a "Memory Stick Duo" PLAY/EDIT lamp: settings for viewing/editing Touch the LCD screen to select the menu item. -
Page 35: Menu Items
Menu items Available menu ilems (Q) vmy depending on which lamp is lit. During Easy Handycam operalion, tile following settings are aulomalically applied (p. 20). _ CAMERA SET menu (p 37) SCENE SELECT • • SPOT METER • • EXPOSURE •... - Page 36 Men# items (Ceetie#ed} EDIT/PLAY menu (p. 48) VAR.SPD REC CTRL AUD DUB CTRL • iiiiiiiiiiiiiiiiiiiiiiiiiiiiiiiiiiiiiiii END SEARCH • STANDARD menu (p. 50) REC MODE • • AUDIO MODE • VOLUME • AUDIO • LCD/VF • • • TV TYPE • •...
-
Page 37: Camera Setmenu
CAMERA SETmenu Settingstoadjustyourcamcorder t othe recording conditions LANDSCAPE* (_-1) Seh:ct to shoot distant subjects clearly. The default settings are marked with _'. This setting also prevents your camcorder The indicators in parentheses appear when on glass or metal mesh in from focusing the items are selected. - Page 38 _gANERA SET mesh (Co_ti_ed} @ Touch [_]. * Ac[iusted to 11)cus on sut_iects tlulher away only. To return the setting to atttomatic exposure. ** Ac[iusted not 1o 11_cus on subjects a short tuuch [AUTO] -"'+ [_. distance away. (b Notes •...
- Page 39 @ Touch [txm_]. (_) Touch the subject on the screen. appears. txm_ flashes quickly. When the white balance has been adjusted and stored in @ Touch [ENDI. the memory, the indicator stops To adjust the focus automatically, touch flashing. [AUTOI -+ [ENDI in step @. Notes O Notes •...
- Page 40 _gANERA SET mesh (Co_ti_ed} • The shuuer speed of your camcorder changes depending on the brighmess. The morion of the piclurc slow down ill this case. This is useful to shoot small subjects, such as flowers or insects. You can blur out backgrounds and tile subject stands...
- Page 41 When you set [SELF-TIMER] to [ON] You can compensate for camera shake (the 1¢_.)),tile self-timer starts recording in about def:mlt setting is [ONI). Set [STEADYSHOT] to [OFF]/'@") when 10 seconds after pressing PHOTO to record still images. using a tripod (optional) or the conversion To cancel the count down.
-
Page 42: Memory Setmenu
MEMORY SETmenu Settings for the "Memory Stick Duo" QUALITY The default settings are marked with _'. The indicators in parentheses appear when (FINE) _" FINE the items are selected. Records still images at the fine image See page 34 for details on selecting quality level. - Page 43 • Do not do any ol tile lollowing while 1_ Formatting...I is displayed: • When using the "Memory Stick Duo" made by Operale file POWER swilch/operation Sony Corporation. bultons. The nulnber of recordable pictures varies depending on tile recording environmenl.
-
Page 44: Pict.appli.menu
PICT.APPLI.menu MEMORYSETmem_ Special effects on pictures or additional functionson recording/playback The default settittgs are marked with P". SERIES The indicators in parentheses appear when the items are selected. Assigns fih: numbers in sequence even if the "Memory Stick Duo" is replaced with See page 34 for details on selecting another one. - Page 45 OVERLAP ( fadein only) You can add digital effects Io your recordings. WIPE(fadein only) (!) Touch Ihe desired effecl. (_) Adjust Ihe efl_:ct with [_/[_, then Iouch [_. DOTFADER (fadein only) STILL The degree of transparency of the still image you want to superimpose under a movie.
- Page 46 _PICT.APPLL mesh (go,timber} FLASH (flashmotion) Records a movie _ith a scri:ll-still-inmge effect (strobe effect). You can add special effects to a picture during recording or playback. [g+, appears. LUll, KEY(luminance key) _" OFF Replaces a brighter uea in a still image memorized at the moment when [LUMI.
- Page 47 "_° Tips • Smooth inlerval recording is relea_d when approxinlately 12 hours have elap_d after • You can save pictures edited using special shooting has begun, elli_cts on a ' Menlory Stick Duo" (p. 59) or • Sounds recorded, record thenl on mlother VCR/DVD device, etc. (p.
-
Page 48: J@ Edit/Play Menu
®EDIT/PLAY menu _P_CT.APPLL mesh (g0_ti_÷_} Settings foreditingor playing hackin various modes "_° Tips • The demonstration will be suspended in See page 34 for details on selecting situations such as those described below. menu items. When you touch the screen during the den_onstration. - Page 49 --_ HI appears. _Gomi_ O Oo:oo Oo See page 57. AUD DUB CTRL--_-- Using tile internal stereo microphone (_) Touch (Play). (p. 90), you can add sound to a tape already Your camcorder starts audio recording recorded in the 12-bit mode (p.
-
Page 50: Settings While Recording On A Tape Or Other Basicsettings
STANDARD SET menu Settings while recording on a tape or other basicsettings EXEC The default settings are marked with P". The most recently recorded picture The indicators in parentheses appear when played back lY)r about 5 seconds and then the items are selected. stops automatically. - Page 51 See page 33. The recorded picture will not be all"ccted by this operation. m LCDBRIGHT You can _ust the brightness of the LCD When you set [_ STREAM] and cotmect screeu. your camcorder to your computer via the USB cable, you can view the picture your @ Adjust the brighmess with [_71[_.
- Page 52 _STANDARD SETme_/go_i_u@} Notes • The e×posure ad.justment _alue/OEV), a shutter speed, and tim apemu'e _alue appear when still _" LCD PANEL images on a "Memory Stick Duo' are phJyed Shox_ s displays such as the time code on back. file LCD screen and in the viex_ finder. •...
-
Page 53: Customizing Personal
Customizing Personal menu Menu See page 34 for details on selecting You can add desired menu items to any menu items. Personal Menu allocated to the lamp positions currently lit. This is convenient if you add frequently used menu items to Personal Menu. - Page 54 g++st+mk+++P÷rs++++ ++++÷++ Ig++t+++÷+) Touch _-+ [P-MENU SET UP] --* [DELETE]. Touch I?_ggg0] --+ [P-MENU SET UP] It the desired menu item is not -+ [SORT]. displayed, touch r_]/][_+ If tile desired menu item is not displayed, touch [_]/[_]. Touch the menu item you want to move.
-
Page 55: Dubbingto Vcror Dvd/Hdd Recorders
Duflflifig/Edi_i_g Dubbingto VCRor DVD/HDD recorders You catt club images played back on your camcorder to other recording devices, such as VCRs or DVD/HDD recorders. You can conttect your camcorder to VCRs or DVD/HDD recorders, using tile A/V cotmecting cable/[_), tile A/V connecting cable with S VIDEO ([_), or tile i.LINK cable ([_). Connect your camcorder to tile wall outlet using the supplied AC Adaptor for this operation (p. - Page 56 gubbi_ te VSB e_ gVD/Hgg recorders {go_ti_Be_} Notes Refer to the operating instructions supplied with your recording device • When ill'_ connecIing your CalF_corder 1o a details. monaural device, connect die yellow plug of tile A/V connecting cable to file video input jack, and die red/right channel) or file white (letl channel) plug to tile audio input jack on ll/e 5 When dubbing is complete, stop...
-
Page 57: Recordingpicturesfrom A Tv Or Vcretc
Recordingpicturesfrom a TV or VCRetc. You can record pictures or TV programs from a TV ur VCR etc.. onto a tape, you can also record a scene as a still image onto a "Memory Stick Duo" using an optional i.LINK cable. Be sure to insert a cassette ur a "Memury Stick Duo"... - Page 58 Rsss_disS pists_÷s f_om a TV o_ VCR÷ts,_ (go_ti_ued) Press PHOTO lightly at the scene When recording pictures from a VCR: you want to record. Check the Start playing the cassette on the image and press it fully. VCR. When recording pictures from a Notes Select a TV program.
-
Page 59: Dubbing Picturesfrom A Tape To A "Memory Stick Duo
Dubbing picturesfrom Deletingrecorded a tape to a "Memory picturesfromthe Stick Duo" "Memory Stick Duo" You can record a desired ()lit() sceue "Memory Stick Duo" as a still image, frmn Slide the POWER switch a movie you recorded on a tape. Make sure repeatedly to turn on the PLAY/... -
Page 60: Marking Imageson The "Memory Stick Duo" With Specific Information
Marking imageson the "Memory Stick Duo" with specific information(Print mark/Image protection) • Do not mark images on your camcorder if tile When you are using a "Memory Stick Duo" "Memory Stick Duo" already has some images with the write-protect tab. make sure the wilh the Prinl mark put on using (tiller devices. -
Page 61: Printingrecordedimages
Printingrecordedimages (PictBridge compliant printer) Notes You can print out pictures using a PictBridge compliant printer without • We CilllllOl gu_iritnlee operaliOll inodels the camcorder to a computer. that arc not PictBridge comp+ttible. COllnectillg _Pktgridge "_° Tips • You can also opel'aleby selecting inthe Connect the AC Adaptor to obtain po_xer /ollowing orders: from the wall outlet (p. - Page 62 P++++_+r++ r++++++÷+ + malls IP++_+r+++÷ ++mN+a+_P++++_÷+I (g++_++m÷+} Notes • Refer also to tile operating illstr/ictiolls lor tile printer to be used+ • Do not attempt the R>llowing operations when is on the screen. Tile operations may not be performed properly+ Operate the POWER switch.
-
Page 63: What You Can Do With Windowscomputer
a gomp_eg Usi,'_g What you can do with Windowscomputer When you install the "Picture Motion Browser" on a Windows computer l'ron/the supplied CD-ROM, you can enjoy the Tile "First Step Guide" is an instruction following operations. your computer. [llaU/lal rel_r This describes basic operations, from initial O Notes hookup of your camcorder and computer... -
Page 64: Installing The "First Step Guide"And Software
What _aa caa de wit_ Wia_ows Installing the "First Step Guide"and software Hard disk: Disc volttme required for You need to install the "First Step Guide" installation: Approximalely 350 MB and software to your Windows computer Display: DirectX 7 or later-compatible before connecting your camcorder video card, Minimum 1024 x 768... - Page 65 [Next]. is created on the desktop. • Once you register on the website, you can get secure and useful customer Check your country/region, then support. click [Next]. http://www.sony.net/registration/di/...
-
Page 66: Viewing"First Step Guide
[Programsl ![All Programs] lor Windows XP) • Ret_r lo "First Step Guide' lot lhe delails on [Sony Picture Utilityl _- [FirstStcpGuidel connecting your camcorder to the conlputer ----+ Your camcorder's lolder ----+ "First Step copying the still inlages. -
Page 67: Troubleshooting
If the problmn persists, discom_ect the power source and • During Easy Hand3cam operation, settings of the fimctions that are not contact your Sony dealer. displayed on the screen return to their • Overall operations/Easy Handycam/ defaults (p. - Page 68 AC Adaptor from the wall buttons do not appear on the outlet and contact your Sony dealer. The touch panel. battery pack may be worn-out. • Touch the LCD screen lightl). • Press DISP/BATT INFO on your...
- Page 69 The cassette is noisier during Menu items are grayed out. rewinding or fast-forwarding. • You cannot select grayed items in the current recording/playback situation. • When using the AC Adaptor, rewind/f:lst forward speed increases (compared with battery operation) and therefore increases is not displayed.
- Page 70 "Memory cleaning cassette (optional) (p. 84). Stick Duo." • TI3 again from the beginning. • Use a Sony mini DV cassette. • The 'Memory Stick Duo" is fidh Insert another _Memory Stick Duo" or format the "Memory Stick Duo"...
- Page 71 The BACK LIGHT function does not The screen picture is dark, and the function. subject does not appear on the screen. • In the follo_ing settings, the BACK LIGHT function is canceled. • Press and hokl DISP/BATT INFO for a fcx_ [MANUAL] of [EXPOSURE] seconds to turn on the backlight (p.
- Page 72 TrssNsshsstiss/Ssstisssd) Image data stored on a "Memory _4ch-12b is displayed on the screen. Stick Duo" cannot be played back. • The tape you arc playing was rccoMed data cannot bc back it"you another device with a 4ch microphone • hnage pla) cd have modified file or timer names, or have 14CH MIC REC).
- Page 73 • Disconnect the cable from the computer You cannot dub correctly using and camcorder, restart the comptlter_ then A/V connecting cable. connect them again correctly. • The A/V connecting cable is not connected properly. Make sure that the A/V You cannot install the supplied connecting cable is connected to the input...
-
Page 74: Warningindicators And Messages
[D.EFFECT] Sume symptoms you can fix by yourself. If [DIGITAL ZOOM] [TELE MACRO] the prublem persists even after you have tried a couple of times, contact your Sony IFADERI ICANDLEI, dealer or lucal authurized Suny service [FIREWORKS], facility. - Page 75 E:61 :rid / E:62:riri (Warning indicators pertaining to • Contact }our Sony dealer or local the tape) aulhorized Sony service fucility. Inform Slow flashing: them of the 5-digit code, which starts from 'E." • There is less than 5 minutes remaining on the tlpe.
-
Page 76: Using Your Camcorder
Warning i_dicaters a_d messages {Centi.a÷_} Check the connected device. • Sx_itch off the printer and switch it on If messages appear on the screen, follow tile again, then disconnect the USB cable instructions. and reconnect "_" Tips Cannot print. Check the printer. -
Page 77: Usingyour Camcorderabroad
Usingyour camcorderabroad Simple setting of the clock by time Power supply difference You c_ use your camcordnr in any You can easily set the clock to the local countlT/region using the AC Adaptor time abroad by entering the time difference supplied with your camcorder within the AC 100 V to 240 V, 50/60 Hz range. -
Page 78: Maintenanceand Precautions
Maintenanceand precautions M To prevent accidental erasure Slide tile "_rite-protect tab on the cassette to set it to SAVE. Yuu can use mini DV format cassettes only. Use a cassette with tile M_,,E|]_* mark. Your camcorder is not compatible with the Cassette Memory functiun. -
Page 79: About The "Memory Stick
• Be carefifl not to apply excessive lorce when varies depending on the device 1o be used. wrilhlg _1 nlemo area Oll a _'Memol'y Stick *a "M*lgicGate" is a Sony-developed copyrighl Duo." thai records and translcrs protection lechnology Do not atlach a label or file like on gl"Memory... -
Page 80: Pack
Naistssasss ass pr÷sa[tisss {gsstiss÷_} conlorm to file universal slandard. (These • Do nol insert anything other lhan a "Memory Stick Duo" into tile "Menloly Stick Duo" slot, models are not sold in some regions.) Doing so may cause a nlalflmction, •... -
Page 81: About I.link
Aboutstorage of the battery pack charging is complete, disconnect tile cable tile DC IN .back on your c_uncorder or remove • It the battery pack is not used tot a long time, the battely pack, hilly charge tile bnttel T pack nnd use it up on your ctuncorder once... -
Page 82: On Using Your Camcorder
• i.LINK is a more hunilku term Ior tile IEEE 1394 data transport bus pwposed by Sony, and Notes is a trademark approved by many corporations. • VV]len... - Page 83 N It moisture condensationhas occurred casing, unplug your camcorder and have except cbecked by a Sony dealer belorc operating Noue of tile [lluctions cassette ejection will work. Eject tile cassette, turn any further. off your camcorder, and leave it for about •...
- Page 84 • If tile lonowing problenl occurs, cleml tile video (_) Slide the POWER sx_itch repeatedly to turn beads fl)r 10 seconds with tile Sony DVM- on the PLAY/EDIT lamp. 12CLD cleaning ct_ssetre (optkmal). @ T< t ch 17:ggff01 --+ [MENU] ---+ _½_...
- Page 85 About careand storage of the lens (_) Relnove dust from the inside area v,'here the eyecup block was attached v,'ill', a • Wipe the surface ot the lens clean with a soil camera blower, etc. clolh in tile tollllwing insk,nces: When there are fingerprints on file lens surlace.
-
Page 86: Specifications
25 x (Optical), 2 000 x (Digital) nol Nnction properly. In this case, replace Focal length barrel 7 with a Sony CR2025 lithium bauery. f=2.5 - 62.5 mm (1/8 - 2 1/2 in.) Use of another baltery may present a risk of fire or exl)losion. - Page 87 General In CAMERA-TAPE: 41 - 1 189 into** (1 5/8- 46 7/8 in.) Power requirements (16:9) DC 6.8 V/7.2 V (bmtery packl 43 - l 075 mm( 1 3/4 - 42 3/8 in.) (4:3) DC 8.4 V (AC Adaptor) In CAMERA-MEMORY: Average power consmnption 36 ~ 900 mm (1 7/16 ~ 35 I/2 in.) (4:3) During camera recording using the...
- Page 88 USB jack Type mini-B Lithiun/ion DV input/output Design and specifications are subject to change i.LINK Interface/IEEE1394, 4-pin wilhout notice. connector S ]{X)) AC Adaptor AC-L200/L200B Power requirements AC 100 - 240 V. 50/60 Hz Current consumption 0.35-0.18 Power consumption Output wfltage DC 8.4 V* Operating...
- Page 89 Memory Stick Duo" are trademarks of Sony Corporation. • "InloLITHIUM" is a trademark of Sony Corporat ion. • i.LINK and _ are trademarks of Sony Corpormion. Mini lrL_" • vk;eo Cassette is a tladenlark. • Microsoft, Windows, and Windows Media are...
-
Page 90: Identifyingparts And Controls
Q_ick R_r_c_ Identifyingparts and controls The mnnbers in / ) are relerence pages. [] NIGHTSHOT PLUS switch (24) [] PHOTO button 120, 23) [] Power zoom lever (24, 28) [] ['- OPEN/EJECT lever (18) [] Hooks for a shoulder belt Attach a shoulder belt (optional). - Page 91 [] DISP/BATT INFO button (14, 17) [] EASY button 120) [] RESET button ¢D Initializes all tile settings, including the setting of the date and time. [] LCD screen/touch panel (l 7, 94) ¢D [] REC START/STOP button 120, 221 [] Zoom bl_t_olls(24, 28) [] WIDE SELECT button (25) [] Speaker...
- Page 92 _d÷_tifyi_S pa_ts a_ co_tm_s (Co_ti_e_) [] POWER switch (15) [] Viewfinder (17) [] Eyecup (85) [] Viewfinder lens adjustment lever (17) [] DC IN.jack (13) [] CAMERA-TAPE, CAMERA- MEMORY, PLAY/EDIT lamp (15) [] RE(? START/STOP button (20, 22) [] A/V OUT jack (32, 55) [] Tripod receptacle Attach the tripod (optional: the length of the screw [llUS[ be less than 5.5 [n[ll...
- Page 93 HandycamStation 1] Interface connector ¢ (lJSB/jack (611 [] _, DV interface (55,571 [] DC IN jack (12) [] A/V OUT jack (32,551 RemoteCommander [] PHOTO button* (20, 23) The on-screen image when you press this button will be recorded onto the "Memory Slick Duo"...
-
Page 94: Indicatorsdisplayedduringrecording/Playback
Indicatorsdisplayedduringrecording/playback ® [] Remainiug battery (approx./ [] Recording folder (44) [] Recording mode (gP or E_) (50) [] hnage size (25, 42) [] Recording status ([STBY] (standby) or [] Quality (HNF: or STD) (42) [RE(-?](recording)) [] "Memory Stick Duo" indicator and the Recording: Tape counter (hour: number of images that can be recorded minute: second) - Page 95 You can use the [DISP GUIDE] (p. 96) to check the function of each indicator that appears on the LCD screen. O Notes • Some of tile indicators may nol appear when you use [DISP GUIDEI. Upper lel_ Upper right [] Data file name [] Picture number/Total number of...
- Page 96 IsNcato_s disNa_sd _t_isS reco_disS/Nayback (Cost[ms÷a} Center Slide show (45) You can easily check the meaning of each NightShot plus (24) indicator that appears on the LCD screen. Touch [GUIDE] -+ [DISP GUIDE]. Super NightShot plus (40) ['_] Color Slow Shutter (40) PictBridge connecting (61)
-
Page 97: Index
Index Numeric/Symbol 12B IT ........D.EFFECT Handycam Slation ..12, 93 (Digital ellcct) ...... 16BIT ........DATA CODE ... 16.51.96 Dale search ......i.LINK ........DATE/TIME .... 16, 51, 96 A.SHUT i.LINK cable ....55, 57 (Amo shin olf) ...... Delete pictures ...... -
Page 98: Abroad
Mirror mode ......STANDARD menu ,,,,,, 5(I Moisture condensation ..83 STEADYSHOT ....41.70 QUALlTY ......MONOTONE ....... STILL ........MOSAIC ......Still image ..20, 21, 23.27 MOSAIC FADER ....STILL SET ......CTRL SUNRSE SUNSET ....Movie ....20. - Page 99 Windows ....... WIPE ........WORLD TIME ..... Wfite-protecl tab ..... 78, 79 Zero set melnoJ3', ....Zoom ........¢D...
- Page 100 Spa#isb &#& G dde/&da r_pida en espa#ol Paso 1: Comprobaci6n de los elementos suministrados Asegfirese de que su videocfimara contienc Baterfa recargable NP-FH40 los siguientes elementos. E1 nfimero entre pardntesis indica la cantidad dcl elemento. Adaptador de ca (1) CD-ROM "Handycam Application Software"...
- Page 101 Paso2: Cargade la bateria Bateria Interruptor POWER Toma de entrada de cc -- Cable de alimentaci6n Adaptador alimentaci6n de ca AI tomacorriente de pared Puede cargar la bateria Conecte el cable de alimentaciSn "InfoLITHIUM" (serie H) tras conectarla a la videoc_mara. al adaptador de alimentaciSn ca y al tomacorriente de pared.
- Page 102 Paso 2: gar#a de +abate_a {go_i_uaci+_} O Notas Para extraer la videoc;imara de la Handycam Station • Cuando inserte la _ ideocfimara en Handycam Station, cierre la cubierta de la tomu de entrada Apague la alinlent:+ci6n y luego extraiga la decc videocfim:wa de Handyc:+m Station Station y el mlchut_ de cc...
- Page 103 Para comprohar la carga restante de Tiempo de carga (informaci6n la bateria s obre la Tiempo :,proximado (rain) necesario p:u'a cargar totahnente una baterfa descargada bateria) pot completo. Ajuste el interruptor POWER en la posicidn OFF (CHG) y, a continuaci6n, presione DISP/BATT INFO.
- Page 104 Paso 2: gar_a de _abate_a {go_i_uaci6N Tiempo dereproducci6n Acerca del adaptador de alimentacidn Tiempo aproxim:,do (rain) disponible • Si utiliza el adaptador de alimentaci6n de ca cuando utiliza una baterfa completamente utilice un lomucorriente de pmvd cercano. Si se cargada. produce una lalla de flmcionan_iento mienlras uliliza la _ ideocfimara, desconecte inmcdiatamente...
- Page 105 Paso3: Activaci6nde la alimentacidny ajuste de la fecha y hora Ajuste la fecha y la hora cuando use la videoctimara pot primera vez. De lo Ajuste [A] (afio) con FZq/F_I, contrario, la pantalla [AJUS.RELOJ] luego toque Ira. aparecerfi cada vez que encienda la Puede seleccionar cualquier aik_ hasta el videocfimara o cambie la posicidn del afio 2079.
- Page 106 Paso4: Realizaci6n Paso 3: Ac_ivaci_a #e _a a_i_entaci6a _ aiust÷ #÷ _afecha de ajustesantes de la y hora (Coati_[_aci6[_) grabaci6n "_° Sugerencias • Durante la grabaci6n, no se visualizarfin la tccha y la hora. l_stas _ grabar&l autom_ticamente la cinta y podrdn visualizarsv duranle la rcproducci6n ([CODIGO DATOSI (durante el...
- Page 107 Para desactivarla luz de fondode la pantallaLCDparaunalargaduraci6n de la hateria Puede ver imfigenes utilizando el visor para evitar el desgaste de la baterfa o cuando M:mtenga presionado DISP/BATT INFO imagen en la pantalla LCD es mala. durante unos segundo hasta que aparezca "c_.
- Page 108 Paso5: Inserci6nde una cinta o un "Memory Stick Duo" El compartimiento videocasete se desliza autom&ticamente hacia adentro. Solamenle puede ulilizar videocasetes formato mini DV Mi_ _v. Notas • No fuerce el compartimiento videocasete presionando la parte Deslice la palanca _-- OPEN/ con la marca[Do mientras PUSH]...
- Page 109 li ¸ i i i i!i!i! i!ii i i:iiii i ¸! i!iil! i!!il • AI insertar o expulsar el "Memoly Slick Duo", asegfirese de que el "Memory Stick Duo '_ no salte y se caiga. Usted puede utilizar s61o un "Memory Slick Duo"...
- Page 110 Grabaci6n Abra la cubierta del o[_betivo. PHOTO Interruptor POWER REC START/ REC START/ STOP [] STOP [] Las pel/culas se graban en una cinta. Deslice el interruptor POWER varias veces en el sentido de la flecha para que se encienda el indicador CAMERA-TAPE. Presione REC START/STOP (o [_).
- Page 111 Las imfigenes fijas se graban en el "Memory Stick Duo". Deslice el interruptor POWER varias veces en el sentido de la flecha para que se encienda el indicador CAMERA-MEMORY. Mantenga presionado PHOTO ligeramente para ajustar el enfoque y, a continuacibn, presionelo hasta el rondo.
- Page 112 Reproducci6n Deslice el indicador POWER en el sentido de la flecha varias veces para encender el indicador PLAY/EDIT..Si el inlerruptor POWER est_ en la posici6n OFF owE_ (CHG), deslfcelo mientras presiona el botdn verde. ¢_ o_O\ rAPE j,_52_ Toque y, a eontinuaeidn, toque...
- Page 113 Toque I_1. Se visualiz;_ la im_.gen grzlb3d3 m:_s; recielllemenle. 1 0 / 1 REPR. ME Canlbio de] soporte de reproducci6n* Anterior/Siguienle h" a la visualizaci6n de la panlalla de fndice aparece en la panlalla de reproducci6n de cinla, Paravisualizar i m;igenes de un "Memory StickDuo"enla pantalladeindice Toque [_7.
- Page 115 Additional infermatien on this preducl answers to frequently asked quesliens can be 12_und at our Cuslemer Supl_erl Website. http://www.sony.net/ Printed on 70% recycled paper using VOC (Volatile Organic Cornpound)-free vegetable oil based ink. Printed in Japan 2319511110...
Need help?
Do you have a question about the DCR-HC48 and is the answer not in the manual?
Questions and answers