Table of Contents
Advertisement
Quick Links
Owner's Manual
Thank you, and congratulations on your choice of the BOSS GT-PRO
Guitar Effects Processor.
Before using this unit, carefully read the sections entitled:
• IMPORTANT SAFETY INSTRUCTIONS (page 2)
• USING THE UNIT SAFELY (page 3–4)
• IMPORTANT NOTES (page 5–6)
These sections provide important information concerning the proper
operation of the unit.
Additionally, in order to feel assured that you have gained a good grasp of
every feature provided by your new unit, Owner's manual should be read in
its entirety. The manual should be saved and kept on hand as a convenient
reference.
■ Printing Conventions in This Manual
• Text or numerals enclosed in square brackets [ ] indicate bottons.
[WRITE]
[SYSTEM]
• EXP pedal is an abbreviation of "Expression pedal."
• Reference such as (p. **) indicate pages in this manual to which you can refer.
Copyright © 2005 BOSS CORPORATION
All rights reserved. No part of this publication may be reproduced in any form without the written
permission of BOSS CORPORATION.
WRITE button
SYSTEM button
Advertisement
Table of Contents

Related Manuals for Boss GT-PRO


Summary of Contents for Boss GT-PRO
-
Page 1: Printing Conventions In This Manual
Owner’s Manual Thank you, and congratulations on your choice of the BOSS GT-PRO Guitar Effects Processor. Before using this unit, carefully read the sections entitled: • IMPORTANT SAFETY INSTRUCTIONS (page 2) • USING THE UNIT SAFELY (page 3–4) • IMPORTANT NOTES (page 5–6) These sections provide important information concerning the proper operation of the unit. -
Page 2: Important Safety Instructions
WARNING: To reduce the risk of fire or electric shock, do not expose this apparatus to rain or moisture. The lightning flash with arrowhead symbol, within an CAUTION equilateral triangle, is intended to alert the user to the RISK OF ELECTRIC SHOCK presence of uninsulated “dangerous voltage”... -
Page 3: Using The Unit Safely
USING THE UNIT SAFELY symbol alerts the user to important instructions Used for instructions intended to alert or warnings.The specific meaning of the symbol is the user to the risk of death or severe determined by the design contained within the injury should unit... - Page 4 101a • In households with small children, an adult • The unit should be located so that its location or should provide supervision until the child is position does not interfere with its proper venti- capable of following all the rules essential for the lation.
-
Page 5: Important Notes
IMPORTANT NOTES Maintenance 291b In addition to the items listed under “IMPORTANT SAFETY INSTRUCTIONS” and “USING THE UNIT SAFELY” on pages 401a • For everyday cleaning wipe the unit with a soft, dry cloth 2 and 3, please read and observe the following: or one that has been slightly dampened with water. - Page 6 IMPORTANT NOTES Additional Precautions Handling CD-ROMs • Please be aware that the contents of memory can be • Avoid touching or scratching the shiny underside irretrievably lost as a result of a malfunction, or the (encoded surface) of the disc. Damaged or dirty CD-ROM improper operation of the unit.
-
Page 7: Table Of Contents
Contents IMPORTANT SAFETY INSTRUCTIONS ..2 Chapter 4 Introduction to Effects and Parameters..28 USING THE UNIT SAFELY ......3 PREAMP/SPEAKER (Preamp/Speaker Simulator) ..28 OVERDRIVE/DISTORTION........... 31 IMPORTANT NOTES........ 5 DELAY ................32 Using the HOLD (Hold Delay) .......... 34 Main Features ........10 CHORUS................ - Page 8 Contents Chapter 8 NAME (Patch Name).............56 Using the GT-PRO Connected to the FC-200 ..81 ASSIGN................56 Setting the Functions Related to the FC-200..... 81 Chapter 5 Switching Operation of the Creating Original Effects Types (Customize) ..57 GT-PRO for Use with the FC-200 (FC-200 Mode) ... 81 Setting the Operation of the Customizing the COSM Preamps .......57 FC-200’s CTL Pedal (FC-200 CTL Pedal) ......
- Page 9 Contents Installing & Chapter 10 Other Features ........92 Setup the USB Driver ..109 Controlling Various Parameters Through the Guitar Volume.........92 Switching Preamp Channels Driver installation A and B Dynamically with the Guitar Volume ....92 and settings (Windows) ......110 Using the Guitar Volume to Change Selected Effect Parameters (Assign Source) .....
-
Page 10: Main Features
“sitar simulator,” “wave synth,” and more. The GT-PRO includes Quick FX for rapid and efficient control of numerous different functions, EZ Tone, and an amazing array of other great features. Representing a culmination of all of BOSS’s guitar effects technology, the GT-PRO truly is the ultimate guitar multi-effects device. Solo Switch/Dynamic Sense/Internal Pedal System The COSM amps feature a Solo Switch for each channel, which instantly imparts a feeling of greater power the moment it is switched on. -
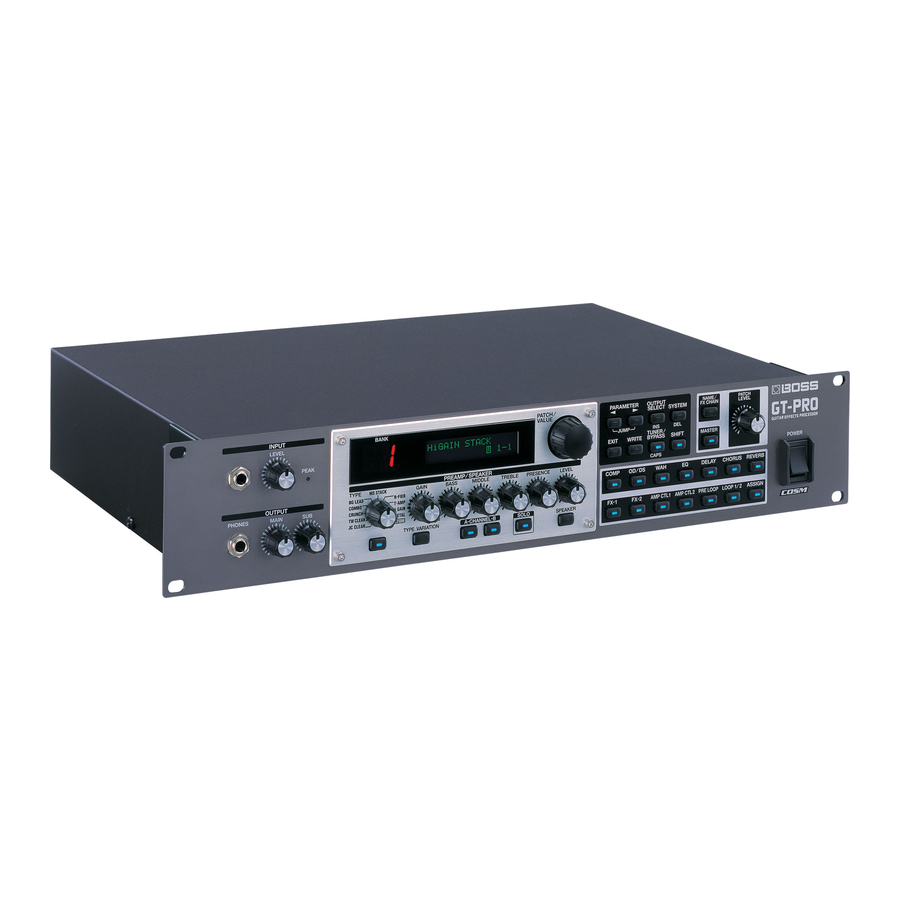
Page 11: Names Of Things And What They Do
Names of Things and What They Do Front Panel fig.002-010 25 26 21 22 9 10 11 12 13 14 15 16 17 18 19 1. INPUT 5. PREAMP/SPEAKER INPUT Jack TYPE Knob The guitar is connected here. Selects the preamp type. INPUT LEVEL Knob GAIN Knob Adjusts the level of the signals input through the... -
Page 12: Power Switch
Names of Things and What They Do 6. COMP On/Off Button 21. OUTPUT SELECT Button Press to change the settings. Allows you to select an output appropriate for the connected device. Be sure to make this selection before you start to 7. -
Page 13: Rear Panel
Names of Things and What They Do Rear panel fig.00-0220 14 15 1. AMP CTL 1 Jack/AMP CTL 2 Jack 10. SUB OUT Connectors R/L When using the AMP CONTROL function (p. 54), There are XLR type connectors that provide balanced connect to the jack used for switching guitar amp output. -
Page 14: Signal Flow
Names of Things and What They Do Signal Flow Control IN (MIDI) Control OUT (MIDI) GT-PRO IN (Audio) GT-PRO OUT (Audio) RETURN 2 SEND 2 RETURN 1 SEND 1 AMP CTL 2 AMP CTL 1 (from USB) RETURN SEND... -
Page 15: Chapter 1 Playing Sounds
Chapter 1 Playing Sounds Making the Connections fig.01-0010 Mixer Guitar Front Panel Digital Recorder etc. Stereo Headphones Tuner etc. Guitar Amp Foot Switch EXP Pedal EXP Pedal (Roland EV-5 etc.) (FS-6 etc.) (Roland EV-5 etc.) External Effects Processor External Effects Processor OUTPUT INPUT INPUT... -
Page 16: Turning On The Power
Chapter 1 Playing Sounds * To prevent malfunction and/or damage to speakers or other - - - - - - - - - - - - - - - - - - - - - - - - - - - - - - - - - - - - - - - - - - - - devices, always turn down the volume, and turn off the power •... -
Page 17: Adjusting The Input Level
Chapter 1 Playing Sounds Adjusting the Input Level Selecting the MAIN OUT Output Device (Amp) (Main Output Select) Use the INPUT LEVEL knob to adjust the input level to suit your guitar. Select the type of device connected to the MAIN OUT jack. fig.01-0060 fig.01-0080 1. -
Page 18: Selecting The Sub Out Output Device (Amp) (Sub Output Select)
Chapter 1 Playing Sounds Turning Off the Power Selecting the SUB OUT Output Device (Amp) (Sub Output Select) 1. Before turning off the power, confirm the following. Select the type of device connected to the SUB OUT jack/ • Is the volume on the GT-PRO, your amp, and all other connector. -
Page 19: Creating Your Own Favorite Tones (Patches)
Chapter 2 Creating Your Own Favorite Tones (Patches) What is a Patch? How to Switch Patches (Patch Change) The GT-PRO can store 400 combinations (or “sets”) of effects and parameter settings. Whenever you’re at the Play screen, you can turn the Each of these sets is called a “Patch,”... -
Page 20: Adjusting The Tones With The Knobs
Chapter 2 Creating Your Own Favorite Tones (Patches) Adjusting the Tones with the Knobs Turning the Effect On and Off The GT-PRO panel features eight knob controls. These knobs The GT-PRO’s internal effects are switched on and off with let you make adjustments or changes to the selected patch’s button controls. -
Page 21: Setting The Effects Simply (Quick Fx)
Chapter 2 Creating Your Own Favorite Tones (Patches) Setting the Effects Simply Calling Up Existing Patch Settings (QUICK FX) Just as with the Quick Settings, you can call up and use only the specific effect settings you need from the User and Preset Each effect includes prepared sample settings called “Quick patches. -
Page 22: Making More Precise Effect Settings
Chapter 2 Creating Your Own Favorite Tones (Patches) Making More Precise Effect Settings Changing the Connection Order of Effects (Effect Chain) Each effect comprises several different kinds of parameters. You can more precisely create the sounds you want by Here’s how you can change the order in which the effects are editing each of these parameters individually. -
Page 23: Naming Patches (Patch Name)
Chapter 2 Creating Your Own Favorite Tones (Patches) Naming Patches (Patch Name) Each patch can be given a name (Patch Name) consisting of up to sixteen characters. You’ll probably want to take advantage of this feature by assigning names that suggest the sound you’ll obtain, or the song in which it’ll be used. -
Page 24: Chapter 3 Saving The Tones You Have Created
Chapter 3 Saving the Tones You Have Created Storing Patches (Patch Write) Copying Patches (Patch Copy) When you want to keep a tone created with the Quick You can copy a Preset or User patch to another User patch. Settings or a tone with altered parameter values, use the fig.03-0030 “Write procedure”... -
Page 25: Exchanging Patches (Patch Exchange)
Chapter 3 Saving the Tones You Have Created Exchanging Patches Initializing Patches (Patch Exchange) You can return (initialize) the User patches to their original standard settings. On the GT-PRO, you can “swap” or exchange the positions This is convenient when you want to create a new patch from of two User patches. -
Page 26: Initializing Patches With A Tone Similar To What You Have In Mind
Chapter 3 Saving the Tones You Have Created Initializing Patches with a Tone Storing Settings by Effect Similar to What You Have in Mind (User Quick Settings) If you already have a clear idea about the kind of sound you In addition to storing settings in the form of patches, you can want to create, you can save yourself a lot of trouble by also store settings in terms of their effect. -
Page 27: Copying The Preamp/Speaker Settings To Another Channel
Chapter 3 Saving the Tones You Have Created Copying the PREAMP/SPEAKER 4. When you want to change the User Quick Setting name (12 characters), use PARAMETER [ ] to Settings to Another Channel move the cursor, and use the PATCH/VALUE dial to change the characters. -
Page 28: Introduction To Effects And Parameters
Explanation of their respective owners, which are separate companies Range from BOSS. On/Off Those companies are not affiliated with BOSS and have Turns the PREAMP/SPEAKER effect on/ Off, On not licensed or authorized BOSS’s GT-PRO. off. Their marks are used solely to identify the equipment Channel Mode whose sound is simulated by BOSS’s GT-PRO. - Page 29 Chapter 4 Introduction to Effects and Parameters Parameter/ Parameter/ Explanation Explanation Range Range Dynamic Sens This turns off the speaker simulator. This is the built-in speaker of the amp you Effective with Dynamic selected for Chan- Original selected with “Type.” nel Mode.
- Page 30 Chapter 4 Introduction to Effects and Parameters Type List Type Explanation R-FIER Type Explanation Models the sound of the Channel 1 CLEAN JC CLEAN R-FIER Cln Mode on the MESA/Boogie DUAL Rectifi- JC-120 This is the sound of the Roland JC-120. Models the sound of the Channel 2 RAW Warm Clean This gives a mellow, clean sound.
-
Page 31: Overdrive/Distortion
It provides 30 types of distortion and three different custom Booster COSM amps. settings. Blues OD This is a crunch sound of the BOSS BD-2. A lustrous crunch sound with an added ele- Parameter/ Crunch Explanation ment of amp distortion. -
Page 32: Delay
Chapter 4 Introduction to Effects and Parameters DELAY Parameter/ Explanation Range Hold This effect adds delayed sound to the direct sound, giving Up to 2.8 seconds of performance content is recorded, then played more body to the sound or creating special effects. back repeatedly. - Page 33 Chapter 4 Introduction to Effects and Parameters Parameter/ Explanation Range You can change the value in increments of ten by Delay1 HiCut (Delay 1 High Cut Filter) *1 pressing [SHIFT] so its indicator is lighted before you This sets the frequency at which the high cut rotate the PATCH/VALUE dial.
-
Page 34: Using The Hold (Hold Delay)
Chapter 4 Introduction to Effects and Parameters CHORUS Using the HOLD (Hold Delay) * Recording and playback of performances and other operations In this effect, a slightly detuned sound is added to the are carried out with pedals while Hold is in effect. Connect original sound to add depth and breadth. -
Page 35: Reverb
Chapter 4 Introduction to Effects and Parameters REVERB COMP (Compressor) This effect adds reverberation to the sound. This is an effect that produces a long sustain by evening out the volume level of the input signal. You can switch it to a Parameter/ “limiter”... -
Page 36: Wah
Chapter 4 Introduction to Effects and Parameters FX-1/FX-2 You can control the wah effect in real time by adjusting the With FX-1 and FX-2, you can select the effect to be used from EXP pedal connected to the EXP PEDAL 1 or 2 jack or FC-200 the following. -
Page 37: Acs (Advanced Compressor)
This models a dbx 160X. see below Selects the compressor type. Vtg Rack U This models a UREI 1178. BOSS Comp This models a BOSS CS-3. Attack This is a compressor that adds an even Adjusts the strength of the picking attack Hi-BAND 0–100 stronger effect in the high end. -
Page 38: Aw (Auto Wah)
Chapter 4 Introduction to Effects and Parameters TM (Tone Modify) Parameter/ Explanation Range This changes the tone of the connected guitar. Frequency Adjusts the center frequency of the Wah ef- 0–100 Parameter/ fect. Explanation Range Peak Type Adjusts the way in which the wah effect ap- see below Selects the type of tone modification. -
Page 39: Tr (Tremolo)
Chapter 4 Introduction to Effects and Parameters PH (Phaser) Parameter/ Explanation Range By adding varied-phase portions to the direct sound, the phaser effect gives a whooshing, swirling character to the Adjusts the tone for the low frequency -50–+50 sound. range. High Parameter/ Explanation... -
Page 40: Fl (Flanger)
Chapter 4 Introduction to Effects and Parameters FL (Flanger) The flanging effect gives a twisting, jet-airplane-like With the volume level of the left and right sides alternately character to the sound. changing, when playing sound in stereo, you can get an effect that makes the guitar sound appear to fly back and Parameter/ forth between the speakers. -
Page 41: Uv (Uni-V)
Chapter 4 Introduction to Effects and Parameters UV (Uni-V) SG (Slow Gear) Although this resembles a phaser effect, it also provides a This produces a volume-swell effect (“violin-like” sound). unique undulation that you can’t get with a regular phaser. Parameter/ Explanation Range Parameter/... -
Page 42: Str (Sitar Simulator)
Chapter 4 Introduction to Effects and Parameters STR (Sitar Simulator) FB (Feedbacker) This simulates the sound of the sitar. This allows you to use feedback playing techniques. * Note that the notes you want to apply feedback to must be Parameter/ played singly and cleanly. -
Page 43: Afb (Anti-Feedback)
Chapter 4 Introduction to Effects and Parameters AFB (Anti-feedback) Parameter/ Explanation Range This prevents the acoustic feedback that can be produced by * When set to BPM, the value of each parameter will be set according to the body resonances of a guitar. the value of the Master BPM (p. -
Page 44: Wsy (Wave Synth)
Chapter 4 Introduction to Effects and Parameters WSY (Wave Synth) SEQ (Sub Equalizer) This is a synth sound that processes the guitar input signal. This adjusts the tone as a sub equalizer. A parametric type is adopted for the high-middle and low-middle range. Parameter/ Explanation Range... -
Page 45: Fx-2
Chapter 4 Introduction to Effects and Parameters FX-2 Parameter/ Explanation Range Pre Delay *1 You can use the following effects in FX-2 in addition to whatever effect is shared by FX-1 and FX-2. Adjusts the time from when the direct 0 ms–300 ms, sound is heard until the harmonist sounds are heard. -
Page 46: Creating Harmonist Scales (User Scale)
Chapter 4 Introduction to Effects and Parameters Creating Harmonist Scales (User Scale) PS (Pitch Shifter) When “Harmony” is set to any value from -2oct to +2oct, and This effect changes the pitch of the original sound (up or the harmony does not sound the way you intend, use a “User down) within a range of two octaves. -
Page 47: Pb (Pedal Bend)
Chapter 4 Introduction to Effects and Parameters PB (Pedal Bend) RT (Rotary) This lets you use the pedal to get a pitch bend effect. This produces an effect like the sound of a rotary speaker. The EXP pedal automatically switches to the pedal bend Parameter/ function when PB is selected. -
Page 48: 2Ce (2 X 2 Chorus)
Chapter 4 Introduction to Effects and Parameters 2CE (2 x 2 Chorus) AR (Auto Riff) Two separate stereo chorus units are used for the low- This allows you to automatically produce a phrase simply by frequency and high-frequency ranges in order to create a picking a single note. -
Page 49: Creating Original Phrases (User Phrase)
Chapter 4 Introduction to Effects and Parameters Creating Original Phrases SYN (Guitar Synth) (User Phrase) This detects the pitch of an electric guitar and outputs a synthesizer sound. In addition to the 30 different prepared phrases, you can also create up to ten of your own original phrases (User phrases). * When you use a guitar synthesizer, observe the following points. -
Page 50: Ac (Acoustic Processor)
Chapter 4 Introduction to Effects and Parameters Parameter/ Parameter/ Explanation Explanation Range Range PWM Depth (Pulse Width Modulation Depth) *2 Synth Level 0–100 Adjusts the depth of the PWM. Adjusts the volume of the synthesizer 0–100 sound. When it is set to “0,” no PWM effect is obtained. Direct Level Cutoff Frequency 0–100... -
Page 51: Sh (Sound Hold)
Chapter 4 Introduction to Effects and Parameters SH (Sound Hold) EQ (Equalizer) You can have sound played on the guitar be held Adjusts the tonal quality. A parametric type equalizer is used continuously. This effect allows you to perform the melody for the upper and lower midrange. -
Page 52: Loop (External Effects Loop) 1/2
Chapter 4 Introduction to Effects and Parameters LOOP (External Effects Loop) 1/2 When Type is Set to Stereo 1 or Stereo 2 Parameter/ This allows you to connect an external effects device to the Explanation Range LOOP 1/2 SEND and RETURN jacks and use it as part of the Mode GT-PRO’s effects. -
Page 53: Pre Loop
Chapter 4 Introduction to Effects and Parameters When Type is Set to S/R1→S/R2 or S/R1&S/R2 Parameter/ Explanation Range Parameter/ Return 2 Level Explanation Range Adjusts the volume of the input from the ex- 0–200 Select ternal effects device. S/R1, S/R2, This selects how SEND/RETURN 1 and S/R1&S/R2 SEND/RETURN 2 are used. -
Page 54: Amp Ctl (Amp Control) 1/2
Chapter 4 Introduction to Effects and Parameters AMP CTL (Amp Control) 1/2 MASTER By connecting your guitar amp’s channel switching jack to The following parameters can be set with MASTER. the GT-PRO’s AMP CTL 1 (AMP CTL 2) jack, you can then •... -
Page 55: Patch Level
Chapter 4 Introduction to Effects and Parameters Patch Level FV (Foot Volume) This is a volume control effect. Parameter/ Explanation Normally, this is controlled with the expression pedal Range connected to the EXP PEDAL 1 jack or the FC-200’s EXP Patch Level pedal. -
Page 56: Fx Chain (Effect Chain)
Chapter 4 Introduction to Effects and Parameters FX CHAIN (Effect Chain) NAME (Patch Name) Here’s how you can change the order in which the effects are Each patch can be given a name (Patch Name) consisting of connected. up to sixteen characters. You’ll probably want to take advantage of this feature by assigning names that suggest the 1. -
Page 57: Creating Original Effects Types (Customize)
Chapter 5 Creating Original Effects Types (Customize) With the GT-PRO’s Customize function, you can rely on your Parameter/ own sensibilities and create a totally new effect by tweaking Explanation Range the settings for the “Preamp/Speaker Simulator,” Type “Overdrive/Distortion,” and “Pedal Wah.” The result can fig.05-0030d then be saved on the GT-PRO as “Custom”... -
Page 58: Customizing The Speakers
Chapter 5 Creating Original Effects Types (Customize) Parameter/ Explanation Parameter/ Range Explanation Range Preamp High Speaker Size fig.05-0090d fig.05-0120d Adjusts the preamp section’s high-frequen- -50–+50 5”–15” Selects the size of speaker. cy tone. Color Low fig.05-0130d Customizing the Speakers You can make two different sets of settings, Custom 1 and Custom 2. -
Page 59: Customizing Overdrive/Distortion
Selects the basic type of overdrive/distor- see below tion. 3,5 2,4 OD-1 This is the sound of the BOSS OD-1. OD-2 This is a overdrive sound with high gain. CRUNCH This is a crunch sound. This gives a basic, traditional distortion DS-1 sound. -
Page 60: Customizing Pedal Wah
Chapter 5 Creating Original Effects Types (Customize) Customizing Pedal Wah Parameter/ Explanation Range You can make three different sets of settings, Custom 1, Type Custom 2, and Custom 3. fig.05-0260d The sound of any patch that uses Custom 1, 2, or 3 will be altered if the custom settings are edited. -
Page 61: Chapter 6 Using Pedals To Control The Effects
Chapter 6 Using Pedals to Control the Effects Notes on Setting the Pedal Functions When Setting the FV (Foot Volume) Function Separately for Individual Patches With the GT-PRO, each effect features various different The manner in which the FV (Foot Volume: p. 55) is parameters, and you can adjust these as you perform to controlled is determined for individual patches via the EXP produce even more effective changes in your tones. -
Page 62: Setting The Operation Of The External Foot Switch (Ctl 1, 2, 3, 4 Function)
Chapter 6 Using Pedals to Control the Effects Setting the Operation of the External fig.06-0030 Foot Switch (CTL 1, 2, 3, 4 Function) This applies the settings determining the function of the foot switches connected to the CTL 1/2 and CTL 3/4 jacks as global settings for the entire GT-PRO. -
Page 63: Setting The Operation Of The External Exp Pedal (Exp1, 2 Function)
Chapter 6 Using Pedals to Control the Effects Setting the Operation of the External Value Explanation Amp Ctl2 On/Off Switches the AMP CTL 2 on and off. EXP Pedal (EXP1, 2 Function) Switches the Manual Mode (p. 85) on and MANUAL On/Off off. -
Page 64: Setting The Operation For An External Midi Device (Cc#7, Cc#80, Cc#1 Function)
Chapter 6 Using Pedals to Control the Effects Setting the Operation for an External MIDI CC#7 Device (CC#7, CC#80, CC#1 Function) Value Explanation The pedal normally is used as a “foot vol- ume” pedal. When Pedal Wah (p. 36) or These settings are applied to the entire GT-PRO, controlling Auto Pedal Bend (p. -
Page 65: Setting The Fv (Foot Volume) Operation For Individual Patches (Exp1/Cc#7 Foot Volume)
Chapter 6 Using Pedals to Control the Effects Setting the FV (Foot Volume) Operation for Value Explanation Controls the Start/Stop of external MIDI de- Individual Patches (EXP1/CC#7 Foot Volume) MIDI Start/Stop vices (such as sequencers). Controls the Play/Stop of external MIDI de- MMC Play/Stop vices (such as hard disk recorders). -
Page 66: Setting External Controller Functions To Individual Patches (Assign)
Chapter 6 Using Pedals to Control the Effects Setting External Controller Functions 4. Turn the PATCH/VALUE dial to select the Quick Settings. to Individual Patches (Assign) Display Explanation This sets, on an individual patch basis, the functions of Quick ASSIGN Current Setting external pedals (foot switches or expression pedals) - - -: User Setting... -
Page 67: Manual Settings
Chapter 6 Using Pedals to Control the Effects Manual Settings 5. Rotate the PATCH/VALUE dial to change the setting’s value. Here, you can individually determine which controller is to 6. Repeat Steps 4 and 5 as needed. control which parameter. fig.06-0130 7. - Page 68 Chapter 6 Using Pedals to Control the Effects When using the foot switch: Value Explanation fig.06-0170 Patch Bank Inc Amount of change in Switches to the next higher bank number. parameter value Patch Bank Dec maximum value Switches to the next lower bank number. Target Max * Although you can set this so that the same target is controlled by more than one controller, in such cases, make sure not to...
- Page 69 Chapter 6 Using Pedals to Control the Effects Source Source Mode fig.06-0200d fig.06-210d This sets the controller (source) that affects the target This determines whether the control pedal will function as a parameter. momentary type switch (such as the optional FS-5U). Controllers that can be selected as the source are shown Value Explanation...
-
Page 70: Internal Pedal System
Chapter 6 Using Pedals to Control the Effects Internal Pedal fig.06-0240 With the trigger you have set, the assumed EXP pedal starts working. If you have set “Internal Pedal” to “Source,” set the following parameters. Parameter/ Explanation Range Trig (Trigger) fig.06-0250d Act.Range Act.Range... -
Page 71: Wave Pedal
Chapter 6 Using Pedals to Control the Effects Parameter/ Explanation Range You may be unable to change parameter settings when Curve the following functions are set for the target while fig.06-0270d INTERNAL PEDAL or WAVE PEDAL is selected for the source. -
Page 72: Using The Gt-Pro With External Midi Devices Connected
Chapter 7 Using the GT-PRO with External MIDI Devices Connected What Can You Do with MIDI? Remotely Controlling the GT-PRO Using an External MIDI Device You can perform the following operations using MIDI with Switching Patch Numbers the GT-PRO. When the GT-PRO receive Program Change messages from * The use of MIDI requires that the MIDI channels of the the external MIDI device, its patches are simultaneously connected devices match. -
Page 73: Notes Regarding The Midi Messages That Can Be Transmitted And Received
Chapter 7 Using the GT-PRO with External MIDI Devices Connected Notes Regarding the MIDI Messages That Making the Settings for MIDI Functions Can Be Transmitted and Received Here is a description of the GT-PRO’s MIDI functions. Set The MIDI messages that the GT-PRO can transmit and them as needed, depending on the intended use. - Page 74 Chapter 7 Using the GT-PRO with External MIDI Devices Connected Parameter/ Parameter/ Explanation Explanation Range Range MIDI Device ID MIDI CTL1 OUT (MIDI CTL 1 Pedal Out) fig.07-0070d fig.07-0110d This sets the Device ID used for transmitting This sets the controller number when opera- 1–32 and receiving Exclusive messages.
-
Page 75: Transmitting And Receiving Midi Data
Chapter 7 Using the GT-PRO with External MIDI Devices Connected Transmitting and Receiving When Transmitting Data to Another GT-PRO Connect as shown in the figure below, and match the Device MIDI Data ID for the transmitting and receiving devices. fig.07-0160 On the GT-PRO, you can use Exclusive messages to provide another GT-PRO with identical settings, and save effect settings on a MIDI sequencer or other device. -
Page 76: Receiving Data
Chapter 7 Using the GT-PRO with External MIDI Devices Connected Receiving Data from an External Receiving MIDI Device (Bulk Load) fig.07-0210 Making the Connections When Receiving Data Saved on a MIDI Sequencer Connect as shown below. Set the GT-PRO’s Device ID to the same number that was used when the data was transmitted to the MIDI sequencer. -
Page 77: Setting The Program Change Map
Chapter 7 Using the GT-PRO with External MIDI Devices Connected Setting the Program Change Map fig.07-0250 When switching patches using Program Change messages transmitted by an external MIDI device, you can freely set the correspondence between Program Change messages received by the GT-PRO and the patches to be switched to in the “Program Change Map.”... -
Page 78: Enabling/Disabling The Program Change Map Settings (Midi Map Select)
Chapter 7 Using the GT-PRO with External MIDI Devices Connected Changing Patch Numbers on an Enabling/Disabling the Program Change Map Settings (MIDI Map Select) External MIDI Device from the GT-PRO This setting determines whether patches are switched When a patch is selected on the GT-PRO, the bank select and according to the Program Change Map settings, or to the program change messages sent from the GT-PRO correspond default settings. -
Page 79: About Midi
Chapter 7 Using the GT-PRO with External MIDI Devices Connected About MIDI MIDI has sixteen channels 1–16, and MIDI messages will be received by the instrument (the receiving device) whose channel matches the channel of the transmitter. MIDI is an acronym for Musical Instrument Digital Interface, and is a world-wide standard for allowing electronic musical * If omni mode is on, data of all MIDI channels will be received equipment to communicate by transmitting messages such as... -
Page 80: About The Midi Implementation
Chapter 7 Using the GT-PRO with External MIDI Devices Connected About the MIDI implementation MIDI allows a variety of messages to be exchanged between instruments, but it is not necessarily the case that all types of message can be exchanged between any two MIDI devices. Two devices can communicate only if they both use the types of messages that they have in common. -
Page 81: Using The Gt-Pro Connected To The Fc-200
Chapter 8 Using the GT-PRO Connected to the FC-200 Switching Operation of the GT-PRO for You can connect the Roland FC-200 MIDI Foot Controller (sold separately) to the GT-PRO. Use with the FC-200 (FC-200 Mode) Using the FC-200 makes changing patches and working with effects more convenient (“Chapter 6 Using Pedals to Control Parameter/ Explanation... -
Page 82: Setting The Timing For Switching Patches (Fc-200 Program Change Out)
Chapter 8 Using the GT-PRO Connected to the FC-200 Transmitting Settings for the Setting the Timing for Switching Patches (FC-200 Program Change Out) GT-PRO to the FC-200 Parameter/ This procedure transmits the settings made in “Setting the Explanation Range Functions Related to the FC-200” (p. 81) from the GT-PRO to FC-200 PC Out the FC-200. -
Page 83: Transmitting Settings Data To The Fc-200
Chapter 8 Using the GT-PRO Connected to the FC-200 Transmitting Settings Data to the Controlling the GT-PRO with FC-200 the FC-200 After the GT-PRO and FC-200 are connected with a MIDI This section describes how to use the FC-200 to switch the cable, change the FC-200’s settings with the GT-PRO. -
Page 84: Using The Fc-200'S Ctl And Exp Pedals
Chapter 8 Using the GT-PRO Connected to the FC-200 Switching the Bank and Number Controller Pedal Function fig.08-0130 Number EXP Pedal CC#7 CC#7 Function CTL Pedal CC#80 CC#80 Function Pedal Connected to the CC#1 CC#1 Function FOOT SW/EXP 1 Jack * This is enabled when the controller numbers assigned to each of the FC-200’s pedals and jacks are set to the factory-set values. -
Page 85: Switching The Effect On And Off With The Fc-200'S Pedals (Manual Mode)
Chapter 8 Using the GT-PRO Connected to the FC-200 Switching the Effect On and Off with Selecting the Effect to Be Switched On and Off With the Pedals the FC-200’s Pedals (Manual Mode) The GT-PRO features a Manual mode, in which the pedals on 1. -
Page 86: Advanced Settings
Chapter 8 Using the GT-PRO Connected to the FC-200 Advanced Settings If the controller number set for the Assign (p. 66) source This section describes more convenient ways to use the FC- is the same as that assigned to an FC-200 pedal and you 200. -
Page 87: Automatically Setting The Fc-200 With The Corresponding Gt-Pro Settings When Turning On The Gt-Pro
Chapter 8 Using the GT-PRO Connected to the FC-200 Connecting an External MIDI Device After connecting the FC-200, you will find it convenient to change the settings without having to disconnect and in FC-200 Mode reconnect the MIDI cables. If, while controlling the GT-PRO with the FC-200, you also want to run an additional MIDI device, connect the MIDI IN Automatically Setting the FC-200 with the connector on the other external MIDI device to the GT-PRO’s... -
Page 88: Using The Gt-Pro Connected To A Computer Via Usb
Chapter 9 Using the GT-PRO Connected to a Computer Via USB Before Connecting with USB Switching the Driver Mode ig.09-0030 With the GT-PRO, you can use USB to transmit both digital audio signals and MIDI messages between the GT-PRO and your computer. -
Page 89: Setting Usb-Related Functions
Chapter 9 Using the GT-PRO Connected to a Computer Via USB Setting USB-Related Functions Parameter/ Explanation Range USB Mix Channel This section describes the GT-PRO’s USB functions. Set these functions according to how you want to use the unit. fig.09-0080d Setting the Digital Audio Signal Input/Output Sets the output jacks used in mixing the dig-... -
Page 90: Recording The Gt-Pro's Output With A Computer
Chapter 9 Using the GT-PRO Connected to a Computer Via USB Applying Effects with the GT-PRO to Parameter/ Explanation a Computer’s Audio Playback Range USB Monitor Cmd (USB Monitor Command) Set the audio output port used by applications to the GT- fig.09-0110d PRO. -
Page 91: Running The Gt-Pro From A Computer
Chapter 9 Using the GT-PRO Connected to a Computer Via USB Running the GT-PRO from a Computer You can use USB MIDI to run the GT-PRO from your computer. When you set the GT-PRO to the Advanced driver mode (p. 110, p. -
Page 92: Chapter 10 Other Features
Chapter 10 Other Features Controlling Various Parameters 4. Rotate the PATCH/VALUE dial to change the setting’s value. Through the Guitar Volume As the guitar volume changes during the performance, Dynamic Sens is adjusted in response to the volume The GT-PRO includes a function to control effect parameters when the preamps are switched. -
Page 93: Using The Guitar Volume To Change Selected Effect Parameters (Assign Source)
Chapter 10 Other Features Using the Guitar Volume to Change Selected Effect Parameters (Assign Source) You can jump to the core parameters by pressing PARAMETER [ ] (or [ ]) while holding down Assign (p. 66) features a function that allows effect PARAMETER [ ] (or [ ]). -
Page 94: Adjusting The Overall Sound To Match The Usage Environment (Global)
Chapter 10 Other Features Adjusting the Overall Sound to Match Parameter/ Explanation Range the Usage Environment (Global) Mid Freq (Middle Frequency) fig.10-0140d The GT-PRO includes a feature that allows you to change the overall tone temporarily. This is called the “Global function.” With the Global function, you can temporarily change your settings to match those of your equipment and the operating Specify the center of the frequency range... -
Page 95: Sub Global Eq
Chapter 10 Other Features Sub Global EQ USB/Digital Out This adjusts the tone of the SUB OUT regardless of the Parameter/ equalizer on/off settings of individual patches. Explanation Range USB/DGT Out Ch. (USB/Digital Out Channel) Parameter/ Explanation fig.09-0060d Range Sub Low EQ fig.10-0180d MAIN, SUB, Selects the signals output from the USB and... -
Page 96: Adjusting The Display Contrast (Lcd Contrast)
Chapter 10 Other Features Adjusting the Display Switching the Sounds Input Contrast (LCD Contrast) to the GT-PRO (Input Select) Depending on where the GT-PRO is placed, the display (on This selects the input sounds, those input through the INPUT the right) may become difficult to read. If this occurs, adjust jacks or those input via USB, to which the effects are applied. -
Page 97: Adjusting The Tone Of The Sounds Input To The Gt-Pro (Input Level/Input Presence)
Chapter 10 Other Features Adjusting the Tone of the Sounds Input to Keeping Effect Sounds Playing After Patches the GT-PRO (Input Level/Input Presence) Are Switched (Patch Change Mode) The GT-PRO includes a function used for adjusting the tone The GT-PRO features a mode that is enabled when spatial to match the connected guitar. -
Page 98: Using The Identical Preamp Settings In All Patches (Preamp Mode)
Chapter 10 Other Features Using the Identical Preamp Settings Limiting the Patches That Can Be in All Patches (Preamp Mode) Switched (Patch Extent) With the GT-PRO, you can have a preamp be set globally for By setting an upper limit to the patches, thus limiting the use in all patches. -
Page 99: Changing The Exp Pedal Mode When Patches Are Switched (Assign Hold)
Chapter 10 Other Features Changing the EXP Pedal Mode When Setting the Knob Functions Patches are Switched (Assign Hold) (Knob Mode) This setting determines whether or not the Assign’s (p. 66) This sets the way the values of settings are changed when the operational status is carried over to the next patch when control knobs are turned. -
Page 100: Switching The Output/Input Level
Chapter 10 Other Features Switching the Output/Input Level Checking the Effect Level with the Level Meter You can switch between the MAIN OUT, SUB OUT, and LOOP 1/2 SEND output levels and the LOOP 1/2 RETURN You can meter the output level of each effect. This is handy input levels. -
Page 101: Tuning The Guitar (Tuner/Bypass)
Chapter 10 Other Features Tuning the Guitar (Tuner/Bypass) How to Tune 1. Play a single open note on the string being tuned. When the Tuner is turned on, sounds input to the GT-PRO The name of the note closest to the pitch of the string that are output directly as is (bypassed), and the tuner is was played appears in the display. - Page 102 Chapter 10 Other Features Parameter/ Explanation Range TUNER Pitch fig.10-0500d 435–445 Hz Sets the reference pitch. The frequency of A4 (the middle A on a piano keyboard) played by an instrument (such as a piano) that provides the pitch to which the other instruments refer in tuning before a performance begins is called the reference pitch.
-
Page 103: Appendices
Appendices Restoring the Factory List of Factory Settings Settings (Factory Reset) Parameter Value TUNER Restoring the GT-PRO to the settings made at the factory is TUNER Pitch A= 440Hz referred to as “Factory Reset.” TUNER Out Bypass Not only can you return all of the settings to the values in OUTPUT SELECT effect when the GT-PRO was shipped from the factory, you MAIN Output Sel. - Page 104 Appendices Parameter Value Monitor Cmd Disable Dir Monitor Advanced Driver Mode MIDI RX Channel Omni Mode Omni On TX Channel Device ID Sync Clock Auto PC OUT CC#7 EXP 1 OUT CTL1 OUT CC#81 CC#80 CTL2 OUT CTL3 OUT CTL4 OUT MIDI Map Select Manual Mode Pedal 1...
-
Page 105: Midi Implementation Chart
Appendices MIDI Implementation Chart GUITAR EFFECTS PROCESSOR Date: Feb. 14, 2005 MIDI Implementation Chart Model GT-PRO Version: 1.00 Transmitted Recognized Remarks Function... Basic Default 1–16 1–16 Memorized Channel Changed 1–16 1–16 Default OMNI ON/OFF Memorized Mode Messages Altered ************** Note True Voice Number : **************... -
Page 106: Specifications
Appendices Specifications Controls < Front Panel > INPUT LEVEL knob GT-PRO: Guitar Effects Processor MAIN OUTPUT knob SUB OUTPUT knob AD Conversion (PREAMP/SPEAKER) 24 bit + AF method TYPE knob DA Conversion GAIN knob 24 bit BASS knob MIDDLE knob Sampling Frequency TREBLE knob 44.1 kHz... - Page 107 AF Method (Adaptive Focus method) This is a proprietary method from BOSS & Roland that vastly improves the signal-to-noise (S/N) ratio of the A/ D and D/A converters.
-
Page 108: Gt-Pro Software System Requirements
While under most conditions, a computer similar to the CPU/Clock: above will permit normal operation of the GT-PRO, Pentium®, Celeron™, Intel-compatible Processor/600 MHz BOSS cannot guarantee compatibility solely on these or Higher factors. This is due to numerous variables that may influence the processing environment, such as... -
Page 109: Installing & Setup The Usb Driver
Installing & Setup the USB Driver In order to use the GT-PRO USB, you must first install the USB driver. The USB Driver is included in the “GT-PRO Software CD-ROM.” ■ What is USB Driver? The USB Driver is software which passes data between the GT-PRO and the application (sequencer software etc.) that is running on the USB-connected computer. -
Page 110: Driver Installation And Settings (Windows)
Driver installation and settings (Windows) About the Driver Modes The GT-PRO features two operational modes, each of which uses a different type of driver, with one mode using the special driver on the CD-ROM included with the GT-PRO and the other mode using the standard Windows driver. Before installing the drivers, you must first switch the GT-PRO’s driver mode. -
Page 111: Installing The Special Driver
Driver installation and settings (Windows) Installing the Special Driver Windows XP users Disconnect all USB cables except for a USB keyboard and USB mouse (if used). You must log on to Windows with a user name whose account has administrative privileges (e.g., Open the System Properties dialog box. - Page 112 The screen will indicate “Please choose your search and installation options”. Select “Don’t search. I will choose the driver to install”, and click [Next]. Make sure that the “Model” field indicates “BOSS GT-PRO”, and click [Next]. Driver installation will begin.
- Page 113 Driver installation and settings (Windows) If you changed the “Driver Signing Options” setting (p. 111, step 4), restore the setting to its previous state after restarting Windows. Log on to Windows using the same user account as the one used when the driver was installed.
-
Page 114: Windows 2000 Users
Driver installation and settings (Windows) Windows 2000 users Disconnect all USB cables except for a USB keyboard and USB mouse (if used). Log on to Windows as a user with administrative privileges (such as Open the System Properties dialog box. Administrator) Click the Windows Start button, and from the menu that appears, select Settings | Control Panel. - Page 115 Driver installation and settings (Windows) If the “File signature verification” (Step 4) setting was not set to “Ignore”, a “Digital Signature Not Found” dialog box will appear. If “File signature verification” is set to “Warn” Click [Yes]. Continue the installation. If “File signature verification”...
- Page 116 Driver installation and settings (Windows) Giving priority to background services In Windows 2000, make settings to enable background processing. If you fail to make this setting, you may experience interruptions in the sound. To ensure that MIDI and audio processing occurs smoothly, use the following procedure to make settings. Click the Windows Start button, and from the menu that appears, select Settings | Control Panel.
-
Page 117: Windows Me/98 Users
Driver installation and settings (Windows) Windows Me/98 users With the GT-PRO disconnected, start up Windows. Disconnect all USB cables except for a USB keyboard and USB mouse (if used). If you are using virus checking or similar software, be sure to exit it as well. Exit all currently running software (applications). -
Page 118: Installing The Os-Standard Driver
Driver installation and settings (Windows) Installing the OS-standard Driver The installation procedure will differ depending on your system. Please proceed to one of the following sections, depending on the system you use. • Windows XP/2000 users............(p. 118) • Windows Me users ..............(p. 119) •... -
Page 119: Windows Me Users
Driver installation and settings (Windows) Windows Me users With the GT-PRO disconnected, start up Windows. Disconnect all USB cables except for a USB keyboard and USB mouse (if used). Exit all currently running software (applications). Also close any open windows. If you are using virus checking or similar software, be sure to exit it as well. -
Page 120: Windows 98 Users
Driver installation and settings (Windows) Windows 98 users The USB composite device driver is installed first, then the USB audio device driver is installed. Use the following procedure to install the drivers. With the GT-PRO disconnected, start up Windows. Disconnect all USB cables except for a USB keyboard and USB mouse (if used). Exit all currently running software (applications). - Page 121 Driver installation and settings (Windows) Check CD-ROM drive, and click [Next]. A dialog box like the one shown below will appear. fig.12-0094 Click [Next]. File (driver) copying will begin. If the Windows CD-ROM is not inserted in the CD-ROM drive, a Insert Disk dialog box may appear.
- Page 122 Driver installation and settings (Windows) Click [Next], and proceed with the installation in the same way as in steps 8–10. When installation of the USB audio device driver is complete, a dialog box like the one shown here will appear. fig.12-0098 Click [Finish].
-
Page 123: Driver Settings
MIDI devices BOSS GT-PRO Control MIDI OUT If you specify BOSS GT-PRO as the output port for the GT-PRO Editor/Librarian, sequencer soft- ware, etc., you can control the GT-PRO using System Exclusive and other messages. BOSS GT-PRO Control MIDI IN If you specify BOSS GT-PRO as the input port for the GT-PRO Editor/Librarian, sequencer software, etc., you can acquire data from the GT-PRO using System Exclusive and other messages. -
Page 124: Input/Output Device Settings
Default device field. From the list that appears for each field, select “GT-PRO” or “USB Audio Device.” choose the device shown below. Sound playback BOSS GT-PRO Sound recording BOSS GT-PRO Click [OK] to close the Sounds and Audio Devices Properties dialog box. -
Page 125: Software Settings
Before you start up your software, use a USB cable to connect the GT-PRO to your computer. If your software allows you to specify audio input/output settings, choose BOSS GT-PRO. For details, refer to the owner’s manual for your software. -
Page 126: Driver Installation And Settings (Macintosh)
Driver installation and settings (Macintosh) About the Driver Modes The GT-PRO features two operational modes, each of which uses a different type of driver, with one mode using the special driver on the CD-ROM included with the GT-PRO and the other mode using the standard Mac OS driver. Before installing the drivers, you must first switch the GT-PRO’s driver mode. -
Page 127: Installing The Special Driver
Insert the CD-ROM into the CD-ROM drive of your computer. In the Driver (Mac OS X) folder of the CD-ROM, double-click GTPROUSBDriver.pkg. The display will indicate “Welcome to the BOSS GT-PRO USB Driver Installer”. The message “This Installer package Click [Continue]. -
Page 128: Driver Settings
44.1 kHz”. “Internal speakers” for the “Play alerts and sound effects through” In the Output tab, set “Choose a device for sound output” to “BOSS GT-PRO 44.1 kHz”. setting. GT-PRO In the Input tab, set “Choose a device for sound input” to “BOSS GT-PRO 44.1 kHz”. -
Page 129: Mac Os 9 Users
Driver installation and settings (Macintosh) Mac OS 9 users Installing the driver Use either OMS or FreeMIDI as the MIDI driver. OMS can be found in the OMS 2.3.8 E folder within the OMS (Mac OS 9) The included GT-PRO driver is an add-on module for using the GT-PRO with OMS or folder of the CD-ROM. - Page 130 Driver installation and settings (Macintosh) OMS settings Before connecting the USB cable, switch the GT-PRO’s driver mode to “Advanced.” For instructions on switching the GT-PRO’s driver modes, refer to “Switching the Driver Mode” (p. 88). With the power switch turned OFF, use the USB cable to connect the GT-PRO to your computer.
- Page 131 BOSS GT-PRO, and click [OK]. fig.12-0260 * If the dialog box does not show “BOSS GT-PRO,” check whether the GT-PRO is connected correctly, and start up OMS Setup once again. Verify that the OMS MIDI Device Setup dialog box lists the GT-PRO. Then click all check boxes from the BOSS GT-PRO to check them, and click [OK].
- Page 132 Driver installation and settings (Macintosh) From the Edit menu, select OMS MIDI Setup. In the OMS MIDI Setup dialog box that appears, check Run MIDI in background, and click [OK]. fig.12-0290 Exit OMS Setup. Make MIDI device settings on your sequencer software. For details on settings, refer to the manual that came with your software.
- Page 133 Driver installation and settings (Macintosh) FreeMIDI settings Before connecting the USB cable, switch the GT-PRO’s driver mode to “Advanced.” For instructions on switching the GT-PRO’s driver modes, refer to “Switching the Driver Mode” (p. 88). With the power switch turned OFF, use the USB cable to connect the GT-PRO to your computer.
- Page 134 Driver installation and settings (Macintosh) Click [Continue]. In the dialog box that appears, set Studio Location: to GT-PRO,GT-PRO Port, and click [>>Add>>]. fig.12-0340 When settings are complete, click [Done]. A setting window will appear. In the setting window, change the device name indicating the MIDI device connected to the GT-PRO as follows.
- Page 135 Driver installation and settings (Macintosh) Installing the ASIO driver You must install the MIDI driver even if you will be using only audio on the GT-PRO. ASIO (Steinberg Audio Stream Be sure to install the MIDI driver before you install the ASIO driver. In/Out Interface) This is an audio interface standard This section explains how to install the ASIO driver that allows the GT-PRO to be used by your...
-
Page 136: Installing The Os-Standard Driver
Driver installation and settings (Macintosh) Installing the OS-standard Driver The installation procedure will differ depending on your system. Please proceed to one of the following sections, depending on the system you use. • Mac OS X users................ (p. 136) • Mac OS 9 users ................ (p. 138) Mac OS X users With the GT-PRO disconnected, start up Mac OS. - Page 137 Driver installation and settings (Macintosh) fig.12-0380 The “Main Volume” slider will In the Output tab, set the Choose a device for sound output to “GT-PRO.” not move. fig.12-0390 In the Input tab, set the Choose a device for sound input to “GT-PRO.” fig.12-0400 Cautions when using the GT-PRO Before you use your software, please note the following points.
-
Page 138: Mac Os 9 Users
Driver installation and settings (Macintosh) Mac OS 9 users With the GT-PRO disconnected, start up Mac OS. Exit all currently running software (applications). If you are using a virus checker or similar software, be sure to exit it as well. After starting up Mac OS, select Apple System Profiler from the Apple menu. - Page 139 Driver installation and settings (Macintosh) Settings the sound input/output From the Apple menu, select Control Panel – Sound. The Sound dialog box will appear. fig.12-0430 The Sound dialog box will appear. Click the Speakers tab or Speaker Settings. fig.12-0440 With the volume turned down on the GT-PRO and on your peripheral audio equipment, click [Start Test].
- Page 140 Driver installation and settings (Macintosh) In Choose a source for sound input (Device), select USB audio. fig.12-0460 If USB audio is not displayed, close the Sound dialog box, and disconnect the GT-PRO’s USB cable from the Macintosh. Perform the driver installation (p. 138) once again.
-
Page 141: Setting The Special Driver's Functions
Setting the Special Driver’s Functions Adjusting the audio latency When using the GT-PRO in Advanced mode, you can change the driver settings to adjust the latency of the audio. To adjust the latency, change the Buffer Size in the driver settings dialog box. As described in “Opening the special driver settings dialog box”... - Page 142 Open the Control Panel and double-click BOSS GT-PRO. The BOSS GT-PRO Driver Settings dialog box will appear. * In Windows XP, click “Switch to classic view” to switch the display to the classic view. BOSS GT-PRO will not be displayed unless the classic view is selected.
-
Page 143: Troubleshooting
Troubleshooting Error Messages ❏ Is the connected amp/mixer turned off, or the volume lowered? → Check the settings of your amp/mixer system. If you attempt an incorrect operation or if an operation could not be executed, the display will indicate an error message. ❏... -
Page 144: Other Problems
Troubleshooting Oscillating sound occurs Other Problems ❏ Is the value for any gain- or volume-related effects Patch does not change parameter set too high? → Lower these values. ❏ Is something other than the Play screen shown in the display? ❏... -
Page 145: Problems Related To The Usb Driver
Troubleshooting ❏ ❏ Do the MIDI channel settings of both devices match? Is USB enabled on your computer? → Make sure that the MIDI channels of both devices match → Refer to the operation manual for your computer, and (p. 73). make sure that USB is enabled. - Page 146 Did you make “Driver Signing Options”? → In order to install/re-install the driver, you must make If you find BOSS GT-PRO with a yellow “!” or a red “?” displayed beside it, delete this in the same way. “Driver Signing Options.”...
-
Page 147: Problems When Using The Usb Driver
Troubleshooting Problems when using the ❏ Is your computer in Suspend or Sleep mode? → If so, get your computer to resume normal operation, USB Driver then exit all applications that are using the GT-PRO. Next, turn the GT-PRO’s power off, then switch it on again. - Page 148 Troubleshooting Sound is interrupted during audio recording/playback ❏ Does your sequencer software support ASIO 2.0? → If your ASIO-compatible software does not support ASIO 2.0, it will not operate correctly if you use [GT- ❏ Are many applications running on your computer? PRO ASIO2.0 16bit] or [GT-PRO ASIO2.0 24bit] as the →...
- Page 149 Check the contents, and click either [OK] or [Cancel]. ❏ If you are using the special driver, you can solve this 6. In the “System Properties” dialog box, click [OK] to problem in the “BOSS GT-PRO Driver Settings” close the dialog box. dialog box. 7. Restart your computer.
- Page 150 * If you change the buffer size, you must exit the software and then restart it. Recorded sound is too low * BOSS/Roland can make no guarantee of, nor provide support → Adjust the volume of the effects. regarding the operation of sequencer software and audio editing software made by another manufacturer.
-
Page 151: Deleting The Special Driver
• the Administrator or other user with the privileges of the Driver (Mac OS X) of the CD-ROM). Administrators group 3. The display will indicate “This uninstalls BOSS GT- * For more information regarding this, consult your computer PRO driver from this Macintosh.”; click [Uninstall]. -
Page 152: Patch List
Patch List ■ User Patch Patch Name OD/DS Type PRE Ch.Mode Ch.A Type Ch.B Type U 1- 1 STACK DRIVE Single (Ch.A) MS HiGain Power Stack U 1- 2 HEAVY METAL DRV Single (Ch.A) R-FIER Vnt1 R-FIER Mdn1 U 1- 3 MS1959 LEAD Single (Ch.A) MS1959(I) - Page 153 Patch List Patch Name OD/DS Type PRE Ch.Mode Ch.A Type Ch.B Type U 6- 1 AMERICAN DS Single (Ch.A) MS1959(I) MS HiGain U 6- 2 HEAVY STACK Single (Ch.A) Power Stack Metal Stack Dual Mono Blues MS1959(II) U 6- 3 BLUES+MS1959 MIX U 6- 4 SMOOTH DETUNE...
- Page 154 Patch List Patch Name OD/DS Type PRE Ch.Mode Ch.A Type Ch.B Type U11- 1 DEEP STACK LEAD Single (Ch.A) MS HiGain MS HiGain U11- 2 BIG LEAD T-Scream Single (Ch.A) StackCrunch JC-120 Fat OD Single (Ch.A) SLDN StackCrunch U11- 3 LONG SUSTAIN DRV U11- 4 MILKY WAY...
- Page 155 Patch List Patch Name OD/DS Type PRE Ch.Mode Ch.A Type Ch.B Type U16- 1 60’s CLEAN Single (Ch.A) VO Clean VO Drive U16- 2 FAT CLEAN Single (Ch.A) Warm Clean JC-120 Single (Ch.A) JC-120 Warm Clean U16- 3 BIG HALL CLEAN U16- 4 LOW TONE JAZZ Single (Ch.A)
-
Page 156: Preset Patch
Patch List ■ Preset Patch Patch Name OD/DS Type PRE Ch.Mode Ch.A Type Ch.B Type P21- 1 STACK DRIVE Single (Ch.A) MS HiGain Power Stack P21- 2 HEAVY METAL DRV Single (Ch.A) R-FIER Vnt1 R-FIER Mdn1 Single (Ch.A) MS1959(I) MS HiGain P21- 3 MS1959 LEAD P21- 4... - Page 157 Patch List Patch Name OD/DS Type PRE Ch.Mode Ch.A Type Ch.B Type P26- 1 AMERICAN DS Single (Ch.A) MS1959(I) MS HiGain P26- 2 HEAVY STACK Single (Ch.A) Power Stack Metal Stack Dual Mono Blues MS1959(II) P26- 3 BLUES+MS1959 MIX P26- 4 SMOOTH DETUNE Single (Ch.A) SmoothDrive...
- Page 158 Patch List Patch Name OD/DS Type PRE Ch.Mode Ch.A Type Ch.B Type P31- 1 DEEP STACK LEAD Single (Ch.A) MS HiGain MS HiGain P31- 2 BIG LEAD T-Scream Single (Ch.A) StackCrunch JC-120 Fat OD Single (Ch.A) SLDN StackCrunch P31- 3 LONG SUSTAIN DRV P31- 4 MILKY WAY...
- Page 159 Patch List Patch Name OD/DS Type PRE Ch.Mode Ch.A Type Ch.B Type P36- 1 60’s CLEAN Single (Ch.A) VO Clean VO Drive P36- 2 FAT CLEAN Single (Ch.A) Warm Clean JC-120 Single (Ch.A) JC-120 Warm Clean P36- 3 BIG HALL CLEAN P36- 4 LOW TONE JAZZ Single (Ch.A)
-
Page 160: Index
Index Numerics 2 x 2 Chorus ................48 DEL ................23, 27, 56 2CE ..................... 48 DELAY ................12, 32–33 DGT ................... 22 DIGITAL OUT ................. 13 Digital Signature ..............115 AC ....................50 Direct Monitor ................89 Acoustic Processor ..............50 DIRECT OUT ................ - Page 161 Index GS ....................38 MIDI IN ..................13 GT-PRO Editor ................. 88 MIDI Map Select ..............78 GT-PRO Librarian ..............88 MIDI OUT ................. 13 Guitar Amp ................ 18, 54 MIDI Sequencer ..............75–76 Guitar In ................90, 96 MIDI THRU ................13 Guitar Simulator ..............
- Page 162 Index Preamp/Speaker Simulator ........... 28 PRESENCE ................. 11, 20 Target ..................67 Preset Bank ................19 Target Range ................68 Preset Patch ................19 TM ....................38 Program Change ..............72, 79 Tone Modify ................38 Program Change Map ............. 77 Total NS ..................
- Page 163 For EU Countries CAUTION Danger of explosion if battery is Apparatus containing incorrectly replaced. Replace only with the same or Lithium batteries equivalent type recommended by the manufacturer. Discard used batteries according to the manufacturer’s instructions. ADVARSEL! VARNING Lithiumbatteri - Eksplosionsfare ved Explosionsfara vid felaktigt batteribyte.
- Page 164 03899334 ’05-3-1N...
Need help?
Do you have a question about the GT-PRO and is the answer not in the manual?
Questions and answers