
Related Manuals for Sharp AY-AP18CJ


Summary of Contents for Sharp AY-AP18CJ
- Page 1 AY -AP18C J AY -AP24C J SPLIT TYPE ROOM AIR CONDITIONER OPERATION MANUAL INDOOR UNIT OUTDOOR UNIT AY-AP18CJ AE -A18CJ AY-AP24CJ AE -A24CJ...
-
Page 3: Table Of Contents
ENGLISH Thank you for purchasing a SHARP air conditioner. Please read this manual carefully before operating the product. CONTENTS • PLASMACLUSTER OPERATION ..11 • PRECAUTIONS ..........1 • ONE-HOUR OFF TIMER ...... 11 • ADDITIONAL NOTES ON OPERATION ..3 •... - Page 4 PRECAUTIONS CAUTIONS FOR USE If a gas appliance is used in the same room as the air conditioner, ventilate the room periodically to prevent oxygen depletion. For safety, do not touch the unit with wet hands, it may cause an electric shock. For safety, turn the circuit breaker off when not using the unit for an extended period of time.
-
Page 5: Additional Notes On Operation
ADDITIONAL NOTES ON OPERATION OPERATING TEMPERATURE RANGE • The built-in protective INDOOR TEMP. OUTDOOR TEMP. device may prevent the unit from operating when 32˚C D.B. 46˚C D.B. upper limit used out of this range. 23˚C W.B. COOLING 21˚C D.B. 21˚C D.B. •... -
Page 6: Part Names
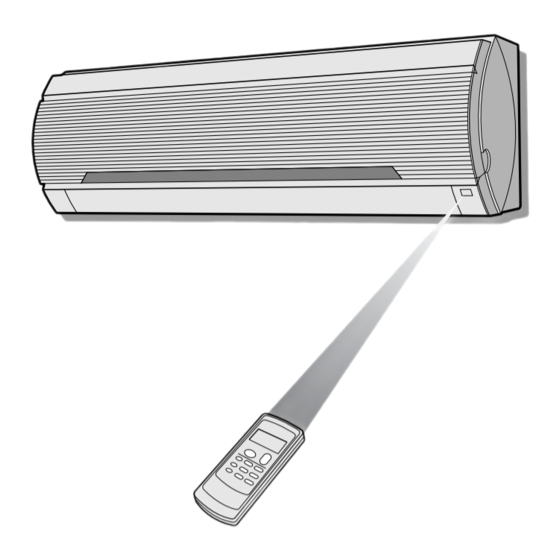
PART NAMES INDOOR UNIT 1 Inlet (Air) 2 Open Panel 3 AUX. Button 4 Air Filters 5 Receiver Window 6 Louvre Unit Open to clean the inside of the air conditioner. 7 Power Supply Cord (AY-AP18CJ only) 8 Indicator Panel 9 Vertical Adjustment Louvres 0 Horizontal Adjustment Louvres q Outlet (Air) -
Page 7: Remote Control
REMOTE CONTROL 1 TRANSMITTER 2 DISPLAY (Liquid Crystal Display) 3 ON/OFF Button MODE TEMP. 4 THERMO. (Thermostat) Button 5 DISPLAY Button TIMER 6 MODE Button TEMP. 7 TIMER ON Button (for setting the timer) 8 ONE-HOUR OFF TIMER Button 9 TIMER OFF Button (for setting the timer) DISPLAY MODE 0 FAN Button q TIMER CANCEL Button... -
Page 8: Using The Remote Control
USING THE REMOTE CONTROL LOADING BATTERIES Use two size-AAA (R03) batteries. Remove the battery cover at the back of the remote control. Insert batteries in the compartment, mak- ing sure the ± and — polarities are correctly aligned. • Lines will be indicated on the display when batteries are properly installed. -
Page 9: Tips About Plasmacluster Operation
TIPS ABOUT PLASMACLUSTER OPERATION The ionizer inside the air conditioner will release cluster ions, which are collective mass of positive and negative ions, into the room. The cluster ions reduce airborne mold fungus and deodorize/decompose odor- causing molecules. Ionizer Cluster ions Mold fungus Odor AIR CLEAN OPERATION... -
Page 10: Basic Operation
BASIC OPERATION Press the MODE button to select the operation mode. AUTO HEAT COOL DRY FAN ONLY Press the ON/OFF button to start op- MODE TEMP. eration. • The red OPERATION lamp ( ) on the unit will light. TIMER TEMP. - Page 11 TIPS ABOUT AUTO MODE In the AUTO mode, the temperature setting and mode are automatically selected according to the room temperature when the unit is turned on. Modes and Temperature Settings Room temp. at opera- Automatic Operation tion start-up Mode Thermostat Setting Below 21°C HEAT...
-
Page 12: Adjusting The Air Flow Direction
ADJUSTING THE AIR FLOW DIRECTION VERTICAL AIR FLOW DIRECTION The air flow direction is automatically preset in each mode as follows for optimum comfort: COOL and DRY mode Horizontal air flow HEAT and FAN ONLY mode Diagonal air flow HOW TO ADJUST THE AIR FLOW DIRECTION Adjustment range Press the SWING button on the remote control once. -
Page 13: Plasmacluster Operation
PLASMACLUSTER OPERATION AIR CLEAN OPERATION : Cluster ions released into air will reduce airborne mold fungus and deodorize/decompose odor-causing molecules. REFRESHING OPERATION : Negative ions will be released at an increased rate. During operation, press the PLASMACLUSTER button to select the mode. MODE TEMP. -
Page 14: Timer Operation
TIMER OPERATION TIMER OFF The unit will turn off automatically according to your setting. Timer duration can be set from minimum 0.5 hours (30 minutes) to maximum 12 hours. Up to 9.5 hours, you can set by 0.5 hours (30 minutes) increments and from 10 to 12 hours, by 1 hour increment. -
Page 15: Timer On
TIMER ON The unit will turn on automatically according to your setting. Timer duration can be set from minimum 0.5 hours (30 minutes) to maximum 12 hours. Up to 9.5 hours, you can set by 0.5 hours (30 minutes) increments and from 10 to 12 hours, by 1 hour increment. -
Page 16: Auxiliary Mode
AUXILIARY MODE Use this mode when the remote control is not available. TO TURN ON Lift the front panel of the indoor unit and press the AUX. button on the operation panel. • The red OPERATION lamp ( ) on the unit will light and the unit will start operating in the AUTO mode. -
Page 17: Cleaning The Filters
MAINTENANCE Be sure to disconnect the power cord from the wall outlet or turn off the circuit breaker before performing any maintenance. CLEANING THE FILTERS The air filters should be cleaned every two weeks. TURN OFF THE UNIT REMOVE THE FILTERS 1 Lift the open panel. -
Page 18: Before Calling For Service
BEFORE CALLING FOR SERVICE The following conditions do not denote equipment malfunctions SWISHING NOISE UNIT DOES NOT OPERATE The unit will not operate if it is turned on The soft, swishing noise is the sound of immediately after it is turned off. The unit will not the refrigerant flowing inside the unit. -
Page 19: Specifications
SPECIFICATIONS Indoor unit AY-AP18CJ AY-AP24CJ Outdoor unit AE-A18CJ AE-A24CJ Rated A.C. voltage (V) 230-240 230-240 Rated freuency (Hz) Cooling capacity (kW)* Heating capacity (kW)* *When tested in accordance with AS/NZS3823.1.1. - Page 20 SHARP CORPORATION OSAKA, JAPAN Printed in Thailand TINSEA339JBRZ 02GO...
Need help?
Do you have a question about the AY-AP18CJ and is the answer not in the manual?
Questions and answers