Table of Contents
Advertisement
Advertisement
Table of Contents

Related Manuals for Epson 1EMP-S1


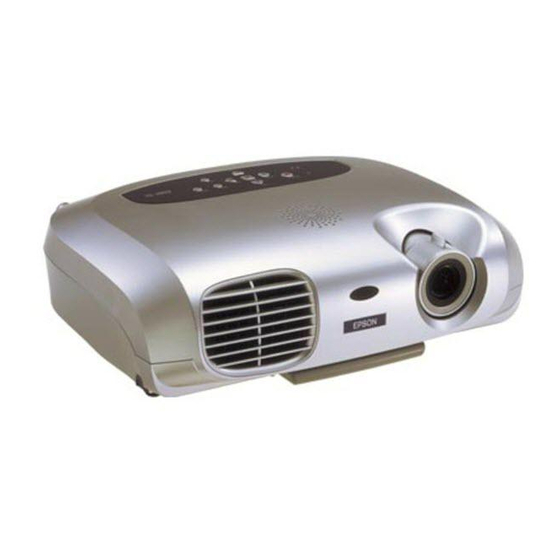
Summary of Contents for Epson 1EMP-S1
- Page 1 EMP-S1 User’s Guide User's Guide...
-
Page 2: Meaning Of Symbols
Indicates related topics and pages which contain more detailed information. Provides terminology definitions. The terms "this unit" and "this projector" which appear in this manual may also refer to the accessories supplied with the projector and other optional products. s "Glossary" P.62... -
Page 3: Features
Features f Auto setup (Computer connections) The projector analyses the signal of the computer to which it is connected and automatically makes adjustments to ensure optimal projection results. s "Auto setup (Computer connections)" P.27 f Colour mode Image quality can be selected according to the type of scene. -
Page 4: Table Of Contents
Connecting to Video Equipment ... 18 Projecting video images...18 Playing sound from video equipment...19 Basic Operation Turning on the Projector... 20 Turning off the Projector... 22 Adjusting the Display ... 23 Adjusting the projection size ...23 Setting the focus ...23 Adjusting the projection angle...24... -
Page 5: Part Names And Functions
• handle Pull out this handle to use when carrying the projector. • lens cover Attach when not using the projector to prevent the lens from becoming dirty or damaged. s P.9 EMP-S1 User’s Guide • control panel s P.5 •... -
Page 6: Control Panel
Before Using the Projector > Part Names and Functions Control panel • [Power] button s P.20 Turns the projector on and off. • Power indicator s P.20, P.42 Flashes or lights in different colours to indicate the operating status of the projector. -
Page 7: Rear
Before Using the Projector > Part Names and Functions Rear • Computer/Component Video ports P.13, P.18 Inputs analogue video signals from a computer and Component Videog signals from other video sources. • Video port s P.18 Inputs Composite Videog signals to the projector. -
Page 8: Base
Before Using the Projector > Part Names and Functions Base • handle Pull out this handle to use when carrying the projector. EMP-S1 User’s Guide • Ceiling mount fixing points (3 points) Install the optional ceiling mount here when suspending the projector from the ceiling. -
Page 9: Remote Control
Momentarily turns off the audio and video. EMP-S1 User’s Guide • [Power] button s P.20 Turns the projector on and off. • [Color Mode] button s P.27 Selects the colour mode. The colour mode changes in the order of Dynamic, Presentation,... -
Page 10: Before Using The Remote Control
Operable distance: Max. approx. 6m (20ft.) (May be shorter depending on conditions.) Operable angle: approx. 30° horizontally, 15° vertically * The remote control infrared receiver on the back of the projector can also be used under the same conditions. 30° 30°... -
Page 11: Projection Distance And Screen Size
Be sure to read the "Safety Instructions / World-Wide Warranty Terms" guide before installation. Installation method Set up the projector so that it is at right angles to a screen. Projection distance: 87-1109cm When setting up the projector against a wall, leave a space of at least 20cm between the projector and the wall. -
Page 12: Other Installation Methods
EMP-S1 User’s Guide f Ceiling/Rear projection (Using a translucent screen) * The optional ceiling mount is required when installing the projector from a ceiling. Please contact your dealer if you wish to use this method, as special equipment is required for installation. -
Page 13: Connecting To A Computer
Refer to the documentation provided with the computer for further details. • If the computer and projector are too far away from each other for the provided computer cable to reach, use the optional VGA-HD15 PC cable. -
Page 14: Projecting Images From A Computer
Before Using the Projector > Connecting to a Computer Projecting images from a computer Different cables are used depending on whether the monitor port of your computer is a Mini D-Sub 15Pin, 5BNCg f When using a Mini D-Sub 15 pin connector... -
Page 15: Playing Sound From A Computer
You can also adjust the volume from the configuration menu. [Menu] button → "Setting" → "Volume" Connecting to an external monitor The image being input into the projector can be displayed on a computer monitor. To Audio port s "Setting menu" P.38 EMP-S1 User’s Guide... -
Page 16: Presentation Remote Controller
Before Using the Projector > Connecting to a Computer Presentation Remote Controller You can use the Presentation Remote Controller as a wireless mouse to control the mouse pointer on the computer screen. Before using the Presentation Remote Controller, remove the insulation tape. - Page 17 Before Using the Projector > Connecting to a Computer Keeping the defaults, click "Next". Click the check box next to "Specify a location" and type "C:\WINDOWS". Click "Next" • You may need to enter a different location to search for the OS files that you are using.
-
Page 18: Part Names And Functions
Part Names and Functions Operate the Presentation Remote Controller by aiming it at the Presentation Remote Receiver. When using the Freeze or A/V Mute functions, aim the presentation remote control towards the remote control infrared receiver of the projector. •... -
Page 19: Connecting To Video Equipment
Connecting to Video Equipment When connecting, be sure to: • Turn off the power for both the projector and the video equipment. Damage may result if you try to make a connection when the power is switched on. • Check the connector types. -
Page 20: Playing Sound From Video Equipment
Before Using the Projector > Connecting to Video Equipment f For RGB Video Computer cable (accessory) To RGB out port • After projection starts, change the "Input Signal" setting in the "Image" menu to "Computer". • For an RGB connection, a commercially available adapter or converter cable may be required. -
Page 21: Turning On The Projector
Basic Operation Turning on the Projector Turn off the power of the projector and the equipment you are connecting to. Connect the computer/video. s "Connecting to a Computer" P.12 , "Connecting to Video Equipment" P.18 Remove the lens cover. Attach the power cable to the projector. -
Page 22: Press The Power Button
Basic Operation > Turning on the Projector Press the [Power] button. The projector beeps and the power supply indicator begins to blink green. Wait until the power indicator lights green. It takes about 40 seconds. EMP-S1 User’s Guide... -
Page 23: Turning Off The Projector
It takes about 20 seconds. Unplug the projector from the outlet. Do not remove the plug while the power indicator is blinking, or this may damage the projector. Unplug the power cable at the projector. Replace the lens cover. -
Page 24: Adjusting The Projection Size
[Wide] : increase the size [Tele] : reduces the size If you would like to enlarge the image further, move the projector further away from the screen. • The default setting is wide. • The E-Zoom function lets you enlarge parts of the image. -
Page 25: Adjusting The Projection Angle
Centre of lens Seen from above If it is not possible to set up the projector so that it is at right angles to a screen, it can be set up at a slight vertical angle instead. (Max 10°) EMP-S1 User’s Guide Raise the front of the projector while pressing the feet buttons on both sides. -
Page 26: Keystone
Basic Operation > Adjusting the Display Keystone When the projector is not set at right angles to a screen, the display distorts in the shape of a trapezoid. This distortion can be corrected. You can correct only vertical distortion with this function. -
Page 27: Selecting The Input Source
Projector The input source changes each time [Source] is pressed. * The items selected using the "Input signal" command in the "Image"... -
Page 28: Adjusting Computer Generated Images
•sRGBg Conforms to the sRGB colour standard. If the connected source has an sRGB mode, set both the projector and the connected source to sRGB. The colour mode changes each time you press the [Color Mode] button on the remote control. -
Page 29: A/V Mute
Advanced Operation > Functions for Enhancing Projection A/V Mute Temporarily stops the image and sound. Press the [A/V Mute] button on the remote control. The sound and image disappear. Projection is resumed when you press the [A/V Mute] button again or press the [Esc] button. -
Page 30: Projecting In Widescreen (Changing Aspect Ratio)
Advanced Operation > Functions for Enhancing Projection Projecting in widescreen (changing aspect ratio) This function changes the Aspect ratiog when component video images (YCbCr and YPbPr) or video images (S-Video or composite video) are being projected. Images which have been recorded in digital video or onto DVDs can be viewed in 16:9 wide-screen format. -
Page 31: E-Zoom
Advanced Operation > Functions for Enhancing Projection E-Zoom The image is enlarged or reduced. Press the [E-Zoomz] button on the remote control. A target scope is displayed on the screen. Press the [u][d][l][r] buttons to move the target scope to the centre of the part you wish to enlarge/ reduce. -
Page 32: Configuration Menus
Configuration Menus Various adjustments and settings can be made within the configuration menus. Image Color Mode (Computer Images) Picture Quality Auto Setup Input Signal Reset Setting Screen Display Video Signal Volume Sleep Mode Language Reset Info Lamp Hours (Computer Images) Source Input Signal Resolution... -
Page 33: Menu Operation
Advanced Operation > Configuration Menus Menu operation Press the [Menu] button The top configuration menu is displayed. Top Menu Sub Menu 1 EMP-S1 User’s Guide Press the [u] or [d] buttons to select the Top Menu item. - Page 34 Advanced Operation > Configuration Menus Press the [e] button. Sub Menu 1 is displayed. Press the [u] or [d] buttons to select the Sub Menu 1 items, then press the [e] button. For Sub Menu 2, press the [u] or [d] buttons in the same way, then press the [e] button.
- Page 35 Advanced Operation > Configuration Menus (c)Press the [l] or [r] buttons to select the value. Then, press the [e] button. (d)Press the [u] [d] [l] [r] buttons to move the image display position. Set other items in the same way. Press the [Esc] button to return to the previous item or menu, or select "Return".
-
Page 36: Function List
Advanced Operation > Configuration Menus Function list f Image menu • When no signal is being input, only the settings for "Auto Setup" and "Input Signal" can be adjusted. • The functions in the "Image" Menu will be different according to the type of signal which is being input. Computer images EMP-S1 User’s Guide Video images... - Page 37 • Living Room: Brightness is emphasized. Ideal for playing video games in bright rooms. • sRGBg: Conforms to the sRGB colour standard. If the connected source has an sRGB mode, set both the projector and connected source to sRGB. Picture Brightness Adjusts the brightness of the image.
- Page 38 (Adjustment is only possible when (Video images only) Adjusts the tint of the image. Auto Setup ON: When the input source is switched to a computer signal, the projector automatically adjusts the image (Computer images only) OFF: Auto Setup is disabled. Input Signal Select the type of image signal connected to the Computer/Component Video port.
-
Page 39: Setting Menu
Advanced Operation > Configuration Menus f Setting menu Sub menu Screen Keystone Corrects vertical keystone distortion in the image. • The projected image changes when keystone correction is carried out. • If the images become uneven in appearance after keystone correction has been carried out, decrease the sharpness setting. - Page 40 • Press the [e] button and select "Yes" on the confirmation screen which is displayed. been carried out for the set time (5, 10 and 30 minutes). Projection will shut down and the projector enters a standby state after cooling down. (The power indicator lights orange).
- Page 41 Sync Info Displays picture signal information. (Computer images only) In the event that you are having problems with your projector and need to contact an EPSON Service Centre, please quote the information displayed on this screen. EMP-S1 User’s Guide Video images...
-
Page 42: Reset Menu
Advanced Operation > Configuration Menus f Reset menu Sub menu Lamp-Hours Reset Resets the lamp operating time. When this command is selected, the cumulative lamp operating time is reset to the default value. All Reset Resets all items in the configuration menus to their default settings. •... -
Page 43: When You Suspect A Problem
When You Suspect a Problem First, check the indicators on the projector. There are two indicators on the projector unit which notify you of projector conditions. Power indicator • If the indicator is not lit, the power supply is not on. -
Page 44: Warning Indicator
After about 5 minutes have passed, unplug the power cable and check the following: • Make sure the air filter and ventilation outlet are clear and that the projector is not positioned against a wall. • If the air filter is dirty, it should be cleaned. - Page 45 "International Warranty Conditions" in the "Safety Instructions/World-Wide Warranty Terms" guide. • If you follow the above steps and are still unable to correct the problem, please cease using the projector, unplug the projector from the electrical outlet and request repairs from your dealer or nearest address provided in the "International Warranty Conditions"...
-
Page 46: When The Indicators Provide No Help
P.48 • The power does not turn off (after the [Power] button is pressed) After the power has been switched off and the projector is in cool-down mode, the [Power] button will not work. When a Sleep Mode interval has been set, the lamp cuts out after no operations have been carried out for the set time (5, 10 or 30 minutes). -
Page 47: No Images Appear (Messages Are Displayed 1)
For the remote control, press the [Computer] button or the [S-Video/Video] button. s "Selecting the Input Source" P.26 s "Connecting to a Computer" P.12 , "Connecting to Video Equipment" P.18 s "Turning on the Projector" P.20 EMP-S1 User’s Guide... -
Page 48: Image Is Out Of Focus (Unclear)
Set the projector up in the room in which it is to be used approximately one hour before use. If condensation forms on the lens, turn off the power and wait for the condensation to disappear. -
Page 49: Vertical Stripes Appear In The Image
"Setting" → "Video Signal." configuration menu. Set the computer so that the signals that are output are compatible with this projector. Refer to your computer's documentation for further details. s "Supported Display Resolutions" P.66 If using an extension cable, electrical interference may affect the signals. -
Page 50: Only Part Of The Image Is Displayed (Large/Small)
(changing aspect ratio)" P.29 If dual display has been activated in the Display Properties of the connected computer's Control Panel, the projector will only display about half of the image on the computer screen. To display the whole of the image on the computer screen, turn off the dual display setting. - Page 51 Troubleshooting > When You Suspect a Problem f Image colours are poor, tinted green or tinted red/purple • Are the image signal format settings correct? • Does the lamp need replacement? • Has the image contrast been adjusted correctly? ([Menu] button → "Image" → "Picture Quality"...
-
Page 52: Image Is Dark
P.56 s "Image menu" P.35 s "Image menu" P.35 The projector may be in A/V Mute mode. Press the [A/V Mute] button on the remote control to cancel A/V Mute. s "A/V Mute" P.28 s "Setting menu" P.38 s "Playing sound from a computer"... -
Page 53: The Remote Control Does Not Work
"Changing the battery (Remote Control, Presentation Remote Controller)" P.55 This projector is designed so that the Power indicator remains lit even after the power has been turned off. The Power indicator will switch off when the power cable is disconnected from the electrical outlet. -
Page 54: Projector Care
If the projector is particularly dirty, moisten the cloth with water containing a small amount of (ph) neutral detergent, and then firmly wring the cloth dry before using it to wipe the projector case. After you have done this, wipe the projector another time with a soft, dry cloth. -
Page 55: Cleaning The Air Filter
If the air filter becomes clogged with dust, it can cause overheating and damage the projector. Keeping the projector horizontal, use a vacuum cleaner to clean away the dust from the air filter. • If the air filter is difficult to clean or if it is broken, it should be replaced. -
Page 56: Replacing Consumables
Appendices > Projector Care Replacing consumables f Changing the battery (Remote Control, Presentation Remote Controller) Replacement battery: 1 × CR2025 lithium battery Keep batteries away from children to avoid the risk of accidents. If a child swallows the battery, contact your doctor immediately. -
Page 57: Lamp Replacement Period
If replacing the lamp yourself, be careful to avoid pieces of broken glass. Turn off the projector and wait for the cool-down period to end. (Approx. 20 seconds) Remove the power cable and wait for the lamp to cool down. (Approx. - Page 58 Appendices > Projector Care Loosen the fixing screws holding the lamp in place. Remove the old lamp. Install the new lamp. Press the lamp until it clicks into place, then tighten the two fixing screws. EMP-S1 User’s Guide Replace the lamp cover.
-
Page 59: Resetting The Lamp Operating Time
Appendices > Projector Care f Resetting the lamp operating time The projector has a built-in counter which keeps track of the lamp operating time and causes the replacement warning message to be displayed when the cumulative operating time reaches a certain point. -
Page 60: Replacing The Air Filter
Appendices > Projector Care f Replacing the air filter Replacing the air filter can also be performed when the projector is mounted to a ceiling. Turn off the projector power, wait for the cool-down period to end, then disconnect the power cable. -
Page 61: Optional Accessories
Use to connect the projector to a computer. Use these extension cables if the provided computer cable is too short. Use when connecting the projector to a computer with a 5BNC port. Use to connect the projector to a component video source. - Page 62 ELPDC02 Multimedia viewer ELPDC04 * A special method of installation is required in order to suspend the projector from the ceiling. Please contact your dealer if you require this installation method. Part name Use when installing the projector to a ceiling.
-
Page 63: Glossary
Cool-down happens automatically when the [Power] button is pressed on the projector or on the remote control to turn the projector off. Do not unplug the projector power cable whilst it is cooling down. If cool-down is interrupted, heat from... - Page 64 It refers to standard television systems which do not satisfy the conditions for High-Definition Television. Security A device consisting of a projector case with a hole in lock it that a commercially-available theft-prevention cable can be passed through in order to secure the device to a table or pillar.
- Page 65 Appendices > Glossary YCbCr The carrier signal contained in the colour bar signal used in modern (NTSC) TV transmissions. The name comes from the Y (luminance) signal and the CbCr (chroma (colour)) signals. YPbPr The carrier signal contained in the colour bar signal used in high-definition TV (HDTV) transmissions.
-
Page 66: Cable Format
Cable Format f Serial connection • Connector type: D-Sub 9 pin(male) • Projector input port type : RS-232C <Projector> <Projector> (PC serial cable) <Computer> Signal name <Computer> EMP-S1 User’s Guide Function Signal line grounding Transmitting data Receiving data Data set ready... -
Page 67: Supported Display Resolutions
Supported Display Resolutions f Computer Refresh Rateg Resolution Signal (Hz) 640 × 480 VGAg 640 × 350 VGAEGA 640 × 480 VESA 72 / 75 / 85,iMac* 56 / 60 / 72 / 75 / 800 × 600 SVGAg 85,iMac* 43i / 60 / 70 / 75 / 1024 ×... -
Page 68: Specifications
Monitor Out port Computer/Component Video port Connectors S-Video port Video port Audio port Control (RS-232C) port Pixelworks ICs are used in this projector. Safety USA (100-120VAC) UL1950 3 Canada (100-120VAC) CSA C22.2 No.950-95 (cUL) European Community (200-240VAC) The Low Voltage Directive (73/23/EEC) IEC60950 2 +Amd.3, +Amd.4... -
Page 69: Appearance
Appearance Centre of projector 87.5 * Distance from centre of lens to ceiling mount Centre of lens 56.4* 45.5 EMP-S1 User’s Guide × 3-M4 82.5... -
Page 70: Index
Ceiling mount fixing points ... 7 Changing the battery ... 55 Cleaning the air filter ... 54 Cleaning the lens ... 53 Cleaning the projector case ... 53 Color Mode ... 36 Color Temperature ... 37 Component Video ... 18 Composite Video ... - Page 71 > Index Joystick ... 17 Keystone ... 25, 38 Lamp cover ... 7 Lamp Hours ... 40 Lamp replacement period ... 56 Lamp-Hours Reset ... 41 Language ... 39 Lens cover ... 4 Message ... 39 Mini D-Sub 15 pin ... 13 Monitor Out port ...
- Page 72 Target scope ... 30 Tint ... 37 Top Menu ... 32 Tracking ... 36 Translucent screen ... 11 Turning off the Projector ... 22 Turning on the Projector ... 20 Ventilation outlet ... 4 Video ... 40 Video port ... 6 Video Signal (displaying the Video signal) ...
- Page 73 According to 47CFR, Part 2 and 15 Class B Personal Computers and Peripherals; and/or CPU Boards and Power Supplies used with Class B Personal Computers :EPSON AMERICA, INC. Located at :3840 Kilroy Airport Way MS: 3-13 Long Beach, CA 90806...
Need help?
Do you have a question about the 1EMP-S1 and is the answer not in the manual?
Questions and answers