Table of Contents
Advertisement
Quick Links
Advertisement
Table of Contents

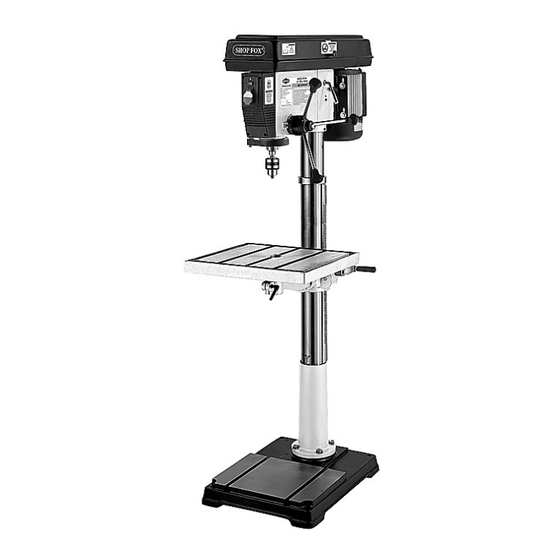
Related Manuals for Shop fox SHOP FOX M1039


Summary of Contents for Shop fox SHOP FOX M1039
-
Page 3: Table Of Contents
Woodstock Technical Support ................3 About Your New 12-Speed Drill Press ..............3 Specifications ....................4 Additional Safety Instructions for Drill Presses ............8 110V/220V Operation ..................9 Extension Cords .................... 9 Grounding ....................9 Unpacking ....................10 Inventory ....................10 Machine Placement .................. - Page 4 Headstock Breakdown ................... 34 Parts List ....................35 Safety Label Placement ................. 36...
- Page 5 We stand behind our machines! In the event that questions arise about your machine, parts are miss- ing, or a defect is found, please contact Woodstock International Technical Support at (360) 734-3482 or send e-mail to: . Our knowledgeable staff will help you troubleshoot prob- lems and send out parts for warranty claims.
- Page 6 Approximate Machine Weight ..............320 lbs. Length/Width/Height ..............34 ⁄ x 21 x 70 ⁄ " Footprint ....................23 x 18" Type ............... TEFC Capacitor Start Induction Horsepower .................... 1 ⁄ Voltage ............110/220V (prewired 110V), Single-Phase Amps ....................15A/7.5A Speed ....................1725 RPM Cycle ......................
- Page 7 M1039 headstock controls. M1039 table controls. Belt Tension Lever Light Switch (110V only) Scale Power Switch Table Height Crank Handle Belt Tension Lock Small Lock Lever Torsion Spring Large Lock Lever Lash Screw Depth Stop...
- Page 8 Indicates an imminently hazardous situation which, if not avoided, WILL result in death or serious injury. Indicates a potentially hazardous situation which, if not avoided, COULD result in death or serious injury. Indicates a potentially hazardous situation which, if not avoided, MAY result in minor or moderate injury.
-
Page 9: Extension Cords
DO NOT use machinery in damp, wet locations, or where any flammable or noxious fumes may exist. Clutter and dark shadows may cause accidents. Undersized cords overheat and lose power. Replace extension cords if they become damaged. DO NOT use extension cords for 220V machinery. - Page 10 A face shield used with safety glasses is recommended. Always keep hands and fingers away from the drill bit. Never hold a workpiece by hand while drilling! DO NOT wear gloves when operating the drill. Properly tighten and securely lock the drill bit in the chuck. Use only round, hex, or triangular shank drill bits, or tapered shank drill bits mated with the appropriate sleeve.
-
Page 11: Grounding
Model M1039 is prewired for 110V opera- tion, but may be rewired for 220V operation. To do this, consult the wiring diagram in the back of this manual. Always connect this machine to a dedicated circuit (wire, breaker, plug, receptacle) with a verified ground, using the recommended circuit breakers and plugs/receptacles listed at the bottom of this page. -
Page 12: Inventory
For any missing parts, find the part number in the back Model M1039 has been carefully pack- of this manual and contact Woodstock aged for safe transporting. If you notice the machine has International, Inc. at (360) 734-3482 or at been damaged, please contact your authorized dealer immediately. - Page 13 This machine distributes a The table and other unpainted parts of your heavy load in a small footprint. Some floors machine type are coated with a waxy grease may require additional bracing to support that protects them from corrosion during ship- both machine and operator.
- Page 14 Although not required, we recommend that you mount your new machine to the floor. Because this is an optional step and floor materials may vary, floor mount- ing hardware is not included. Generally, you can either bolt your machine to the floor or mount it on machine mounts.
- Page 15 The column must be secured on the base to properly assemble your drill press. Hex Bolts Place the column on the base and align the mount- ing holes. Secure the column to the base with the four M12-1.75 x 45 hex bolts, as shown in The table bracket must be installed as described to prop- Column secured to base.
- Page 16 Place the rack inside of the table bracket, mesh it together with the pinion, and slide the table sup- port/rack assembly over the column, as shown in Slide the column ring over the column with the bev- eled edge facing down ( ), fit the beveled edge of the column ring over the rack, and tighten the setscrew.
- Page 17 The headstock must be mounted on the column/base assembly before the drill press can be operated. Moving and installing the headstock is a two-person job, at the very least. Although the headstock can be lifted directly onto the column while upright, doing so is difficult and potentially dangerous because of the heavy weight involved.
- Page 18 Chuck Key MT4/JT3 Arbor The drill chuck attaches to the spindle by means of the arbor, shown in . Matched tapers on the arbor and the inside of the chuck create a semi-permanent assembly when properly joined. Use mineral spirits to thoroughly clean the drill JT3 Drill chuck, arbor, and spindle sockets and dry all sur- Drift Key...
- Page 19 Spindle The downfeed handles must be installed to properly oper- Belt Cover ate the drill press. Knob Thread the handles into the pinion hub, as shown in , and tighten. Remove the screw that fastens the belt cover in place and install the belt cover knob in its place (see Downfeed handles and belt for location).
-
Page 20: Test Run
Before installing a drill bit, test run the machine to iso- late any problems that may occur. Plug the drill press into the power supply. Turn the drill press ; if there is a problem, turn the drill press immediately. The drill press should run smoothly, with little or no vibration or rubbing noises. - Page 21 The Model M1039 will perform many types of operations that are beyond the scope of this manual. Many of these operations can be dangerous or deadly if performed incorrectly. The instructions in this section are written with the understanding that the operator has the necessary knowl- edge and skills to operate this machine.
-
Page 22: Drilling
The charts shown on & are intended as guides only. Always follow the manufacturer's speed rec- ommendations if provided with your drill bits, cutters, or hole saws. Exceeding the recommended speeds may be dangerous. The speeds shown are intended to get you started. The optimum speed will always depend on various factors, including tool diameter, drilling pressure, material hard- ness, material quality, and desired finish. - Page 23 -21-...
- Page 24 . Belt configuration and speed settings. -22-...
-
Page 25: Depth Stop
Upper Depth Nut Jam Nut The Model M1039 is designed for drilling holes in wood or metal. The basic operation of a drill press is lining up your drill bit with the intended hole location, turning the drill press , and using the down feed levers to move the spinning drill bit into the workpiece. - Page 26 Lower the upper jam nut against the depth nut. Large Lock Lever Using wrenches, hold the depth nut in place and Small Lock tighten the upper jam nut against the depth nut. Lever Crank Handle Lock Bolt Location Pin Nut The table can be raised/lowered, rotated, and tilted Typical table adjustment 90º...
-
Page 27: Arbor Removal
The arbor can be removed to install other Morse Taper Both Slots tooling in the spindle. A drift key is included to help Aligned remove the arbor or other tooling from the spindle. Usually, once the chuck and arbor have been properly mounted together, they are considered semi-perma- nent connections. -
Page 28: Cleaning
® Regular periodic maintenance on your Model M1039 will ensure its optimum performance. Make a habit of inspecting your machine each time you use it. Loose mounting bolts. Loose chuck and/or arbor. Worn switch. Worn or damaged cords and plugs. Damaged V-belt. -
Page 29: Depth Stop Calibration
If you require additional machine service not included in this section, please contact Woodstock International Technical Support at (360) 734-3482 or send e-mail to: The drill press comes fitted with a depth stop to use when drilling multiple holes at the same depth. - Page 30 Spring The feed shaft return spring is adjusted at the factory; Cover Lock however, during the life of the drill press you may want Slot to adjust the feed shaft return spring so the return pres- sure suits your operating needs. Jam nut and Spring lock cover nut...
-
Page 31: Wiring Diagram
Power and light switch wiring. Motor junction box wiring. 110V light socket. Wiring diagram on inside of junction box cover. -29-... - Page 32 -30-...
- Page 33 This section covers the most common problems and corrections with this type of machine. Machine does not Plug or receptacle at fault or wired Test power plug and receptacle for good contact start or a breaker incorrectly. and correct wiring. trips.
- Page 34 Chuck wobbles or Foreign material is stuck between Remove chuck and clean and de-burr tapered is loose on spindle chuck-to-spindle mating surface. chuck and spindle mating surfaces, then reas- shaft. semble. Damaged chuck. Replace. Spindle does not Quill shaft is gummy with sawdust and Clean gummy substance with penetrating oil and retract completely oil.
- Page 35 -33-...
- Page 36 -34-...
- Page 37 PART # DESCRIPTION PART # DESCRIPTION XLABEL04 ELECTRICITY LABEL XM1039054 ROUND KNOB M5-.8 XM1039002 CLOSE DOOR HORIZ LABEL XPW02M FLAT WASHER 5MM XLABEL08H READ MANUAL LABEL XPS09M PHLP HD SCR M5-.8 X 10 XLABEL06 RESP/GLASSES LABEL XPS14M PHLP HD SCR M6-1 X 12 XPSB14M CAP SCREW M8-1.25 X 20 XPW03M...
- Page 38 PART # DESCRIPTION PART # DESCRIPTION XPK07M KEY 6 X 6 X 20 XPW13 FLAT WASHER 3/4 XM1039101 SCALE RING XM1039114 XM1039102 FEED SHAFT XPN01M HEX NUT M6-1 XPSS01M SET SCREW M6-1.0 X 10 XM1039116 SHAFT XPRP04M ROLL PIN 4 X 24 XPSS01M SETSCREW M6-1 X 10 XM1039105...
- Page 39 -37-...
- Page 40 -38-...
- Page 41 Name ___________________________________________________________________________________ Street __________________________________________________________________________________ City _________________________ State ___________________________Zip ________________________ Phone # ______________________ Email___________________________Invoice # ___________________ Model #_________Serial #______________Dealer Name__________________Purchase Date___________ How did you learn about us? _____ Advertisement _____ Friend ____ Local Store _____ Mail Order Catalog _____ Website ____ Other: How long have you been a woodworker/metalworker? _____ 0-2 Years _____ 2-8 Years...
- Page 42 FOLD ALONG DOTTED LINE Place Stamp Here FOLD ALONG DOTTED LINE TAPE ALONG EDGES--PLEASE DO NOT STAPLE...
Need help?
Do you have a question about the SHOP FOX M1039 and is the answer not in the manual?
Questions and answers