Table of Contents
Advertisement
SHERWOOD INDUSTRIES IS AN ENVIRONMENTALLY RESPONSIBLE COMPANY. THIS MANUAL IS PRINTED ON RECYCLED PAPER.
PLEASE KEEP THESE INSTRUCTIONS FOR FUTURE REFERENCE
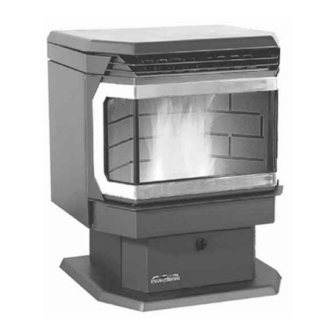
PELLET STOVE
EF4
Freestanding and Fireplace Insert
OWNER'S MANUAL
Contact your building or fire officials about restrictions and
installation inspection requirements in your area.
PLEASE READ THIS ENTIRE MANUAL BEFORE INSTALLATION
AND USE OF THIS PELLET BURNING ROOM HEATER. FAILURE TO
FOLLOW THESE INSTRUCTIONS COULD RESULT IN PROPERTY
DAMAGE, BODILY INJURY, OR EVEN DEATH.
EF4i-118
Advertisement
Table of Contents

Related Manuals for Enviro EF4


Summary of Contents for Enviro EF4
- Page 1 SHERWOOD INDUSTRIES IS AN ENVIRONMENTALLY RESPONSIBLE COMPANY. THIS MANUAL IS PRINTED ON RECYCLED PAPER. PLEASE KEEP THESE INSTRUCTIONS FOR FUTURE REFERENCE PELLET STOVE Freestanding and Fireplace Insert OWNER’S MANUAL Contact your building or fire officials about restrictions and installation inspection requirements in your area.
-
Page 2: Table Of Contents
Safety Warnings And Recommendations...4 Operating Instructions...6 Automatic Safety Features...6 Slider/Damper Setting...6 Operating Your Pellet Stove...7 Turning Your Pellet Stove Off...7 Routine Cleaning and Maintenance...8 Installation...11 Deciding Where to Locate your Pellet Appliance...11 Removing Pellet Stove From Pallet...11 Dimensions - Freestanding...12 Dimensions - Fireplace Insert...12... -
Page 3: Introduction
UALITY Pellet quality is important, please read the following: Your enviro pellet stove has been designed to burn wood pellets only. Do not use any other type of fuel, as this will void any warranties stated in this manual. The performance of your pellet stove is greatly affected by the type and quality of wood pellets being burned. -
Page 4: Important Safety Data
CLEANING: There will be some build up of fly ash and small amounts of creosote in the exhaust. This will vary due to the ash content of the fuel used and the operation of the stove. It is advisable to inspect and clean the exhaust vent semi-annually or every two tons of pellets. - Page 5 GLASS: Do not abuse the glass by striking or slamming the door. Do not attempt to operate the stove with broken glass. The stove uses ceramic glass. Replacement glass must be purchased from an ENVIRO dealer. Do not attempt to open the door and clean the glass while the unit is in operation or if glass is hot.
-
Page 6: Operating Instructions
To compensate for the fan cycling action that may occur, turn up the blower control proportionately to the heat output. D. If the power goes out, the unit will stop running. When the power comes back on, the stove will not restart unless the exhaust temperature is still above 120°F (49°C). -
Page 7: Operating Your Pellet Stove
KNOB “A”: Fan Controller. By adjusting the knob you will vary the rate of airflow into the room by varying the speed of the convection blower. When you first start the stove, it should be placed in the “OFF” position in order to heat the unit as quickly as possible. Once the room has come up to temperature, the control may be set to a comfortable level. -
Page 8: Routine Cleaning And Maintenance
● If, after long periods of burning, the fire continually builds up and overflows the burn pot or there is a build up of clinkers, this is an indication that the pellet fuel quality is poor or the stove may need cleaning. - Page 9 INSERT ASH REMOVAL: The EF4 pellet stove insert does not have an ash pan and the ashes must be vacuumed out of the firebox on a daily basis. CAUTION: BECAUSE THE FLY ASH IS VERY FINE, THE USE OF A VACUUM BAG WILL BE REQUIRED TO PREVENT ASH FROM BEING BLOWN BACK INTO THE ROOM.
-
Page 10: Post Season Clean-Up
BLOWER MECHANISMS (season) Unplug the stove then open the right/left side panels to access the two blowers. Vacuum all dust from the motors. Only the convection blower motor (on the right side of the stove) will require lubrication. The convection motor has two lubrication holes on it. -
Page 11: Installation
TOVE To remove your new stove from its pallet, open the left and right side panels. There are two (2) wood screws that are holding the bottom of the stove to the pallet. Remove the screws. Close the side panels. -
Page 12: Dimensions - Freestanding
� � � � ���� ��� Figure 6: Dimensions of EF4 Freestanding. � �� � � �� ���� ��� Figure 7: Dimensions of EF4 Fireplace Insert. � �� � � � ���� ��� �� � � � � ���� ���... -
Page 13: Clearances To Combustibles - Freestanding
NSERT (22.9 cm) (20.3 cm) (22.9 cm) (53.7 cm) (58.9 cm) 9" (22.9 cm) (54.6 cm) Figure 10: EF4 Fireplace Insert Clearance to Combustibles. ���� ���� �� �� ��� ��� ��� ��� �� ���� ��� ����� ���������� - 36 inches... -
Page 14: Pedestal Installation - Freestanding
EDESTAL NSTALLATION REESTANDING The freestanding model comes with a pedestal that has to be attached prior to installation: • Remove the pedestal from the box • Remove the unit from the box • Place the unit on its back on the pallet. •... -
Page 15: Vent Termination Requirements
ERMINATION EQUIREMENTS IT IS RECOMMENDED THAT YOUR PELLET STOVE BE INSTALLED BY AN AUTHORIZED DEALER/INSTALLER. Table 1: Use in conjunction with Figure 13 for allowable exterior vent termination locations. Letter Minimum Clearance 24 in (61 cm) 48 in (122 cm) -
Page 16: Outside Fresh-Air Connection
� � � � �������� � � � � � �������� �� �������� Figure 16: EF4 Fireplace Insert Inlet and Outlet Location. ������� ���� � � � � �� �������� � ��� ��� ����� Figure 14: Outside Air Connection. Insert 7 7⁄8”... -
Page 17: Mobile Home Installation - Freestanding
CAUTION: THE STRUCTURAL INTEGRITY OF THE MANUFACTURED HOME FLOOR, WALL AND CEILING/ROOF MUST BE MAINTAINED. ORNER HROUGH NSTALLATION Installation REESTANDING ENVIRO EF4 HEARTH PAD FLOORING STEEL FRAME Figure 17: Mobile home installation. REESTANDING Fresh Air Intake 2" (5 cm) 2"... -
Page 18: Horizontal Exhaust Through Wall Installation - Freestanding
Equipment. Only use venting of L or PL type with an inside diameter of 3 or 4 inches (7.6 or 10.1 cm). 1. Choose a location for your stove that meets the requirements stated in this manual and allows installation with the least amount of interference to house framing, plumbing, wiring, etc. -
Page 19: Through Wall With Vertical Rise And Horizontal Termination Installation - Freestanding
• Some horizontal through wall installations may require a “T” and 3 to 5 feet (91 to 152 cm) of vertical pipe outside the building to help naturally draft in the unit. • This may be required if a proper burn cannot be maintained, after the stove has been tested and the airflow set. -
Page 20: Inside Vertical Installations - Freestanding
NSIDE ERTICAL NSTALLATIONS 1. Choose a stove location that is ideal. See the section “D 2. Place a non-combustible hearth pad where necessary. 3. Place the unit on the hearth pad (if installed on a carpeted surface) and space the unit in a manner so when the pellet vent is installed vertically, it will be 3”... -
Page 21: Hearth Mount Installation - Freestanding
���� ��� 6" (15 cm) �������� �� ����� �� ��������� ����� ����� Non-combustible floor protection. EARTH OUNT NSTALLATION ��������� ��� ��������� ������ ������ ���� ���� �������� �� ����� ������� ������ ������ ��� ������ ��� �� ����� ������� ���� �� ��������� �� �������... -
Page 22: Masonry Fireplace Installation - Fireplace Insert
Figure 26: Freestanding hearth mount installation overview. ASONRY IREPLACE NSTALLATION The fireplace insert model requires a surround panel and a pedestal. When installing this unit, ensure that the pedestal is removed from the inside of the hopper and installed on the bottom of the unit (see “P EDESTAL NSTALLATION... -
Page 23: Installation Of Control Panel In The Insert Surround Panels
��� �� ���� ��� clearance fireplace, we recommend you use an ENVIRO freestanding model and install ����� ���������� as a hearth mounted unit. Install a 3” (76 ����������� ����� mm) flex pipe from the stove to the top of the chimney (see “H... -
Page 24: Assembling The Insert Surround Panels
3. Place the brass trim over the panel assembly. 4. Place the assembled surround panel around the stove; align the slots with the screw heads. Push back and then down to engage the surround slots on the mounting screws. Make sure the top surround panel sits flat on the stove. -
Page 25: Installation Of Door A
NSTALLATION OF WARNING: DO NOT install the EF4 plated door A when unit is hot or is in operation. REMOVE PAINTED DOOR A: Remove the door assembly by opening the door, use the Allen key with the wood handle that was provided with the stove (see Figure 33). -
Page 26: Troubleshooting
√ Make sure the stove is plugged in and the wall outlet is supplying power. √ Push the Start-up switch. If the stove fails to start, unplug the unit and open the hinged side panels (held tight with one screw at the top, front). - Page 27 √ The unit may require cleaning. Contact your local dealer for service. √ Unplug the stove, open the left side panel. Jump the two (2) brown leads that are attached to the 120°F (49°C) temperature sensor. If the stove operates replace the 120°F (49°C) sensor.
- Page 28 “W √ Check the condition of the vacuum hose (located on the left side of the stove). It should not be cracked or torn and should be installed on the top air inlet tube on the vacuum sensor.
- Page 29 If the stove does not shut down within fifteen (15) minutes, test the switch. √ To test the switch, the stove must be cold. Pull the plug, then plug the stove back in. If it fails to start, replace the switch.
-
Page 30: Wiring Diagram
F (71 Convection Temperature Sensor Exhaust/Combustion Ignitor Grey Grey Phase Control Auger Timer Brown Purple Start-Up Timer Black Black Brown White White Wiring Diagram Purple Purple F (60 Brown Exhaust Brown Temperature Sensor Blue Vacuum Blue Switch Brown Purple Blower Black Brown F (49... -
Page 31: Part List
Ash pan latch (Insert) Auger brass bushings (set of 2) Dial-a-fire knob Shoulder bolt, hardened bushing and nut (set of 2) Pellet stove cleaning brush Ash pan latch (Freestanding) Pedestal & Ash Pan Gasket (10 feet) Convection blower - 115 V... - Page 32 Pedestal (Insert) Door latch cover & door hinge cover (set of 2) Back grill Ash sill Ash pan with latch Stove top (Freestanding) Stove top (Insert) Owner’s Manual - Domestic Front grill Cabinet side set - left and right (Insert)
-
Page 33: Part List -Options
Part List -Options Reference Number Description Steel brick lining Bar set (set of 2) - Gold Door complete - Polished Nickel Door complete - Gold Door complete - Painted Door cover (door A) - Painted Door cover (door A) - Gold Door cover (door A) - Polished Nickel Regular surround panel with Black trim (Insert) Oversize surround panel with Black trim (Insert) -
Page 34: Part Diagram - Components
Part Diagram - Components... -
Page 35: Part Diagram - Steel
Part Diagram - Steel... -
Page 36: Warranty
Warranty Sherwood Industries Ltd. gives a five year limited warranty on all steel manufactured parts. A one-year warranty is provided on all electrical components. The above limited warranties are extended only to the original purchaser. There is no warranty on the following parts: ●... -
Page 37: Installation Data Sheet
Installation Data Sheet The following information must be recorded by the installer for warranty purposes and future reference. NAME OF OWNER: _________________________________________ ADDRESS: _________________________________________ _________________________________________ _________________________________________ PHONE:___________________________________ MODEL:___________________________________ SERIAL NUMBER:___________________________ DATE OF PURCHASE: _____________ DATE OF INSTALLATION:___________ MAGNEHELIC AT INSTALL:___________________ INSTALLER’S SIGNATURE: _________________________________________ 6782 OLDFIELD RD.
Need help?
Do you have a question about the EF4 and is the answer not in the manual?
Questions and answers