Table of Contents
Advertisement
Quick Links
Advertisement
Table of Contents

Related Manuals for NetComm NCT240


Summary of Contents for NetComm NCT240
- Page 1 Installation Guide NCT240 IP DSLAM...
-
Page 2: Table Of Contents
NetComm NCT240 Installation Guide Release 1.0 Table of Content INTRODUCTION ..........................3 ..............................4 EATURES SYSTEM APPLICATION (UPDATE PICTURE!!!)................. 5 SYSTEM REQUIREMENT ........................ 6 LED D ............................6 EFINITION ..............................6 ARDWARE ........................... 7 OFTWARE EATURE INSTALLATION PROCEDURE......................9 ..........................9... -
Page 3: Introduction
Release 1.0 1. Introduction This document is intended for First Office Acceptance test plan for NetComm’s ADSL2+ Broadband Access Switch solution (BAS). The Netcomm NCT240 Broadband Access Switch contains 24 ADSL2/2+ circuits to deliver high-speed data, video and voice service over traditional twisted copper pairs by using DSL technology. -
Page 4: Features
NetComm NCT240 Installation Guide Release 1.0 Features Complete Intelligent L2 switch feature Intelligent DSL interworking feature RFC2684 MpoA VPN pass-through RFC2516 PPPoE packet forwarding. Advanced L2+/higher layer protocol & policy control GVRP (IEEE 802.1q) STP/RSTP (IEEE 802.1d/w) IGMP Snooping DHCP relay and relay agent option 82 Packet inspection and do policy control (filtering, forwarding..) -
Page 5: System Application (Update Picture!!!)
NetComm NCT240 Installation Guide Release 1.0 2. System Application The following figures present the system application in the access network. NCT240 provides video, voice and data service for different users, such as Hotels, SOHOs, residential users and enterprises. The end user can use DSL for Various applications such as Telecommuting, Video streaming, On-line game, IPTV, Distance learning, Telemedicine, Voice over IP and Video conferencing...etc. -
Page 6: System Requirement
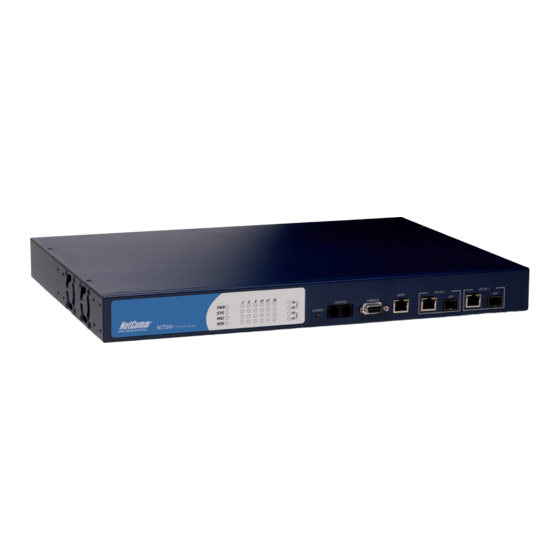
NetComm NCT240 Installation Guide Release 1.0 3. System Requirement LED Definition Items LED color Function PWR (power) GREEN – SOLID Power on System finished initializing GREEN – SOLID stage SYS (system) Flashing GREEN – 2Hz System is booting up System is ready to restart –... -
Page 7: Software Feature
NetComm NCT240 Installation Guide Release 1.0 1. One Ethernet interface (RJ45) support Full Duplex and Half Duplex transceiver function, conforms to IEEE 802.3 Auto-Negotiation standard and comply with IEEE802.3 Ethernet, IEEE802.3u Fast Ethernet. 2. One RS232 console interface (DB9) support Full Duplex, 1、2 stop bits and odd、... - Page 8 NetComm NCT240 Installation Guide Release 1.0 Web-based Support FCAPS management for EMS Syslog SNTP Remote software upgrade Remote file backup and restore...
-
Page 9: Installation Procedure
NetComm NCT240 Installation Guide Release 1.0 4. Installation Procedure Equipment Checklist Before installing the access switch please verify that you have received all the items listed under “Package Contents.” If any of the items are missing or damaged, contact your local distributor. -
Page 10: Mounting
NetComm NCT240 Installation Guide Release 1.0 Mounting The NCT240 may be mounted on any flat surface, such as a shelf, or in a rack. Before you start installing the access switch, make sure you can provide the right operating environment, including power requirements, sufficient physical space, and proximity to other network devices that are to be connected. -
Page 11: Installing Optional Modules
NetComm NCT240 Installation Guide Release 1.0 Installing Optional Modules Before mounting the switch, be sure you install any optional modules. If you have purchased an optional slide-in 1000BASE-T, SFP 1000BASE-X, install it now, and following the instructions below. To rack-mount devices: Attach the brackets to the device using the screws provided in the Bracket Mounting Kit. - Page 12 NetComm NCT240 Installation Guide Release 1.0 Figure 4-2. Installing the Switch in a Rack 3. If installing a single switch only, turn to “Powering On the Switch” at the end of this chapter. If installing several devices, we recommend using one stack for the switch, and another for...
-
Page 13: Desktop Or Shelf Mounting
NetComm NCT240 Installation Guide Release 1.0 Desktop or Shelf Mounting 1. Attach the four adhesive feet to the bottom of the first switch. Figure 4-3. Attaching the Adhesive Feet 2. Set the device on a flat surface near an AC power source, making sure there are at least two inches of space on all sides for proper air flow. -
Page 14: Wall Mount Mounting
NetComm NCT240 Installation Guide Release 1.0 Wall mount Mounting 1. Attach the four adhesive feet to the bottom of the first switch. Figure 4-4. Installing the Switch on a Wall 2. Set the device on a flat surface near an AC power source, making sure there are at least two inches of space on all sides for proper air flow. -
Page 15: Proper Grounding (Earth)
NetComm NCT240 Installation Guide Release 1.0 Proper grounding (earth) Proper Grounding is a very important part of the electrical installation for NCT240, if noise is present in the Electrical ground this noise can leak to the ADSL circuit through the Surge protectors and interfere with the proper operation of ADSL links. -
Page 16: Installing An Sfp Transceiver
NetComm NCT240 Installation Guide Release 1.0 Installing an SFP Transceiver NCT240 Figure 4-5. Inserting an SFP Transceiver into the Slot To install an SFP transceiver, do the following: 1. Use your cabling requirements to select an appropriate SFP transceiver type. -
Page 17: Connecting Rj-21 Cables
NetComm NCT240 Installation Guide Release 1.0 Connecting RJ-21 Cables For incoming phone lines, a splitter can connect directly to a PBX or can be connected via a punch-down block. The particular connection method used will depend on the type of connectors and cables supported on the PBX, and on the existing cabling in the building. -
Page 18: Console Management
NetComm NCT240 Installation Guide Release 1.0 Console management 1. HyperTerminal setting 2. Bootloader startup If you not press any key in the below state, system will load the default startup sequence to do boot our system. U-Boot 1.1.3 (Jun 29 2006 - 16:38:55) BAS ver:1.00.07 U-Boot code: 00200000 ->... - Page 19 NetComm NCT240 Installation Guide Release 1.0 Bank #0: 00000000 128 MB Flash: 32 MB serial Out: serial Err: serial Net: No ethernet found. Hit any key to stop autoboot: 3 Please choose booting method: 1--Startup from old kernel and old ramdisk...
- Page 20 NetComm NCT240 Installation Guide Release 1.0 BAS/ip>? help Display command list Display command list show Display the management ip adress settings Display, flush the device ARP table Set the management ip address and subnet mask gateway Set the default gateway of the device's default gateway...
- Page 21 NetComm NCT240 Installation Guide Release 1.0 help Display command list Display command list < sys > < adsl > < status > < switch > < ip > < statistics > < config > exit Return to upper level BAS0>...
- Page 22 NetComm NCT240 Installation Guide Release 1.0 And we can type the command of exit to leave the group sys, and this program will show following figure BAS> If our location is in top of the level, and we want to terminate this program. We can type end to terminate the program, like following figure.
-
Page 23: Troubleshooting
NetComm NCT240 Installation Guide Release 1.0 5. Troubleshooting Troubleshooting guide Trouble Possible cause Solution PWR indicator does Power outlet, power cord, • Check the power outlet by plugging in not light up after or internal power supply another device that is functioning Turning on the may be defective. -
Page 24: Alarm Definition
NetComm NCT240 Installation Guide Release 1.0 Alarm definition 1. Information about this Alarm Definition. The NCT240 alarm system have two ways that to make a sound by external alarm out or LED signal on faceplate to indicate an error condition. In this document, we... - Page 25 NetComm NCT240 Installation Guide Release 1.0 Major GEMINAX Loss-of-power Major GEMINAX Loss-of-frame Major GEMINAX Loss-of-signal Major GEMINAX loss-of-margin Major GEMINAX Loss of Link Major GEMINAX No Cell Delineation Major GEMINAX Loss of Cell Delineation 15M FECS Major GEMINAX 15 minutes threshold error...
- Page 26 NetComm NCT240 Installation Guide Release 1.0 Loss of Signal Seconds 1D LOFS Major GEMINAX 1 Day threshold error Loss of Frame Seconds 1D LOLS Major GEMINAX 1 Day threshold error Loss of Link Seconds. 1D LPRS Major GEMINAX 1 Day threshold error Loss of Power Seconds.
- Page 27 NetComm NCT240 Installation Guide Release 1.0 15M CV_P Major GEMINAX 15 minutes threshold error non pre-emptive packets with coding violation bearer channel threshold crossing. 15M CVP_P Major GEMINAX 15 minutes threshold error pre-emptive packets with coding violation bearer channel threshold crossing.
-
Page 28: Cable And Pin Assignment
NetComm NCT240 Installation Guide Release 1.0 6. Cable and Pin Assignment Following illustrates how the pins on the RJ-45 connector are numbered. Be sure to hold the connectors in the same orientation when attaching the wires to the pins. Figure 5-1. Connecting to the Punch-down Blocks 10BASE-T/100BASE-TX Pin Assignments For 100BASE-TX/10BASE-T connections, a twisted-pair cable must have two pairs of wires. -
Page 29: 1000Base-T Pin Assignments
NetComm NCT240 Installation Guide Release 1.0 MDI-X Assignment MDI Assignment Input Receive Data + Output Transmit Data + Input Receive Data - Output Transmit Data - Output Transmit Data + Input Receive Data + Output Transmit Data - Input Receive Data - Note: Auto-negotiation must be enabled for automatic MDI/MDI-X pinout configuration. -
Page 30: Console Port Pin Assignments
NetComm NCT240 Installation Guide Release 1.0 Pins Circuit Pins Circuit Pins Circuit Pins Circuit 1,26 1,Ring/Tip 7,32 7,Ring/Tip 13,38 13,Ring/Tip 19,44 19,Ring/Tip 2,27 2,Ring/Tip 8,33 8,Ring/Tip 14,39 14,Ring/Tip 20,45 20,Ring/Tip 3,28 3,Ring/Tip 9,34 9,Ring/Tip 15,40 15,Ring/Tip 21,46 21,Ring/Tip 4,29 4,Ring/Tip... - Page 31 NetComm NCT240 Installation Guide Release 1.0 Figure 5-1. Connecting to the Punch-down Blocks DB-9 Port Pin Assignments EIA Circuit CCITT Signal Description Switch’s DB-9 PC DB-9 DTE Pin DTE Pin # RxD (Received Data) TxD (Transmitted Data) SGND (Signal Ground) Console Port to 9-Pin DTE Port on PC Switch’s 9-pin Serial Port...
-
Page 32: Obtaining Technical Assistance
NetComm NCT240 Installation Guide Release 1.0 7. Obtaining Technical Assistance For this NCT240 installation procedures, please contact NetComm Limited. Accessories for NetComm NCT240 1. A Bracket Mounting Kit It contains two brackets and four screws for attaching the brackets to the DSLAM 2. -
Page 33: Specification
NetComm NCT240 Installation Guide Release 1.0 8. Specification Hardware Dimensions (WxDxH): 440 x 320 x 44.4 mm Weight 5.2 Kg System: Power, System, Major and Minor alarm. ADSL port: link Uplink Port: TX link and FX link. Interfaces One RS232 Serial port for management... -
Page 34: Software Feature
NetComm NCT240 Installation Guide Release 1.0 ANSI T1.413 Issue 2 Line loop back and diagnostic Software Feature L2/L3 Functionality Switch capability: IEEE802.3x flow control, IEEE802.1d bridging. VLAN: IEEE802.1p/q VLAN (4094), stacked VLAN, Port-based and Tag-based. Multicasting: IGMP snooping, 250 groups, Dynamic&Static Configuration. -
Page 35: Glossary
NetComm NCT240 Installation Guide Release 1.0 9. Glossary 10BASE-T IEEE 802.3 specification for 10 Mbps Ethernet over two pairs of Category 3, 4, or 5 UTP cable. 100BASE-TX IEEE 802.3u specification for 100 Mbps Fast Ethernet over two pairs of Category 5 UTP cable. - Page 36 NetComm NCT240 Installation Guide Release 1.0 A 1000 Mbps network communication system based on Ethernet and the CSMA/CD access method. Full-Duplex Transmission method that allows two network devices to transmit and receive concurrently, effectively doubling the bandwidth of that link.
- Page 37 NetComm NCT240 Installation Guide Release 1.0 MPOE (Minimum or Main Point of Entry) The location in a building where cables from the telephone service provider are terminated. Network Diameter Wire distance between two end stations in the same collision domain.
-
Page 38: Product Warranty
Note: NetComm Technical Support for this product only covers the basic installation and features outlined in the Quick Start Guide. For further information regarding the advanced features of this product, please refer to the configuring sections in the User Guide or contact a Network Specialist.
Need help?
Do you have a question about the NCT240 and is the answer not in the manual?
Questions and answers