Table of Contents
Advertisement
Quick Links
Advertisement
Table of Contents

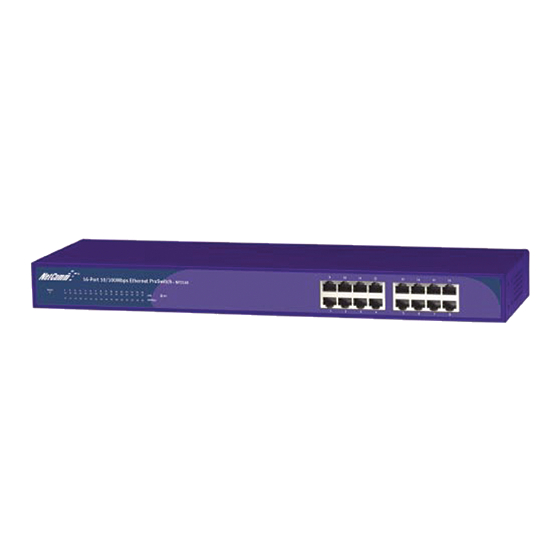
Summary of Contents for NetComm NP2160 ProSwitch
-
Page 2: Table Of Contents
Twisted Pair Cables ... 15 TECHNICAL SPECIFICATION ... 16 General ... 16 Physical and Environmental ... 16 Performance ... 16 REGISTERING YOUR NETCOMM PRODUCT ... 17 Contact Information ... 17 WARRANTY ... 18 Limitations of Warranty ... 18 www.netcomm.com.au Page 2 16-port 10/100Mbps Fast Ethernet ProSwitch Rev.1 - YML623... -
Page 3: About This Guide
ProSwitch. This device integrates 100Mbps Fast Ethernet and 10Mbps Ethernet network capabilities in a highly flexible package. Purpose This guide discusses how to install your NetComm 16-port 10/100Mbps Fast Ethernet ProSwitch. Terms/Usage In this guide, the term "ProSwitch" or "Switch" (first letter upper case) refers to your NetComm16-port 10/100Mbps Fast Ethernet ProSwitch, and "switch"... -
Page 4: Introduction
For Fast Ethernet networks, a switch is an effective way of eliminating problems of chaining hubs beyond the "two-repeater limit." A switch can be used to split parts of the network into different collision domains, making it possible to expand your Fast Ethernet network beyond the 205-meter network diameter limit for 100BASE-TX networks. -
Page 5: Features
The ProSwitch with its rack size is specifically designed for middle to large workgroups. The Switch provides immediate access to a rapidly growing network through a wide range of user- reliable functions. -
Page 6: Unpacking And Installation
Leave at least 10cm of space at the front and rear of the hub for ventilation. Install the Switch on a sturdy, level surface that can support its weight, or in an EIA standard-size equipment rack. For information on rack installation, see the next section, Rack Mounting. - Page 7 Then, use screws provided with the equipment rack to mount each switch in the rack. Rev.1 - YML623 www.netcomm.com.au 16-port 10/100Mbps Fast Ethernet ProSwitch Page 7...
-
Page 8: Identifying External Components
'plug and play' capability without the need of confusing crossover cables or crossover ports. With the Auto-MDI function, you just need to plug-in a network cable to the switch and the other end of the cable into a NIC (Network Interface Card) or another switch or hub. -
Page 9: Using The Proswitch
10Mbps networks and the new 100Mbps networks. Desktop Switching The 16-Port ProSwitch can be used as a desktop switch to build a small network that enables users to have 100 Mbps access to a file server. -
Page 10: Segment Switching
Segment Switching The 16-Port ProSwitch can segment a network into multiple connected pieces, increasing overall bandwidth and throughput.The following diagram illustrates the NetComm 16-Port ProSwitch segmenting networks that are built with the NetComm Swtich. Key: 1 = NetComm16-port 10/100Mbps Fast Ethernet ProSwitch... -
Page 11: Extending A Network
Ethernet specifications limit the length of cable between hubs and PCs to 100 meters for a total diameter of 200 meters. By adding Fast Ethernet switches between hubs, the network is expanded by 200 Mbps with the addition of each switch. The follow diagram illustrates a network of NetComm Switch. -
Page 12: Trouble Shooting
TROUBLE SHOOTING Symptom Cause Power LED is off. Power not received at Switch Check the power cord connections for Link LED is off or Port connection is not intermittent. functioning. A segment or device One or more devices are is not recognized... -
Page 13: Connector Pin Assignments
Normal Assignment on Ports 1 to 16 Input Receive Data + Input Receive Data – Output Transmit Data + Output Transmit Data – 4, 5, 7, 8 Internal termination, not used for data transmission Rev.1 - YML623 16-port 10/100Mbps Fast Ethernet ProSwitch www.netcomm.com.au Page 13... -
Page 14: Cabling Guidelines
Impedance Mutual capacitance at 1 KHz £ 5.6 nF per 100 m Maximum attenuation (dB per 100 m, at 20° C) NEXT loss (dB minimum) www.netcomm.com.au Page 14 Category 5 Cable Four 100 & ± 15% at 4 MHz: 8.2 at 31 MHz: 11.7... -
Page 15: Twisted Pair Cables
The crossover function is usually implemented internally as part of the circuitry in the device. Computers and workstation adapter cards are usually media- dependent interface ports, called MDI or uplink ports. Most repeaters and switch ports are configured as media-dependent interfaces with built-in crossover ports, called MDI-X or normal ports. -
Page 16: Technical Specification
Transmits Method: RAM Buffer: Filtering Address Table: Packet Filtering/ Forwarding Rate: MAC Address Learning: www.netcomm.com.au Page 16 IEEE 802.3 10BASE-T Ethernet IEEE 802.3u 100BASE-TX Fast Ethernet CSMA/CD Ethernet: 10Mbps (half duplex), 20Mbps (full-duplex) Fast Ethernet: 100Mbps (half duplex), 200Mbps (full- duplex) Star 10BASET: 2-pair UTP Cat. -
Page 17: Registering Your Netcomm Product
REGISTERING YOUR NETCOMM PRODUCT To ensure that the conditions of your warranty are complied with, please go to the NetComm web site for quick and easy registration of your product at Alternatively, you can print out a copy of the Warranty Registration Form and mail it to NetComm Limited, PO Box 1200, Lane Cove NSW 2066. -
Page 18: Warranty
2. This warranty shall not apply to software programs, batteries power supplies, cables or other accessories supplied in or with the product; 3. The customer complies with all of the terms of any relevant agreement with NetComm and any other reasonable requirements of NetComm including producing such evidence of purchase as NetComm may require;... - Page 19 All NetComm ACN 002 490 486 products have a standard 12 months warranty from date of purchase. However some products have an extended warranty option (refer to packaging). To be eligible for the extended warranty you must supply the requested warranty information to NetComm within 30 days of the original purchase by registering on-line via the NetComm web site at www.netcomm.com.au.


Need help?
Do you have a question about the NP2160 ProSwitch and is the answer not in the manual?
Questions and answers