Exmark ULTRA VAC QDS Operator's Manual
Lazer z, lazer z as series x, and lazer z as models
Hide thumbs
Also See for ULTRA VAC QDS:
- Operator's & parts manual (32 pages) ,
- Operator's manual (28 pages) ,
- Operator's manual (24 pages)
Table of Contents
Advertisement
Advertisement
Table of Contents

Related Manuals for Exmark ULTRA VAC QDS


Summary of Contents for Exmark ULTRA VAC QDS
- Page 1 ULTRA VAC ® LAZER Z , LAZER Z ® ® SERIES X, AND LAZER Z ® MODELS For Ultra Vac Serial Nos. 850,000 & Higher (To fit Lazer Z (LZZ) and Lazer Z AS Series X (LZAS) Units Serial Nos. 790,000 & Higher) (To fit Lazer Z AS (LZA) Units Serial Nos.
- Page 2 Exmark reserves the right to make changes or add improvements to its products at any time without incurring any obligation to make such changes to products manufactured previously. Exmark, or its distributors and dealers, accept no responsibility for variations which may be...
-
Page 3: Introduction
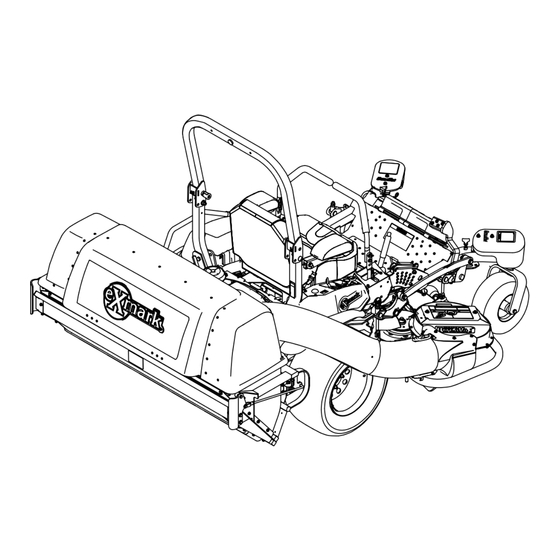
Introduction CONGRATULATIONS on the purchase of your Exmark Ultra Vac. This product has been carefully designed and manufactured to give you a maximum amount of dependability and years of trouble-free operation. This manual contains operating, maintenance, adjustment, and safety instructions for your Exmark Figure 1 Ultra Vac. -
Page 4: Table Of Contents
Contents Introduction ............3 Safety ..............5 Safety Alert Symbol ......... 5 Safe Operating Practices ........5 Safety and Instructional Decals ....... 8 Specifications ............10 Model Numbers ..........10 Systems ............10 Dimensions........... 10 Torque Requirements ........10 Product Overview ..........11 Operation ............. -
Page 5: Safety
WARNING, or CAUTION. perform the job. Only use on machines approved DANGER: White lettering / Red background. by Exmark. Indicates an imminently hazardous situation which, if • Wear appropriate clothing including safety glasses, not avoided, Will result in death or serious injury. -
Page 6: Slope Operation
Safety Slope Operation collection system or mulch kit in place and working properly. Use Extreme caution when mowing and/or turning on slopes as loss of traction and/or tip-over could DANGER occur. The operator is responsible for safe operation on slopes. There are rotating blades in the blower and under the mower deck. -
Page 7: Maintenance And Storage
Safety progressively greater care on slopes as the hopper fills. Maintenance and Storage • Disengage PTO, set parking brake, stop engine and remove key or disconnect spark plug wire. Wait for all movement to stop before adjusting, cleaning or repairing. •... -
Page 8: Safety And Instructional Decals
Exmark equipment dealer or labels. distributor or from Exmark Mfg. Co. Inc. • Replace all worn, damaged, or missing safety • Safety signs may be affixed by peeling off the signs. - Page 9 Safety 103-3508 LZUVQD7 Units Only 109-5890 LZUVQD11 Units Only...
-
Page 10: Specifications
Specifications Specifications Model Numbers Serial Nos: 850,000 and Higher LZUVQD7–Fits Lazer Z (LZZ), Lazer Z AS Series X (LZAS), and Lazer Z AS (LZA) with 48 or 52 inch deck. LZUVQD11–Fits Lazer Z (LZZ) and Lazer Z AS Series X (LZAS) with 60 or 72 inch deck. Fits Lazer Z AS (LZA) with 60 inch deck. -
Page 11: Product Overview
Operation Product Overview Operation Note: Determine the left and right sides of the machine from the normal operating position. Important: For Serial Numbers 790,000 and higher, multiple accessories added to a base unit can change the stability of the machine. Read the unit operator’s manual to determine if counterbalance weights are necessary for the accessories installed on the unit. -
Page 12: Collection System Removal For Side Discharge
Operation have stopped before clearing blower assembly or 2. Disengage the PTO, stop engine, wait for all mower deck moving parts to stop, and remove key. Engage parking brake. 3. To empty the hopper, first disengage the PTO. Lift up on the handle to open the door and empty 3. - Page 13 Operation CAUTION WARNING The deck sheave will become very hot. An uncovered discharge opening will Touching a hot deck sheave can cause severe allow objects to be thrown in operator’s or burns. bystander’s direction. Also, contact with blade could occur. Thrown objects or blade Allow the deck sheave to cool completely contact can cause serious injury or kill you before removing the belt.
-
Page 14: Collection System Installation
Operation CAUTION WARNING The exhaust diverter is hot. Touching a hot Caster or toe board weights installed without exhaust diverter can cause severe burns. the collection system may cause loss of traction and steering control. Loss of control Allow the exhaust diverter to cool completely can result in an accident which may cause before removing the hopper assembly. - Page 15 Operation 4. Remove the hairpin from the mount pin and pull and align the holes. Insert the spring clevis pin the mount pin out of the frame mount barrel. and rotate it downward to latch it onto the handle link. 5.
- Page 16 Operation 16. Belt Installation: For Large Decks: For Small Decks: Pull the spring loaded idler back and slip the belt over the top deck sheave. A. Slip the belt over the impeller sheave on the blower. Note: It may be easier to install the belt if the belt guide is temporarily shifted to one side or temporarily removed.
- Page 17 Operation washers, and three #10-24 nyloc nuts. The screw head should be installed to the inside of the tube to provide minimum obstruction to flow. Make sure that the upper and the lower ends are oriented properly as the tubes are assembled. (Parting lines should roughly be lined up.) Figure 19 1.
-
Page 18: Transporting
Operation CAUTION This unit does not have proper turn signals, lights, reflective markings, or a slow moving vehicle emblem. Driving on a street or roadway without such equipment is dangerous and can lead to accidents causing personal injury. Driving on a street or roadway without such equipment may also be a violation of State laws and the operator Figure 22... - Page 19 Ultra Vac assembly. Insert a 1/2 x 3 inch bolt and 1/2 inch nut (or Exmark service parts: clevis pin P/N 283-55 and hairpin P/N 1-806005) into the downstop hole on each side and lower the roll bar.
-
Page 20: Maintenance
Maintenance Maintenance Note: Determine the left and right sides of the machine from the normal operating position. WARNING WARNING While maintenance or adjustments are being The engine can become very hot. Touching made, someone could start the engine. a hot engine can cause severe burns. Accidental starting of the engine could Allow the engine to cool completely before seriously injure you or other bystanders. -
Page 21: Check Exhaust Diverter
Maintenance Check Condition of Belt WARNING Service Interval: Every 50 hours Under normal use the cloth mesh will deteriorate and wear. Objects could exit 1. Stop engine, wait for all moving parts to stop, and through worn cloth mesh at high speeds. remove key. -
Page 22: Adjustments
Maintenance Adjustments Adjusting the Blower Drive Belt Position 1. Read the operator’s manual for the UltraVac and mower before performing this adjustment. Make sure that you understand the controls, their locations their functions and safety requirements. 2. Ensure the blower, belt cover, tubes and hopper are in good condition, properly attached and latched. 3. - Page 23 Maintenance LZUVQD11 Units: Figure 26 LZUVQD11 Units 1. Handle Link 3. Stop 5. Latches 4. Hinge Links 2. Stop Screws 1. Door closing: The closing of the door is controlled by the two hinge links and the two stop screws (see Figure 26).
-
Page 24: Cleaning
Maintenance Cleaning Clean Muffler and Rear Frame Area Service Interval: Before each use or daily Stop engine, wait for all moving parts to stop, and remove key. Engage parking brake. WARNING Operating engine parts, especially the muffler, become extremely hot. Severe burns can occur on contact and debris, such as leaves, grass, brush, etc. -
Page 25: Storage
Storage Storage Handle Storage When storing the LZUVQD7, fold the handle inward as shown in Figure 27. Remove and retain the knob and carriage bolt from the handle bracket and rotate the handle bracket and rotate the handle inward. Figure 27 LZUVQD7 Only 1. -
Page 26: Troubleshooting
Troubleshooting Troubleshooting Important: It is essential that all operator safety mechanisms be connected and in proper operating condition prior to mower use. When a problem occurs, Do Not overlook the simple causes. For example: starting problems could be caused by an empty fuel tank. The following table lists some of the common causes of trouble. - Page 27 No Claim of breach of warranty shall be cause for cancellation instructions provided by Exmark. or rescission of the contract of sale of any Exmark attachment All warranty work must be performed by an authorized or accessory.
- Page 28 Notes:...
- Page 29 Notes:...
-
Page 30: Service Record
Service Record Date: Description of Work Done: Service Done By:... -
Page 31: Slope
Figure 28 This page may be copied for personal use. 1. The maximum slope you can safely operate the machine on is 15 degrees. Use the slope indicator to determine the degree of slope of hills before operating. Do Not operate this machine on a slope greater than 15 degrees. Fold along the appropriate line to match the recommended slope. - Page 32 SEE EXMARK’S COMPLETE LINE OF ACCESSORIES AND OPTIONS MID-MOUNT RIDING ACCESSORIES AND OPTIONS CUSTOM RIDE SEAT SUSPENSION SYSTEM OPERATOR CONTROLLED DISCHARGE FULL SUSPENSION SEAT ROLL OVER PROTECTION SYSTEM (ROPS) DECK LIFT ASSIST KIT SUN SHADE HITCH KIT TRASH CONTAINER LIGHT KIT...
Need help?
Do you have a question about the ULTRA VAC QDS and is the answer not in the manual?
Questions and answers