Baja motorsports DB30 Mini Bike Owner's Manual
Minibike
Hide thumbs
Also See for DB30 Mini Bike:
- Owner's manual (33 pages) ,
- Operator's manual (23 pages) ,
- Service bulletin (4 pages)
Table of Contents
Advertisement
Quick Links
Advertisement
Table of Contents

Related Manuals for Baja motorsports DB30 Mini Bike


Summary of Contents for Baja motorsports DB30 Mini Bike
- Page 1 Minimum Age Requirement: 16 Weight capacity: 150 Ibs. Rev.l(US) 020509 Alwayswear a helmet;It couldsaveyour Life! Pleaseobtain,review,and followprovincial/ municipal g overnment a cts and regulationspertaining to owningand operatingan off-roadvehicle.
- Page 2 Congratulations on yourpurchaseof the BAJAINC. DB30Mini Bike. YourMini bike iswarrantedto be free of manufacturing defectsin material andworkmanship for a periodof 90 daysfrom the dateof purchase. Duringthe warrantyperiodBAJA,INC.will at itsoption,repair,provide replacement p arts or replaceyour BAJAINC.DB30 MiniBike at no charge. Thiswarrantydoes not covernormalwear itemsor damagecausedby neglector misuseof the product.
- Page 3 This manualshould be consideredas a permanent part of the vehicle and should remainwith the vehicle when resoldor otherwisetransferredto a new user or operator. The manual contains importantsafety informationand instructions which should be read carefully before operatingthe vehicle.All operatorsshould obtain, review,and follow provincial and municipalgovernmentacts and regulationspertainingto owning and operating an off-roadvehicle.
-
Page 4: Table Of Contents
SAFETY ............Safe Operation ........Safety Gear ......... Location of Labels ....... SPECIFICATIONS.......... LOCATIONOF PARTS ........OPERATION..........Left and Right Hand Grip ....... Engine ON/OFF switch and Pull Cord ..Fuel Fill ..........Fuel Valve ........... INSPECTION BEFORE RIDING ......ENGINE STARTINGAND STOPPING .... - Page 5 Pleasereadthis manualand follow all instructions carefully.To emphasize the specialinformation, t he symbolA and thewordsWARNINGor CAUTIONhave somespecialmeanings. P ay great attentiontothe messages. Indicatesa potentialhazardthatcouldresultin deathor injury. CAUTION nd cates a potentialhazardthatcouldresultin vehicledamage. NOTE:Indicating specialinformation whichis to makemaintenance easieror instructions clearer. WARNING and CAUTION are arrangedlike this: The first partwill identify a POTENTIAL HAZARD.
-
Page 6: Safe Operation
SAFE O PERATION Rulesfor SafeOperation A pre-operation checkmustbe conducted, b eforestartingtheengine,insure safety,preventmishaps, a nd damageto components. ITEMTO CHECK CONTENT Steering Smoothness; No restriction o f movement; N oplayor looseness Brakes Properbrakeleverfree play;enoughbrakeforce Tires Properair pressure;Enoughtreaddepth;No cracks,rips,or other damages Fuel Enough fuel for the intended trip;Fuelhoseconnected securely; No damage tofuel tankor cap;Fueltank capclosedsecurely Enginestopswitch Proper operation... - Page 7 This user's manual contains important safety a ndmaintenance information. Read i tcarefully before r iding. F ailing t o follow thewarningscontainedin this manualcouldresultin INJURYor DEATH. It is importantthatthis manualremainwith the vehiclewhenyou transferit to anotheruser or owner. All information, i llustrations, p hotographs andspecifications containedin this manualarebasedon thelatestproductinformation availableat the time of publication.Dueto improvements or otherchanges,therewill besome discrepancies in this manual.
-
Page 8: Safety
SAFETY GEAR ADOT a pproved motorcycle helmet isthemost i mportant part o fyousafety gear. A DOT approved motorcycle helmet can help prevent aserious head injury. Choose ahelmet that fits snugly.Motorcycledealerscanhelp in selectinga good quality helmetwhichfits properly. Operatingthis Mini Bikewithoutwearingan approvedDOT motorcycle helmet,eye protection, a nd protectiveclothingcouldbe hazardous. -
Page 9: Locationof Labels
LOCATIONOF LABELS TI"I_ELE BIENATJ_DO I,L_llD_OP I_F_ DO NOF _THP_[|bL%_ftJJ_= REGULA_SERWGEFROGEDU TIRE P_SSUR_ • C_k _:_ess_s o_ a_ t_s o_y _he_ t_res am¢_, 4 p_ _7_ _pa) - Page 10 LOCATIONOF LABELS...
-
Page 11: Specifications
Description Data Overalllength 1295mm(51 inches) Overallwidth 622mm(24.5 inches) Overallheight 863mm(34 inches) Wheelbase 927mm(36.5 inches) Deadweight 35.38kg (78 Ibs.) Payload 68.04kg(150 Ibs.) Frontwheel 145x70-6 Rearwheel 145x70-6 Braketype Disc Capacityof gasolinetank 1.4L(0.36 gal) Capacityofoil tank 0.45L(0.40qt.) Startingmethod Recoilpullstart Borea stroke 52ramx 46ram PTOshaftrotation Counterclockwise Horsepower... -
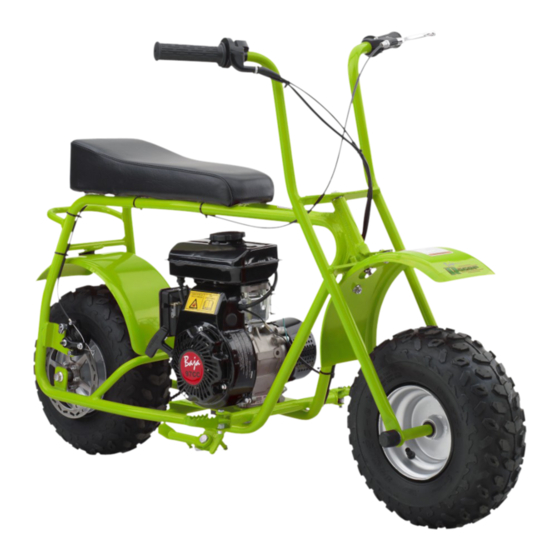
Page 12: Locationof Parts
Hand brake Seat Cushion Front Wheel Rear Wheel Oil fill plug Drive Chain Oil drain plug Kick Stand On/Off Button Throttle handle Tank Air Filter Footpegs Pull Start Cord Brake Caliper... -
Page 13: Operation
LEFT AND RIGHT HAND GRIP OPERATION BrakeLever ON button Throttlecontrolgrip Grip LeftHandGrip OFF button Pullingin brake leverlocatedon left handgrip will stopminibike. Applyingthe handthrottle(movingthrottlecounterclockwise) will cause enginerpmsto increase, causingmini biketo moveforward. Whenthe switchis turnedto '_(_" (off) position,theenginewill notstart. If theengineis runningand the Off buttonis pushedtheenginewill turnoff. Whenthe switchis turnedto "C_J' (on) position,the enginecanstartby using the manualpullstart cord, ENGINE PULLCORD OPERATION... -
Page 14: Fuel Fill
FUEL AND FUEL VALVE OPERATION Fuel filling The capacityof thefuel tankis 1.4L(.40 qt .) Unscrewthegas capby turningit counterclockwiseand carefullyfill thetankwith unleadedgasolinethroughthe opening. DONOT MIX GASAND OILTOGETHER, T HISIS A 4-STROKEENGINE. Replacethegas capby carefullyaligningthe threadson the capand the tankand turningthe cap clockwise. Wipeanyspilledfuel from thedirt bike usinga cloth and disposeof the clothproperly.DONOT SMOKEOR REFUEL THE VEHICLE NEAROPENFLAMESOR NEARHEATINGUNITS. -
Page 15: Inspection Before Riding
ITEM TO CHECK CONTENT Steering Smoothness; No restriction o f movement; N oplayor looseness Brakes Properbrakeleverfree play;enoughbrakeforce. Tires Properair pressure;Enoughtreaddepth;No cracks,rips,or other damages Note: Checktire pressure,specis locatedon sideof tire. Fuel Enough fuel for the intended trip;Fuelhoseconnected securely; N odamage tofuel tankor cap;Fueltankcapclosedsecurely Enginestop switch Proper operation Engineoil Proper level- Checkoil by inspecting EngineOil Dip Stick. -
Page 16: Engine Startingand Stopping
_, CAUTION Verifyfuel and oil level priortostarting(see pages11and 14) Startingthe enginewith low or no oilwill damagethe engine. Neverstarttheengine in a closedplaceas the exhaustedgas from the vehiclecontainstoxic carbonmonoxide. Ensurethere isfuel in fuel tank and oil in crankcase. Set fuel valve leverto "ON" position Placechokeleverto "ON"... -
Page 17: Inspectionand Maintenance
CHECKINGTHE OIL Checkengineoil eachtimepriorto operatingminibike. The oil level shouldbe between upperand lower lines of oil gauge. Set theMini Bikeon levelground,screwoffthe oil gageplug,wipe theoil gagerod cleanand then insertthe gageplug intothecrankcaseagainto checkthe oil level. Thereis no needto screwthe oil gage plugcompletelyin the holeto checktheoil. Add lubricating oil up to the edgeof thefuel plug. -
Page 18: Changing Oil
CHANGING THE OIL Removethe "Screw Plug" located at the bottomof the engineand let the oil drainintoan approvedcollectioncontainer. DONOT PERFORM THIS PROCEDURE WHILETHE ENGINEIS HOT. SERIOUSBURNSCOULDRESULT FROMCONTACT WITH HOTOIL. Disposeof the usedoil properly.For properdisposalprocedures,contact yourlocaloil recyclingcenter. Cleanand replacethe "Screw Plug"tightly. Refillthe enginewith the properamountof oil and rechecktheamountof oil in the engineby usingtheoil gaugeplug. -
Page 19: Checking And Cleaning Air Filter
CHECKING& CLEANING THEAIR FILTER LocateAir Filter Box at rear of engine 2. Removeair filter coverby unscrewing phillipsheadscrew 3. Removefoam Air filter element. 4. TapAir filter elementgentlyto removemostof the dust and dirt. 5. Washfoam elementper instructions belowthenallowto dry thoroughly. 6. Reinstallfoam air filter element. 7. -
Page 20: Adjusting Throttle Cable
ADJUSTINGTHE THROTTLECABLE Makesure the throttlecableis adjustedproperly.To adjust throttlecable, rotate adjustment nut locatedat the handthrottle. Checkif thethrottletwistgrip hasthe requiredfreeoperatingmovement. The required free operatingmovement:2-6ram(.078-.24in.). If thegrip cannotbe movedfreely, turnthe adjustingnut to ensureproperoperatingmovement. Afteradjustment, s tart theengineand checkfor the operatingmovement again. Repeatthe adjustment if necessaryuntilthe desiredoperatingmovement is obtained. -
Page 21: Adjustmentof Rear Brake
ADJUSTMENTOF REAR BRAKE Thefront brakehandgripshouldhavefree operatingmovement of 5-7ram (.2-3in.). Adjustwith free playadjustmentbolt. To make rear brakepad adjustment, t urnrear adjustingboltclockwiseto loosenand counterclockwiseto tightenbraketension. Brakepads shouldbe replacedbya qualified servicetechnicianoncebrake shoesareworn. Brakesareadjustedbyturningin or outthe rearbrakeadjustingbolt 5-7ramfree play (.2-3in.) Free playadjustment bolt Rearbrakeadjustingbolt... -
Page 22: Adjustmentof Chain
ADJUSTMENTOF CHAIN Whenchainadjustment is needed,loosen4 boltsunderengine. Moveengineforward to tightenchainor backwardto loosenchain. Tightenboltsunderengine Torqueboltsto 25 ft./Ibs. Repetitively checktensionof chain. Nut2 Nut1 Loosen _ Tighten Chain ,'_ Chain Engineadjustingbolts Tighten Loosen Chain _ Chain MINORCHAIN ADJUSTMENT Whenminorchainadjustment 19-25mm is needed,loosen"Nut 2". Turn 3/4 in.- 1 in. -
Page 23: Clutch Cleaningand Maintenance
CLUTCH CLEANINGAND MAINTENANCE After every5 hourof use, yourclutchwill need cleaningand lubrication.If clutchbecomestoo dirtyor has lackof lubrication,theclutchwill havea tendencytostick. Thiswill causethe Mini-Biketowantto takeoff before throttleis applied. To cleanand lubricateclutch, followthe instructions below: Makesure engineisturnedoff and engineis coolbeforeremovingclutch cover. RemoveClutchCover Withcompressed air, blowthroughholesto removeany dustand/orparticles. Oil Clutch bearingwith a few dropsof 30Wmotoroil. -
Page 24: Vehiclewashing
VEHICLEWASHING Cleaningthevehicleregularlycanslowdownthe colorfading of its bodyand make iteasierto checkif there is anydamageand any oil leakage. CAUTION Washingthe Mini Bikewith over-pressurized watermay causedamageto someof its components.Therefore,do usea pressure washerto cleanthe vehicle. Thefollowing partsshouldbe cleanedusing lowpressurewater: -- Wheelhub -- Exhaustpipe -- Fueltankand lowerportionof cushion -- Carburetor -- Headlock and ignitionswitch -- Meters... -
Page 25: Instruction For Storage
INSTRUCTIONSFOR STORAGE If thevehicleis not goingto be usedfor a long periodof time,for example,in wintertime, somestepsshouldbe takento preventmalfunction of and damageto its components whichmightbe causedby longstorage. Beforestoringthe vehicle for a long period, propermaintenance hasto be carriedin casemaintenance is not completed whenthe vehicleis put backinto useafterstorage. Changeengineoil. -
Page 26: Resumptionof Serviceafter Storage
RESUMPTIONOF SERVICEAFTER STORAGE Removethe coveringand removethe woodenblocksusedin storingthe vehicle. Changetheengineoil if the vehiclehas beenout of servicefor over4 months. Drainoff the remaining atomizedanti-rustoilfrom thefuel tank, followed by filling it with fresh gasolinetherein. Priorto driving,all the requiredcheck-upsmustbe made. It is betterto driveit at a lowspeed in an openareato test its performance beforenormal operation. -
Page 27: Maintenance Schedule
Items of Maintenance Each Use 1st MO/ Every Every Every 20 HR 3 MO/ 6 MO/ Year/ 50HR 100HR 300HR EngineOil-Check *EngineOil-Change Air Filter-Check *Air Filter-Clean *Air Filter-Change *CarburetorSediment cup-Clean SparkPlug-Check,Adjust SparkPlug-Replace IdleSpeed-Check,Adjust **Valveclearance-Check, Adjust FuelTankand Filter- Clean FuelTube-Check Centrifugal C lutch-Clean X Every5 and Lube hours... -
Page 28: Trouble Shooting
Notes: Maintenance shouldbe conductedmorefrequently when Mini Bike isdriven in dustyareas. WhenMinibike hasexceededthe maximum figures specifiedin thetable, maintenance shouldbestill cycledaccordingto the intervalsof timeor hours statedherein. Engine will not Start 1. FuelValveOFF Move Fuelvalve leverto ON. 2. ChokeOPEN MoveChokeLeverto CLOSED 3. Outof fuel Refuel Drainfuel and carburetor.Refuelwith 4. -
Page 29: Electrical Schematic
EngineSwitch TransistorMagneto Spark Plug Ignition Coil... -
Page 30: Emissions Control Systemwarranty
BAJA INC.- EMISSION CONTROLSYSTEM WARRANTY YOURWARRANTYRIGHTS ANDOBLIGATIONS The emissioncontrolsystemwarrantyperiodfor this vehiclebeginson the date thevehicleis deliveredto thefirst purchaserotherthanan authorizeddealer,or thedate it is first usedas a demonstrator, l ease,or companyvehicle,whichever comesfirst and continues for 60 monthsafterthat date,or 5,000kin, w hichever comesfirst, providedthere hasbeenno abuse,neglector improper maintenance of yourvehicle. - Page 31 Your emission control system warranty covers c omponents whose f ailure would increasean engine'semission,including electroniccontrols, f uel injectionsystem, carburetor, t he ignitionsystem,catalyticconverter, o r any othersystemutilizedin thisvehicleto controlemissionif it is originallyequipped.Alsoincludedmay be hoses,connectors and otheremission-related assemblies.Replacing or repairing othercomponents (including parts,labor,and othercosts)not coveredbythis emissioncontrolsystemwarrantyor the standard warrantyisthe responsibility of theowner.
- Page 32 o Use ofreplacement parts oraccessories notconforming totheoriginal specifications which adversely affect p erformance • Physical damage, corrosion, ordefects caused b y fire, explosions or similarcausesbeyondthe controlof the Distributor. • Failuresnot causedby a defectin materialor workmanship. Useof the vehiclein any typeof competitive racingor relatedeventsimmedi- atelyand completely voidsthis and all otherwarranties.
- Page 33 Baja, INC. P.O.Box 61150 Phoenix, AZ 85082 Tel: 602-443-9180 Toll Free: 888-863-BAJA(2252)
Need help?
Do you have a question about the DB30 Mini Bike and is the answer not in the manual?
Questions and answers