Table of Contents
Advertisement
Advertisement
Table of Contents

Related Manuals for ViewSat VSPRO


Summary of Contents for ViewSat VSPRO
-
Page 2: Table Of Contents
Table of Contents Table of Contents 1. SAFETY PRECAUTIONS 2. HARDWARE DESCRIPTION 3. HOW TO CONNECT YOUR RECEIVER 4. SYSTEM SET-UP 4.1 INSTALLATION WIZARD 5 QUICK GUIDE TO MAJOR FUNCTIONS 6. MENU STRUCTURE 7. MENU OPERATION 7.1. EDIT CHANNELS 7.2. INSTALLATION 7.3. - Page 3 IMPORTANT SAFETY INSTRUCTION IMPORTANT SAFETY INSTRUCTION IMPORTANT SAFETY INSTRUCTION IMPORTANT SAFETY INSTRUCTION DECLEARATION OF CONFORMITY DECLEARATION OF CONFORMITY DECLEARATION OF CONFORMITY DECLEARATION OF CONFORMITY...
-
Page 4: Safety Precautions
SAFETY PRECAUTIONS SAFETY PRECAUTIONS SAFETY PRECAUTIONS SAFETY PRECAUTIONS 1. SAFETY PRECAUTIONS 1.1. ACCESSORIES Check the following accessories when you open the box. This receiver has been manufactured to satisfy the international safety standards. Please read the following recommended safety precautions carefully. MAINS SUPPLY : AC 95~240V 50/60Hz LOCATION : Locate the receiver indoor. -
Page 5: Hardware Description
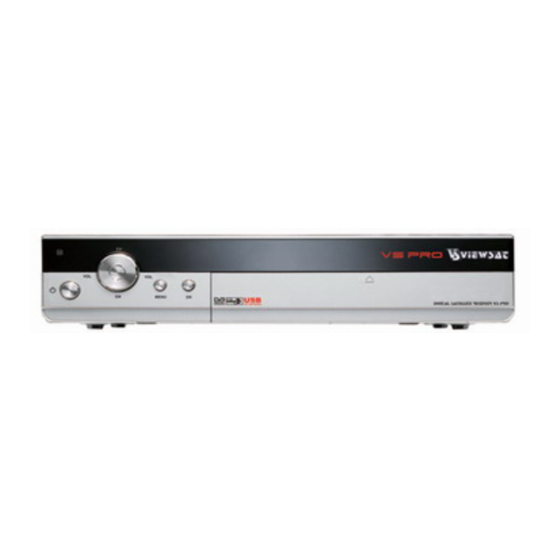
HARDWARE DESCRIPTION HARDWARE DESCRIPTION HARDWARE DESCRIPTION HARDWARE DESCRIPTION 2. HARDWARE DESCRIPTION 2.2. REAR PANEL 2.1. FRONT PANEL 1) DISH IN: This port is to connect the coaxial cable from LNB of your Dish. The IF input is provided through this port and the input frequency range is 950~2150MHz. Also, voltage switching 13V and 18V is passed through this port. -
Page 6: How To Connect Your Receiver
REMOTE CONTROL UNIT REMOTE CONTROL UNIT REMOTE CONTROL UNIT REMOTE CONTROL UNIT HOW TO CONNECT YOUR RECEIVER HOW TO CONNECT YOUR RECEIVER HOW TO CONNECT YOUR RECEIVER HOW TO CONNECT YOUR RECEIVER 3. HOW TO CONNECT YOUR RECEIVER 2.3. REMOTE CONTROL UNIT Please DO NOT plug in the main power supply cord until you complete all the connections. -
Page 7: System Set-Up
- - - - SYSTEM SET SYSTEM SET SYSTEM SET SYSTEM SET 4.1.3. Select Satellite Select the appropriate Satellites from the 4. SYSTEM SET- UP list by using the up/down keys ( ) and ok ▲ · ▼ key. 4.1. INSTALLATION WIZARD * Green: Go to the Next Step When powering on your receiver for the first time, the installation Wizard will starts automatically. -
Page 8: Quick Guide To Major Functions
M M M M ENU STRUCTURE ENU STRUCTURE ENU STRUCTURE ENU STRUCTURE QUICK GUIDE TO MAJOR FUNCTIONS QUICK GUIDE TO MAJOR FUNCTIONS QUICK GUIDE TO MAJOR FUNCTIONS QUICK GUIDE TO MAJOR FUNCTIONS 5. QUICK GUIDE TO MAJOR FUNCTIONS 6. MENU STRUCTURE USB Host This product has two USB Host ports. -
Page 9: Menu Operation
MENU OPERATION MENU OPERATION MENU OPERATION MENU OPERATION 7. MENU OPERATION 7.1. EDIT CHANNELS 7.1.2. Edit Favorite Channels Select the Edit channels menu by using Select Edit Favorite Channels menu in the left/right keys( ◀ ∙ ▶ Edit Channels menu Move into the desired submenu by using Entering this menu, a PIN code may be the up/down (... -
Page 10: Installation
7.2. INSTALLATION Installation menu helps you to setup a Satellite : Select a Satellite to setup variety of parameters necessary for receiving signal, and reset the channel data, etc. LNB Frequency : Select a LNB Frequency. 22 KHz Tone : Turn on or off the 22KHz Tone out. When you select each submenu in Installation menu you may be asked to enter DiSEqC 1.0 &... - Page 11 The channel searching process takes a few Move Motor : Move to East or West direction while pushing the left or right key. minutes. Recalculation : Apply the calibrated value to all Satellites. It shows the searched TV channels on the left and Radio channels on the right.
-
Page 12: Preferences
7.3. PREFERENCES 7.2.8. Factory default Select Factory default menu in Installation Preferences menu helps you to set up Language, Time, Timer List, Parental This is to initialize back to the factory Control, A/V Control, and OSD Setting. default, in case of any problems after Push the MENU key to save and return to changing values of channel data and the previous menu. - Page 13 7.3.4. Parental Control 7.3.2. Time Setting Select Parental Control menu in Preferences menu. This menu helps you to set the age limit, Select Time Settings menu in the change PIN code, lock menu and Preference menu. channels by using the up/down keys Adjust the date and time.
-
Page 14: Record
7.4.2. MP3 List Select MP3 List menu in Record menu or 7.3.6. OSD Setting push key. Select OSD Setting menu in Preferences You can enjoy listening to music in this menu. function. Select MP3 files on the list by This menu helps you to control OSD using the up/down keys ( ) and play setting. - Page 15 7.4.7. Hard Disk Format 7.4.5. PVR Configuration If you want to format your Hard Disk, push OK key. Select PVR Configuration menu in The PIN code is required before Record menu. formatting. You can set the PVR Configuration by Formatting Hard Disk will delete all data using this menu.
-
Page 16: Status
7.5. STATUS 7.4.9. USB Device Safe Remove 7.5.1. Product Information Portable HDD, memory stick or MP3 player can be used as storage for the This menu helps you to check model name, current version of S/W, loader, receiver. Simply connect the device to the receiver by using a USB cable. -
Page 17: Additonal Operation
ADDITIONAL ADDITIONAL OPERATION ADDITIONAL ADDITIONAL OPERATION OPERATION OPERATION 8. ADDITIONAL OPERATION Live channel 8.1. INFORMATION BOX PIP channel When channel changes, information box Timeshift channel will show up and disappear after 3 secs (To change the duration of show-up, Recording 1 & 2 please refer to 7.3.6 OSD Setting ). -
Page 18: Channel List
8.5. SLEEP MODE 8.3. CHANNEL LIST Push key on the live channel to set the This menu helps you to easily select the sleep timer. channel that you wish to watch. Use left/right keys( ) and push the Save ◀ ∙ ▶ Push OK key on live channel, and the button by using up/down keys ( ) and OK... -
Page 19: History & Previous Channel
8.10. CAPTURE To change the channel in the PIP screen, you can use the up/down keys (▲·▼) after changing the channel information Push key to capture the screen. box into PIP mode by using color keys, or select a channel in the PIP channel list. Captured images will be saved into To open the PIP channel list, use the the Capture List menu in Record... -
Page 20: How To Record & Playback
HOW TO RECORD HOW TO RECORD & & & & PLAYBACK PLAYBACK HOW TO RECORD HOW TO RECORD PLAYBACK PLAYBACK 9. HOW TO RECORD & PLAYBACK 9.1. TIME SHIFT If you have to walk away from your TV but do not want to miss the show, you can 9.2.2. -
Page 21: Playback
9.4. PLAYBACK Set appropriate value to all fields and To watch the recorded program, follows push the Red key to save it. the next; Push the MENU key for previous menu key opens the Recorded Program to check the reserved programs in the List. -
Page 22: Trouble Shooting
TROUB TROUB TROUB TROUBLE SHOOTING LE SHOOTING LE SHOOTING LE SHOOTING 10. TROUBLE SHOOTING Problem Solution 9.4.3. Repeat You can watch a certain defined section repeatedly. About the Receiver 1) In Playback, push key to set a starting point of section to repeat. 2) Move the section by using &... -
Page 23: Technical Specifications
TECHNICAL SPECIFICATIONS TECHNICAL SPECIFICATIONS TECHNICAL SPECIFICATIONS TECHNICAL SPECIFICATIONS 11. TECHNICAL SPECIFICATIONS Video Decoder Power Supply - Transport Stream : MPEG-2 ISO/IEC 13818 : Main profile @ main level (MP@ML) - MPEG-2 profiles/levels - Input Voltage : AC 95V~240V 50Hz / 60Hz - Input Rate : Max. -
Page 24: Remote Control Programing
PROGRAMING THE REMOTE CONTROL PROGRAMING THE REMOTE CONTROL PROGRAMING THE REMOTE CONTROL PROGRAMING THE REMOTE CONTROL 12. PROGRAMING THE REMOTE CONTROL Data port - USB(host) : USB 1.1/2.0 compatible - RS-232C : 9-pin D-sub, Transfer rate 115 Kbps Front - Buttons : 7 Buttons Stand by, Menu, Exit, CH+, CH-, VOL+, VOL- - Display... -
Page 26: Warranty Card
WARRANTY CARD WARRANTY CARD WARRANTY CARD WARRANTY CARD 13. WARRANTY CARD...
Need help?
Do you have a question about the VSPRO and is the answer not in the manual?
Questions and answers