Table of Contents
Advertisement
Quick Links
Advertisement
Table of Contents

Related Manuals for ViewSat PVR7000


Summary of Contents for ViewSat PVR7000
-
Page 2: Table Of Contents
Table of Content Table of Contents 1. SAFETY PRECAUTIONS 1.A. ACCESSORIES 2. GENERAL FEATURES 3. HOW TO CONNECT YOUR RECEIVER 4. HOW TO SET YOUR HARD DISK 5. HARDWARE DESCRIPTION 6. SYSTEM SET-UP 7. MENU STRUCTURE 8. MENU OPERATION 8.1. EDIT CHANNELS 8.2. -
Page 3: Important Safety Instruction
Declaration of Conformity Important Safety Instruction Important Safety Instruction Declaration of Conformity FCC Rule : TESTED TO COMPLY WITH FCC PART 15, CLASS B OPERATING ENVIRONMENT : FOR HOME OR OFFICE USE. FCC COMPLIANCE STATEMENT : This device complies with part 15 of the FCC rules. Operation is subject to the following conditions : 1) This device may not cause harmful interference, and 2) This device must accept any interference received, including interference... -
Page 4: Safety Precautions
Safety Precautions 1. SAFETY PRECAUTIONS 1.A. ACCESSORIES This receiver has been manufactured to satisfy the international safety Check the following accessories when you open the box. standards. Please read the following recommended safety precautions carefully. MAINS SUPPLY : AC 95~240V 50/60Hz LOCATION : Locate the receiver indoor. -
Page 5: General Features
How to Connect your Receiver General Features 2. GENERAL FEATURES Fully MPEG-2 & DVB Compliant 2 Tuners 3. HOW TO CONNECT YOUR RECEIVER Time-shifting MP3(MPEG-1 Layer3) decoding Powerful trick mode supported Please DO NOT plug in the main power supply cord until you have finished all the connections. -
Page 6: How To Set Your Hard Disk
How to Set your Hard Disk 1. Two Separated Antenna - Connect two separated antenna cable to each tuner. In that case, works as followings. 1) Watching live channel without recording You can watch all the channels in tuner A and B. 4. -
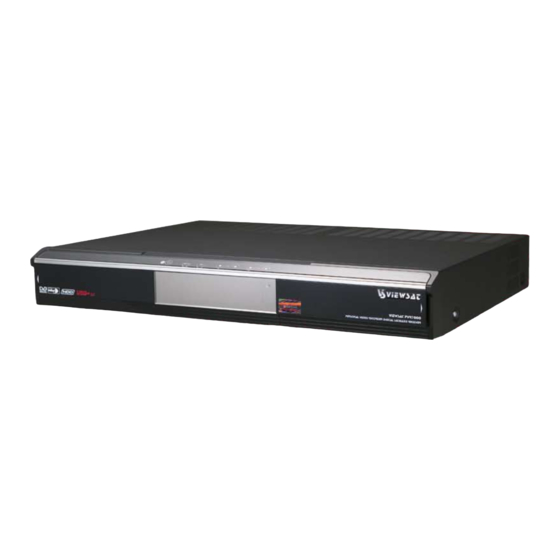
Page 7: Hardware Description
Hardware Description 5. HARDWARE DESCRIPTION 5.B. REAR PANEL 1) DISH IN (A/B) : This port is to connect the coaxial cable from LNB of your Dish. The IF input is provided 5.A. FRONT FANEL through this port and the input frequency range is 950~2150MHz. Also the voltage switching 13V and 18V is passed through this port. -
Page 8: System Set-Up
System Set-up 5.C. REMOTE CONTROL UNIT 6. SYSTEM SET-UP 6.A. Automatic channel search for a satellite You can automatically detect and save all TV and Radio channels of a satellite as follows . System Connection ■ Connect the receiver to all peripheral devices. Power On ■... -
Page 9: Menu Structure
Manu Structure 7. MENU STRUCTURE 6. B. Manual channel search for a transponder You can automatically search and save all TV and Radio channels of a transponder as follows. ■ Select Main Menu/Installation/Channel Scan . Main Menu / Installation/ ■ Select the satellite which you want to search. Channel Scan Antenna Configuration Setting ■... -
Page 10: Menu Operation
Manu Operation 8. MENU OPERATION 8.1.A. CHANNEL LOCK The main menu is classified into several sub menus, which will carry out the Select the Channel lock icon using the left/right keys ( ◀∙▶ various operations individually. Select the channel that you want to lock or unlock from the channel list using the up/down keys ( ▲∙... -
Page 11: Edit Favorites
8.2.B. DELETE FAVORITE CHANNEL 8.1.E. SORT CHANNEL LIST You can choose TV channel list or Radio channel list in an alternative way by pressing the Select the Sort channel list icon using the left/right keys ( ). Press OK key to confirm. ◀∙▶... -
Page 12: Installation
8.3. INSTALLATION LNB Power : Depending on the user’s antenna LNB, you can supply either LNB power by setting ON or not by setting OFF. Normally set this to ON. Installation menu helps you to setup a variety of LNB Type : You can select the LNB type. - Page 13 If you cannot find the desired transponder from the transponder list, you can add it by * 1.3(USALS) only. inputting appropriate parameter values for a new transponder using the key. When you want to change the parameter of an existent transponder, select the parameter : It is the longitude of the selected satellite.
- Page 14 8.3.D. PARENTAL CONTROL 8.3.F. TIME SETTING This function prevents children or unauthorized You can adjust date and time in Time Setting menu. people from watching programs. And you can switch on/off the receiver using this Also you can change PIN code. Select Parental menu.
-
Page 15: System Settings
8.3.H. HARD DISK : If this is On, receiver will beep out the signal status. Signal Beep Information Timeout : You can choose how long information is shown on the screen. : You can choose display mode Auto, 16:9, 4:3 or Letter box. Screen Type This menu helps you to know Hard disk information. -
Page 16: Record Service
8.6. RECORD SERVICE 8.6.C. MP3 FILE LIST Your receiver includes recording service and other additional functions. You can enjoy listening to music in this function. Select MP3 File List menu in Record Service Select Record Service menu in Main Menu, and the following screen will be displayed. menu and the MP3 Player screen on the left will be displayed. - Page 17 8.6.D. PICTURE VIEWER 8.6.F. USB You can see the picture of JPG file format using You can transmit files(mp3, jpg, bmp and AV this function. The maximum image size is files etc.) between receiver and your computer (720*480) pixels that you can use. using this function.
-
Page 18: Additonal Function
Additional Function 9. ADDITIONAL FUNCTION 9.2. CHANNEL LIST 9.1. CHANNEL GUIDE This menu helps you to easily select the channel that you want to watch. Press GUIDE key, and the screen on the left Press OK key, and the screen on the left will be will be displayed. -
Page 19: Zoom Function
9.5. ZOOM FUNCTION You can zoom in screen to use with key, and press the OK key. If you want to move ZOOM zoom box, you can move it using the browse keys ( ). Also, you can change the ◀∙▶... -
Page 20: How To Do Record & Playback
How To Do Record & Playback 10.2.A. Playback Menu 10. HOW TO DO RECORD & PLAYBACK You can see Playback Menu pushing the during playback. In the Playback Menu, You can see Progress Time, 10.1. RECORD Process percentage, function button, Book Mark, There are 3 record ways, Quick Record, in the Channel Guide and in the Record Service Repeat status. -
Page 21: How To Do Reservation Record
How To Do Record & Playback 11. HOW TO DO RESERVATION RECORD 10.2.F. SLOW MOTION There are 2 ways for Reservation Record. One is the way to set the date, time and duration This is for slow motion playback. of the event you want to record in the Record Service menu. The other is the way to set 1) In playback, push key. -
Page 22: Reservation Record In Channel Guide Menu
Applications For Transmission 12. APPLICATIONS FOR TRANSMISSION In the Reservation Table, you can delete the reserved programs selectively or all of them. In case the date and time which you want to do reservation record is doubled with the registered To upload or download MP3, JPEG, CAPTURE Files and Main S/W to or from your date and time of Reservation Table, it can’t be computer, you need to download drivers and programs. -
Page 23: How To Use Transmission Program
After that your computer will install driver in your 12.2. HOW TO USE TRANSMISSION PROGRAM computer. If you finish the installation completely, you can start transmission program. If you can see the message of USB Connected, that means connection complete for starting program. If your connection is not complete, you can see the message of USB Disconnected. -
Page 24: Trouble Shooting
Trouble Shooting Technical Specifications 13. TROUBLE SHOOTING 14. TECHNICAL SPECIFICATIONS Power Supply Problem Solution About the Receiver : SMPS Type : AC 95V~240v 50Hz / 60Hz Input Voltage Does not display LED on the - Connect the power cord to the power outlet : 250V/T2A Fuse Rating front panel or the receiver has no power. - Page 25 Audio Decoder Front System Decoding : MPEG-1 ISO/IEC 11172-3 7 Keys Layer I & II 4 Digits (7 Segments) Display Audio Mode : Mono, Dual, Stereo, Joint Stero Sampling Frequency : 32, 44.1, 48 KHz USB Interface :USB port Audio/Video Output :25M bps ~ 400M bps Data rate Audio Output...
-
Page 26: Programing The Remote Control
Programing The Remote Control 15. PRORAMING THE REMOTE CONTROL... -
Page 28: Warranty Card
Warranty Card 16. WARRANTY CARD...
Need help?
Do you have a question about the PVR7000 and is the answer not in the manual?
Questions and answers