Nautilus Be Strong Commercial R916 Assembly Manual
Commercial series bike
Hide thumbs
Also See for Be Strong Commercial R916:
- Owner's manual (52 pages) ,
- Service manual (68 pages) ,
- Assembly manual (38 pages)

Related Manuals for Nautilus Be Strong Commercial R916


Summary of Contents for Nautilus Be Strong Commercial R916
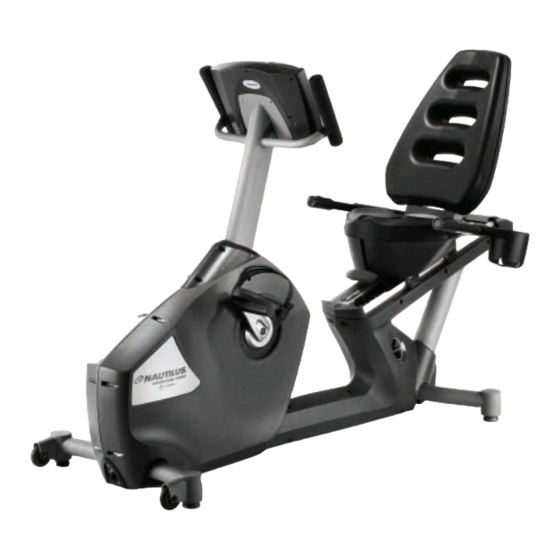
- Page 1 Be Strong. ™ Assembly Manual Commercial Series Bike R916 Model: R916 P/N: 001-6988 Rev C (02/08/07)
- Page 2 Thank you for purchasing the Nautilus® Commercial Series R916 bike. For more than 30 years Nautilus has been producing the world’s finest fitness equipment used in health clubs and homes around the globe. We hope this product exceeds your expectations and is a valuable tool for your facility.
-
Page 3: Table Of Contents
Before You Assemble ....6 Parts List / Box Contents ..... 7 Hardware and Tool List ....8 Assembly Guide ......9 Quick Start Guide ......16 Warranty Information ....17 Contacting Nautilus ...... 18 Nautilus® Commercial Series Bike Assembly Manual... -
Page 4: Product Features
product features C51 CONSOLE REMOTE OPERATION CONTROLS ™ MODEL: R916 SEAT ADJUSTMENT... -
Page 5: Product Specifications
24”w x 67”l x 46”h / 60.96 cm x 170.18 cm x 116.84 Shipping Weight: 231 lbs / 105 kg Net Weight: 180 lbs / 82 kg Self Generating Power Requirements: 9V AC/DC Power Supply (Battery Charger) Nautilus® Commercial Series Bike Assembly Manual... -
Page 6: Before You Assemble
Do not grasp or move the the machine by holding onto the starting the step. computer console. 2. As a general rule, and for all fasteners on your Nautilus ® Commercial Series Bike, turning toward the right Note: will tighten, turning towards the left will loosen. -
Page 7: Parts List / Box Contents
PARTS LIST / BOx CONTENTS REF # DESCRIPTION Console Console Mast Main Frame Seat Pad Handlebar Seat Back Assembly Right Mast Shroud Left Mast Shroud Right Seat Bottom Left Seat Bottom Hardware Pack (not shown) Nautilus® Commercial Series Bike Assembly Manual... -
Page 8: Hardware And Tool List
Hardware and tool list HARDWARE BAG - NOTE: IllusTraTIONs arE NOT TO scalE. The Hardware Bag contains the following individual parts and tools. ref #1 allen Head Bolt M10x25 Qty. 4 ref #9 Flat Washer M8 Qty. 12 ref #2 spring Washer M10 Qty. 4 ref #10 allen Head Bolt M8 x 40 ref #11 allen Head Bolt M8x20 Qty. -
Page 9: Assembly Guide
The following instructions provide direction in assembling the base unit for the Nautilus® Commercial Series Bike model R916. All instructions in the manual are given with the orientation of sitting on the bike facing the console. The console is the front, while the seat is the back. - Page 10 assembly guide Step 2: locate the following for this step: Parts: • right Mast shroud (G) • right Mast shroud (H) Hardware: • ref #4 Phillips Head screw #10-32x3/4” Qty. 6 Tools: • Phillps Head screwdriver Figure 2: 2-1 align right (G) and left (H) Mast shroud on each side of Mast as shown.
- Page 11 NV915 installation manual at this time. If not installing the lcD Monitor, tuck Figure 4: the TV cables (s) into the Mast. 3-4 align the console with the Mast, install and completely tighten the hardware. Nautilus® Commercial Series Bike Assembly Manual...
- Page 12 assembly guide Step 4: locate the following for this step: Figure 5: Parts: • seat back assembly (F) • Handlebar (E) Hardware: • ref #7 allen Head Bolt M8x15 Qty. 4 • ref #8 spring Washer M8 Qty. 4 • ref #9 Flat Washer M8 Qty. 4 Tools: •...
- Page 13 • ref #8 spring Washer M8 Qty. 4 • ref #9 Flat Washer M8 Qty. 4 Tools: • 6mm allen Wrench 5-1 align the seat Pad with the holes in the seat Back assembly. 5-2 Install and completely tighten the hardware. Nautilus® Commercial Series Bike Assembly Manual...
- Page 14 assembly guide Step 6: locate the following for this step: Parts: • seat assembly (from previous step) Hardware: • ref #11 allen Head Bolt M8x20 Qty. 4 • ref #8 spring Washer M8 Qty. 4 • ref #9 Flat Washer M8 Qty. 4 Figure 5: Tools: •...
-
Page 15: Assembly Guide
• ref #12 Phillips Head screw M4x12 Qty. 1 Tools: •Philips Head screwdriver 7-1 align the seat Bottoms with the holes in the underside of the seat. Figure 6: 7-2 Install and completely tighten the hardware. Nautilus® Commercial Series Bike Assembly Manual... -
Page 16: Quick Start Guide
Quick start guide To Start: Press the [QUICK START] key , or select a program key To Stop: Press [STOP] key to pause the workout. Press [STOP] key again to end the workout. During the workout: • After selecting a program, follow the Display prompts and use the numeric keypad to enter information. -
Page 17: Warranty Information
Nautilus Dealer is the responsibility of the purchaser. 3 Years- Mechanical and electrical parts 1. Nautilus will have the option to repair or replace any 1 Year- labor exercise product, which requires service. -
Page 18: Contacting Nautilus
If you need assistance, please have both the serial number of your machine and the date of purchase available when you contact the appropriate Nautilus office listed below. WORLDWIDE CUSTOMER SERVICE INTERNATIONAL CUSTOMER SERVICE • NORTH AMERICA OFFICE •... - Page 19 © 2006 Nautilus, Inc. all rights reserved. Nautilus, the Nautilus logo, My Nautilus, Heart strong, changing the Game in Health and Fitness, rEacT, rOc, remote Operation control, supersoft, Hyperdrive, Be strong are either registered trademarks or trademarks of Nautilus, Inc.
Need help?
Do you have a question about the Be Strong Commercial R916 and is the answer not in the manual?
Questions and answers