Table of Contents
Advertisement
Advertisement
Table of Contents

Subscribe to Our Youtube Channel
Related Manuals for Nautilus NS-4000


Summary of Contents for Nautilus NS-4000
- Page 1 Assembly Instructions NS-4000 Rev. E...
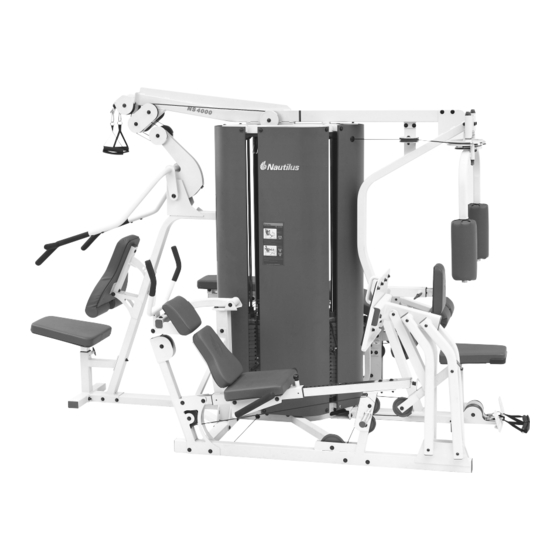
- Page 2 NS-4000...
-
Page 3: Table Of Contents
Gym Components Gym Components Qty. Part # Qty. Part # Main Base 14552 Leg Press Seat Pad Pec Fly Support Upright 14553 AB Crunch Pad 14627 Press Arm Support Upright 14554 Leg Extension Back / Bench 14631 Main Top Frame 14555 Leg Extension Seat Pad 14630... - Page 4 NS-4000...
- Page 5 step Component Step #1 Materials: Pec Fly Roller Pad 2 3/8" Plastic Washer Component Plastic Cap Main Base T Handle Pop Pin Pec Fly Support Upright Low Row Cable Press Arm Support Upright 101a Button Head Screw 1/2" x 4"L Main Top Frame Hex Bolt - 1/2"...
- Page 6 Step #1 Instructions: A. Set the Main Base (1) in a position close to the gym’s final I. Attach the Right Pec Fly Handle (14) to the Pec Fly Mount position. (11) using the hardware shown. Tighten hardware securely making sure that the Pec Fly arm can rotate freely. B.
-
Page 7: Press Arm Main Frame 1
step 1676mm (66") 2 1/4"L 1/4"L 3/4"L 1 1/4"L 3"L 1 1/4"L 5"L 4"L 2 3/4"L 1"L NECESSARY BOLT ORIENTATION Step #2 Materials: A. Attach the Press Arm Base (18) to the Main Base using the hardware shown. Do not tighten hardware. B. - Page 8 step Step #3 Materials: A. Attach the Base Connecting Assembly (37) to the Main Base using the hardware shown. Do not tighten hardware. B. Slide the Leg Press Rear Support (31) on the Leg Press Main Component Base (28) as shown and attach them to the Base Connecting Leg Press Main Base Assembly (37) using the hardware shown.
- Page 9 step 3"L 1"L 1"L 1 1/4"L Step #4 Materials: A. Attach the Leg Press Seat Handle (32) to the Leg Press Seat Glide (30) using the hardware shown. Tighten hardware securely. Component B. Attach the AB Crunch Pad (77) to the AB Crunch Bracket (40) using the hardware shown.
- Page 10 step Step #5 Materials: A. Install all five Leg Press Pivot Shafts (50) into the Left Leg Press Front and Rear Link (42)(44) using the hardware shown, and slide the lower shafts through the holes in the Component Leg Press Main Base. Do not tighten hardware. B.
- Page 11 step Step #6 Materials: A. Attach the Leg Ext. Base Connector (53) and the Leg Ext. Stabilizer (54) to the Main Base using the hardware shown. Do not tighten hardware. Component B. Attach the Leg Ext. Main Frame (51) to the Base Connector Leg Ext.
-
Page 12: Weight Stack Cushion 8
step Step #7 Materials: A. Slide Weight Stack Cushion (67) on two Guide Rods (59) allowing approx. 3" of Guide Rod showing below the Weight Stack Cushion. Insert Guide Rods (59) into the Component holes in the Main Base marked "A". B. - Page 13 step Step #8 Materials: A. Attach the Pec Fly Cable (97) to the Right Pec Fly Handle with the butt end termination shown. B. Remove the nut from the bolt end termination. Route the Component Pec Fly Cable (97) in a figure 8 fashion, and slide the bolt end termination through the slot on the Left Pec Fly Pec Fly Cable 27"L Cable.
-
Page 14: Pulley
281.75" (7155mm) step 2"L 1"L 2"L 3"L 2 3/4"L 1 3/4"L 3"L 2"L Step #9 Materials: A. Place the ring of the Tethered Pop Pin (145) around the center hump of the Top Weight Assembly. B. Thread one end of the Leg Press Cable (99) into the Top Weight Assembly on the stack closest to the Leg Press station. - Page 15 step Step #10 Materials: A. Place the ring of the Tethered Weight Selector Pin (145) around the center hump of the Top Weight Assembly. B. Thread one end of the Leg Ext. Cable (92) into the Top Weight Assembly Component on the stack closest to the Leg Ext/Curl station.
- Page 16 step Step #11 Materials: A. Place the ring of the Tethered Weight Selector Pin (145) around the center hump of the Top Weight Assembly. B. Thread one end of the Pec Fly Cable (93) into the Top Component Weight Assembly on the weight stack closest to the Pec Fly Station.
- Page 17 step 68" (1725mm) 2"L Step #12 Materials: A. Thread one end of the Secondary Cable (96) to the Main Base in the location shown in detail A. Do not tighten locking nut. Component B. Loop the Cable (96) around a 4 1/2" Pulley (90) and attach it to the two Pulley Plates (62) using the hardware Pulley Plate shown.
- Page 18 284.5" (7225mm) step Step #13 Materials: A. Attach the Pulley Bracket (63) to the Main Base in the position shown. Do not tighten locking nut. B. Using the Low Row Cable (95) that was partially installed Component in step 1, loop the Cable (95) over each 4 1/2" Pulley (90) in the Double Floating Pulley Bracket (65) as shown.
- Page 19 277" (7035mm) step 6 1/4"L Step #14 Materials: A. Attach two 4 1/2" Pulleys (90) to the Press Arm Range of Motion using two Pulley Covers (27) and the hardware shown. Tighten hardware securely making sure that the Component lips on the Pulley Covers (27) are located closest to the center tower.
- Page 20 step 127.5" (3240mm) 1676mm (66") 2"L 2 1/4"L Step #15 Materials: A. Place the ring of the Tethered Weight Selector Pin (145) around the center hump of the Top Weight Assembly. B. Thread one end of the Primary Cable (94) into the Top Weight Assembly on the stack closest to the Press Arm station.
-
Page 21: Leg Extension Station Shroud 1
step 3/4"L Step #16 Materials: A. Before attaching the shrouds, make sure that all of the cables have the desired tension and all of the hardware is securely fastened. Component B. Detach the Pec Fly Cable (93) from the Pec Fly Range of Motion, and move the end of the cable back to the 3 1/2"... - Page 22 step NS-4000...
-
Page 23: T Handle Pop Pin -
Gym Components Gym Components Qty. Part # Qty. Part # SUB-ASSEMBLY SUB-ASSEMBLY NOT SHOWN Flat / Incline Bench Supporter 14574 "T" Type Pulley Connector Leg Extension Main Base 14573 1 1/2" Round End Cap 14614 Adjustment Plate 14582 1 1/4" Round End Cap 14612 Round Foot Pad 14617... - Page 24 Sub-Assembly: Leg Extension Pec Fly Seat Pad NS-4000...
- Page 25 Nautilus Fitness Products 800-864-1270 www.Nautilus.com...
Need help?
Do you have a question about the NS-4000 and is the answer not in the manual?
Questions and answers