Table of Contents
Advertisement
User's Guide
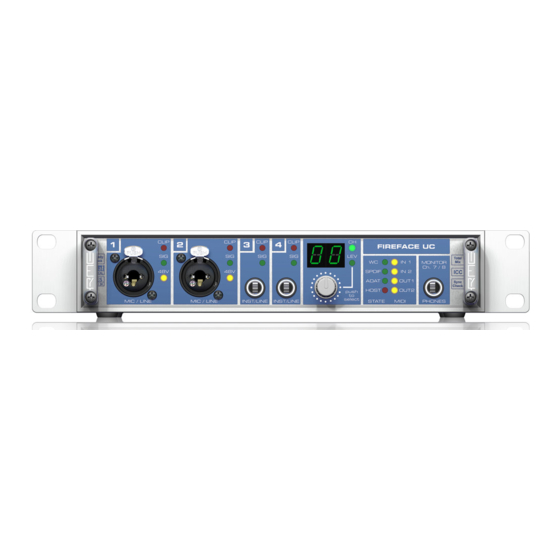
Fireface UC
Portable USB Audio at its best!
™
TotalMix
24 Bit / 192 kHz
™
™
™
SyncAlign
ZLM
SyncCheck
™
SteadyClock
USB 2.0 Digital I/O System
8 + 8 + 2 Channels Analog / ADAT / SPDIF Interface
24 Bit / 192 kHz Digital Audio
36 x 18 Matrix Router
2 x MIDI I/O
Stand-Alone Operation
MIDI Remote Control
Advertisement
Table of Contents
Troubleshooting

Related Manuals for RME Audio Fireface UC


Summary of Contents for RME Audio Fireface UC
- Page 1 User's Guide Fireface UC Portable USB Audio at its best! ™ TotalMix 24 Bit / 192 kHz ™ ™ ™ SyncAlign SyncCheck ™ SteadyClock USB 2.0 Digital I/O System 8 + 8 + 2 Channels Analog / ADAT / SPDIF Interface 24 Bit / 192 kHz Digital Audio 36 x 18 Matrix Router 2 x MIDI I/O...
-
Page 2: Table Of Contents
16.2 Clock Modes - Synchronization ......32 Mac OS X FAQ 17.1 Round about Driver Installation......33 17.2 MIDI doesn't work ..........33 17.3 Repairing Disk Permissions .........33 17.4 Supported Sample Rates........33 17.5 Channel Count under Core Audio......34 17.6 Various Information ..........34 User's Guide Fireface UC © RME... - Page 3 26.7.2 MIDI Page ............ 64 26.7.3 OSC Page............ 65 26.8 Hotkeys and Usage ..........66 26.9 Menu Options............67 The Matrix 27.1 Overview .............. 68 27.2 The User Interface ..........68 27.3 Usage..............68 User's Guide Fireface UC © RME...
- Page 4 31.6 AES/EBU – SPDIF ..........85 31.7 Noise Level in DS / QS Mode ......86 31.8 SteadyClock ............86 Diagrams 32.1 Block Diagram Fireface UC .........87 32.2 Connector Pinouts..........88 Miscellaneous Accessories .............90 Warranty..............90 Appendix ..............91 Declaration of Conformity ........92 User's Guide Fireface UC © RME...
- Page 5 User's Guide Fireface UC General User's Guide Fireface UC © RME...
-
Page 6: Introduction
• SyncCheck tests and reports the synchronization status of input signals • Word clock input and output • 2 x MIDI I/O, 32 channels high-speed MIDI • 1 x Hi-power headphone output • DIGICheck DSP: Level meter in hardware, peak- and RMS calculation User's Guide Fireface UC © RME... -
Page 7: First Usage - Quick Start
The State LEDs (WC, SPDIF, ADAT) indicate a valid input signal separately for each digital input. Additionally, RME's exclusive SyncCheck indicates if one of these inputs is locked, but not synchronous to the others, in which case the LED will flash. See also chapter 9.8/16.2, Clock Modes - Synchronization. -
Page 8: Quick Start
The Fireface UC remembers all settings, and loads these automatically when switched on. With this, the Fireface UC can be used stand-alone after setting it up accordingly, replacing lots of dedicated devices (see chapter 21). User's Guide Fireface UC © RME... -
Page 9: Installation And Operation - Windows
User's Guide Fireface UC Installation and Operation - Windows User's Guide Fireface UC © RME... -
Page 10: Hardware Installation
Win (see above) prior to installing the drivers. Insert the RME Driver CD into your CD-ROM drive, and follow further instructions which appear on your computer screen. The driver files are located in the directory \Fireface_USB on the RME Driver CD. -
Page 11: Driver Update
Settings dialog, and the registration of the ASIO driver. These entries can be re- moved from the registry by a software de-installation request. This request can be found (like all de-installation entries) in Control Panel, Software. Click on the entry 'RME Fireface USB'. 7.4 Firmware Update The Flash Update Tool updates the firmware of the Fireface UC to the latest version. -
Page 12: Configuring The Fireface Uc
(see chapter 13/14). The string Errors does not refer to buffer errors, but USB transmission errors. The display will be reset on any start of a playback/record. More information can be found in chapter 35.3. User's Guide Fireface UC © RME... - Page 13 In Clock Mode the clock reference is shown. See also chapter 31.1. The About tab includes information about the current driver version as well as the current firm- ware version of the Fireface UC. User's Guide Fireface UC © RME...
-
Page 14: Settings Dialog - Pitch
Therefore the internal clock can be set to 44.1 kHz or 48 kHz, but not to a value in be- tween. SteadyClock, RME's sensational Low Jitter Clock System, is based on a Direct Digital Synthesizer (DDS). This superior circuitry can generate nearly any frequency with highest pre- cision. -
Page 15: Settings Dialog - Gain
Basically Timecode can also be used as clock source. However, the calculation of the position information is less precise then. Recommended is a clocking of the Fireface UC with a clock signal (for example Word) directly from the device that sends the Timecode. User's Guide Fireface UC © RME... -
Page 16: Operation And Usage
Therefore the driver of the Fireface UC includes a workaround: the sample rate can be set glob- ally for all WDM devices within the Settings dialog, see chapter 8.1. User's Guide Fireface UC © RME... -
Page 17: Dvd-Playback (Ac-3/Dts)
(tab Sounds, scheme 'No audio'). Note 2: The DVD player will be synced backwards from the Fireface. This means when using AutoSync and/or word clock, the playback speed and pitch follows the incoming clock signal. User's Guide Fireface UC © RME... -
Page 18: Notes On Wdm
(the basic and the interleaved device). Multi-Channel using WDM The WDM Streaming device Loudspeaker (Analog 1+2) of the RME driver can operate as usual stereo device, or as up to 8-channel device. An 8-channel playback using the Windows Media Player requires the speaker setup 7.1 Sur- round. -
Page 19: Channel Count Under Wdm
RME's sophisticated tool DIGICheck is an exception to this rule. It operates like an ASIO host, using a special technique to access playback channels directly. Therefore DIGICheck is able to analyse and display playback data from any software, no matter which format it uses. -
Page 20: Analog Recording
An automated control of real-time monitoring can be achieved by Steinberg’s ASIO protocol with RME’s ASIO drivers and any ASIO 2.0 compatible program. When 'ASIO Direct Monitoring' has been switched on, the input signal is routed in real-time to the output whenever a recording is started (punch-in). -
Page 21: Clock Modes - Synchronization
If the input sample rate is different then there will be no Sync indication. With RME’s AutoSync and SyncCheck, finally anyone can master this common source of error, previously one of the most complex issues in the digital studio world. -
Page 22: Operation Under Asio
Fireface UC ADAT 5 to 6 Fireface UC ADAT 5 to 6 Fireface UC ADAT 5 to 6 Fireface UC ADAT 7 to 8 Fireface UC ADAT 7 to 8 Fireface UC ADAT 7 to 8 User's Guide Fireface UC © RME... -
Page 23: Known Problems
Note: TotalMix is part of the hardware of each Fireface. Up to three mixers are available, but these are separated and can't interchange data. Therefore a global mixer for all units is not possible. User's Guide Fireface UC © RME... -
Page 24: Digicheck Windows
• Completely multi-client. Open as many measurement windows as you like, on any chan- nels and inputs or outputs! To install DIGICheck, go to the \DIGICheck directory on the RME Driver CD and run setup.exe. Follow the instructions prompted on the screen. -
Page 25: Hotline - Troubleshooting
13. Hotline – Troubleshooting 13.1 General The newest information can always be found on our website www.rme-audio.com, section FAQ, Latest Additions. Important: Check that the correct (PC = Windows, AP = Mac) firmware is loaded by a double- click on the rotary encoder. - Page 26 User's Guide Fireface UC © RME...
- Page 27 User's Guide Fireface UC Mac OS X – Installation and Operation User's Guide Fireface UC © RME...
-
Page 28: Hardware Installation
15.1 Driver Installation After the Fireface has been connected, (see 14. Hardware Installation) install the drivers from the RME Driver CD. The driver files are located in the folder Fireface_USB. Installation works automatically by a double-click on the file Fireface USB.pkg. -
Page 29: Driver Update
The Safety BIOS can also be activated manually: Push the rotary encoder button while switch- ing on the unit. This method is also useful to temporarily deactivate a newer firmware. With pressed button the older version of the firmware will be loaded. User's Guide Fireface UC © RME... -
Page 30: Configuring The Fireface
Properties For to select the unit to be configured. On the right of it the current firmware and driver version is shown. User's Guide Fireface UC © RME... - Page 31 Consumer state. Note: The optical input detects the incoming format automatically. SPDIF coax. The coaxial SPDIF output can have the Channel Status Consumer or Professional. For further details please refer to chapter 24.2. User's Guide Fireface UC © RME...
-
Page 32: Clock Modes - Synchronization
In this case, the Clock Source should be set temporarily to SPDIF. RME’s exclusive SyncCheck technology (first implemented in the Hammerfall) enables an easy to use check and display of the current clock status. Input Status indicates whether there is a valid signal (Lock, No Lock) for each input (Word Clock, ADAT, SPDIF and LTC), or if there is a valid and synchronous signal (Sync). -
Page 33: Mac Os X Faq
17. Mac OS X FAQ 17.1 Round about Driver Installation The driver with the file suffix zip provided by RME is a compressed archive. Zip is directly sup- ported by OS X, a double click on the file is all one needs to do. -
Page 34: Channel Count Under Core Audio
1/2, without further delay/latency. Use Speaker Setup to freely configure the playback to all available channels. Even multichan- nel playback (Surround, DVD Player) can be set up this way. User's Guide Fireface UC © RME... -
Page 35: Using More Than One Fireface
• Completely multi-client. Open as many measurement windows as you like, on any chan- nels and inputs or outputs! To install DIGICheck, go to the \DIGICheck directory on the RME Driver CD and run setup.exe. Follow the instructions prompted on the screen. -
Page 36: Hotline - Troubleshooting
20. Hotline – Troubleshooting The newest information can always be found on our website www.rme-audio.com, section FAQ, latest Additions. Important: Check that the correct (PC = Windows, AP = Mac) firmware is loaded by a double- click on the rotary encoder. -
Page 37: Stand-Alone Operation, Connections
User's Guide Fireface UC Stand-Alone Operation and Connections User's Guide Fireface UC © RME... -
Page 38: Stand-Alone Operation
Pushing the knob for more than a second activates the Link (Gang) mode. The display will show off or on. In stereo (on) mode, the display only presents the left channels of a stereo pair (L1, L3, L5...). The gain and volume setting is then valid for both channels. User's Guide Fireface UC © RME... -
Page 39: 8-Channel Ad/Da-Converter
The Matrix in TotalMix enables you to route and link all inputs and outputs completely freely. All the above functionalities are even available simultaneously, can be mixed and combined in many ways. Simply said: the Fireface UC is a perfect analog/digital routing matrix! User's Guide Fireface UC © RME... -
Page 40: Analog Inputs
+4 dBu nominal level. The above levels are also found in our ADI-8 series of AD/DA converters, the Multiface, and even in our Mic-Preamps QuadMic and OctaMic. Therefore all RME devices are fully compati- ble to each other. -
Page 41: Instrument / Line Front
Overall the inputs 3/4 can work with levels from –16 dBu up to +25 dBu. Two LEDs display a present signal (from –65 dBFS on) and warn against overload (-2 dBFS). User's Guide Fireface UC © RME... -
Page 42: Analog Outputs
+2 dBV 12 dB The above levels are also found in our ADI-8 series of AD/DA converters, the Multiface, and even in our Mic-Preamps QuadMic and OctaMic. Therefore all RME devices are fully compati- ble to each other. 23.2 Phones (7/8) Channels 7/8 of the Fireface are available on the front via one 1/4"... -
Page 43: Digital Connections
The ADAT optical input of the Fireface UC is fully compatible with all ADAT optical outputs. RME's unsurpassed Bitclock PLL prevents clicks and drop outs even in extreme varipitch op- eration, and guarantees a fast and low jitter lock to the digital input signal. A usual TOSLINK cable is sufficient for connection. -
Page 44: Midi
However, due to the limited bandwidth of MIDI, this kind of application will often show various problems. Note: The MIDI input LED displays any kind of MIDI activity, including MIDI Clock, MTC and Active Sensing. The latter is sent by most keyboards every 0.3 seconds. User's Guide Fireface UC © RME... -
Page 45: Word Clock
WC LED is lit, and the Settings dialog shows either Lock or Sync (see chapter 35.1). Thanks to RME's Signal Adaptation Circuit, the word clock input still works correctly even with heavily mis-shaped, dc-prone, too small or overshoot-prone signals. Thanks to automatic signal centering, 300 mV (0.3V) input level is sufficient in principle. -
Page 46: Technical Description And Background
22 MHz from a slow word clock of 44.1 kHz is no problem anymore. Additionally, jitter on the input signal is highly rejected, so that even in real world usage the re-gained clock signal is of highest quality. User's Guide Fireface UC © RME... -
Page 47: Cables And Termination
Lock LED, but appears on the monitor, i.e. the user can check immediately whether a valid word clock signal is present and is currently being used. The Input State also displays the frequency of the current word clock signal, measured by the hardware. User's Guide Fireface UC © RME... - Page 48 User's Guide Fireface UC © RME...
-
Page 49: Totalmix Fx
User's Guide Fireface UC TotalMix FX User's Guide Fireface UC © RME... -
Page 50: Totalmix: Routing And Monitoring
TotalMix provides the means to mix and monitor these on a single stereo output. • Mixing of the input signal to the playback signal (complete ASIO Direct Monitoring). RME not only is the pioneer of ADM, but also offers the most complete implementation of the ADM functions. - Page 51 User's Guide Fireface UC © RME...
-
Page 52: The User Interface
Now move the faders up from all sources - input and playback channels - that you want to hear at the submix output. The following chapters explain step by step all functions of the user interface. User's Guide Fireface UC © RME... -
Page 53: The Channel
The arrow symbol at the bottom minimizes the channel width to that of the level meters. An- other click maximizes it again. A mouse click with held Ctrl key causes all channels to the right to enlarge and minimize at once. User's Guide Fireface UC © RME... -
Page 54: Settings
In the View Options / Routing the function Trim Gains can be globally switched on and off for all channels. The global Trim mode is recommended when using TotalMix FX as live mixing desk. User's Guide Fireface UC © RME... - Page 55 Main Out. With this any hardware output can be controlled and listened to through the monitoring output very conveniently. Using the option Assign / Cue to in the Control Room section, Cue can also be used with any of the Phones outputs. User's Guide Fireface UC © RME...
-
Page 56: Section Control Room
AN 1 to 8, SPDIF and AS 1/2, as at 192 kHz the other ADAT channels are not available anymore. The output for the Cue signal, which is usually Main, can also be set to one of the Phones outputs. User's Guide Fireface UC © RME... -
Page 57: The Control Strip
Fader. A Shift-click on a fader adds the fader to the temporary fader group. All faders now marked yellow are ganged, and move simultaneously in a relative way. The temporary fader group is deleted by a click on the F symbol. User's Guide Fireface UC © RME... -
Page 58: View Options
2 Rows. Switches the mixer view to 2 rows. Hardware Inputs and Software Playbacks are placed side by side. This view saves a lot of space, especially in height. O-Names. Display of the original names of channels when they had been renamed by the user. User's Guide Fireface UC © RME... -
Page 59: Snapshots - Groups
Hide Channel in MIDI Remote 1. The selected channels are hidden for MIDI remote (CC and Mackie Protocol). Hide Channel in OSC Remote 1. The selected channels are hidden for OSC remote con- trol. User's Guide Fireface UC © RME... - Page 60 Layout Preset. That makes it very easy to see and to verify which channels are mixed/routed to the current output. Sub makes checking and verifying of mixes, but also the mix editing itself, a lot easier, and maintains perfect overview even with lots of channels. User's Guide Fireface UC © RME...
-
Page 61: Scroll Location Marker
When the TotalMix FX window is intentionally made small in width, so only a few channels are shown. • When some or all EQ or Dynamics panels are open. Then all relevant settings are always visible, but require a lot of space horizontally. User's Guide Fireface UC © RME... -
Page 62: Preferences
UC, overwriting the current ones in the unit. Graphics Use D2D (Change requires restart). Default on. Can be deactivated to use a compatible but CPU-taxing graphics mode, in case graphics problems show up. User's Guide Fireface UC © RME... -
Page 63: Settings
Dim. Amount of attenuation for the Main Out in dB. External Input. Selects the stereo input that replaces the mix signal on the Main Out when activated. The volume of the stereo signal is adjusted by the slider Gain. User's Guide Fireface UC © RME... -
Page 64: Midi Page
TotalMix level meters in the preferences. Note: When MIDI Out is set to NONE then TotalMix FX can still be controlled by Mackie Control MIDI commands, but the 8-channel block is not marked as remote target. User's Guide Fireface UC © RME... -
Page 65: Osc Page
Options Activates Send Peak Level. transmission of the peak level meter data. Peak Hold activates the peak hold function as set up for the TotalMix level meters in the preferences. User's Guide Fireface UC © RME... -
Page 66: Hotkeys And Usage
Copy Submix. Copies the whole submix of the selected output into memory. All input and play- back faders from that routing will be included. Paste Submix. Writes the previously copied submix on to the now selected output. User's Guide Fireface UC © RME... -
Page 67: Menu Options
Reset output volumes. All faders of the third row will be set to 0 dB, Main and Speaker B to -10 dB. Reset channel names. Removes all names assigned by the user. Total Reset. Playback routing 1:1 with mixdown to Main Out. Switches off all other func- tions. User's Guide Fireface UC © RME... -
Page 68: The Matrix
View options, as they don’t make sense here. Instead the button Mono Mode lets you decide whether all the actions per- formed in the Matrix are valid for two channels or just one. User's Guide Fireface UC © RME... -
Page 69: Tips And Tricks
– the Main Out and the other Hardware Output. Even better: the faders of both outputs are still active, so the signal level can be adjusted individually. User's Guide Fireface UC © RME... -
Page 70: Recording A Submix - Loopback
The block diagram shows how the software's input signal is played back, and fed back from the hardware output to the software input. User's Guide Fireface UC © RME... -
Page 71: Ms Processing
Low Cut, Expander, Compressor or Delay. The most basic application is the manipulation of the stereo width: a change of the level of the side channel allows to manipulate the stereo width from mono to stereo up to extended. User's Guide Fireface UC © RME... -
Page 72: Midi Remote Control
Snapshot 1 - 8 select Main Out F10 - F12 select Cue Phones 1 - 3 *Tested with Behringer BCF2000 Firmware v1.07 in Mackie Control emulation for Steinberg mode and with Mackie Control under Mac OS X. User's Guide Fireface UC © RME... -
Page 73: Setup
TotalMix also supports the 9th fader of the Mackie Control. This fader (labelled Master) will con- trol the stereo output fader (lowest row) which is set up as Main Out in the Control Room sec- tion. User's Guide Fireface UC © RME... -
Page 74: Midi Control
16 Controller numbers are used: 102 up to 117 (= hex 66 to 75). With these 16 Controllers (= faders) and 4 MIDI channels each per row, up to 64 faders can be controlled per row (as re- quired by the HDSPe MADI). User's Guide Fireface UC © RME... -
Page 75: Loopback Detection
27.8.3. An OSC implementation chart can be downloaded from the RME website: http://www.rme-audio.de/download/osc_table_totalmix.zip RME offers a free iPad template for the iOS app TouchOSC (by Hexler, available in the Apple App-Store): http://www.rme-audio.de/download/tosc_tm_ipad_template.zip The RME forum hosts further information, more templates (iPhone…) and lots of useful user feedback. -
Page 76: Stand-Alone Midi Control
ARROW DOWN or Assignable2/PAGE- move one row down Master Mute MUTE Ch. 1 – 8 Mute SELECT Ch. 1 – 8 Select REC Ch. 1 – 8 select output bus (current submix) User's Guide Fireface UC © RME... -
Page 77: Technical Reference
User's Guide Fireface UC Technical Reference User's Guide Fireface UC © RME... -
Page 78: Technical Specifications
• Maximum input level XLR, Gain 65 dB: -55 dBu • Maximum input level TRS, Gain +0 dB: +21 dBu • Maximum input level TRS, Gain +65 dB: -44 dBu • CLIP LED: -2 dBFS • SIG LED: -65 dBFS User's Guide Fireface UC © RME... -
Page 79: Midi
• Level range: 1.0 Vpp – 5.6 Vpp • Lock Range: 27 kHz – 200 kHz • Jitter when synced to input signal: < 1 ns • Jitter suppression: > 30 dB (2.4 kHz) User's Guide Fireface UC © RME... -
Page 80: Digital Outputs
• Temperature range: +5° up to +50° Celsius (41° F up to 122°F) • Relative humidity: < 75%, non condensing • Included power supply: Internal switching PSU, 100 - 240 V AC, 2 A, 24 Watts User's Guide Fireface UC © RME... -
Page 81: Technical Background
The same information is presented in the Fireface's Settings dialog. In the status display Input State the state of all clocks is decoded and shown as simple text (No Lock, Lock, Sync). User's Guide Fireface UC © RME... -
Page 82: Latency And Monitoring
31.2 Latency and Monitoring The term Zero Latency Monitoring has been introduced by RME in 1998 for the DIGI96 series of audio cards. It stands for the ability to pass-through the computer's input signal at the inter- face directly to the output. Since then, the idea behind has become one of the most important features of modern hard disk recording. -
Page 83: Usb Audio
Fireface is connected. With multiple devices it can also be checked if they are connected to the same controller. Furthermore this information can be used to operate an external USB drive without disturbing the Fireface UC, by simply connecting the drive to the other controller. User's Guide Fireface UC © RME... -
Page 84: Ds - Double Speed
As the transmission of quad rate signals is done at standard sample rate (Single Speed), the ADAT output still delivers 44.1 kHz or 48 kHz. The SPDIF (AES) output of the Fireface UC provides 192 kHz as Single Wire only. User's Guide Fireface UC © RME... -
Page 85: Aes/Ebu - Spdif
The table shows that a Professional-coded signal would lead to malfunctions for copy prohibi- tion and emphasis, if being read as Consumer-coded data. Nowadays many devices with SPDIF input can handle Professional subcode. Devices with AES3 input almost always accept Consumer SPDIF (passive cable adapter necessary). User's Guide Fireface UC © RME... -
Page 86: Noise Level In Ds / Qs Mode
When limiting the measurement range from 20 Hz to 20 kHz (so called audio bandpass) the value would be -110 dB again. This can be verified with RME's DIGICheck. The function Bit Statistic & Noise measures the noise floor by Limited Bandwidth, ignoring DC and ultrasound. -
Page 87: Diagrams
32. Diagrams 32.1 Block Diagram Fireface UC User's Guide Fireface UC © RME... -
Page 88: Connector Pinouts
TRS plug to TS plugs is required. The pin assignment follows interna- tional standards. The left channel is connected to the tip, the right chan- nel to the ring of the TRS jack/plug. User's Guide Fireface UC © RME... -
Page 89: Miscellaneous
User's Guide Fireface UC Miscellaneous User's Guide Fireface UC © RME... -
Page 90: Accessories
33. Accessories RME offers several optional components for the Fireface UC: Part Number Description Optical cable for SPDIF and ADAT operation: OK0050 Optical cable, TOSLINK, 0.5 m (1.6 ft) OK0100 Optical cable, TOSLINK, 1 m (3.3 ft) OK0200 Optical cable, TOSLINK, 2 m (6.6 ft) OK0300 Optical cable, TOSLINK, 3 m (9.9 ft) -
Page 91: Appendix
Current driver version: W: 1.025, Mac OS X: 1.76, Firmware 116 Although the contents of this User’s Guide have been thoroughly checked for errors, RME can not guarantee that it is correct throughout. RME does not accept responsibility for any mislead- ing or incorrect information within this guide. -
Page 92: Declaration Of Conformity
For this the device has to be sent free to the door to: IMM Elektronik GmbH Leipziger Straße 32 D-09648 Mittweida Germany Shipments not prepaid will be rejected and returned on the original sender's costs. User's Guide Fireface UC © RME...
Need help?
Do you have a question about the Fireface UC and is the answer not in the manual?
Questions and answers