Konica Minolta bizhub 20P Quick Manual
Bizhub 20p quick guide
Hide thumbs
Also See for bizhub 20P:
- Service manual (289 pages) ,
- User manual (161 pages) ,
- Safety information manual (39 pages)
Table of Contents
Advertisement
Quick Links
Quick Guide
Start Here
Before you can use the printer, read this Quick Guide for the correct setup and installation.
IMPORTANT
DO NOT connect the interface cable yet.
1
Unpack the printer and check the components
1
1
2
3
4
5
CD/DVD-ROM
(including User's Guide and
Network User's Guide)
WARNING
Plastic bags are used in the packaging of your printer. To avoid danger of suffocation, please keep
these bags away from babies and children.
Note
• Save all packing materials and the box in case for any reason you must ship your printer.
• The interface cable is not a standard accessory. Buy the appropriate interface cable for the interface you
want to use (USB, Parallel or Network).
USB cable
• Please make sure you use a USB 2.0 interface (Type A/B) cable that is no longer than 6 feet (2.0 meters).
• When you use a USB cable, make sure you connect it to the USB port of your computer and not to a USB port on a
keyboard or non-powered USB hub.
Parallel cable
DO NOT use a parallel interface cable that is longer than 6 feet (2.0 meters).Use a shielded interface cable that is IEEE
1284-compliant.
Network cable
Use a straight-through Category5 (or greater) twisted-pair cable for 10BASE-T or 100BASE-TX Fast Ethernet Network.
8
7
6
9
Safety Information
Quick Guide
Guide
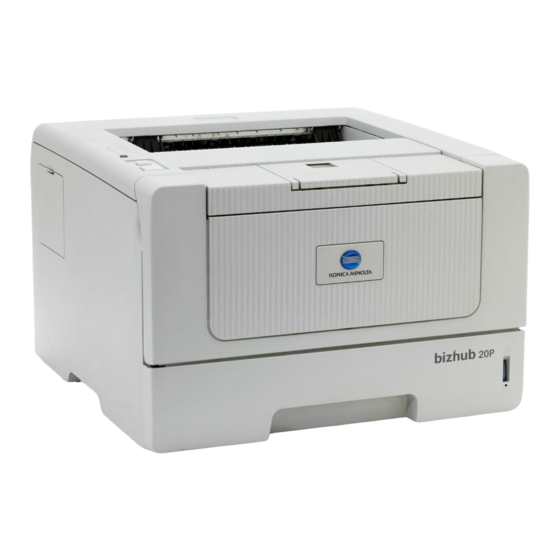
Front Cover Release Button
a
Control Panel
b
Face-down Output Tray
c
Support Flap 1 (Support Flap 1)
Front Cover
d
Paper Tray
e
Power Switch
f
Face-down Output Tray
g
Support Flap 2 (Support Flap 2)
Face-down Output Tray
h
Multi-purpose Tray (MP Tray)
i
Drum Unit and Toner
Cartridge Assembly
AC Power Cord
A32P-9200-01
1
Advertisement
Table of Contents

Related Manuals for Konica Minolta bizhub 20P


Summary of Contents for Konica Minolta bizhub 20P
- Page 1 Quick Guide Start Here Before you can use the printer, read this Quick Guide for the correct setup and installation. IMPORTANT DO NOT connect the interface cable yet. Unpack the printer and check the components Front Cover Release Button Control Panel Face-down Output Tray Support Flap 1 (Support Flap 1) Front Cover...
- Page 2 Note Keep a minimum gap around the printer as shown in the illustration. 100mm(4 in.) 100mm 100mm (4 in.) (4 in.) 130mm (5.12 in.) Symbols used in this guide WARNING WARNINGS tell you what to do to prevent possible personal injury. CAUTION CAUTIONS specify procedures you must follow or avoid to prevent possible minor injuries.
-
Page 3: Install The Drum Unit And Toner Cartridge Assembly
Put the drum unit and toner cartridge assembly Install the drum unit and into the printer until it clicks into place. toner cartridge assembly IMPORTANT DO NOT connect the interface cable yet. Close the front cover of the printer. Remove the packing tape from the outside of the printer. -
Page 4: Load Paper In The Paper Tray
Fan the stack of paper well to avoid paper jams Load paper in the paper and misfeeds. tray Pull the paper tray completely out of the printer. Put paper in the tray, and make sure that the paper is below the maximum paper mark a. The side to be printed on must be face down. -
Page 5: Print A Test Page
After the printer has finished warming up, the Print a test page Status LED stops blinking and stays green. IMPORTANT DO NOT connect the interface cable yet. Make sure that the printer power switch is off. Press Go. The printer prints a test page. Check Connect the AC power cord to the printer. - Page 7 Choose your connection type For USB interface cable ® Windows , go to page 8 Macintosh, go to page 11 For Parallel interface cable ® Windows , go to page 12 For Wired Network ® Windows , go to page 14 Macintosh, go to page 19...
-
Page 8: For Usb Interface Cable Users
IMPORTANT DO NOT connect the USB interface cable yet. Note If the KONICA MINOLTA screen does not appear automatically, go to My Computer (Computer), Note double-click the CD/DVD-ROM icon, and then If the Found New Hardware Wizard appears on double-click start.exe. - Page 9 ® Windows Click USB cable users. When this screen appears, make sure the printer power switch is on. Connect the USB cable to the USB connector marked with a symbol, and then connect the cable to the computer. Click Next. Note ®...
- Page 10 ® Windows Click Finish. Note • If you do not want to set your printer as Default printer, uncheck Set as Default Printer. • If you want to disable the Status Monitor, uncheck Enable Status Monitor. The installation is now Finish complete.
-
Page 11: Install The Driver
Remove the label covering the USB interface connector. The KONICA MINOLTA software will search for the KONICA MINOLTA printer. During this time the following screen will appear. Connect the USB cable to the USB connector marked with a... -
Page 12: For Parallel Interface Cable Users
Choose your language. IMPORTANT DO NOT connect the parallel interface cable yet. Note If the KONICA MINOLTA screen does not appear Note automatically, go to My Computer (Computer), double-click the CD/DVD-ROM icon, and then If the Found New Hardware Wizard appears on double-click start.exe. - Page 13 Parallel ® Windows Click Parallel cable users. Click Finish. Note • If you do not want to set your printer as Default printer, uncheck Set as Default Printer. • If you want to disable the Status Monitor, uncheck Enable Status Monitor. Note ®...
-
Page 14: For Wired Network Interface Cable Users
CD/DVD-ROM drive. The opening screen will printer users appear automatically. Choose your language. TCP/IP TCP/IP Note If the KONICA MINOLTA screen does not appear Router automatically, go to My Computer (Computer), Network printer double-click the CD/DVD-ROM icon, and then Note double-click start.exe. - Page 15 Wired Network ® Windows Click Network cable users. Choose Search the network for devices and choose from a list of discovered devices (Recommended). Or enter your printer's IP Address or its node name. Click Next. Note ® ® • For Windows Vista /Windows 7, when the User Account Control screen appears, click...
- Page 16 Wired Network ® Windows Click Finish. Note • If you do not want to set your printer as Default printer, uncheck Set as Default Printer. • If you want to disable the Status Monitor, uncheck Enable Status Monitor. • If you disabled your Personal Firewall software ®...
-
Page 17: For Shared Network Printer Users
When the Select Components screen appears, check PS (PostScript Emulation) Driver, and then continue following the on-screen instructions. Note If the KONICA MINOLTA screen does not appear automatically, go to My Computer (Computer), double-click the CD/DVD-ROM icon, and then double-click start.exe. - Page 18 Wired Network ® Windows When the License Agreement window Click Finish. appears, click Yes if you agree to the License Note Agreement. • If you do not want to set your printer as Default printer, uncheck Set as Default Printer. •...
- Page 19 CD/DVD-ROM into your CD/DVD-ROM drive. The installation is now Finish complete. Double-click bizhub 20P icon on your desktop. Double-click the Start Here icon. Follow the on-screen instructions. The KONICA MINOLTA software will search for the KONICA MINOLTA printer. During this...
-
Page 20: For Network Users
BRAdmin Light utility (For Windows users) The BRAdmin Light is a utility for initial setup of KONICA MINOLTA network connected devices. It can also search for KONICA MINOLTA products in a TCP/IP environment, view the status and configure basic network settings, such as IP Address. -
Page 21: Bradmin Light Utility (For Mac Os X Users)
BRAdmin Light utility (For Mac OS X users) The BRAdmin Light is a utility for initial setup of KONICA MINOLTA network connected devices. It can also search for KONICA MINOLTA products on your network, view the status and configure basic network settings, such as IP Address from a computer running Mac OS X 10.3.9 or greater. -
Page 22: Web Based Management (Web Browser)
Reset the network settings to the (web browser) factory default The KONICA MINOLTA print server is equipped with To reset all network settings of the print server to its a web server that allows you to monitor its status or factory default, follow the steps below. -
Page 23: Other Information
Other Information Safety precautions To use the printer safely If you DO NOT follow these safety instructions, there is a possibility of a fire, electrical shock, burn or suffocation. Please keep these instructions for later reference and read them before attempting any maintenance. - Page 24 Other Information CAUTION Lightning and power surges can damage this product! We recommend that you use a quality surge protection device on the AC power outlet, or unplug the cords during a lightning storm. After you have just used the printer, some internal parts of the printer will be extremely hot. When you open the front or back cover (back output tray) of the printer, DO NOT touch the shaded parts shown in the illustration.
- Page 25 Phone: 201-825-4000 compliance with the limits for a Class B digital device. declares, that the products Industry Canada Compliance Statement Product name: Laser Printer bizhub 20P (For Canada only) This Class B digital apparatus complies with Model number: Canadian ICES-003.
- Page 26 Program is to promote the development and popularization of energy-efficient office equipment. ® As an ENERGY STAR Partner, KONICA MINOLTA CLASS 1 LASER PRODUCT LASER KLASSE 1 PRODUKT BUSINESS TECHNOLOGIES, INC. has determined PRODUCTO LASER DE CLASE 1 ®...
- Page 27 Other Information EU Directive 2002/96/EC and EN50419 Warning - This printer must be earthed. The wires in the mains lead are coloured in line with the following code: Green and Yellow: Earth Blue: Neutral Brown: Live This equipment is marked with the above recycling symbol.
-
Page 28: Shipment Of The Printer
Other Information Shipment of the printer If for any reason you must ship your printer, carefully Repack the printer. package the printer to avoid any damage during transit. We recommend that you save and use the original packaging. The printer should also be adequately insured with the carrier. -
Page 29: Control Panel
Other Information Control panel Back Cover LED The Back Cover LED indicates when errors occur in the back of the printer. Toner LED The Toner LED indicates when the toner is low or requires replacement. Drum LED The Drum LED indicates when the drum life will end soon, the drum is at the end of its life or the corona wire needs cleaning. -
Page 30: Printer Led Indications
Other Information Printer LED Indications Blinking: OFF: Printer LED Sleep Ready Print data Warming up Receiving data remaining Back Cover Toner Drum Paper Status Green Yellow Dimmed Green Green Yellow Printer LED Replace toner Drum life will Replace drum Drum error Toner low end soon Back Cover... -
Page 31: Options And Consumables
Options and Consumables Options The printer has the following optional accessories. You can expand the capabilities of the printer by adding these items. For more details about the optional Lower Tray Unit and compatible SO-DIMM Memory, visit us at http://konicaminolta.com/. For installing these items, see Chapter 5 of the User's Guide on the CD/DVD-ROM. - Page 32 All other trademarks are the property of their respective owners. Notice KONICA MINOLTA BUSINESS TECHNOLOGIES, INC. reserves the right to make changes to this guide and to the equipment described herein without notice. Considerable effort has been made to ensure that this guide is free of inaccuracies and omissions.
- Page 33 LU8043001 1...
Need help?
Do you have a question about the bizhub 20P and is the answer not in the manual?
Questions and answers