ATEN Altusen SN0108 User Manual
Matrix kvm switch
Hide thumbs
Also See for Altusen SN0108:
- Quick start manual (1 page) ,
- User manual (111 pages) ,
- User manual (98 pages)
Table of Contents
Advertisement
Quick Links
Download this manual
See also:
User Manual
Advertisement
Table of Contents

Related Manuals for ATEN Altusen SN0108


Summary of Contents for ATEN Altusen SN0108
- Page 1 Serial over the NET SN0108 / SN0116 User Manual Enterprise KVM Solutions by ATEN 2004-12-15...
-
Page 2: Fcc Information
FCC Information This is an FCC Class A product. In a domestic environment this product may cause radio interference in which case the user may be required to take adequate measures. This equipment has been tested and found to comply with the limits for a Class A digital device, pursuant to Part 15 of the FCC Rules. -
Page 3: Package Contents
Package Contents The complete SN0108 / SN0116 package consists of: SN0108 or SN0116 RJ-45 (F) to DB-9 (M) Adapter RJ-45 (F) to DB-9 (F) Adapters (SN0108); or 16 RJ-45 (F) to DB-9 (F) Adapters (SN0116) Power Cord Software CD Rack Mount Kit (Brackets and Phillips head hex M3 x 8 screws) Foot Pads User Manual* Quick start guide... -
Page 4: Table Of Contents
Contents Chapter 1 Introduction Overview ....... . . 1 Requirements ....... 2 Features . - Page 5 Chapter 5 Out of Band Operation Direct Terminal Connection (HyperTerminal) ... . . 39 HyperTerminal Setup ......39 Logging In .
-
Page 6: About This Manual
About This Manual This User Manual is provided to help you get the most from your SN0108 / SN0116 system. It covers all aspects of installation, configuration and operation. An overview of the information found in the manual is provided below. -
Page 7: Getting Help
Conventions This manual uses the following conventions: Indicates text that you should key in. Courier Indicates keys you should press. For example, [Enter] means to press the Enter key. If keys need to be chorded, they appear together in the same bracket with a plus sign between them: [Ctrl+Alt]. -
Page 8: Altusen Technical Support
ALTUSEN Technical Support North America Technical Registered ALTUSEN product owners are entitled Phone Support to telephone technical support. Call the ALTUSEN Technical Support Center: 949-453-8885. International Technical 1. Contact your local dealer. Phone Support 2. Call the ALTUSEN Technical Support Center: (886-2) 8692-6959. -
Page 9: Overview
Chapter 1. Introduction Overview The SN0108 / SN0116 Serial over the NET™ is a control unit that provides remote serial access to up to eight (SN0108) or 16 (SN0116) servers or other serial IT devices (hubs, routers, power management devices, etc.), via a TCP/IP connection. -
Page 10: Requirements
The SN0108 / SN0116’s firmware is upgradeable over the Net, so you can stay current with the latest improvements simply by downloading updates from our website. With its advanced features and ease of operation, the SN0108 / SN0116 is the most convenient, most reliable, and most cost effective way to obtain access to your remote, serially connected, IT products. -
Page 11: Features
Features M Complete Remote Serial Management: Remote serial access over the Internet for up to 8 (SN0108) or 16 (SN0116) servers or other serial IT devices M Secure: Multi level secure user login; user authentication; port-specific access rights M Easy Setup: Plugging cables into their ports is all it takes M Network Access: Convenient browser access with an intuitive GUI;... - Page 12 Notes: 2004-12-15...
-
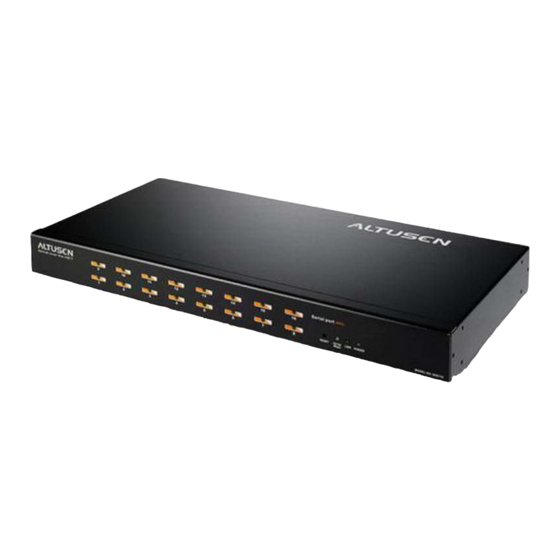
Page 13: Hardware Setup
Chapter 2. Hardware Setup SN0108 / SN0116 Front Panel 2 3 4 5 2 3 4 5 Port LEDs A Port LED lights to indicate the device attached to its corresponding port is online. The LED flashes when data is being transmitted through its corresponding port. Reset Switch Pressing and holding this switch in for less than three seconds performs a system reset. -
Page 14: Sn0108 / Sn0116 Rear Panel
SN0108 / SN0116 Rear Panel Power Socket The power cable from the AC source plugs in here. Power Switch This standard rocker switch powers the SN0108 / SN0116 on and off. LAN Port The Ethernet cable that connects the SN0108 / SN0116 to the Internet plugs in here. -
Page 15: Installation
Installation Before you Begin To prevent damage to your equipment, make sure that all devices on the installation are properly grounded. PC Installation Refer to the Installation Diagram on p. 8 (the numbers in the diagram correspond to the numbers of the steps), as you do the following:PC installation 1. - Page 16 Male Adapter Modem Female Adapter 2004-12-15...
-
Page 17: Sun Fire V100 Server Installation
Sun Fire V100 Server Installation For each Sun Fire V100 server you wish to install, refer to the Installation Diagram on p. 10 (the numbers in the diagram correspond to the numbers of the steps), as you do the following: 1. - Page 18 SunFire V100 Server Male Adapter Female Adapter 2004-12-15...
-
Page 19: Browser Operation
Chapter 3. Browser Operation Logging In SN0108 / SN0116 operation is Internet browser based. To begin: 1. Open your browser and specify the IP address of the SN0108 / SN0116 you want to access in the browser’s URL location bar. Note: 1. -
Page 20: The Sn0108 / Sn0116 Main Screen
The SN0108 / SN0116 Main Screen After you have successfully logged in, the Main Screen appears: M Except for the Logout icon, the icons arranged horizontally across the top are only enabled for the administrator. Administrative functions are explained in Chapter 4. Be sure to click the Logout icon when you end your session. - Page 21 Button Access Function Status Clicking this button brings up the Serial Port Status screen. This is the same screen that displays after a log in. Users can see the status of each of the devices attached to the SN0108 / SN0116’s COM ports.
-
Page 22: Configuration And Control
Configuration and Control Telnet After viewing the status of the devices attached to the SN0108 / SN0116’s ports, if you want to access any of them, click the Telnet button. A screen similar to the one below appears: 1. Select the port you would like to access. Note: You must have permission in order to access a port (see p. - Page 23 3. To access the device connected to the port, click Connect. The SN0108 / SN0116 opens a Telnet session and a screen similar to the one below appears: 4. Log in with your SN0108 / SN0116 Username and Password. A telnet connection to the device is established: 2004-12-15...
- Page 24 5. If you are connected to a computer and want to go to a terminal session or command line to operate it, Press [Enter]. When you have finished with the session, log out, then bring up the Main Menu. Note: Be sure to log out before bringing up the Main Menu, otherwise, another user can access the device without having to log in.
- Page 25 The Main Menu is the text based equivalent of the browser configuration and control functions. The descriptions and explanations for the Browser Operations apply to the submenu functions presented here, as well. Note: 1. As with the browser version, access to many of these submenus are restricted to the administrator or users with configuration permission.
-
Page 26: Administration Chapter
Port Configuration: Since only the administrator and users with port configuration permission can access this function, it is discussed in the Administration chapter (see p. 30). User Manager: For users, clicking the User Manager button brings up a screen that shows their username, port configuration permission status, and the ports they are authorized to control: 2004-12-15... - Page 27 Clicking Edit brings up a dialog box that allows users to change their password and Comments information: M To save any changes, click Update. M To exit without saving any changes, click Back. 2004-12-15...
- Page 28 Notes: 2004-12-15...
-
Page 29: Administration
Chapter 4. Administration Working Environment Configuration The icon bar at the top of the main screen is used by the administrator to configure the SN0108 / SN0116’s working environment. An explanation of each of the configuration functions is given in the sections that follow. General When you click the General icon, the following dialog box appears: 2004-12-15... - Page 30 System Information: The System Information section allows you to provide a name and description for the SN0108 / SN0116 Station. Providing a Station Name and Description informations is optional, but makes it convenient to differentiate the Stations in large, multistation installations. Administrator: This section sets the administrator’s login name and password.
-
Page 31: Network
Network Network Configuration allows you to set up the network parameters for the SN0108 / SN0116: Service Ports: Lets you select the service ports that the SN0108 / SN0116 listens for incoming data on. Unless you have a specific reason for changing them, we recommend you leave the default settings as they are. - Page 32 To have the Station obtain its IP address automatically from a DHCP server: 1. Put a check in the Obtain an IP address automatically [DHCP] checkbox. 2. Enable the Enable report from the following SMTP server checkbox, and key in the IP address of your SMTP server. 3.
-
Page 33: Radius
RADIUS If you are using a RADIUS server, RADIUS Configuration allows you to set up its parameters: 1. Check Enable RADIUS. 2. Fill in the IP addresses and Service Ports for the Primary and Alternate RADIUS servers. 3. Key the Shared Secret character string that you want to use for authentication between the SN0108 / SN0116 and the RADIUS Server in this field. -
Page 34: Oobc
OOBC OOBC (Out of Band Configuration), provides the ability to access the SN0108 / SN0116 via a serial connection. This can either be a direct serial connection from a local computer, or a dial in connection via modem. When you click the OOBC icon, the following dialog box appears: 1. -
Page 35: Date / Time
Date / Time The Date / Time function allows you to set the SN0108 / SN0116’s date and time. When you click the Date / Time icon, the following dialog box appears: The date and time that the SN0108 / SN0116 is currently set to appear in the upper section. -
Page 36: Firmware
Firmware The Firmware Upgrade function provides a smooth, automated process for upgrading the SN0108 / SN0116’s firmware. New firmware upgrade packages are posted on our web site as they become available. Check the site regularly to find the latest packages. Preparation: 1. -
Page 37: Logout
3. Click the Browse button; navigate to the upgrade file on your computer, and select it. 4. Click Upload to perform the upgrade. Note: 1. If you enable Check Firmware Version, the upgrade function compares the station’s firmware level with that of the upgrade files. -
Page 38: Device Management Configuration
Device Management Configuration The buttons in the bar along the left side of the SN0108 / SN0116 web page are used to manage and access the devices connected to the SN0108 / SN0116’s COM ports. The Browser Operation chapter discussed the functions available to ordinary Users. - Page 39 Property Settings: To set up the serial communications parameters for a port, select it, then click the Property Settings button at the bottom of the page: M Each port on the SN0108 / SN0116 has a port ID number (COM1 - COM8, or COM1 - COM16).
- Page 40 Alert Settings: The Port Alert Settings dialog box provides a way for you to be informed via email about problems that may occur on the devices connected to the SN0108 / SN0116’s ports. When a device has a problem - such as a critical error that requires a reboot - debug messages can be sent through its COM port.
-
Page 41: User Management
1. Use the Alert String fields to specify the alerts you want to receive. 2. Enable the Enable report to the following address checkbox, and key in the IP address of your SMTP server. 3. If your server requires authentication, put a check in the My server requires authentication checkbox. - Page 42 M To delete a user account, select it and click Delete. M To add a user account, click Add. A dialog box similar to the one below appears: 1. Key in a Username and Password for the new user (up to 16 characters each). 2.
- Page 43 M To Edit a user account: 1. Select it in the User Manager dialog box, then click Edit. A dialog box similar to the one below appears: 2. Make your changes in the appropriate fields and checkboxes. 3. To save your changes, click Update. 4.
-
Page 44: Session Info
Session Info Clicking the Session Info button brings up the Active Sessions display: This display lets the administrator see at a glance all the users currently logged into the SN0108 / SN0116, and provides information about each of their sessions. It also gives the administrator the option of forcing a user logout by selecting the user and clicking End Session. -
Page 45: Log
Clicking the Log button brings up the Event Log dialog box: The SN0108 / SN0116 maintains a log file of the events that take place on it. This dialog box allows you to select the range of events you wish to view: M Choose Today then click OK to see a listing of only today’s events. - Page 46 Once you make a choice and click OK an Event Log List, similar to the one below, appears: When you have finished viewing the event list: M If you want to return to the Event Log dialog box, click Back. M If you want to erase the contents of the entire log file, click Clear All.
-
Page 47: Out Of Band Operation
Chapter 5. Out of Band Operation In case the goes down, or the SN0108 / SN0116 cannot be accessed with the usual browser based method for some other reason, the SN0108 / SN0116 can be reached via several additional methods, described in the sections below: Direct Terminal Connection (HyperTerminal) HyperTerminal Setup 1. - Page 48 Key a name to describe the connection in the Name field (we chose Com1Test); select an icon to represent the connection; then click OK. A dialog box similar to the one below comes up: 3. For the Connect using: field, select Direct to COM1 (assuming you are using COM1 on your PC), then click OK.
- Page 49 4. For OOBC connections, the SN0108 / SN0116’s serial port settings and the computer’s COM port settings must be the same. Change the settings in your dialog box (if necessary), so that they match the SN0108 / SN0116’s Console Port settings (see Port Configuration, p. 30, for details), then click OK. Note: The SN0108 / SN0116’s default settings are 9600 bps;...
-
Page 50: Logging In
7. Change the settings (if necessary), so that they match the settings shown in the diagram, then click OK. 8. Close the HyperTerminal Window. When Windows asks if you want to disconnect, click Yes. When Windows asks if you want to save the session, click Yes. -
Page 51: Indirect Terminal Connection (Hyperterminal)
Indirect Terminal Connection (HyperTerminal) This method uses HyperTerminal to phone into the SN0108 / SN0116 from a remote location. Connection Setup 1. Set up your hardware configuration to match the diagram, below: SN0108 / SN0116 Ethernet Cable Serial Modem Cable Phone Line RJ45 to DB9 Male Adapter... -
Page 52: Final Check
This completes the HyperTerminal setup. For Windows NT, 2000, XP and Windows Server 2003 systems, a HyperTerminal icon that connects you to the SN0108 / SN0116 is created on the desktop. For Windows 98 and ME, you must access HyperTerminal from the Windows Start Menu. Final Check To make sure that the modem and COM port are correctly installed: 1. -
Page 53: Logging In
Logging In 1. Double click the HyperTerminal icon on your desktop. 2. In the VT100 terminal window, key in: atdt [modem telephone number] [Enter] The terminal responds with: CONNECT115200 3. Wait at least 60 seconds, then key in: [Ctrl+D] 4. Key in your Username and Password to bring up the SN0108 / SN0116’s Main Menu. -
Page 54: Direct Dial In Connection (Ppp)
Direct Dial In Connection (PPP) This type of connection works directly through the COM port. Connection Setup 1. Use Ethernet cable and an RJ45 to DB9 female adapter to connect one of the SN0108 / SN0116’s serial ports to a COM port on a PC (see Steps 1 and 2 of the Installation section and the installation diagram - pp. - Page 55 4. In the Modem Properties dialog box that comes up change the dialog box settings (if necessary), so that the COM port is correct, then click OK. 5. Click the Connection tab to see the connection setup page: 6. Change your settings (if necessary), so that they match the settings shown in the figure above then click Advanced..
- Page 56 7. In the Advanced Connection Settings dialog box enable Use flow control; select Hardware (RTS/CTS); then click OK to return to the Connection page. 8. Click OK (at the bottom of the Connection page; then click Next. The following dialog box appears: 9.
-
Page 57: Finishing Up
Finishing Up The SN0108 / SN0116’s serial port settings and the computer’s COM port settings must be the same. Change the SN0108 / SN0116’s settings for the port you are connecting the computer to (see Port Configuration, p. 30), so that they match the ones you just set in the dialog boxes (as shown in the table below): Parameter... -
Page 58: Indirect Dial In Connection (Ppp)
Indirect Dial In Connection (PPP) This method uses a modem connection to phone into the SN0108 / SN0116 from a remote location. Connection Setup 1. Set up your hardware configuration to match the diagram, below: SN0108 / SN0116 Ethernet Cable Serial Modem Cable Phone Line RJ45 to DB9 Male... -
Page 59: Final Check
Final Check To make sure that the modem and COM port are correctly installed, follow the procedures described under Final Check on p. 44. Logging In 1. Double click the icon you created in the Dial-up Network folder. 2. Key in your Username and Password; click Connect and wait for the Authentication procedure to complete (be patient, it may take a few moments). -
Page 60: Telnet Access
Telnet Access Logging In 1. On your computer, open a terminal (command line) session. 2. At the prompt, key in the SN0108 / SN0116’s IP Address in the following way: telnet [IP Address] Note: The default telnet port is 23. If that port is already being used, up to 16 additional users can log in by adding a port number (from 5000 to 5015) to the login command. -
Page 61: Ssh Access
SSH Access With a Terminal Session (Linux): 1. Open a terminal (command line) on your computer. 2. At the prompt, key in your SN0108 / SN0116 Username and the SN0108 / SN0116’s IP Address in the following way: SSH [username@IP Address] Note: The default SSH port is 22. -
Page 62: With A Third Party Utility (Windows)
With a Third Party Utility (Windows): SSH sessions can be implemented under Windows with the use of third party utility software, such as PuTTY, a free implementation of Telnet and SSH for the Win32 and Unix platforms. To make an SSH connection with PuTTY, do the following: 1. -
Page 63: Appendix
Appendix Specifications Function SN0108 SN0116 Serial To Devices 8 x RJ-45 16 x RJ-45 Connectors Uplink 1 x RJ-45 Power Socket 1 x 3 Pronged Receptacle LEDs Link [LAN] 1 x Green 10/100 1 x Orange/Green Mbps Power 1 x Blue RS-232 Port 8 x Green 16 x Green Switches... -
Page 64: Administrator Login Failure
Administrator Login Failure If you are unable to perform an Administrator login (because the Username and Password information has become corrupted, or you have forgotten it, for example), you can clear the login information with the following procedure: 1. Power off the SN0108 / SN0116 and remove its housing. 2. -
Page 65: Ip Address Determination
IP Address Determination If you are an administrator logging in for the first time, you need to access the SN0108 / SN0116 in order to give it an IP address that users can connect to. There are three methods to choose from. In each case, your computer must be on the same network segment as the SN0108 / SN0116.After you have connected and logged in you can give the SN0108 / SN0116 its fixed network address in the Network Settings dialog box (see p. - Page 66 4. Select either Obtain an IP address automatically (DHCP), or Specify an IP address. If you chose the latter, fill the IP Address, Subnet Mask, and Gateway fields with the information appropriate to your network. 5. Click Set IP. 6. After the IP address shows up in the Device List, click Exit to end the program.
- Page 67 Method 3: A fixed IP address can also be assigned with the ARP command as follows: 1. Turn off the power to the SN0108 / SN0116. 2. Enter the following command: arp -s <ip address> <SN0108 / SN0116’s MAC address> Where the IP address that you assign is one suitable for the network segment that the SN0108 / SN0116 resides on.
-
Page 68: Stacking And Mounting
Stacking and Mounting The SN0108 / SN0116 can be placed on the desktop or it can be rack mounted, as described in the sections that follow. Stacking To place the PN9108 / PN9108U on the desktop stick the self-adhesive footpads that came with your package to the unit’s bottom panel at the four corners. -
Page 69: Rj45 To Db9 Pin Assignments
RJ45 to DB9 Pin Assignments DCE Connection Signal RJ45 DTE Connection Signal RJ45 6 + 1 7 + 8 Note: The RJ45 to male DB9 adapter supplied with this package is configured for DCE; the RJ45 to female DB9 adapter is configured for DTE. -
Page 70: Troubleshooting
Troubleshooting Problem Solution After I shut the SN0108 / The SN0108 / SN0116’s battery needs to be SN0116 off and then turn it replaced. Open the housing and replace the back on, the Time and Date battery. Settings are lost. Limited Warranty IN NO EVENT SHALL THE DIRECT VENDOR’S LIABILITY EXCEED THE PRICE PAID FOR THE PRODUCT FROM THE DIRECT, INDIRECT, SPECIAL, INCIDENTAL OR CON-... - Page 71 Index G - H Administration ....21 General settings ....21 Date and time ....27 HyperTerminal .
- Page 72 Front panel....5 Rear panel ....6 Port configuration... . . 30 Specifications.
Need help?
Do you have a question about the Altusen SN0108 and is the answer not in the manual?
Questions and answers