ATEN CS1764 User Manual
Usb dvi kvmp switch
Hide thumbs
Also See for CS1764:
- User manual (44 pages) ,
- User manual (35 pages) ,
- User manual (44 pages)
Table of Contents
Advertisement
Quick Links
Advertisement
Table of Contents

Related Manuals for ATEN CS1764


Summary of Contents for ATEN CS1764
- Page 1 USB DVI KVMP Switch CS1762 / CS1764 User Manual www.aten.com...
-
Page 2: Fcc Information
CS1762 / CS1764 User Manual FCC Information FEDERAL COMMUNICATIONS COMMISSION INTERFERENCE STATEMENT: This equipment has been tested and found to comply with the limits for a Class A digital device, pursuant to Part 15 of the FCC Rules. These limits are designed to provide reasonable protection against harmful interference when the equipment is operated in a commercial environment. -
Page 3: User Information
CS1762 / CS1764 User Manual User Information Online Registration Be sure to register your product at our online support center: International http://eservice.aten.com Telephone Support For telephone support, call this number: International 886-2-8692-6959 China 86-400-810-0-810 Japan 81-3-5615-5811 Korea 82-2-467-6789 North America... -
Page 4: Package Contents
© Copyright 2020 ATEN® International Co., Ltd. Manual Part No. PAPE-0231-300G Manual Date: 2020-10-07 ATEN and the ATEN logo are registered trademarks of ATEN International Co., Ltd. All rights reserved. All other brand names and trademarks are the registered property of their respective owners. -
Page 5: Table Of Contents
CS1762 / CS1764 Front View ....... 4 CS1762 / CS1764 Rear View ....... . 5 Hardware Setup Cable Connections . - Page 6 CS1762 / CS1764 User Manual Mac Keyboard..........21 Sun Keyboard .
-
Page 7: About This Manual
It covers all aspects of installation, configuration and operation. An overview of the information found in the manual is provided below. Chapter 1, Introduction, introduces you to the CS1762 / CS1764 system. Its purpose, features and benefits are presented, and its front and back panel components are described. -
Page 8: Conventions
For information about all ATEN products and how they can help you connect without limits, visit ATEN on the Web or contact an ATEN Authorized Reseller. Visit ATEN on the Web for a list of locations and telephone numbers: International http://www.aten.com... -
Page 9: Introduction
KVM (Keyboard, Video, Mouse) switch functionality by combining a 2 port (CS1762) or 4 port (CS1764) KVM switch with a 2 port USB hub at the same time as it provides an interface for a digital monitor (DVI). -
Page 10: Features
CS1762 / CS1764 User Manual There is no better way to save time and money than with a CS1762 / CS1764 installation. Since a single console manages all of the computers, the CS1762 / CS1764 setup: eliminates the expense of having to purchase separate console components for each computer;... -
Page 11: Hardware Requirements
Either two (CS1762), or four (CS1764) cable sets are provided with this package. Note: The quality of the display is affected by the quality and length of the cables. -
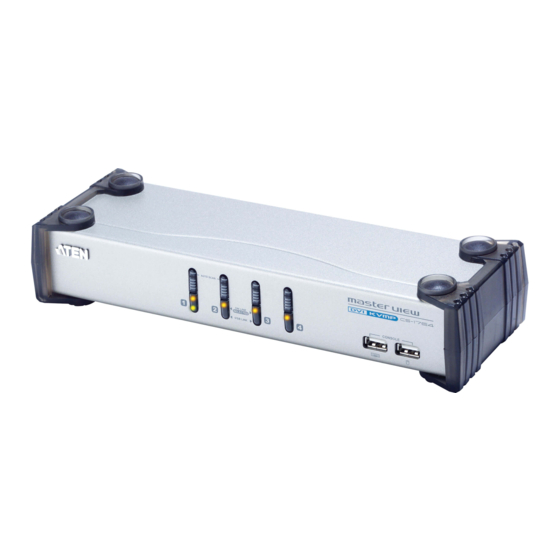
Page 12: Components
CS1762 / CS1764 User Manual Components CS1762 / CS1764 Front View 1&2 1&2 Component Description Port Selection Press a switch for longer than two seconds to bring the KVM, USB Pushbuttons hub, and audio focus to the computer attached to its corresponding port. -
Page 13: Cs1762 / Cs1764 Rear View
Firmware The Firmware Upgrade Cable that transfers the firmware upgrade Upgrade Port data from the administrator’s computer to the CS1762 / CS1764 plugs into this connector. See p. 21 for firmware upgrading details. USB Hub USB peripherals (printers, scanners, etc.) can plug into these ports. - Page 14 CS1762 / CS1764 User Manual This Page Intentionally Left Blank...
-
Page 15: Hardware Setup
Keyboard Power On function. Cable Connections To set up your CS1762 / CS1764 USB DVI KVMP Switch installation, refer to the installation diagram on the following pages (the numbers in the diagrams correspond to the steps, below), and do the following: 1. - Page 16 CS1762 / CS1764 User Manual...
-
Page 17: Basic Operation
Hot Plugging The CS1762 / CS1764 supports USB hot plugging – components can be removed and added back into the installation by unplugging their cables from the USB hub ports without the need to shut the unit down. -
Page 18: Powering Off And Restarting
Each CPU port section on the CS1762 / CS1764 switch is assigned a port number (1 or 2 for the CS1762; 1 to 4 for the CS1764). The port numbers are marked on the rear panel of the switch (see page 5 for details). -
Page 19: Hotkey Operation
Chapter 4 Hotkey Operation The CS1762 / CS1764 provides an extensive, easy-to-use, hotkey function that makes it convenient to control and configure your KVM installation from the keyboard. Hotkeys provide asynchronous (independent) switching of the KVM, USB hub, and audio focus. Therefore, you can give one computer the KVM focus, another the USB hub focus, while a third has the audio focus. -
Page 20: Going Directly To A Port
CS1762 / CS1764 User Manual Going Directly to a Port Hotkey Action [Scroll Lock] [Scroll Lock] Brings the KVM, USB, and audio focus to the computer [n] [Enter] attached to the port corresponding to the specified Port Note that the KVM, USB, and audio focus all go to this port even if they were on different ports to begin with. -
Page 21: Hotkey Setting Mode
See the table below for details. Note: 1. The n stands for the number of seconds that the CS1762 / CS1764 should dwell on a port before moving on to the next. Replace the n with a number between 1 and 99 when entering this hotkey combination. - Page 22 CS1762 / CS1764 User Manual When HSM is active, the Caps Lock, and Scroll Lock LEDs flash in succession to indicate that HSM is in effect. They stop flashing and revert to normal status when you exit HSM. Ordinary keyboard and mouse functions are suspended – only Hotkey compliant keystrokes and mouse clicks (described in the sections that follow), can be input.
-
Page 23: Alternate Port Switching Keys
4. Hotkey Operation Alternate HSM Invocation Keys An alternate set of HSM invocation keys is provided in case the default set conflicts with programs running on the computers. To switch to the alternate HSM invocation set, do the following: 1. Invoke HSM (page 13) 2. - Page 24 CS1762 / CS1764 User Manual Keyboard Operating Platform The CS1762 / CS1764’s default port configuration is for a PC compatible keyboard operating platform. If your console uses a PC compatible keyboard and you have a Mac attached to a port, for example, you can change the port’s keyboard operating platform configuration so that the PC compatible keyboard emulates the Mac keyboard.
-
Page 25: Usb Reset
4. Hotkey Operation List Hotkey Settings To see a listing of the current hotkey settings, do the following: 1. Invoke HSM (see page 13 for details). 2. Press and release the F4 function key. 3. Open a text editor or word processor and use its Paste function to display the settings. -
Page 26: Restore Default Settings
Note: To exit Firmware Upgrade Mode, you must power off the switch. Restore Default Settings To reset the CS1762 / CS1764 to its default hotkey settings, do the following: 1. Invoke HSM (see page 13 for details). 2. Press [R] [Enter]. - Page 27 4. Hotkey Operation HSM Summary Table After invoking HSM (see page 13), key in one of the following keys to perform the corresponding function: Function Toggles between the default and alternate HSM invocation keys. Toggles between the default and alternate Port Switching keys.
- Page 28 CS1762 / CS1764 User Manual This Page Intentionally Left Blank...
-
Page 29: Keyboard Emulation
Chapter 5 Keyboard Emulation Mac Keyboard The PC compatible (101/104 key) keyboard can emulate the functions of the Mac keyboard. The emulation mappings are listed in the table below. PC Keyboard Mac Keyboard [Shift] Shift [Ctrl] Ctrl [Ctrl] [1] [Ctrl] [2] [Ctrl] [3] [Ctrl] [4] [Alt]... -
Page 30: Sun Keyboard
CS1762 / CS1764 User Manual Sun Keyboard The PC compatible (101/104 key) keyboard can emulate the functions of the Sun keyboard when the Control key [Ctrl] is used in conjunction with other keys. The corresponding functions are shown in the table below. -
Page 31: The Firmware Upgrade Utility
1. From a computer that is not part of your KVM installation go to our Internet support site and choose the model name that relates to your device (CS1762 or CS1764) to get a list of available Firmware Upgrade Packages. -
Page 32: Starting The Upgrade
CS1762 / CS1764 User Manual 4. Shut down the computers on your CS1762 / CS1764 installation. 5. Invoke Firmware Upgrade Mode (see page 18). The front panel LEDs flash together to indicate Firmware Upgrade Mode is in effect. Starting the Upgrade To upgrade your firmware: 1. - Page 33 6. The Firmware Upgrade Utility 3. Click Next. The Firmware Upgrade Utility main screen appears: The Utility inspects your installation. All the devices capable of being upgraded by the package are listed in the Device List panel. 4. As you select a device in the list, its description appears in the Device Description panel.
- Page 34 CS1762 / CS1764 User Manual 5. After you have made your device selection(s), Click Next to perform the upgrade. If you enabled Check Firmware Version, the Utility compares the device’s firmware level with that of the upgrade files. If it finds that the device’s...
-
Page 35: Upgrade Succeeded
6. The Firmware Upgrade Utility Upgrade Succeeded After the upgrade has completed, a screen appears to inform you that the procedure was successful: Click Finish to close the Firmware Upgrade Utility. After a successful completion, the switches exit Firmware Upgrade Mode, and reset themselves. - Page 36 CS1762 / CS1764 User Manual This Page Intentionally Left Blank...
-
Page 37: Appendix
Appendix Safety Instructions Read all of these instructions. Save them for future reference. Follow all warnings and instructions marked on the device. Do not place the device on any unstable surface (cart, stand, table, etc.). If the device falls, serious damage will result. ... - Page 38 CS1762 / CS1764 User Manual The power cord or plug has become damaged or frayed. Liquid has been spilled into the device. The device has been exposed to rain or water. The device has been dropped, or the cabinet has been damaged.
-
Page 39: Technical Support
Online Technical Support http://support.aten.com Support Troubleshooting http://www.aten.com Documentation Software Updates Telephone Support 886-2-8692-6959 North America Email Support ATEN TECH support@aten-usa.com ATEN NJ sales@aten.com Online Technical Support ATEN TECH http://www.aten-usa.com/support Support ATEN NJ http://support.aten.com Troubleshooting ATEN TECH http://www.aten-usa.com Documentation ATEN NJ http://www.aten.com... -
Page 40: Specifications
CS1762 / CS1764 User Manual Specifications Function CS1762 CS1764 Computer Connections Port Selection Front Panel Pushbuttons; Hotkey Console Keyboard 1 x USB Type A Connectors Mouse 1 x USB Type A Video 1 x DVI-I F Speakers 1 x Mini Stereo Jack F (Green) -
Page 41: Troubleshooting
Appendix Troubleshooting Operation problems can be due to a variety of causes. The first step in solving them is to make sure that all cables are securely attached and seated completely in their sockets. In addition, updating the product’s firmware may solve problems that have been discovered and resolved since the prior version was released. -
Page 42: Hotkey Default Settings
CS1762 / CS1764 User Manual Hotkey Default Settings The hotkey factory default settings are as follows: Setting Default Port Switching [Scroll Lock] [Scroll Lock] Invoking HSM [Number Lock] [-] Auto Scan Interval 5 Seconds Beeper Keyboard Operating PC Compatible Platform... -
Page 43: About Sphd Connectors
Appendix About SPHD Connectors This product uses SPHD connectors for its KVM and/or Console ports. We have specifically modified the shape of these connectors so that only KVM cables that we have designed to work with this product can be connected. -
Page 44: Limited Warranty
What is covered by the Limited Hardware Warranty ATEN will provide a repair service, without charge, during the Warranty Period. If a product is detective, ATEN will, at its discretion, have the option to (1) repair said product with new or repaired components, or (2) replace the entire product with an identical product or with a similar product which fulfills the same function as the defective product.
Need help?
Do you have a question about the CS1764 and is the answer not in the manual?
Questions and answers