Table of Contents
Advertisement
Quick Links
Advertisement
Table of Contents

Related Manuals for Outlaw 950 7.1


Summary of Contents for Outlaw 950 7.1
- Page 1 Model 950 7.1 Channel Preamp/Processor Owner’s Manual ® Version 1.2.6...
-
Page 2: Please Read First
Owner’s Manual Warnings Please Read First CAUTION: To reduce the risk of electric shock, do not remove the cover. No user service- able parts inside. Refer to qualified personnel. WARNING: To reduce the risk of fire or electric shock, do not expose this appliance to rain or moisture. -
Page 3: Installation Location
When installing an outside antenna, extreme care should be taken to avoid touching power lines, circuits or other power sources as this could be fatal. Because of the hazards involved, antenna installation should be left to a professional. Model 950 7.1 Channel Preamp/Processor Owner’s Manual Precautions... -
Page 4: Table Of Contents
Owner’s Manual Table of Contents Table of Contents Please Read First Model 950 Features Unpacking Accessories Model 950 Front Panel Model 950 Rear Panel Front Panel and On Screen Display (OSD) 10 Remote Control 12 Surround Format Information Dolby Digital Dolby Digital Surround EX Dolby Pro Logic II DTS-ES... -
Page 5: Model 950 Features
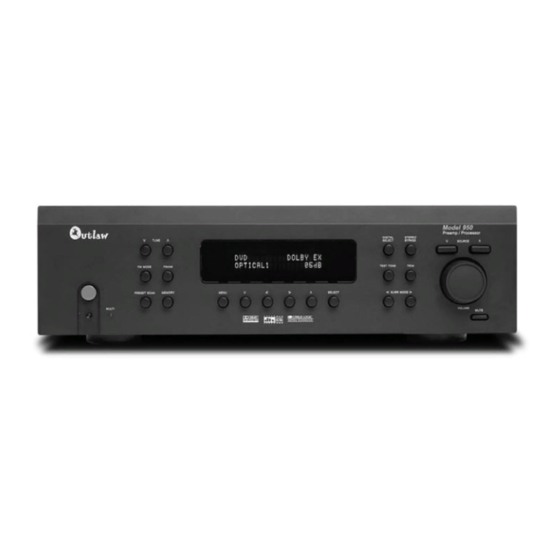
**Manufactured under license from Digital Theater Systems, Inc. US Pat. No.5,451,942 and other worldwide patents issues and pending. “Dolby,” “Pro Logic” and the double-D symbol are trademarks of Dolby Laboratories. ©1992-1997 Dolby Laboratories, Inc. All rights reserved. “DTS” and “DTS Digital Surround” are trademarks of Digital Theater Systems, Inc. - Page 6 Owner’s Manual Model 950 Front Panel Complete Multiroom System When properly connected, a second source may be sent to a remote room, complete with remote volume control, source selection and tuner control. A trigger for the second zone allows a second amplifier to turn on and off independently of the main room.
-
Page 7: Navigation Buttons
Pressing the button again returns the unit to the previous volume setting. The STANDBY/MUTE indicator goes out. Owner’s Manual Model 950 Front Panel DIGITAL STEREO SELECT BYPASS SOURCE TEST TONE TRIM SURR MODE VOLUME MUTE Model 950 7.1 Channel Preamp/Processor... - Page 8 Owner’s Manual Model 950 Rear Panel Model 950 Rear Panel � � � � � � � ��������� ����� �� ��� ������� � ����� ������� ������� ���������� ���������� ��� ������� ������� ���� ���� ���� ���� Ω ���� �� ��������������� ����� �����...
-
Page 9: Front Panel And On Screen Display (Osd)
The information presented on the front panel is identical to that shown on your TV monitor, allowing you to perform speaker settings, set up your input sources, set the listening modes, and much more. Model 950 7.1 Channel Preamp/Processor Owner’s Manual... -
Page 10: Remote Control
Owner’s Manual Remote Control Model 950 Remote Control ����� ��� ���������������� ��� ���� ��� �� ��� �� �� ��� �� ��� ��� ����� ������� ����� ���� ��� ���� ����� ����� � ��� � � � � ���� � ���� ���� ����... - Page 11 Once the FRONT PANEL DISPLAY begins to flash Memory 01, enter the desired preset number using the numeric keypad on the remote. 26 Light Illuminates the Remote Control buttons for 7 seconds. Model 950 7.1 Channel Preamp/Processor Owner’s Manual Remote Control...
-
Page 12: Dolby Pro Logic Ii
Dolby Digital Surround EX ® . Within This processing mode is a joint development of Dolby Laboratories and the THX division of LucasFilm, Ltd. Film soundtracks encoded with Dolby Digital Surround EX technology contain an extra channel, added to the soundtrack during mixing, called Surround Back, which places audio behind the listener ®... -
Page 13: Dts Neo:6
Always consult the owner’s manual that came with the component you are connecting for more information on the source component’s connections. Model 950 7.1 Channel Preamp/Processor Owner’s Manual Connecting Your Model 950... - Page 14 Owner’s Manual Connecting Your Model 950 Connecting Audio Equipment to the Model 950 � � � � � � � � ��������� ����� �� ��� ������� � ����� ������� ������� ���������� ���������� ��� ������� ������� ���� ���� ���� ���� Ω ����...
-
Page 15: Dvd Player
���� �������������������������� ��������������������������������������� ���������������������������� �������������������������� ��������������������������� ������������������������������ �������������������������������������������������������������������������������� ����� ���������������������������� ����������������������������������������������������������������������������������� ����������������������������� �������������������� ���������������������������������������������������������������������������� ������ �� ��� ������ ������������ ������������������������� ����� ������������� ����������������� ������������������������� NOTE:�� �������������������������� ������������������������ �������������������������� ����������������� ����������������������� ���������������������� ��������������������� ���������������������������� ����������������������� ����������������������� Model 950 7.1 Channel Preamp/Processor... - Page 16 Owner’s Manual Connecting Your Model 950 Connecting an External Amplifier to the Model 950 � � � � � ��������� ����� �� ��� � ����� ������� ������� ���������� ���������� ��� ������� ���� ���� ���� ���� ���� Ω �� ��������������� ����� �����...
-
Page 17: Stereo Amplifier
Connecting Your Model 950 ���������� Model 950 ���������������� ���������������� ������� ���������������������� ����������� �������������������������� ����������������������������� ���� �������������������������� ��������������������������������������� ���������������������������� �������������������������� ��������������������������� ������������������������������ �������������������������������������������������������������������������������� ���������������������������� ����������������������������������������������������������������������������������� ����������������������������� �������������������� ���������������������������������������������������������������������������� �� ��� ������������ ������������������������� ����� ����������������� ������������������������� ����������� Model 950 7.1 Channel Preamp/Processor... - Page 18 ������� ���������� ���������� ��� ������� ���� ���� ���� ���� Ω ���� �� ��������������� ����� ����� ��� ������� Owner’s Manual � Connecting Your Model 950 � Connection Record Chart ��� ������� ������ ������ ��������� ��������� ����� ����� ��������� ��������� ������� ������� ���������...
-
Page 19: Connecting Audio Components
Outlaw’s ICBM-1 between the player and the Model 950. Model 950 7.1 Channel Preamp/Processor Owner’s Manual Connecting Your Model 950... -
Page 20: Video Recorder
Owner’s Manual Connecting Your Model 950 Video Recorder A video recording device such as a VCR, PVR (such as a TiVo mateTV ® , DishPlayer ® or similar device) or DVD recorder can be connected to the Model 950 using the following methods. Connect the composite video output from the recording device to Composite the VCR IN composite video jack on the rear of the preamp/processor. -
Page 21: Am Antenna
AC outlet. Doing so may cause an electric shock. Always connect power by plugging into the AC out- let last and disconnect by unplugging from the AC outlet first. Model 950 7.1 Channel Preamp/Processor Owner’s Manual Connecting Your Model 950... -
Page 22: System Setup
Owner’s Manual System Setup System Setup At this point you should have made all the necessary physical connections between the Model 950 and your source equipment, amplifiers and speakers. All that remains is to properly configure the system to reflect your specific equipment and room characteristics. -
Page 23: Input Setup And Selection
Dolby Digital process. Compression makes the loud parts softer and the soft parts louder to reduce the difference between the two. Owner’s Manual System Setup P L 7 S T E R E O DDOLBY EX Model 950 7.1 Channel Preamp/Processor... -
Page 24: Speaker Configuration
Owner’s Manual System Setup One type of compression is most useful for situations such as late night viewing of programs with a wide dynamic range (like many action movies) that might disturb others in your home. This function can also be used to provide compression for program material that may require enhancement of overall intelligibility (such as some older soundtracks). - Page 25 ����������������� ��������������������� ���������� ����� �������� ���� �������� ���� �������������������������������� ������������������������������ ��������������������������� ������ ��������� ������������������������������� �������������������������������� ������������������������������������ ������������°��������������������� Owner’s Manual System Setup ���������� ������������� ����� ������������������ ���������������� ��������������������� ����������������������� �������������� ��������� ������ �������� ����� �������� ���� Model 950 7.1 Channel Preamp/Processor...
- Page 26 Owner’s Manual System Setup The first step in configuring the 950 to operate with your speaker system is to set the type, number and crossover frequencies of your particular loudspeakers. You make these selections using the Speaker Configuration menu shown below. Figure 2 SPEAKER CONFIG >...
-
Page 27: Channel Calibration
3. Press the TEST TONE button on the front panel or the TEST button on the remote control again to exit the Test Tone function. LEFT FRONT Owner’s Manual System Setup button to select the Return to Main Menu Model 950 7.1 Channel Preamp/Processor... -
Page 28: System Configuration
Owner’s Manual System Setup System Configuration The System Configuration menu is used to enter Speaker Distances (for proper sound delay), set Display parameters, operate the Sleep Timer, and turn Theater Compensation on or off. The Display, Sleep Timer and Theater Compensation settings are covered in the section titled “Operation.”... -
Page 29: Multi-Zone
Return to Main Menu option. 12. Press the SELECT or MENU button to return to the Main Menu, or press the MENU button twice to exit. Model 950 7.1 Channel Preamp/Processor Owner’s Manual System Setup MULTI-ZONE... -
Page 30: Operation
Owner’s Manual Operation Operation Now that you have completed the initial setup and configuration of the Model 950, it is simple to operate and enjoy. Reading the following section will help you get the maximum pleasure from your new equipment. Make sure the unit is plugged in and the Main Power switch on the rear panel of the 950 is in the On position, as outlined in the “System Setup”... -
Page 31: Data Format Options
Front Panel Display and OSD. An example is shown below: BYPASS ANALOG 00dB 2. Press the button again to return the signal path to the digital system. Model 950 7.1 Channel Preamp/Processor Owner’s Manual Operation... -
Page 32: Tuner Operation
Owner’s Manual Operation Tuner Operation The Model 950 Tuner can receive AM, FM and FM stereo broadcasts. Up to 32 stations can be preset and accessed from the front panel or remote. Stations can also be tuned manually. NOTE: Tuner reception cannot take place unless an appropriate AM and/or FM antenna is connected to the rear panel of the 950 as described on page 20. -
Page 33: Recording A Source
Return to Main Menu option. 7. Press the SELECT or MENU button to return to the Main Menu, or press the MENU button twice to exit. Model 950 7.1 Channel Preamp/Processor Owner’s Manual Operation LEFT FRONT... -
Page 34: Theater Compensation
Owner’s Manual Operation To adjust channel trim using the TRIM function: 1. Press the TRIM button on the front panel or the remote control. The Front Panel Display and the OSD will show the following: CHANNEL TRIM LEFT FRONT 2. Use the < and > buttons to adjust the channel trim level. You can adjust the selected channel level in 1dB steps across a range of -15dB to +10dB. -
Page 35: Setting The Front Panel Display Brightness
Front Panel Display. button until System Configuration is selected. SYSTEM CONFIG appears on the Front Panel Display. button until the Sleep Time Set menu is selected. button twice to exit the DOLBY D Model 950 7.1 Channel Preamp/Processor Owner’s Manual Operation... -
Page 36: Multizone Operation
Owner’s Manual Operation Multi-zone Operation The 950 allows you to send a stereo signal to a remote second zone. This signal must be amplified by an optional external power amplifier and sent into speakers in the remote zone. You can choose to feed any analog stereo source connected to the inputs of the 950 to the second zone and you can independently control its volume, regardless of what source has been chosen to play on the main system. -
Page 37: Remote Control Setup And Operation
10 seconds to indicate that the remote control is ready to be programmed. The following steps must be entered while they are lit. If the lights go out, simply press the Source and MUTE but- ton again to re-enter the setup code. Model 950 7.1 Channel Preamp/Processor Owner’s Manual... - Page 38 Owner’s Manual Remote Control Setup and Operation 4. Point the remote control toward the device that was turned on in Step 1 and press in the first three-digit setup code number for that device using the number buttons (0-9) on the remote control. The LED and selected Source button will blink and then stay lit after you enter a setup code.
-
Page 39: Operation
The stored sequence is now erased from the Macro button. Note: Any previously stored commands on a Memory Button will be erased when new commands are stored on the same Memory Button. Model 950 7.1 Channel Preamp/Processor Owner’s Manual... -
Page 40: Example Of Programming A Macro Sequence
Owner’s Manual Remote Control Setup and Operation Example of Programming a Macro Sequence: To program the M1 button in the AUD mode to turn on the Audio receiver, turn on the TV and turn on the VCR. 1. Press AUD and MUTE buttons simultaneously. The red LED and the AUD button remain lit. -
Page 41: Setup Codes
ONWA OPTONICA 019 081 PANASONIC 034 056 080 164 PHILCO 001 003 024 056 059 060 063 064 127 143 164 004 PHILIPS 164 093 038 005 001 003 004 059 Model 950 7.1 Channel Preamp/Processor Owner’s Manual Setup Codes... - Page 42 Owner’s Manual Setup Codes TV (continued) Manufacturer/Brand Setup Code Number PIONEER 025 135 004 018 023 176 PORTLAND 004 143 PROSCAN 144 160 161 167 PROTON 171 173 004 143 QUASAR 034 056 RADIO SHACK 004 019 127 143 160 161 065 156 144 001 004 023 024 056 074 REALISTIC 007 019 RUNCO...
- Page 43 TOSHIBA VIETA YAMAHA ZENITH 074 057 Manufacturer/Brand Setup Code Number DENON GOLDSTAR KENWOOD MAGNAVOX OPTIMUS PANASONIC PHILIPS PIONEER 020 034 REALISTIC SAMSUNG 023 029 SHARP 025 028 SONY TECHNICS TOSHIBA YAMAHA Model 950 7.1 Channel Preamp/Processor Owner’s Manual Setup Codes...
-
Page 44: Care And Maintenance
Owner’s Manual Care and Maintenance Manufacturer/Brand Setup Code Number ADCOM AIWA 187 170 089 AKAI AUDIO TECHNICA CARVER 167 041 135 138 139 050 203 DENON 205 226 FISHER 047 033 208 046 136 163 004 KENWOOD 007 055 023 137 016 MARANTZ 044 041 MONDIAL... -
Page 45: System Reset
Check interconnects to the amplifier and connections from the amplifier to the speakers Check surround mode to make certain it provides output to all speakers Check Speaker Config menu to make certain all speakers are set to Small or Large Model 950 7.1 Channel Preamp/Processor Owner’s Manual Troubleshooting... -
Page 46: Model 950 Specifications
Owner’s Manual Specifications Model 950 Specifications Preamplifier Analog Section Input Impedance 26KΩ Output Impedance (Main-RCA) <600Ω Rated Input 2.0Vrms Maximum Input 3.0Vrms Rated Output (100kΩ load) 1.5Vrms Minimum Load 5kΩ Maximum Output 6.3Vrms Volume Range Main -80dB to +10.0 dB (1dB resolution) Zone -80dB to +10.0 dB (1dB resolution) Bass Management... -
Page 48: Outlaw Audio Limited Warranty
Outlaw Audio Limited Warranty This warranty protects the owner of the Outlaw Model 950 Preamp/ Processor (the PRODUCT) for five (5) years from the date of purchase. This warranty covers all defects in material and workmanship with the following specific exceptions. These are: •...
Need help?
Do you have a question about the 950 7.1 and is the answer not in the manual?
Questions and answers