Table of Contents
Advertisement
Advertisement
Table of Contents

Related Manuals for Outlaw 990


Summary of Contents for Outlaw 990
- Page 1 Model 990 7.1 Channel Preamp/Processor Owner’s Manual Version 1.0...
-
Page 2: Please Read First
(including amplifiers) that produce heat. IMPORTANT SAFETY NOTE Before connecting a new component such as the Model 990 to your audio or home theater system it is always good practice to make certain that all components are turned off, and preferably unplugged from their AC power source. -
Page 3: Installation Location
990. Should the power cord require replacement, use an identical type, or contact Outlaw Audio for service. -
Page 4: Table Of Contents
Serial Number Date of Purchase The contents of this manual are Copyright © 2005 by Outlaw Audio, LLC, and may not be duplicated or reproduced by any means, whether physical, electronic or otherwise without prior written consent from Outlaw Audio. -
Page 5: Model 990 Features
It contains everything you need to know to connect, configure and use your new preamp/processor. You’ll learn how to make your Model 990 work with all of the other components in your system, and how to adjust its settings for the best possible performance. -
Page 6: Unpacking
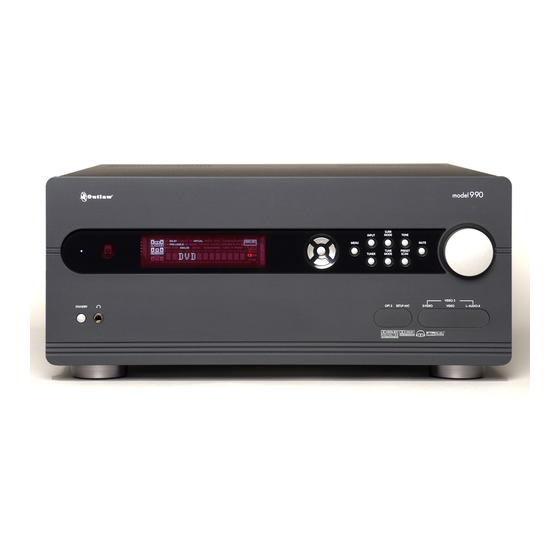
Two Low-Voltage Triggers One trigger turns on and off whenever the Model 990 does; this trigger is useful for automatic on/off of compatible power amplifiers (including all Outlaw models). A separate trigger can be assigned to activate or deacti-... - Page 7 This can be used for video game or camcorder hookup, and also works with most digital cameras. Stereo analog audio inputs (see page TK) These are particularly useful for video game systems, camcorders, and portable music players. Owner’s Manual Model 990 Front Panel Model 990 7.1 Channel Preamp/Processor...
-
Page 8: Model 990 Rear Panel
RS-232 port (see page 23) This connector can be used either for control of the Model 990 by a touch- screen, such as an AMX or Crestron, or for uploading new software into the Model 990. - Page 9 Connect an external infrared sensor to these inputs. This configuration allows remote control of the Model 990 even if it is installed in a cabinet with solid doors. It also allows control of the Model 990 from a second room.
-
Page 10: Front Panel And Onscreen Display (Osd)
OSD using the COMPONENT VIDEO OUTPUT, but the picture may blank temporarily when you activate the menu system. If both S-Video and composite video signals are input into the Model 990, the OSD can be viewed only through the S-VIDEO OUTPUT jack. - Page 11 Indicates when the remote control is in Programming or Learning mode and flashes to indicate success or failure of these functions. POWER button (see pages 34, 42) Turns off the Model 990. Also turns other components controlled by the remote on and off. MENU button (see pages 23-33) Activates the Model 990’s on-screen menu.
-
Page 12: Zone 2 Remote
990’s Zone 2 audio/video output. You will need to install an infrared sensor in Zone 2, connected to one of the Model 990’s IR inputs, in order for this remote to function, as it has different remote codes than the main room remote. For that reason, it cannot be used with the Model 990’s built-in sensor. -
Page 13: Dts
DTS-ES is an extension of the original DTS format that adds an additional back surround channel to to a soundtrack. DTS ES-Matrix titles provide the sixth channel by a matrix process, while DTS ES-Discrete media delivers a true, Model 990 7.1 Channel Preamp/Processor Owner’s Manual... -
Page 14: Dts Neo:6
To help you with this task, we have provided a chart (page 19) to record which components are connected to the Model 990, as well as which type of input (analog, coaxial, S-Video, etc.) is used. Keep this chart for future reference. - Page 15 Owner’s Manual Connecting Your Model 990 Connecting Audio Equipment to the Model 990 Model 990 7.1 Channel Preamp/Processor ���� ������ ������� ����������� ��� ������ ��� ��� ������ ���� � �� � �� ������� L R � ������ ������� ������...
- Page 16 Optical connection, but not both. For Coaxial connections, use either COAX 1 or 2. Likewise, Optical connections 1-4 are interchangeable. You will configure the Model 990 later to use the specific input you have chosen. See ”Connecting your Model 990” for more information.
- Page 17 Owner’s Manual Connecting Your Model 990 Connecting an External Amplifier to the Model 990 ������� ���� ����� ������ �������� ��������� �������� ��������� ���� ���� NOTE:�� � ������������������������������� ����������������������� ���������������������������� �������� ��������� Model 990 7.1 Channel Preamp/Processor...
- Page 18 Owner’s Manual Connecting Your Model 990 Connecting the Model 990 to Audio/Video Equipment in a Second Zone ����������� ������������������ NOTE:�� ��������������������������������� ��������� ������� �������������������������������� ������������������������� ���������� ���������������� � � ������� Outlaw Audio...
- Page 19 ������� ������ ��������� ����� ��������� ������� ����������� ����������� ������������� ����� ����� ����� ������ ��������� ��������� ��������� ��������� ��������� ��������� ��������� ��� ����� ���������� � � ���������� � � ������ ������ ����� ��������� ������� ��������� ��� Model 990 7.1 Channel Preamp/Processor...
-
Page 20: Connecting Video Components
Connect the L and R audio outputs on the recorder (usually marked Analog PLAY) to the TAPE IN jacks on the rear of the Model 990 and connect the L and R audio inputs (usually marked REC) to the RECORD OUT/TAPE jacks of the Model 990. -
Page 21: Video Display Connections
DVD-Audio or SACD playback, connect the six outputs from your player to the 7.1 AUDIO IN jack set on the rear panel of the Model 990. Use the L, R, CEN, SUB, SL, and SR jacks; ignore the jacks labeled SBL and SBR. (These are intended to accommodate 7.1-channel audio technology if it appears in... -
Page 22: Antenna Connections
Connect the supplied AM antenna to the push terminals labeled AM LOOP on the rear panel of the Model 990. Start by pressing in the lever on the bottom of one of the terminals. Next, insert one of the antenna wires. Release the level and repeat the process with the other lever and the other wire. -
Page 23: Power Connection
AC outlet first. Input Configuration Your first step in setting up the Model 990 is to configure its inputs. In this step, you will tell the Model 990 which signals you are feeding it from each source device. -
Page 24: Renaming Video Inputs
Audio Input Selection Now you need to tell the Model 990 which audio input is used for the source device you are configuring. You may want to reference the system chart you filled out when you connected your source devices to the Model 990. -
Page 25: On-Screen Message On/Off
(or the stations they receive) seem to cause lip sync problems more than do DVD players. The Model 990 lets you delay the audio to fix this problem. It also lets you set a different lip sync delay for each input, in increments of one millisecond. -
Page 26: Speaker Configuration
Owner’s Manual Speaker Configuration Once you are finished configuring the inputs, it is time to configure the Model 990 for your particular loudspeaker system. You can perform this task automatically or manually, but before proceeding, please read the following information carefully. - Page 27 ����������������� ��������������������� ���������� ����� �������� ���� �������� ���� �������������������������������� ������������������������������ ��������������������������� ������ ��������� ������������������������������� �������������������������������� ������������������������������������ ������������°��������������������� Owner’s Manual Speaker Configuration ���������� ������������� ����� ������������������ ���������������� ��������������������� ����������������������� �������������� ��������� ������ �������� ����� �������� ���� Model 990 7.1 Channel Preamp/Processor...
-
Page 28: Automatic Setup
:-4 dB RETURN TO MAIN MENU If the setup microphone is not plugged in, your amplifier is not turned on or connected to the Model 990, or no front speakers are connected to the amplifier, an error screen appears: Outlaw Audio AUTO SETUP >... - Page 29 Subwoofer Crossover Adjustment To optimize the bass performance and power handling of your speaker system, you must tell the Model 990 what subwoofer crossover points to use for the front left/right, center, side surround, and back surround speakers (assuming you have not already gone through auto setup).
- Page 30 RETURN TO MAIN MENU, then press SET. You have now completed basic manual setup of the Model 990. You may now configure surround modes, multi-room operation, and system preferences—all of which we will take you through in the following pages.
-
Page 31: Surround Configuration
Surround Configuration The Model 990’s Surround Configuration menu lets you fine-tune some of the unit’s surround-sound modes and processes. To enter the Surround Configuration menu: 1. Press the MENU button on the front panel or the remote to display the Main Menu. -
Page 32: Channel Subwoofer Offset
There is no “by the book” or “proper” way to set this control; you simply adjust it to your taste. Play some music you like, set the Model 990 for stereo playback, and adjust the Subwoofer Offset until it sounds good to you. -
Page 33: Front-Panel Display Time Out
SET. Or simply hit the MENU button to return to your program. Default Volume Setting You can adjust the volume setting that appears when you turn on the Model 990. The volume can come on at either the last setting you were using when you turned the Model 990 off, or at a default setting of your choosing. -
Page 34: Operation
Now that you have completed the initial setup and configuration of the Model 990, you will find it easy to operate. Read the following section to learn the basics of operating the Model 990, as well as a few tips and tricks that will enhance your enjoyment of your home theater system. -
Page 35: Channel Trim
You can trim the channels while you are listening to a source, or you can trim the channels using the Model 990’s internal test tone. The trim range is +15 dB to –15 dB. To adjust channel level while listening to a source: 1. -
Page 36: Recording A Source
(or the stations they receive) seem to cause lip sync problems more than do DVD players. The Model 990 lets you delay the audio to fix this problem. It also lets you set a different lip sync delay for each input, in increments of one millisecond. -
Page 37: Using The Am/Fm Tuner
(01 to 30) for that station. Using Headphones The Model 990’s front headphone jack allows you to listen in private without disturbing others nearby. Thanks to the Model 990’s Dolby Headphone processing, you can enjoy a realistic surround-sound effect even when using headphones. - Page 38 Owner’s Manual 2. Play any audio or audio/video source, such as a CD player, a DVD player, or the AM/FM tuner. Turn the volume down so it is just loud enough to hear. This will prevent Outlaw Audio...
-
Page 39: Multi-Zone Operation
Model 990. You can also control volume of the main zone and the second zone individually. The second zone can operate even when the Model 990 is turned off in the main zone. A separate Zone 2 remote control is provided for use in the second zone. -
Page 40: Using Multi-Zone Capability From The Second Zone
Programming is accomplished by simply punch- ing in a four-digit code number that matches your equipment. In addition to the Model 990 itself, the remote control can operate up to seven other audio and video devices in your home entertainment system. They are... -
Page 41: Setup Using Preprogrammed Codes
The TNR button is used exclusively for control of the Model 990. To program the remote to control another device, you must enter a four-digit code. Codes for a wide variety of devices and brands are provided in the following pages. -
Page 42: Volume Control Punch-Through
Owner’s Manual Remote Control Setup and Operation Checking the Codes If you have set up the Model 990 remote by searching for the codes, for future reference, you may wish to find out which four-digit code is operating your equipment. -
Page 43: Setup Codes
Wards 0053, 0157 Yamaha 0036, 0888 DVD PLAYERS Manufacturer/Brand Setup Code Number Apex 0672 Denon 0490 Fisher 0670 0522 Gradiente 0651 Hitachi 0573, 0664 Hiteker 0672 0623, 0558 Kenwood 0682, 0534 Model 990 7.1 Channel Preamp/Processor Owner’s Manual Setup Codes... - Page 44 Philips 1076, 1142, 0722, 0724, 0749 Proscan 0392 0506, 0392, 0143, 0855 Radio Shack 0869 Samsung 1109 Star Choice 0869 Zenith 0856 Outlaw Audio TELEVISIONS Manufacturer/Brand Setup Code Number 0019, 0030 Admiral 0093, 0463 Aiko 0092 Aiwa 0701 Akai 0030...
- Page 45 Inteq 0017 0054 0000 KEC0 0180 0180, 0030 Kenwood 0030, 0019 Konka 0707, 0632, 0628, 0638, 0703 0056 0154, 0047, 0054, 0156, 0178 Logik 0016 Inteq Inteq Inteq Inteq InteqInteq — Model 990 7.1 Channel Preamp/Processor Owner’s Manual Setup Codes...
- Page 46 0240 Bell & Howell 0104 Broksonic 0121, 0184, 0002, 0209, 0479 0072, 0278 Calix 0037 Canon 0035 Carver 0081 Outlaw Audio Citizen 0278, 0037 Colt 0072 Craig 0037, 0072, 0047, 0240 Curtis Mathes 0035, 0060, 0162 Cybernex 0240 Daewoo 0278, 0045...
- Page 47 White Westinghouse 0072, 0278, 0209 XR-1000 0072, 0000, 0035 Yamaha 0038 Zenith 0039, 0000, 0033, 0209, 0479 VIDEO ACCESSORIES Manufacturer/Brand Setup Code Number Panasonic 1120 Pioneer 1010 Sensory Science 1126 Sharp 1010 Model 990 7.1 Channel Preamp/Processor Owner’s Manual Setup Codes...
-
Page 48: Care And Maintenance
MAIN POWER button on the rear panel of the Model 990. This will prevent the automatic turn on circuits from accidentally turning the system on during your absence. -
Page 49: Model 990 Specifications
17.38 inches / 441.5 mm Height 7.75 inches / 196.9 mm Depth 17.75 inches / 450.9 mm Weight 28 lbs. / 12.7 kg Trigger Outputs 1, 2 (User Assignable) Sequential Delay 50 mA @ 12 VDC Model 990 7.1 Channel Preamp/Processor Owner’s Manual Specifications... -
Page 52: Outlaw Audio Limited Warranty
Outlaw Audio shall not be liable for, in any way responsible for, any inci- dental or consequential damages of any kind. Some states do not allow limitations on how long an implied warranty lasts and/or do not allow the exclusion of incidental or consequential damages;...
Need help?
Do you have a question about the 990 and is the answer not in the manual?
Questions and answers