Table of Contents
Advertisement
Advertisement
Table of Contents

Related Manuals for Outlaw 975


Summary of Contents for Outlaw 975
-
Page 2: Please Read First
The unit should not be placed in a built-in installation such such as the Model 975 to your audio or home theater system it is always as a bookcase or rack unless proper ventilation is provided. There should be good practice to make certain that all components are turned off, and preferably free space of at least 16 cm (6 in.) and an opening behind the unit. -
Page 3: Precautions
If you do not intend to use the Model 975 for any consider- unit, size of grounding conductors, location of antenna discharge unit, connec- able length of time, disconnect the plug from the AC outlet. -
Page 4: Unpacking
“DTS” and “DTS Digital Surround” are trademarks of Digital Theater Systems, Inc. © Digital Theater Systems, Inc. All rights reserved. Specifications are those in effect at the time of printing. Outlaw Audio, LLC. reserves the right to change specifications or designs at any time without notice, and without obliga- tion to modify existing units. -
Page 5: Table Of Contents
Chapter 2 Troubleshooting Guide Audio Recording Connecting Your Model 975 Specifications Connecting Audio Components Chapter 5 Model 975 Connection and Settings Chart Connecting Video Components Tuner Operation Remote Control Codes Antenna Connections Select Tuner and Band 30-Day Satisfaction Guarantee External Amplifier Connections... -
Page 6: Model 975 7.1 Channel Preamp/Processor
This simplicity not only makes the Model 975 compact and affordable, it also makes it easier to use. In order to get maximum performance from your Model 975, Your new Outlaw Audio preamp/processor is a high-perfor- Chapter 1 Contents please take a few minutes to read this manual. It tells you... -
Page 7: Accessories
Dolby TrueHD, Dolby Digital Plus, and Dolby Programmable universal remote control Digital decoding*; DTS-HD Master Audio, DTS-HD Controls the Model 975 as well as a TV and as many as High-Resolution Audio and DTS decoding** six other components Decodes all current 5.1 and 7.1 surround-sound formats. -
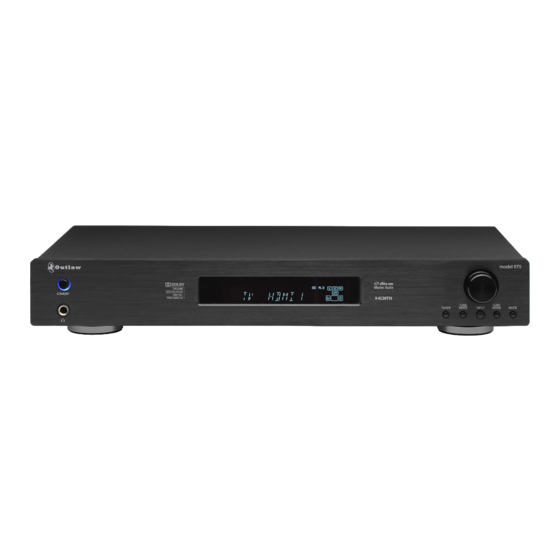
Page 8: Model 975 Front Panel
Indicates program source, DSP mode, channel inputs, Toggles between stereo and mono FM tuning modes Model 975, it’s important to understand how the differ- tuner preset and/or frequency, digital input, volume when the tuner is selected source and the FM band is ent buttons, switches, and connections work. -
Page 9: Model 975 Rear Panel
TV set into the Component Video Input jacks (see pages 22-23) This jack connects to a display with an S-video input, Model 975, so it can be reproduced through your home Use these jacks to connect devices with component such as older TVs. -
Page 10: Remote Controls
OFF button (see page 37) LD players, or TVs lacking ARC compatibility. These setup and configuration menus. Press this button to turn the Model 975 off. It will not inputs are fully assignable. The main functions of each button for both remotes are turn the power on;... - Page 11 2-channel, 5.1 or 7.1 signal, and on your system’s speaker has been programmed to control. input source on the Model 975, follow the steps in “Selecting configuration. This button also operates the Reverse VOL +/- control (see pages 38, 48-49) a Source”...
- Page 12 This button lets you change your speaker configura- button also operates the Stop function on devices that This button selects the Video input on the Model 975. tion settings without going into the on-screen menu. the remote has been programmed to control.
- Page 13 CH. LEVEL button (see page 42) that the remote has been programmed to control, such This button selects the Disc input on the Model 975. It also This button allows you to adjust channel balance with- as a cable or satellite remote.
- Page 14 Deactivates any active surround modes and switches Use this button to change your speaker configuration MENU button (see page 26-35) the Model 975 to stereo operation. A connected and settings. Press repeatedly to select the speaker’s set- Toggles the on-screen display (OSD) menu system on configured subwoofer will be active in stereo mode.
-
Page 15: Front Panel Display
(OSD), which can only be seen when the tuner is the selected source. When the source on a video monitor connected to the Model 975 through HDMI. Activates the Night listening mode. Choose from on, is an HDMI jack, the input source indicator turns off. -
Page 16: Audio Formats And Listening Modes
SURR BACK RIGHT SURR BACK RIGHT Analog Stereo and PCM Stereo The Model 975 supports almost any audio format out these tracks to fit on media such as DVD and be passed there. These include the latest lossy and lossless digital... - Page 17 This is the only non-licensed surround mode we chose to to use less disc space. DTS-HD Master Audio also supports include in the Model 975, and we included it for a very 7.1 channels. good reason: It’s the perfect mode for parties. The same DTS is an alternative to Dolby Digital that shares the same sound comes from the front and rear speakers—it’s not...
-
Page 18: Speaker Setup Tips
(1 meter) above the listener’s ear level. Front left, center, and right speakers Before we explain how to configure your Model 975 for The best speaker placement for your particular room will ¼ your speaker system, let’s make sure your speakers are... - Page 19 (and not just you), this is worth exploring. You can place the subwoofers in the corners of the room, or in the middle of the walls. You can use Y-adapters to connect the Model 975’s subwoofer output to multiple subwoofers. Model 975 7.1 Channel Preamp/Processor...
-
Page 20: Connecting Your Model
Whenever two or more devices are connected using HDMI ¼ If you plan to use the Model 975’s REC OUT jacks to cables, during the initial power on cycle there is an initial record audio onto a computer or tape deck, be sure to “handshake”... - Page 21 Model deck or CD recorder can be connected to the Model 975. to the Aux stereo audio input jacks on the Model 975. Other 975 before connecting any loudspeakers to your system. This will...
-
Page 22: Connecting Video Components
S-video inputs. ¼ Video Game Console or Internet Video Streaming signal, as the Model 975 can pass video through as “native” Device (Apple TV, Roku, Google TV, etc.) ¼ The S-video output carries only signals from the two with no video processing at all, or you can elect to Auto Scale composite and two S-video inputs. - Page 23 L and R channel outputs on the source device Component device’s S-Video output to one of the Model 975’s S-video to the set of analog audio jacks on the Model 975 that are If your display does not offer HDMI input but does have inputs.
-
Page 24: Antenna Connections
You can only connect a 75Ω type FM antenna to the Model back surround/front height L and R, side surround L and R, 975. If you choose to use an antenna other than the one front L and R, center and subwoofer. -
Page 25: Power Control Connections
Outlaw, but it wall outlet, confirm that all connections to the Model 975 the Model 975 to the input of the amplifier used to power may also be used to activate compatible products such as have been made correctly. -
Page 26: System Setup
Night Sync Before you begin, make certain that the AC power cord output. You can also access some of the Model 975’s setup Surr Mode AM/FM Spkr Set Chapter 3 Contents supplied with the Model 975 is firmly inserted into the... - Page 27 Press the MENU button on the remote control. remote control to select one of the available A list of the Model 975’s six setup menus will be shown on parameter choices. your video display. Use the UP and DOWN arrow keys ( ) on the ...
-
Page 28: Speaker Setup
Surround L/R Depending on what you selected for the for size (Large or Small) and Crossover settings. If not up to the HDMI output of the Model 975 and that everything is Front L/R speakers, there are up to three options for the available, check your speaker’s low end frequency response... - Page 29 Repeat the process for each speaker in your system. Back LB/RB The selection you make for Surround Mode correct distances will enable the Model 975 to create a The list of speakers will vary depending on what informa- determines which of these three options are displayed in more realistic, three dimensional soundfield.
- Page 30 At the standard calibration for Dolby Pro Logic IIz, the those sold under the RadioShack and Galaxy brands, or if You may need to adjust the Model 975’s test tone volume level of the front height speakers are too low to be heard you have a smartphone, use an SPL meter app.
-
Page 31: Input Setup
First the inputs must be configured. To do this, you use the to 60Hz. menu and OSD to tell the Model 975 which of the various Repeat the process for each speaker (or pair of If you hear distortion coming from a speaker, raise its connections on the back will be assigned to which input. - Page 32 ¼ ¼ Before you configure your inputs, there are a few To configure your Model 975’s inputs: If an HDMI video source is not selected, you cannot select important notes about what combinations are supported one of the HDMI inputs as your audio source. However, you Use the remote control’s menu button and naviga-...
-
Page 33: Video Setup
4 : 3 ¼ ¼ The Model 975’s Video Setup menu is shown above. It lets To make adjustments to the video parameters: The Audio Setup menu is shown above. It lets you adjust you adjust the basic video parameters (Brightness, Con- basic audio parameters such as Bass and Treble, and also Use the remote control’s menu button and naviga-... - Page 34 Dolby Pro Logic II or DTS NEO:6 mode is Model 975, and must be turned back to OFF in order for material is playing. The available choices are: engaged.
-
Page 35: Video Output Setup
Choose Autoscale if you wish to per- Use the remote control to make adjustments to form scaling within the Model 975. There are no rules here, Repeat the process for all other inputs you the parameters of the selected function. - Page 36 A setting of 0 gives the least surround effect, while 3 gives the most surround effect. We recommend starting with a setting of 0 and adjusting from there to your taste. 0 1 2 3 Outlaw Audio...
-
Page 37: Operation
To turn the Model 975 on and off: Menu Chapter 4 Contents Menu Swap Input functions of the Model 975, as well as other components in Mute Exit To turn the unit on, press the STANDBY button on Stereo LFE Trim CH Delay CH Level... -
Page 38: Selecting A Source
Sync ¼ ¼ The Model 975 lets you select from one of five sources, Use this control to adjust the volume level of all currently Use this control to turn the sound off momentarily. labeled TV, Disc, Video, Game and Aux. The names of the connected speakers. -
Page 39: Changing The Surround Mode
The “.1” after the parentheses indicates the presence of a If you are using a 5.1 setup with front height speakers If the Model 975 is receiving a 6.1 or 7.1 signal and you have low-frequency effects (LFE ) channel. -
Page 40: Switching To Stereo
Sync Night Sync The Model 975 has bass and treble controls that can boost The Model 975 lets you deactivate surround sound and If you notice a lip sync problem with a movie or TV show or cut treble in 2 dB steps, to a maximum ±10 dB. These switch to stereo at the push of a button. -
Page 41: Activating Night Mode (Drc)
Repeat the process for the remaining speakers. The front panel display will show the currently selected DRC mode, as shown above. Press the NIGHT button repeatedly to change the mode to DRC on, DRC off or DRC Auto. Model 975 7.1 Channel Preamp/Processor... -
Page 42: Checking Operating Status
SPL meter app. ¼ ¼ The Model 975 can give you an immediate indicator of the The Model 975 allows you to adjust channel levels two ways: To adjust the channel levels of the Model 975 using the internal test tone generator: digital multichannel format (i.e., DTS-HD Master Audio,... -
Page 43: Listening With Headphones
To adjust the channel levels of the Model 975 The Model 975’s front headphone jack works with any You can use the Model 975’s REC OUT jacks to record from during playback: standard headphones equipped with a 1/4-inch plug, or any of the Model 975’s analog inputs or the AM/FM tuner. -
Page 44: Tuner Operation
AM/FM tuner built into the Model Menu Menu Mute Exit Mute Exit Mute Exit 975 can be tuned to any of 15 AM and 15 FM Func Func – – – – Activating the Tuner and selecting a band Tuning to a radio station... -
Page 45: Create Memory Preset Manually
Press the AUTO PST button on the remote. station you want to set into memory. The Model 975’s tuner will automatically scan the band, Use the numeric keypad to enter the number of Press and hold the MEM button on the remote the station you want to listen to. -
Page 46: Entering A Station Manually
Guide Night Sync The Model 975 allows you to select radio stations directly if Sometimes FM reception is clearer in mono than in stereo. you know the station’s frequency. If you’re hearing a lot of interference or static in your FM signal, try listening in mono to see if it clears up. -
Page 47: Remote Control Operation
Stereo LFE Trim CH Delay CH Level Menu Swap Input The remote control for the Model 975 can be programmed Press and hold the SETUP button for about 3 Chapter 6 Contents Video Game seconds until the LED indicator glows solid, then to control a large number of audio/video devices. -
Page 48: Programming Using Auto Code Search
MUTE commands to bypass the currently controlled device Given the vast library of compatible device codes, you may and adjust the volume on the Model 975, without requiring Turn on the power of the device you want to Test Direct T. -
Page 49: Deactivate Punch-Through Volume
Check to make sure the function works by pressing rently control the Model 975 instead of the device. Stereo LFE Trim CH Delay CH Level If the volume controls still work the Model 975 , repeat the Stereo LFE Trim CH Delay CH Level Stereo... -
Page 50: Activate Punch-Through Channel
LFE Trim CH Delay CH Level Stereo LFE Trim CH Delay CH Level Video Game question (i.e., DISC, AUX, etc.), and verify that the DISC, AUX or the Model 975) and change the channels on a Menu Swap Input Menu Swap Input Press and hold the CH - button. -
Page 51: Macro Power Mode
¼ ¼ To deactivate the Macro Power setting: Repeat the steps above. When a Macro Power sequence has already been programmed, repeating the steps above deactivates this function. Model 975 7.1 Channel Preamp/Processor... -
Page 52: Care And Maintenance
Sleep Status Exit Tone Disc When the Model 975 becomes dirty, wipe it with a clean, If you will not be using your home theater system for an Chapter 7 Contents Info Guide soft, dry cloth. For tougher dirt or stains, first unplug the... -
Page 53: System Reset
The factory default settings will be restored. ¼ ¼ In rare cases the Model 975’s internal processor may freeze To reset the unit: The operating software installed on your Model 975 can or lock-up causing abnormal operation. This is common to all be updated by using the RSS-232C port (see H on page 9) Turn off any connected amplifiers. -
Page 54: Troubleshooting Guide
Make sure the cable between the Model 975’s subwoofer output and the subwoofer’s line input is connected and in good condition. ¼ ¼ Speaker setup in Model 975 not Check the settings in the Model 975’s Speaker Setup menu to make sure the subwoofer properly configured output is activated. ¼ ¼... -
Page 55: Specifications
70 x 430 x 242 mm Stereo 0.3% Weight 8.27 lb 3.75 kg Stereo Separation 40 dB typ. Adjacent Channel Selectivity 70 dB ±400 KHz IF Rejection Ratio 120 dB Frequency Response 20 Hz to 15 KHz ±1.5 dB Model 975 7.1 Channel Preamp/Processor... -
Page 56: Model 975 Connection And Settings Chart
Model 975 Connection and Settings Chart Use this chart to record the DISC GAME VIDEO components connected to Device Device Device Device Device your Model 975, as well as which type of input (HDMI, component, analog, coaxial, Video Video Video... -
Page 57: Remote Control Codes
2151, 2321, 2941 DIAMOND VISION 1211, 1611, 2001 1671, 2121, 2191, 2241, SONIC 0011 INSIGNIA HITACHI 0303, 0443, 0523, 0623 2371 AKB36157101 2921 DIGISTAR 0381, 0581, 0871, 1061, SONY 1071, 1641, 1731, 1901, 2451 2161, 2741 Model 975 7.1 Channel Preamp/Processor... - Page 58 0597, 0217, 0067, 0697, PHILIPS-MAGNAVOX 0735, 0745, 1055, 1225, ARCHER 0264, 0334, 0404, 0474 GENEXXA 0577, 1017, 0427 0767 GREENHILL 1105 1615 AT&T 0514, 0674 GOLDSTAR 0687 HAAZ 1295, 1465 PIONEER 0025, 0525, 0705, 0875, 0985, 1595, 1775 Outlaw Audio...
- Page 59 0445 TIVO 0985, 1505 FISHER 0405 PANASONIC 0545 STARCOM 0314, 0464 SYMPHONIC 0445 TOSHIBA 1735, 1745 FUNAI 0445, 0795 PHILIPS 1163 STARGATE 0014 TOSHIBA 0015, 0115 GO-VIDEO 0255, 0415, 0565, 1385 PIONEER 0985 TANDY 0434 Model 975 7.1 Channel Preamp/Processor...
-
Page 60: 30-Day Satisfaction Guarantee
Product to Outlaw. We will pay the return shipping ® Outlaw Audio, LLC. *This warranty is limited to ninety (90) days from the date of original purchase for any Outlaw Audio product that is used for professional or commercial purposes, or any other income-producing purpose.
Need help?
Do you have a question about the 975 and is the answer not in the manual?
Questions and answers