D-Link DHP-W306AV User Manual
Powerline av wireless n extender
Hide thumbs
Also See for DHP-W306AV:
- User manual (74 pages) ,
- Quick installation manual (41 pages) ,
- Technical specifications (2 pages)
Table of Contents
Advertisement
Advertisement
Table of Contents

Related Manuals for D-Link DHP-W306AV


Summary of Contents for D-Link DHP-W306AV
-
Page 2: Table Of Contents
PLC Settings ....................25 Using Windows 7 ..................50 ® MAC Address Filter - Static IP .............28 Connect to a Wireless Network ............53 Advanced Wireless .................29 Using Windows Vista ® .............................. Wi-Fi Protect Setup ................30 Configure Wireless Security ...............55 D-Link DHP-W306AV User Manual... - Page 3 What is Wireless? ..................63 How does wireless work? ..............63 Wireless Local Area Network (WLAN) ...........63 Wireless Modes ..................66 Networking Basics ................67 Check your IP address ..............67 Statically Assign an IP address ...........68 Technical Specifications ..............69 Warranty ...................71 D-Link DHP-W306AV User Manual...
-
Page 4: Product Overview
Section 1 - Product Overview Product Overview Package Contents D-Link DHP-W306AV PowerLine AV Wireless N Extender CAT5 Ethernet Cable CD-ROM with Software and User Manual System Requirements Network Requirements • IEEE 802.11n or 802.11g wireless clients • 10/100 Ethernet clients Browser Requirements •... -
Page 5: Introduction
Introduction The DHP-W306AV allows you to connect both wired and wireless computers, high-definition TVs, networking devices, and gaming consoles using the most pervasive medium in your home - the electrical wiring. Share Internet connections and experience smooth file transfers, streaming multimedia, online gaming and more. - Page 6 Power outlets and electrical wiring must all be part of the same electrical system. Certain electrical conditions in your home, such as wiring condition and configuration, may affect the performance of this product. Additional D-Link PowerLine AV adapters are required to add new devices to the network. A minimum of two D-Link PowerLine AV Network Adapters are required to create a network. Connecting this product to a power strip with a surge protector may adversely affect the performance of this product.
-
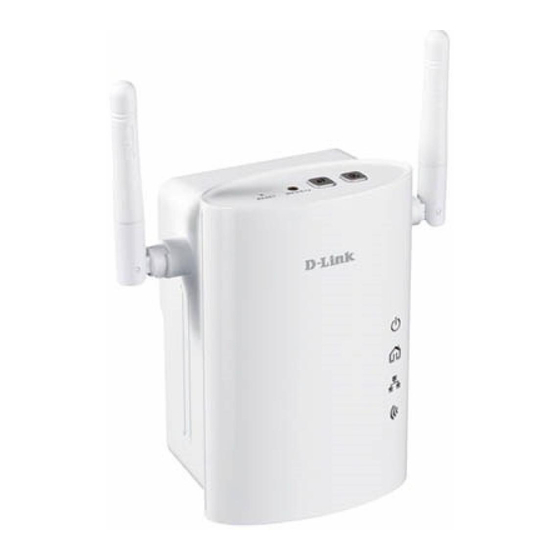
Page 7: Hardware Overview
Section 1 - Product Overview Hardware Overview Connections ON/OFF Turns the device ON or OFF. (standby/inactive) RJ-45 10/100BASE-TX Ethernet Port Connects to Digital Media Devices, PCs, Game Consoles, Network Storage Devices D-Link DHP-W306AV User Manual... -
Page 8: Side
Press to start the WPS process. You will have 120 seconds to start the WPS process on another WPS Button wireless device. Encryption Button Push this button to establish a secure powerline network with other PowerLine AV devices. D-Link DHP-W306AV User Manual... -
Page 9: Led's
A solid light indicates a connection to an Ethernet-enabled device. This LED blinks during data Ethernet LED transmission. A solid light indicates that the wireless segment is ready. This LED blinks during wireless data Wireless LED transmission. D-Link DHP-W306AV User Manual... -
Page 10: Hardware Installation
Connect the Ethernet Cable Connect one end of the supplied CAT5 Ethernet cable to the Ethernet port on the DHP-W306AV and the other end of the cable to the device’s Ethernet interface. You can also enable wireless to connect to the Wi-Fi devices using WPS. -
Page 11: Wireless Installation Considerations
The key to maximizing wireless range is to follow these basic guidelines: 1. Keep the number of walls and ceilings between the D-Link access point and other network devices to a minimum. Each wall or ceiling can reduce your adapter’s range from 3-90 feet (1-30 meters.) Position your devices so that the number of walls or ceilings is minimized. -
Page 12: Powerline Network - Quick Setup
Encryption Button Usage The Eny Button is used to add a PowerLine AV device to a PowerLine network. You can allow the DHP-W306AV to join a network by pressing the Eny Button to toggle it to the Broadcast state or Join state. -
Page 13: Hardware Installation - For Wireless Router
Plug the DHP-W306AV Extender into a power outlet in a different area of your home. Turn on the DHP-W306AV Extender by pushing the power button located on the side of this unit. Connect one end of the included Ethernet cable to the Ethernet port on the DHP-W306AV and attach the other end of the Ethernet cable to the PC as illustrated in Room 3. - Page 14 To secure PowerLine network from unauthorized users, press the ENY button on the PowerLine AV Adapter for 3 seconds. Then, press the ENY button on the DHP-W306AV Extender for 3 seconds. This must be done within two minutes after pressing the ENY button on the first device. The ENY LED should blink.
- Page 15 Plug the DHP-W306AV Extender into a power outlet in a different area of your home. Turn on the DHP-W306AV by pushing the power button located on the side of the unit. Connect one end of the included CAT5 Ethernet cable to the Ethernet port on the DHP-W306AV and attach the other end of the Ethernet cable to the PC as shown in Figure 1, Room 3.
- Page 16 Section 1 - Product Overview Hardware Installation - For PowerLine AV Wireless Router Scenario 1: If you have an existing PowerLine network with a PowerLine AV Wireless Router (e.g. D-Link, DHP-1320) and would like to add a DHP- W306AV Extender.
-
Page 17: Wireless
Section 3 - Configuration Wireless Connect an Ethernet cable from the Ethernet port on the DHP-W306AV to a computer for configuration. If you wish to change the default settings or optimize the performance of the DHP-W306AV, you may use the web-based configuration utility. -
Page 18: Wireless Setup Wizard
If you would like to enter your settings without running the wizard, click Wireless Setup on the left side and skip to page 21. This Wizard is designed to assist you in configuring your DHP-W306AV as an access point. D-Link DHP-W306AV User Manual... - Page 19 In order for your network settings to take effect the AP will reboot automatically. When the device has finished rebooting the main screen will be displayed. D-Link DHP-W306AV User Manual...
- Page 20 This key must be entered on your wireless clients. Click Next to continue. The following screen will show you the network key to enter on your wireless clients. Click Save to finish the Setup Wizard. D-Link DHP-W306AV User Manual...
-
Page 21: Wireless Setup
Enable Auto The Auto Channel Scan setting can be selected to allow Channel the DHP-W306AV to select the channel with the least Scan : amount of interference (during boot-up). Indicates the channel setting for the DHP-W306AV. Wireless... - Page 22 Wi-Fi Protected Setup. It is still possible to change wireless network settings with Manual Wireless Network Setup, Wireless Network Setup Wizard, or an existing external WLAN Manager user. Please refer to page 47. Save Settings: Click Save Settings to save and activate the new changes. D-Link DHP-W306AV User Manual...
-
Page 23: Lan Setup - Dhcp
LAN/private network. Device Name: Enter the Device Name of the AP. Changing the Device Name is recommended if there is more than one D-Link device within the subnet. Save Settings: Click Save Settings to save and activate the new changes. -
Page 24: Lan Setup - Static Ip
Enter the Device Name of the AP. It is recommended that you change the Device Name if there is more than one D-Link device within the subnet. You can enter the device name of the AP into your web browser to access it instead of IP address for configuration. -
Page 25: Configuration
Section 2 - Installation Configuration PLC Settings This section will show you how to configure your new D-Link PowerLine AV using the web-based configuration utility. D-Link DHP-W306AV User Manual... - Page 26 If the field displays the word Disconnect, then the device has been added to the network but it is not ready. Please check its password and make sure the device is powered on. Mac Address: You can find the MAC address printed on the back of your device. D-Link DHP-W306AV User Manual...
- Page 27 Section 3 - Configuration QoS Setting: You can configure your PowerLine AV devices to give priority to powerline network traffic accordingly. Enter the name, MAC Address, and priority level. D-Link DHP-W306AV User Manual...
-
Page 28: Mac Address Filter - Static Ip
Save Settings. MAC Filter List: Displays the list of clients in the filter list. Save Settings: Click Save Settings to save and activate the new changes. D-Link DHP-W306AV User Manual... -
Page 29: Advanced Wireless
Select this checkbox to enable WLAN partition. If this feature is enabled, then there is no barrier between communication among wireless stations connecting to the Access Point. If this is disabled, wireless clients are not allowed to exchange data through the Access Point. D-Link DHP-W306AV User Manual... -
Page 30: Wi-Fi Protect Setup
Create a random number that is a valid PIN: PIN. This becomes the access point’s PIN. You can then copy this PIN to the user interface of the user. Reset PIN to Default: Restores the default PIN of the access point. D-Link DHP-W306AV User Manual... -
Page 31: Add Wireless Device With Wps
Select PIN to use your PIN number from your wireless device to connect to your network. Click Connect to continue. Start WPS on the wireless device you are adding to you wireless network to complete the setup D-Link DHP-W306AV User Manual... -
Page 32: Adding A Wireless Device Using The Pbc Method
Select PBC to use Push Button Configuration in order to connect to your network. Click Connect to continue. Press the WPS Button on the wireless device that you are adding to your network to complete the setup. D-Link DHP-W306AV User Manual... -
Page 33: User Limit
Enable User Check the Enable User Limit box to enable this Limit: feature. User Limit: Enter the maximum number of clients, between 1 and 32. Save Click Save Settings to save and activate the Settings: new changes. D-Link DHP-W306AV User Manual... -
Page 34: Admin
This feature is disabled by default. Save Settings: Click Save Settings to save and activate the new changes. D-Link DHP-W306AV User Manual... -
Page 35: System
If you would like to save the current access point configuration settings, use the Save button above. Note: Restoring the factory default settings will not reset the Wi-Fi Protected Status to Not Configured. Reboot the Click to reboot the access point. Device: D-Link DHP-W306AV User Manual... -
Page 36: Firmware
You can upgrade the firmware of the access point from this page. Make sure the firmware you would like to use is on the local hard drive of your computer. Click Browse... to locate the firmware file to be used for the update. Please check the D-Link support site for firmware updates at http://support.dlink.com. -
Page 37: Time
Minute, and Second and then click Save Settings. You can also click the Copy Your Computer’s Time Settings button at the bottom of the screen. Save Settings: Click Save Settings to save and activate the new changes. D-Link DHP-W306AV User Manual... -
Page 38: Schedules
After making your changes, click Save to save Add: Schedule Rules the schedule rule. List: The list of schedules will be listed here. Click the Edit icon to make changes or click the Delete icon to remove the schedule. D-Link DHP-W306AV User Manual... -
Page 39: Device Info
Section 3 - Configuration Device Info This page displays the current information for the DHP-W306AV. It will display the LAN and wireless LAN information. General: Displays the access point’s time and firmware version. LAN: Displays the MAC address and the private (local) IP settings for the access point. -
Page 40: Logs
Section 3 - Configuration Logs The DHP-W306AV keeps a running log of events and activities occurring on the AP. If the AP is rebooted, the logs are automatically cleared. You can save the log files under Log Settings. Log Options:... -
Page 41: Statistics
Statistics The DHP-W306AV keeps statistics of the traffic that passes through it. You can view the amount of packets that pass through the LAN and wireless portions of the network. The traffic counter will reset if the access point is rebooted. -
Page 42: Wireless
The wireless section allows you to view the wireless clients that are connected to your wireless access point. Connection Displays the amount of time the wireless client has Time: been connected to the access point. MAC Address: Displays the Ethernet ID (MAC address) of the wireless client. D-Link DHP-W306AV User Manual... -
Page 43: Ipv6
Section 3 - Configuration IPv6 This section will display all of your IPv6 Internet and network connection details. D-Link DHP-W306AV User Manual... -
Page 44: Help
Section 3 - Configuration Help Click on the links below for more information on each section in the GUI. D-Link DHP-W306AV User Manual... -
Page 45: Wireless Security
Section 3 - Configuration Wireless Security This section will show you the different levels of security you can use to protect your data from intruders. The DHP-W306AV offers the following types of security: • WPA2 (Wi-Fi Protected Access 2) • WPA2-PSK (Pre-Shared Key) •... -
Page 46: What Is The Wpa
The password can include symbols (!?*&_) and spaces. This key must be the exact same key entered on your wireless bridge or access point. WPA/WPA2 incorporates user authentication through the Extensible Authentication Protocol (EAP). EAP is built on a more secure public key encryption system to ensure that only authorized network users can access the network. D-Link DHP-W306AV User Manual... -
Page 47: Configure Wep
3. Next to WEP Encryption, select 64-bit or 128-bit encryption. 4. Next to WEP Key 1, enter a WEP key that you create. Make sure you enter this key exactly on all your wireless devices. 5. Next to Authentication, select Both or Shared Key. D-Link DHP-W306AV User Manual... -
Page 48: Configure Wpa/Wpa2 Personal
6. Click Save Settings at the top of the window to save your settings. If you are configuring the access point with a wireless adapter, you will lose connectivity until you enable WPA-PSK on your adapter and enter the same passphrase as you did on the access point. D-Link DHP-W306AV User Manual... - Page 49 5. Next to RADIUS Server, enter the IP Address of your RADIUS server. 6. For Port, enter the port you are using with your RADIUS server. 1812 is the default port. 7. Next to Shared Secret, enter the security key. 8. Click Save Settings to save your settings. D-Link DHP-W306AV User Manual...
-
Page 50: Connect To A Wireless Network
1. Click on the wireless icon in your system tray (lower-right corner). Wireless Icon 2. The utility will display any available wireless networks in your area. D-Link DHP-W306AV User Manual... - Page 51 If you get a good signal but cannot access the Internet, check your TCP/IP settings for your wireless adapter. Refer to the Networking Basics section in this manual for more information. 4. The following window appears while your computer tries to connect to the router. D-Link DHP-W306AV User Manual...
- Page 52 It may take 20-30 seconds to connect to the wireless network. If the connection fails, please verify that the security settings are correct. The key or passphrase must be exactly the same as on the wireless router. D-Link DHP-W306AV User Manual...
-
Page 53: Connect To A Wireless Network
If you get a good signal but cannot access the Internet, check you TCP/IP settings for your wireless adapter. Refer to the Networking Basics section in this manual for more information. Click Connect Anyway to continue. D-Link DHP-W306AV User Manual... - Page 54 The utility will display the following window to indicate a connection is being made. The final window indicates the establishment of a successful connection. The next two pages display the windows used to connect to either a WEP or a WPA-PSK wireless network. D-Link DHP-W306AV User Manual...
-
Page 55: Configure Wireless Security
Wireless Utility by right-clicking on the wireless ® computer icon in your system tray (lower right corner of screen). Select Connect to a network. 2. Highlight the wireless network (SSID) you would like to connect to and click Connect. D-Link DHP-W306AV User Manual... - Page 56 It may take 20-30 seconds to connect to the wireless network. If the connection fails, please verify that the security settings are correct. The key or passphrase must be exactly the same as on the wireless router. D-Link DHP-W306AV User Manual...
-
Page 57: Connect To A Wireless Network
(displayed using the SSID) and click the Connect button. If you get a good signal but cannot access the Internet, check you TCP/ IP settings for your wireless adapter. Refer to the Networking Basics section in this manual for more information. D-Link DHP-W306AV User Manual... -
Page 58: Configure Wpa-Psk
(lower-right corner of screen). Select View Available Wireless Networks. 2. Highlight the wireless network (SSID) you would like to connect to and click Connect. The default SSID for DHP-W306AV is dlink. D-Link DHP-W306AV User Manual... - Page 59 It may take 20-30 seconds to connect to the wireless network. If the connection fails, please verify that the WPA-PSK settings are correct. The WPA-PSK passphrase must be exactly the same as on the wireless router. D-Link DHP-W306AV User Manual...
-
Page 60: Troubleshooting
1. Why am I unable to access the web-based configuration utility? When entering the IP address of the D-Link access point (192.168.0.50 for example), you are not connecting to a website on the Internet or have to be connected to the Internet. The device has the utility built-in to a ROM chip in the device itself. Your computer must be on the same IP subnet to connect to the web-based utility. - Page 61 • Close your web browser (if open) and open it. • Access the web management. Open your web browser and enter the IP address of your D-Link access point in the address bar. This should open the login page for your the web management.
-
Page 62: Wireless Basics
D-Link wireless products are based on industry standards to provide easy-to-use and compatible high-speed wireless connectivity within your home, business or public access wireless networks. Strictly adhering to the IEEE standard, the D-Link wireless family of products will allow you to securely access the data you want, when and where you want it. -
Page 63: What Is Wireless
D-Link is the worldwide leader and award winning designer, developer, and manufacturer of networking products. D-Link delivers the performance you need at a price you can afford. D-Link has all the products you need to build your network. - Page 64 Section 3 - Configuration Who uses wireless? Wireless technology has become so popular in recent years that almost everyone is using it, whether it’s for home, office, business, D-Link has a wireless solution for it. Home • Gives everyone at home broadband access •...
- Page 65 The wireless connection in public places is usually called “hotspots”. Using a D-Link Cardbus Adapter with your laptop, you can access the hotspot to connect to Internet from remote locations like: Airports, Hotels, Coffee Shops, Libraries, Restaurants, and Convention Centers.
-
Page 66: Wireless Modes
An Infrastructure network contains an Access Point or wireless bridge. All the wireless devices, or clients, will connect to the wireless bridge or access point. An Ad-Hoc network contains only clients, such as laptops with wireless cardbus adapters. All the adapters must be in Ad-Hoc mode to communicate. D-Link DHP-W306AV User Manual... -
Page 67: Networking Basics
Check your IP address After you install your new D-Link adapter, by default, the TCP/IP settings should be set to obtain an IP address from a DHCP server (i.e. wireless router) automatically. To verify your IP address, please follow the steps below. -
Page 68: Statically Assign An Ip Address
Windows® XP - Click on Start > Control Panel > Network Connections. Windows® 2000 - From the desktop, right-click My Network Places > Properties. Step 2 Right-click on the Local Area Connection which represents your D-Link network adapter and select Properties. Step 3 Highlight Internet Protocol (TCP/IP) and click Properties. -
Page 69: Technical Specifications
* Maximum wireless signal rate derived from IEEE Standard 802.11g and 802.11n specifications. Actual data throughput will vary. Network conditions and environmental factors, including volume of network traffic, building materials and construction, and network overhead, lower actual data throughput rate. Environmental factors will adversely affect wireless signal range. D-Link DHP-W306AV User Manual... - Page 70 Safety & Emissions • FCC • IC • CE • C-Tick Dimensions • L = 4.13 inches • W = 2.79 inches • H = 2.02 inches Weight • 0.45 lbs Warranty • 1 Year Limited D-Link DHP-W306AV User Manual...
-
Page 71: Warranty
Warranty Period or ninety (90) days, whichever is longer, and is subject to the same limitations and exclusions. If a material defect is incapable of correction, or if D-Link determines that it is not practical to repair or replace the defective Hardware, the actual price paid by the original purchaser for the defective Hardware will be refunded by D-Link upon return to D-Link of the defective Hardware. - Page 72 D-Link further warrants that, during the Software Warranty Period, the magnetic media on which D-Link delivers the Software will be free of physical defects. The customer’s sole and exclusive remedy and the entire liability of D-Link and its suppliers under this Limited Warranty will be, at D-Link’s option, to replace the non-conforming Software (or defective media) with software that substantially conforms to D-Link’s...
- Page 73 D-Link Systems, Inc., 17595 Mt. Herrmann, Fountain Valley, CA 92708. D-Link will not be held responsible for any packages that are lost in transit to D-Link. The repaired or replaced packages will be shipped to the customer via UPS Ground or any common carrier selected by D-Link.
- Page 74 FOR WARRANTY SERVICE) RESULTING FROM THE USE OF THE PRODUCT, RELATING TO WARRANTY SERVICE, OR ARISING OUT OF ANY BREACH OF THIS LIMITED WARRANTY, EVEN IF D-LINK HAS BEEN ADVISED OF THE POSSIBILITY OF SUCH DAMAGES. THE SOLE REMEDY FOR A BREACH OF THE FOREGOING LIMITED WARRANTY IS REPAIR, REPLACEMENT OR REFUND OF THE DEFECTIVE OR NONCONFORMING PRODUCT.
- Page 75 • Connect the equipment into an outlet on a circuit different from that to which the receiver is connected. • Consult the dealer or an experienced radio/TV technician for help. For detailed warranty information applicable to products purchased outside the United States, please contact the corresponding local D-Link office.
Need help?
Do you have a question about the DHP-W306AV and is the answer not in the manual?
Questions and answers