Table of Contents
Advertisement
Quick Links
Copyright
All mobile products by GIGA-BYTE Communications mentioned in this document, including the
device, accessories, software, text, music, and pictures, are owned by, or authorized by original
manufacturers to GIGA-BYTE Communications. Reproduction, transfer, distribution, or storage of
part or all of the contents in this document in any form without the prior written permission of
GIGABYTE Communications Inc. is prohibited.
GIGA-BYTE Group, GIGA-BYTE Communications Inc.
Advertisement
Table of Contents

Related Manuals for Gigabyte GSmart MW700


Summary of Contents for Gigabyte GSmart MW700
- Page 1 GIGA-BYTE Communications. Reproduction, transfer, distribution, or storage of part or all of the contents in this document in any form without the prior written permission of GIGABYTE Communications Inc. is prohibited. GIGA-BYTE Group, GIGA-BYTE Communications Inc.
-
Page 2: Safety Information
Safety Information This chapter contains important information on safe and efficient operation. Please read this information before using the device. Exposure to Radio Frequency (RF) Energy The device contains a transmitter and a receiver. When it is ON, it receives and transmits RF energy. -
Page 3: Regulatory Agency Identifications
Regulatory Agency Identifications For regulatory identification purposes, your product is assigned a model number of MW700. To ensure continued reliable and safe operation of your device, use only the accessories listed below with your MW700. The Battery Pack has been assigned a model number of GPS-H01. Note: This product is intended for use with a certified Class 2 or Class 3 Limited Power Source, rated 5 Volts DC, maximum 1 Amp power supply unit. - Page 4 Safety precautions for RF exposure ‧ Use only original manufacturer-approved accessories, or accessories that do not contain any metal. ‧ Use of non-original manufacturer-approved accessories may violate your local RF exposure guidelines and should be avoided. Exposure to Radio Frequency (RF) Signals Your device contains a radio transmitter and receiver.
- Page 5 turned ON. ‧ Should not carry the phone in a breast pocket. ‧Should use the ear opposite the pacemaker to minimize the potential for interference. If you have any reason to suspect that interference is taking place, turn the phone OFF immediately Hearing Aids Some digital wireless phones may interfere with some hearing aids.
-
Page 6: General Information
General Information This chapter contains important information on safe and efficient operation. Please read this information before using the device. Ignorance of the following notices may lead to violations of the law. ․Before using the device, please make sure you have fully charged the battery. ․Do NOT remove the battery from the device during charging. -
Page 7: Table Of Contents
Table of Contents Copyright…………………………………………………………………………………………..…………1 Safety Information…………………………………………………………………………………………..2 General Information…………………………………………….…………………………………….…….3 Chapter 1 Before Using Your Device………………………………………………...………………1-1 1.1 Familiarizing yourself with MW700..……………………………………………………………….1-1 1.2 Features.……..………………………………………………………………………………………1-2 1.3 Insert the Battery & SIM card………………………………………………………………………..1-3 1.4 SIM.………………………..………………………………………………………….………………..1-3 1.5 Battery.…….……………………………………………………………………….………………….1-3 1.6 Lock/Unlock.…...……………….……………………………………………………………………..1-4 1.7 Power.………………….………………………………………………………………………………1-4 Chapter 2 Getting Started.……………………………………………………………………………. 2-1 2.1 Display Information........................2-1 2.2 Screen Orientation........................2-5 2.3 Setting Time&... - Page 8 4.2 System Settings........................4-3 Chapter 5 Synchronization.……………………................5-1 5.1 Install and Use ActiveSync…....................5-1 5.2 Synchronize via Bluetooth......................5-1 Chapter 6 Getting Connected…....................6-1 6.1 Internet Access........................6-1 6.2 GPRS Connection Settings......................6-1 6.3 Activating GPRS Connection....................6-1 6.4 GPRS Wizard ..........................6-2 6.5 Connecting with Your Personal Computer................6-2 6.6 Bluetooth Wireless Transmissions...................6-2 6.7 Internet Sharing........................6-3 6.8 Wi-Fi ............................6-4...
- Page 9 9.12 STK (SIM Tool Kit).........................9-6 9.13 Zip….………………........................9-6 9.14 SD Add-Ons...........................9-6 9.15 GPS Tracking.........................9-6 9.16 SIM Manager.........................9-7 9.17 Backup Tool...........................9-7 Chapter 10 Managing Your Mobile...................10-1 10.1 Memory Management......................10-1 10.2 Memory..........................10-1 10.3 Add or Remove Programs....................10-1 Chapter 11 Specifications…..………………………………………………………………………11-1 Chapter 12 FAQ................……………......12-1 MW700│9...
-
Page 10: Chapter 1 Before Using Your Device
1 Before Using Your Device 1.1 Familiarizing yourself with answer a call by pressing Talk/Send key, MW700 or go to Phone Dialer screen. This section introduces you to the hardware of Press this key to end a the device and its function keys. call or to return to End Key Today screen from any... -
Page 11: Features
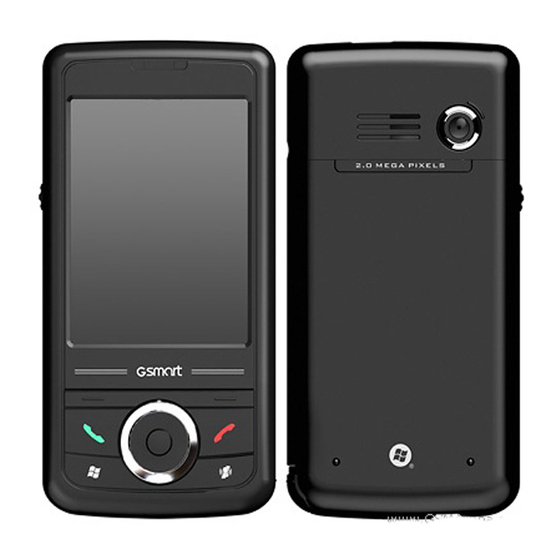
your desktop PC, the built-in speaker. transmit data or charge The CMOS camera on the battery. the back of the device 19 Camera Lens supports 2-mega-pixel photo and high quality video. Push and slide out the cover to replace 20 Battery Cover battery and unlock SIM card hatch. -
Page 12: Insert The Battery & Sim Card
Windows Live Messenger, Pocket Outlook, 4. Insert the battery back to the battery slot. Pocket Explorer, and Office tools (Word, Excel, and PowerPoint). Also features Encryption, Internet Sharing, Windows Update, Pictures& Videos, Calculator, Games, ActiveSync, and File Explorer. ․Other programs: SIM Manager, FM Radio, Zip, Java, GPS Tracking, etc. -
Page 13: Lock/Unlock
Note: Using any battery pack or AC adapter (charger) not specified/endorsed by GSmart on this phone may be dangerous and may invalidate any warranty and approval given to the device. Unplug the charger from the power supply when it is not in use. Charging the battery Please make sure that the battery is installed and fully charged when using your MW700 for... - Page 14 seconds to turn it off. To reduce the power consumption of your device, you may change the backlight duration and brightness level. Also, you can save more power by setting the device to turn off automatically if it is not in use for a specific period of time.
-
Page 15: Chapter 2 Getting Started
2 Getting Started 2.1 Display Information create or edit a file. 5. Pop up menu The main screen displays the following This allows you to quickly access an item. information: Tap on the icon and tap again to perform an action. - Page 16 Recorder, JAVA, Calculator, Easy-Touch Menu, Pocket Tools Remote, Restore to Default, Zip Block List, Dial Phone Kit, Internet Manager Sharing, SIM Manager Bubbles Games Breaker, Solitaire Transmit data between your ActiveSync Programs computer and You will see many application icons under your the device.
- Page 17 Tap Start > Settings > Personal tab: Tab Start > Settings > System Tab Program Description Program Description You may assign programs to Buttons Contains information of the hard keys. About device. You can set your preferred input Input method. Backlight Settings for backlight.
- Page 18 Status & Icon area help keep your mobile This area shows icons of basic system status device protected. or alerts. You can tap on the icons to get the definitions or go to the settings. Status Type Icon Description Main battery power is full.
-
Page 19: Screen Orientation
You have one or more instant message(s). System volume. Phone volume. Volume Ringer is on. Ringer is off. Note: To choose reminder types and sounds for your Swan, tap Start > Settings > Personal tab > Sounds & Notifications. Portrait 2.2 Screen orientation You can choose your screen display in Portrait or Landscape mode. -
Page 20: Using The Stylus
a calendar, and select a desired month, corresponding field, the system will display date, and year. the letters/numbers identified from your 7. Tap OK, a pop-up window will appear on handwriting. your screen to confirm to Save Changes to 3. Do not write letters/numbers continually to the clock settings. -
Page 21: Drawing On The Screen
Recognizer, you can write a sentence or more than one sentence. Pause and let Transcriber change the written characters to typed characters. 1. On your screen keyboard, tap the arrow icon next to keyboard icon for more input methods. On the pop-up list, tap Transcriber. -
Page 22: Editing My Info
Creating a recording information. 1. To add a recording to a note, open the note 4. Tap Notes tab to input other information before recording. Tap Start > Programs > you would like to display on your device. Notes. 5. If you want your information to be displayed 2. -
Page 23: Multi-Language
connect the phone with PC. ActiveSync will Swahili, Swedish, Swedish (Finland), Tatar, start automatically. Thai, Turkish, Ukrinian, Urdu (Islamic Republic of Pakistan), Uzbek (Cyrillic), Uzbek (Latin). 2.13 Multi-Language The device supports multi-language automatically. If the documents don’t show correctly, tap “Start” > Settings > System > Region and select the region and the language you want. -
Page 24: Chapter 3 Phone Functions
3 Phone Functions When a call is connected, the screen displays 3.1 Phone Dialer screen and key the following: Introduction 1. The calling status 2. The name and number of the contact you Press Talk/Send key to enter phone functions. are calling Please insert a SIM card before using these 3. -
Page 25: Receiving/Ignoring A Call
1. .After entering Phone Dialer screen you can replaces the international prefix of the dial a number using the keypad on the country that you are calling from. screen. 2. Enter the full phone number you want to dial. It should include the country code, 2. -
Page 26: Making A Call From Contacts
3.7 Making a call from contacts 3.8 Creating a new contact On Today screen, you can tap Contacts on the On Contacts screen, tap New on the bottom bottom right of the screen to enter Contacts. Or left of the screen. A blank record will appear. under Phone Dialer screen, tap Contacts on 1. -
Page 27: Setting Ringtone And Password
phone number to open a drop-down menu number you would like to block. for more options. 2. Select “OK” to save the settings. Alternatively, tap “Contacts” on Today screen, highlight the contact you would like to block and tap “Menu”. Select “Set to Block List”. -
Page 28: Chapter 4 Settings
4 Settings 2. To enable this function, select how long 4.1 Personal settings your device must be turned off before the You may set your personalized settings by password is required for using the device by preference. tapping Prompt if device unused for. 3. - Page 29 Phone Security Setting for phone functions. You may check Require PIN when phone is used to enhance your phone security. Tap You can easily view and change settings, such Change PIN to change your SIM PIN number. as the ring type and ring tone to be used for Services tab incoming calls, and the keypad tone to be used when entering phone numbers.
-
Page 30: System Settings
Sounds & Notifications 4.2 System settings Setting for alarm sound and notifications. About Turning off sounds and the notification helps This function contains information about your conserve battery power. To change the ring device. type and volume: Version tab displays important device 1. - Page 31 displayed on your device, go to Regional tapping Stop, or just tap Stop All to stop all the Settings by tapping Start > Settings > running programs. System tab > Regional Settings. Power Customers Feedback Battery status and settings. Customer Experience Improvement Program Tap Start >...
- Page 32 Regional Settings. Remove Programs Remove programs from your device Remove Programs allows you to uninstall programs that are saved in your device’s storage memory. It also shows the total available storage memory. Select a program that you would like to remove from the program box and tap Remove.
-
Page 33: Chapter 5 Synchronization
5 Synchronization You may use Microsoft ActiveSync to device already has built-in ActiveSync. synchronize data in this device with personal 2. Hardware Installation: computer. Connect this device with your personal computer by using the USB cable. ․You can synchronously update Outlook data 3. - Page 34 “Connect via Bluetooth” and tap ”Synchronize” in this device to process synchronization. For descriptions regarding synchronization through Bluetooth device, please refer to Synchronizing Your Information > Connect to a PC via Bluetooth” in device Help. MW700│5-2...
-
Page 35: Chapter 6 Getting Connected
6 Getting Connected When using GPRS and Internet connection, you will not be able to answer a call. If you want to make a call, your device will automatically disconnect to the Internet and reconnect to the Internet at the end of conversation. -
Page 36: Gprs Wizard
hold on a connection to open pop-up menu Bluetooth Connection Settings and select “Connect”. When Bluetooth is activated, tap icon on Today screen, and you will see icon in the pop-up window. 6.4 GPRS Wizard When you are connected to GPRS network, Bluetooth is a short distance wireless you may surf on the Internet or send and communication technology. -
Page 37: Internet Sharing
6. On Devices tab screen, select the device to be connected, and then select “Next“. The screen will prompt for password. After inputting password on password input screen, select “Next“. 7. If the password entered is correct, the connection will be form. Note: Optional Bluetooth accessories such as Bluetooth headset are available. -
Page 38: Wi-Fi
6.9 USB You may use the device as a mass storage device or a Micro SD card reader. 1. On the device, select Start > Settings > Connections tab > USB 2. Tap “SD Card Reader”, and then tap “Change”. 3. -
Page 39: Chapter 7 Messaging
7 Messaging 7.1 Email & Message Before receiving and sending your email or message, please make sure that this device has connected to a network. When you are connected to a network, you may go to “Messaging” to receive and send your email or message. -
Page 40: Directly Connect To Email Server
2. If you choose not to perform 7.4 Establish Email Service synchronization, you may manually copy or move email messages between this device If you have email accounts from ISP or and the computer. company network, you may use “Messaging” 3. - Page 41 7.5 Using Email and Message The main functions of “Messaging” are stated as follows: When composing a new mail, you can: 1. Tap “To, CC, BCC” fields to input receivers’ email addresses. 2. Tap “Subject” field to input a subject for your new mail.
-
Page 42: How To Use Push Email
On the mail content screen, select and hold to activate pop-up Menu. 7.6 How to Use Push Email With push e-mail, you can have access to new incoming e-mail in real time. This Direct Push Technology can be enabled by the Exchange Server 2003 administrator, bringing the latest information to you. -
Page 43: How To Use Mms
Adding a photo or video: Note: To be able to use direct push, you You can add either a still image or a video clip need to have an exchange server. to each individual slide. After you've tapped the Microsoft Exchange Server 2003 also area to add a photo or vide: supports useful functions such as remote device wipe. -
Page 44: Messenger
MMS Configuration: - Takes you to the next slide. To configure your MMS account, select Start > The first number indicates the Messaging > MMS > Menu > Tools > Options > current slide you are viewing. The second Accounts > MMS. Check the items you wish to indicates the total number of slides. - Page 45 Compose Hotmail: 1. After signing in Messenger, wait for the sync to finish and then select Start > Messaging. 2. Select Windows Live Inbox from the drop down menu on the top left corner. 3. Tap Menu > New. MW700│7-7...
-
Page 46: Chapter 8 Multimedia
8 Multimedia Settings: 8.1 Camera 6. Scene Mode: you may select different You may use camera function in this device to scene modes to fit the shooting capture important moments. environment. 7. Mode: you may select different shooting 1. Select Start > Programs > Multimedia > modes for your needs. -
Page 47: Video Mode
8.2 Video Mode 5. Storage: Phone, microSD. (The storage location will automatically change to The device camera can also be used as a microSD card if the microSD card is video recorder to record memorable moments plugged in before launching video of your life. -
Page 48: Pictures & Videos
8.5 Pictures & Videos You may use “Pictures & Videos” function to manage your photos or videos. In Pictures & Videos > Options, you may resize the picture. In “Menu”, you can also perform functions such as “Set as Today Background…”, “Play Slide Show “... - Page 49 Note: If you use an A2DP Bluetooth headset to listen to the music, Audio Mixer won’t work. MS800│8-4...
-
Page 50: Chapter 9 Applications
9 Applications View and Update Calendar: 9.1 Calendar Select an appointment on the calendar to view Appointments and Meetings: appointment summary. If you want to change You may use “Calendar” to arrange the details of an appointment, select “Edit”. appointments, meetings, and other events. Send Meeting Notice: You may view your appointments in different You may use “Calendar”... -
Page 51: Tasks
letter search for contacts that starts with 9.3 Tasks that letter. 3. Tap on contact’s name or phone number to You may use “Tasks” to help you track view or edit contact’s details. unfinished tasks. 4. Tap on any contact and hold to open pop-up menu. -
Page 52: Word Mobile
in “Notes”. If a note file contains voice notes in same time, this device will ask you to save the addition to text, a small icon representing voice first document first. When creating a new notes will appear in the content area of the document or editing an old document, you may note. -
Page 53: Powerpoint Mobile
screen will open a new Excel file. Your Excel 9.8 Windows Media Player Mobile can only open one file at a time. When you open a second file at the same time, this Your Windows Media Player allows you to play device will ask you to save first file. -
Page 54: Internet Explore
․Tap “Menu” to open Menu. ․Select and hold any location of website content to open pop-up menu. View Favorites: 1. On browser screen, select “Menu” > “Favorites”. 2. On Favorites screen, select the website you want to view. ․Select the website you would like to go to. ․You may add or delete folders or URL links. -
Page 55: Calculator
9.10 Calculator 4. Select a location where you would like to extract the file to. Calculator allows you to run simple operations 5. Tap “OK” and enter the password (if in this device. required) to decompress the zip file. Select Start > Programs > Tools > Calculator 9.14 SD Add-Ons to use your calculator. -
Page 56: Sim Manager
on task bar on Today screen shows that GPS is trying to connect. on task bar on Today screen shows that GPS is connected. 9.16 SIM Manager To change contact information on your SIM card, tap Start > Programs > Phone Manager > SIM Manager, then tap a SIM contact and edit To copy SIM contacts to your device: 1. -
Page 57: Chapter 10 Managing Your Mobile
10 Managing Your Mobile 10.1 Memory Management Select Start > Internet Explorer > Menu > Tools > Options > Memory Tab. Select “Clear Select Start > Settings > System Tab > History” and “Delete File” to delete browsed Memory web page related records. Main Tab: 10.3 Add or Remove Programs Display current memory status of this device. - Page 58 You must move this program to this device use “File Explorer” in this device to find the manually. If you cannot find any installation program and delete it by selecting and holding instructions for this program, please use the program’s name and then select “Delete” ‘Browse’...
-
Page 59: Chapter 11 Specifications
11 Specifications Item Specification System Information Operating System Windows Mobile 6 Professional Processor Marvell PXA 270 520 MHz Memory 256 MB ROM, 64MB RAM Size Dimensions (mm) 116*59*14.95 mm Weight (in grams) 130 g (Including Battery) Battery Battery Capacity Li-Ion 1300 mAh Standby time Up to 150 hours Talk time... - Page 60 Resolution 320*480 pixels Band Band EDGE; GSM 850/900/1800/1900 Connectivity Bluetooth Bluetooth 2.0 Modulation: GFSK Band:2.4 - 2.4835GHz Output power:0dbm (Typical) WLAN WLAN 802.11b/g Wireless Technology: OFDM and DSSS Operating frequency: 2.412 - 2.462GHz Output power:12dbm (Typical) GPRS GPRS Class 12 WAP 2.0 Modem dial-up Mini USB 1.1...
-
Page 61: Digital Camera
Max Size (per) Depends on available RAM Audio Format WMA, MP3, MID, AMR, WAV,AAC Max Size Depends on available RAM Video Format 3GP, MPEG4 Max Size Depends on available RAM Phonebook Size Depends on available RAM Ringtone Type MP3, WMA, AMR Polyphone 192 polyphonic mid file Digital Camera... -
Page 62: External Memory
Macro Mode Video Recording Message Windows Live Messenger E-Mail External Memory Type Micro SD Card Max Size No Limit Operating Temperature -10℃~45℃ Temperature Note: Specifications may vary in some regions. MW700│11-4... -
Page 63: Chapter 12 Faq
12 FAQ Why can’t I turn on the device? change this setting in Start > Settings > System tab > Backlight > Battery Power tab & Please make sure that the device has sufficient External Power tab. power, and that the battery is secured in the device. - Page 64 on your computer and reinstall. How do I take out the Micro SD card from the SD adapter? The card slot on this device is designed for Micro SD cards. To remove the Micro SD card from the SD card adapter, please hold the SD card adapter with one hand, and slightly lift the end of the Micro SD card and pull.
Need help?
Do you have a question about the GSmart MW700 and is the answer not in the manual?
Questions and answers