Table of Contents
Advertisement
Quick Links
Download this manual
See also:
Quick Manual
Advertisement
Table of Contents

Related Manuals for Gigabyte GSmart M3447


Summary of Contents for Gigabyte GSmart M3447
- Page 1 M3447...
-
Page 2: Copyright
Copyright All mobile products by GIGA-BYTE COMMUNICATIONS INC. mentioned in this document, including the device, accessories, software, text, music, and pictures, are owned by, or authorized by original manufacturers to GIGA-BYTE COMMUNICATIONS INC. Reproduction, transfer, distribution, or storage of part or all of the contents in this document in any form without the prior written permission of GIGA-BYTE COMMUNICATIONS INC. -
Page 3: Safety Information
Safety Information This section contains important information on safe and efficient operation. Please read this information before using the device. • Use only the batteries and power adapter provided by the manufacturer. Use of unauthorized accessories may void your warranty. •... - Page 4 ROAD AND ENVIRONMENTAL SAFETY • Turn off the phone in areas with a potentially explosive atmosphere or where flammable objects exist such as gas stations, fuel depots, and chemical plants among others. Sparks from these areas could cause explosion or fire and result in injury or even death. •...
- Page 5 WEEE Notice The WEEE logo on the document or on the package box indicates that this product must not be disposed of or dumped with your other household waste. You are liable to dispose of all your electronic or electrical waste equipment by relocating over to the specified collection point for recycling of such hazardous waste.
-
Page 6: General Information
General Information This section contains important information on safe and efficient operation. Please read this information before using the device. Ignorance of the following notices may lead to violations of the law. • Before using the device, please make sure you have fully charged the battery. •... -
Page 7: Table Of Contents
Table of Contents Copyright ..............................0-1 Safety Information ............................0-2 General Information............................ 0-5 Chapter 1 Getting Started ........................1-1 1.1 Your Phone ............................1-1 1.2 Installing or Uninstalling the SIM Card and Battery ................1-3 1.3 Charging the Battery..........................1-4 1.4 Using Headset............................ - Page 8 5.2 Fun & Games ............................5-1 5.3 Extra ..............................5-1 5.4 Service ..............................5-1 5.5 Organizer.............................. 5-1 5.6 User Profile............................5-2 5.7 Shortcuts .............................. 5-2 Chapter 6 Managing Your Phone ......................6-1 6.1 Settings ..............................6-1 6.2 PC Sync Tool ............................6-2 6.3 Specifications ............................
-
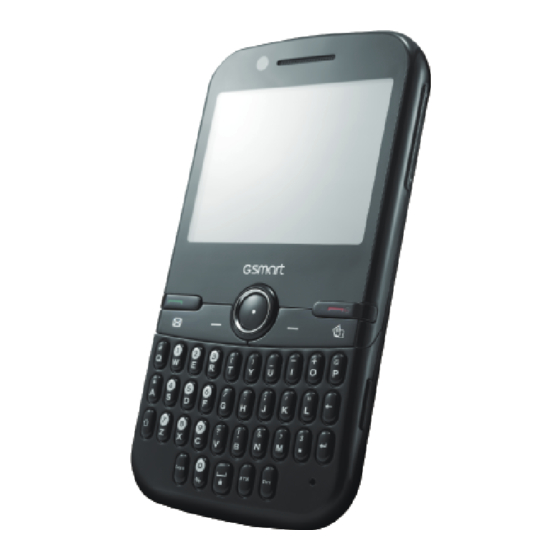
Page 9: Chapter 1 Getting Started
1. Getting Started 1.1 Your Phone LED Signals: Red light: Charging is This section introduces you to the hardware of the activated. device. Blue light: Bluetooth is activated. LED / Speaker Flashing green light: Got missed calls or unread messages. Speaker: The source of music and voice. - Page 10 • Connect USB cable and the AC adapter to charge the battery. Items Functions The camera on the back of the device 2 Megapixels supports 2-mega-pixel Camera photo and high-quality Items Functions video. Press upwards or You need to open the downwards to increase Volume Key cover to install or...
-
Page 11: Installing Or Uninstalling The Sim Card And Battery
1.2 Installing or Uninstalling the 3. Stay your palm close to the back cover. SIM Card and Battery To remove the back cover 1. Please turn over your phone with the back cover facing up. 4. Then pull the back cover with your fingertip to remove it. -
Page 12: Charging The Battery
Insert the SIM card. Make sure the gold contacts 2. Plug the AC adapter to an outlet to start are facing down and the cut-off corner is facing charging. towards the battery slot. NOTE: • The battery can also be charged when you To remove the SIM card connect your phone to the computer. -
Page 13: Phonebook
Press and hold End Key until the phone is turned the SIM card(s). off. NOTE: If your phone is locked, please un-lock Add Contacts to Blacklist it first. Then you can turn off your phone. 1. Tap Application Drawer > Phonebook. 2. - Page 14 of the weather. NOTE: When you update the information of the Status Bar Icons weather, you may be charged. The Status bar icons indicate different types of information. Other Icons of the Home Screen Icon Description Types Icons Descriptions Tap Widget to select the widgets you want.
-
Page 15: Bluetooth
2G network is in The device is use. locked. Lock/Unlock 3G network is in The device is use. unlocked. 1.9 Bluetooth Roaming. Your phone connects to the Internet via GPRS / EDGE / 3G. NOTE: When you turn on the phone, you may connect to the Internet automatically (If your No SIM card SIM card supports that). - Page 16 tap OK. NOTE: • The password you enter on your phone must be the same password to be entered on the other Bluetooth device. • Once a partnership has been created, connecting to that device again will no longer require entering the password. M3447│1-8...
-
Page 17: Chapter 2 Phone Functions & Input
2. Phone Functions & Input To open Phone screen, tap any of number keys on the keyboard. Phonebook on the Phone screen. 2. Tap the desired contact, and then, tap Call or press Talk Key. To make emergency calls Enter the international emergency number 112, and then, press Talk Key. -
Page 18: Video Calls
hold. Then tap Options > Conference to set up Functions about video calls conference calls. When the video call is connected successfully, NOTE: Conference call is a network service. you can use some functions. You can use the Check with your network provider for the on-screen keyboard to input phone numbers. - Page 19 • To display the symbols keyboard, tap • To switch numbers and alphabets, tap M3447│ 2-3...
-
Page 20: Chapter 3 Email & Messaging
3. Email & Messaging Use Messaging to access text and MMS contacts, tap Enter number or tap Add from messages. Use Email to send and receive e-mail Phonebook to select the contact(s). messages via your Internet e-mail accounts. 8. Tap Options > Send to send your message. Note: If you want to save your message to the 3.1 Text Message draft, tap Options >... -
Page 21: Multimedia Message
3. Tap Yes to delete the message. 2. Select a contact, and then, tap Options. 3. Tap Send multimedia message. To delete all text messages 4. Compose your message. Tap Options > Add 1. Tap Application Drawer > Messaging. picture, Add sound, or Add video. 2. -
Page 22: Using Email
Account > Yes. 4. In the “Subject”, enter the subject. 3. Input Email address, and then, tap Options > 5. Compose your e-mail. Tap Options > Done to Next. complete the composing. 4. Select a protocol, and then, tap Options > 6. -
Page 23: Chapter 4 Multimedia Applications
4. Multimedia Applications 4.1 Photos and Videos Tap to activate the settings. Your phone is equipped with a 2.0 megapixels camera to take photos and videos. Tap to take a photo. Tap to go back to Taking a photo Multimedia. 1. - Page 24 Configuring camera settings On the camera screen, tap the settings icon . Tap to view and adjust the general settings of your camera and video recorder. Available Mode Setting options Photo album, Video recorder, Switch to and Use front camera. Normal, Continuous shot, Capture...
-
Page 25: Image Viewer
To play slideshow default. 1. Tap Application Drawer > Multimedia > Image Camera, Use Switch to viewer. front camera. 2. Select an image, and then, tap Options > Slide Scene mode Auto, Night. show > Play. 176x144 (QCIF), 3. Tap the pause icon to pause the slide show. 320x240(QVGA), Tap the leave icon to leave the slide show Record size... -
Page 26: Photo Editor
controls. To remove an audio file from the playlist 1. While playing an audio file, tap Options > Current playlist. 2. Select an audio file in the playlist. 3. Tap Options > Remove > Yes, and then, the song is removed from the playlist. 4.4 Photo Editor You can use this function to edit photos. -
Page 27: Fm Radio
Icon Function Icon Function Tap to decrease the Tap to record. frequency by 0.1 MHz. Tap to play or pause the Tap to play or pause the channel. audio file. Tap to increase the frequency by 0.1 MHz. Tap to go to the previous audio file. -
Page 28: Slide Show
Add melody 1. Tap Application Drawer > Multimedia > Melody composer > Add. 2. Begin to compose the melody. 3. Tap Options to play, to adjust the playing speed, to select the instrument, or to save the file. 4.9 Slide Show Tap Application Drawer >... -
Page 29: Chapter 5 Programs
5. Programs 5.1 File Manager Stopwatch. You can select Typical stopwatch or nWay stopwatch. Help you browse the files in your phone and in your memory card. Tap Application Drawer > File Ebook reader manager. Help you read electronic books. Tap Application Drawer >... -
Page 30: Organizer
1. In order to add events in the calendar, tap Set up the Internet manually Application Drawer > Organizer > Calendar. 1. Tap Application Drawer > Settings > 2. Select a date, and then, tap Options > Add Connectivity > Data account > GPRS > Options event. -
Page 31: User Profile
• Listen to leaving messages:Tap Application Drawer > Organizer > Answer machine > Leaving messages. Select the audio file, and then, tap Play. 5.6 User Profile Help you adjust the settings of tone, volume, alert, ring, and answer mode. Tap Application Drawer > User profile. -
Page 32: Chapter 6 Managing Your Phone
6. Managing Your Phone 6.1 Settings screen saver, etc. Change the Tap Application Drawer > Settings to view and adjust Themes background. the settings of your phone. If you activate this function, the greeting Dual SIM switch Greeting text text will show up on You can select “select with SIM status”... -
Page 33: Pc Sync Tool
Security settings 6.2 PC Sync Tool You can lock/unlock the SIM card and the programs. PC Sync Tool is a powerful software to manage your When you do that, you need to input the password mobile phone through your PC. Please connect your first. - Page 34 the availability of local networks and individual usage.) Radio Band & Standard 850 / 900 / 1800 /1900 GSM/GPRS/EDGE WCDMA 2100 MHz Connectivity Bluetooth Bluetooth 2.1 + EDR USB 2.0 Audio Jack 3.5 mm stereo audio jack Digital Camera 2.0 Megapixel Color Rear Camera Camera with Video Recording...
Need help?
Do you have a question about the GSmart M3447 and is the answer not in the manual?
Questions and answers