HAMPTON BAY WDF9-2 Manual
- Use and care manual (19 pages) ,
- Manual (18 pages) ,
- Use and care manual (13 pages)
Advertisement
Pre-assembly
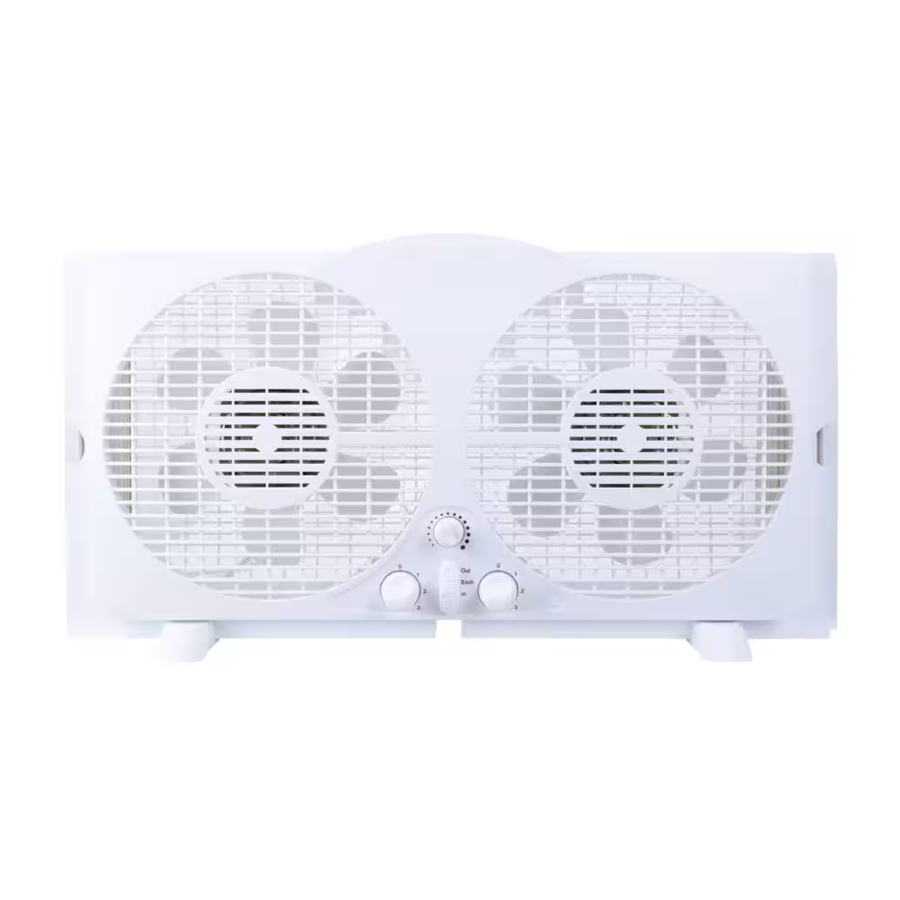
PRODUCT DESCRIPTION

| Part | Description | Quantity |
| A | Fan Body | 1 |
| B | Left Fan Speed Control | 1 |
| C | Right Fan Speed Control | 1 |
| D | Thermostat Control | 1 |
| E | Fan Intake-Exhaust/Air Exchange | 1 |
| F | Feet | 2 |
| G | Expandable Panels | 2 |
Assembly Instructions
- This window fan has been designed to fit double-hung, slider ad casement windows with minimum openings of 24.4 in. wide and 13 in. high. ( Fig. 1 ). No feet required when using in the window. This fan is designed and recommended for use with your window screen in place.


ADDITIONaL NOTES fOr DOUBLe-HUNG TYPe WINDOWs (fig. 2)

- With the window fully open, set the fan in the window with front (A) of fan facing the INSIDE.
- Hold fan with one hand while adjusting panels (G) with the other.
- Close the window on top of the fan with the bottom edge of the window behind the lip of fan housing.
- If the fan still does not fit properly in the window, readjust the expandable panel (G) on right/left side of fan to fill in remaining space between panel and window frame until a secure fit is achieved.
- This fan can also be used on the floor. Push the feet (F) into the fan body (A) and snap together. (Fig. 3)


Operation
- . Make sure rotary switches are in the OFF position.
- . Plug into 120V AC electric outlet.
- . Set the individual fan motors on either
![]() (intake),
(intake), ![]() (exhaust ) or
(exhaust ) or ![]() (exchange) using the control lever.
(exchange) using the control lever. - . Turn the Thermostat Control to its highest setting (full clockwise).
- . To start the unit turn the rotary switches to desired speed: 0=Off, 3=High, 2=Medium, 1=Low.
- . While the window fan is on, turn the Thermostat Control counter-clockwise towards the smaller dots until the fan stops (Away from Cooler). This is the selected comfort level.
- . If the fan is stopped and you want to turn it back on, turn the Thermostat Control clockwise until the fan starts, towards the larger dots (Towards Cooler).
 (intake),
  (exhaust ) or
 Care and Maintenance
TO CLEAN: Always disconnect the power cord from the electrical outlet when cleaning your fan. Light accumulated dust can be removed by using a soft cloth to wipe away the dust at the back grille of the fan. Wipe the exterior surfaces of the fan occasionally with a damp cloth (not dripping wet) and dry thoroughly with a soft dry cloth before operating the fan. Do not use harsh cleaners or materials to clean this unit. This will cause damages to it.
 Do not allow water to run into the interior of the fan as this could create a fire or electric shock hazard. The fan motor is factory lubricated for life and will require no further lubrication. No other user maintenance is required or recommended. If service is required, send your fan to the authorized service facility. |
TO STORE: Make sure to clean the fan before storing. Retain the original packaging for the purpose of storing your fan. Always store the fan in a dry place. Never store it while it is still plugged in. Never wrap the cord tightly around the fan. Also, do not put any stress on the cord where it enters the fan, as it could cause the cord to fray and break.
Safety Information
Please read and understand this entire manual before attempting to assemble, operate or install the product. When using electrical appliances, basic precautions should always be followed to reduce the risk of fire, electric shock and injury to persons, including the following:
- Do not operate any fan with a damaged cord or plug. Discard fan or return to an authorized service facility for examination and/or repair.
- Do not run cord under carpeting. Do not cover cord with throw rugs, runners, or similar coverings. Do not route cord under furniture or appliances. Arrange cord away from traffic area and where it will not be tripped over.
- Never insert fingers, pencils, or any other object through the grille when fan is running.
- Disconnect fan when moving from one location to another, before putting on or taking off parts.
- Disconnect fan when removing grilles for cleaning.
- Do not operate in the presence of explosive and/or flammable fumes.
- Do not place fan or any parts near an open flame, cooking or other heating appliance.
- Always use on a dry, level surface, do not use outdoors.
- Do not let the cord hang over the edge of a table, counter, or come in contact with hot surfaces.
- To disconnect grip plug and pull from wall outlet.
Never yank on cord.
 To reduce the risk of electric shock and injury to persons, do not use this fan near a door or window. |
| To reduce the risk of fire or electric shock, do not use this fan with any solid-state speed control device. |
PLEASE READ AND SAVE THESE
IMPORTANT SAFETY INSTRUCTIONS
Polarized Plug
This appliance has a polarized plug (one blade is wider than the other). The polarized plug is not intended to be used in non-polarized outlets (having both slots the same size). To reduce the risk of electric shock, this plug is intended to fit in a polarized outlet only one way. If the plug does not fit fully in the outlet, reverse the plug. If it still does not fit, contact a qualified electrician to install the proper outlet. Do not attempt to modify this plug or defeat this safety feature in any way.

Power Cord safety Tips
- Never pull or yank on the cord or the appliance.
- To insert the plug, grasp it firmly and guide it into the outlet.
- To disconnect the appliance, grasp the plug and remove it from the outlet.
- Before each use, inspect the line cord for cuts and/or abrasion marks. If any are found, this indicates that the appliance should be serviced and the line cord replaced. Please return it to an authorized service representative.
- Never wrap the cord tightly around the appliance, as this could place undue stress on the cord where it enters the appliance and cause it to fray and break.
Do not operate appliance if the line cord shows any damage or if appliance works intermittently or stops working entirely.
Documents / ResourcesDownload manual
Here you can download full pdf version of manual, it may contain additional safety instructions, warranty information, FCC rules, etc.
Advertisement


Need help?
Do you have a question about the WDF9-2 and is the answer not in the manual?
Questions and answers