Table of Contents
Advertisement
Available languages
Available languages
Advertisement
Chapters
Table of Contents

Related Manuals for Craftsman C935-355190


Summary of Contents for Craftsman C935-355190
- Page 1 Model No. C935-355190 • Assembly • Operating Instructions • Replacement Parts • Warranty CAUTION: You must read and understand this owner’s manual before operating unit. SEARS CANADA P/N 598992-00 Rev. 1 19” MULCHING MOWER INC., TORONTO, JULY 2006...
-
Page 2: Table Of Contents
Warranty...i Safety ...1 Assembly ...2 Operation...4 Maintenance ...6 Storage...7 Trouble Shooting Guide ...8 Repair Parts ...9 Parts Ordering Instructions ...11 Safety specifications have been introduced in North America which relate to the design of lawnmowers intended for consumer use. These specifications are intended to reduce the risks of blade contact injuries. This lawnmower was designed to incorporate all such recommended design features. -
Page 3: Safety
WARNING: When using electric tools, basic safety precautions should always be followed to reduce the risk of fire, electric shock, and personal injury, including the following: WARNING: This product contains chemicals, including lead, known to the State of California to cause cancer, and birth defects or other reproductive harm. -
Page 4: Unpacking The Mower
• REPAIRS AND SERVICE. Repairs, maintenance and any adjustments not specified in this manual should be performed by authorized service centers or other qualified service organizations, always using identical replacement parts. • USE OF ACCESSORIES AND ATTACHMENTS. The use of any accessory or attachment not recommended for use with this lawnmower could be hazardous. - Page 5 ASSEMBLING THE GRASSBAG (FIGURE 3A,3B,3C,3D) 1. UNPLUG MOWER, AND WAIT FOR BLADE TO COME TO A COMPLETE STOP. 2. Before starting to assemble the grassbag to the frame, check that the grassbag and frame are similar to figure 3A. 3. Slide the grassbag onto the frame as shown in figure 3B. 4.
-
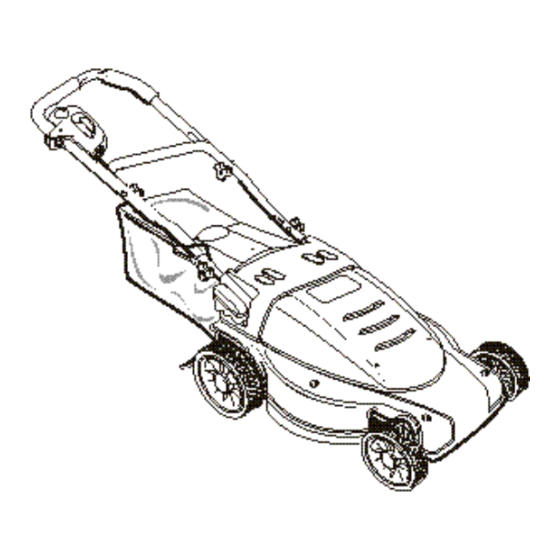
Page 6: Know Your Mower
KNOW YOUR MOWER READ THIS OWNER’S MANUAL AND SAFETY RULES BEFORE OPERATING YOUR MOWER. Compare the illustrations with your mower to familiarize yourself with the location of various controls and adjustments. Save this manual for future reference. SWITCH LEVER GRASSBAG WHEEL HEIGHT ADJUSTMENT... - Page 7 THE OPERATION OF ANY LAWNMOWER CAN RESULT IN FOREIGN OBJECTS THROWN INTO THE EYES, WHICH CAN RESULT IN SEVERE DAMAGE. ALWAYS WEAR SAFETY GLASSES OR EYE SHIELDS BEFORE STARTING YOUR LAWNMOWER AND WHILE MOWING. WE RECOMMEND WIDE-VISION SAFETY MASK FOR OVER THE SPECTACLES OR STANDARD SAFETY GLASSES, AVAILABLE AT SEARS RETAIL OR CATALOGUE STORES.
-
Page 8: Mulching Tips
WHEEL HEIGHT ADJUSTMENT (FIGURE 8) 1. BEFORE MAKING ANY ADJUSTMENTS, TURN OFF, UNPLUG MOWER AND WAIT FOR BLADE TO STOP. 2. Your mower features the Sears one touch wheel height adjustment system. This system will adjust all four wheels at the same time. 3. -
Page 9: Service And Ad Just Ments
REMOVING AND ATTACHING BLADES (FIGURE 9,10,11) 1. RELEASE SWITCH LEVER TO TURN MOWER OFF, WAIT FOR THE BLADE TO STOP, AND UNPLUG MOWER! 2. Use a piece of 2x4 wood (about 2 feet long) to keep blade from turning while removing blade nut. 3. - Page 10 TROUBLE SHOOTING/CORRECTIVE ACTION GUIDE: PROBLEM -Motor will not start -Motor keeps slowing down Runs but poor cut results -Excess vibration -Mower is hard to push -Mower leaves clumps of grass -Discharge/Bag plugging CORRECTIVE ACTION - Check fuse or circuit breaker to ensure power is to outlet.
- Page 11 PICTURE OF UNIT WITH CALLOUTS...
-
Page 12: Parts List
PARTS LIST... -
Page 13: Repair Parts
Models C935-355190 SERVICE YOUR SERVICE Model may be found on the Nameplate on rear of mower housing. You should record Model Number and keep in a safe place for future reference. SEARS CANADA INC., HOW TO ORDER REPAIR PARTS Each lawnmower has its own MODEL NUMBER. - Page 16 Guide d’utilisation Nº de modèle C935-355190 • Assemblage • Fonctionnement • Pièces de rechange • Garantie MISE EN GARDE Vous devez lire et comprendre les directives du présent guide avant d’utiliser l’appareil. SEARS CANADA Pièce nº 598992-00 Rev. 1 TONDEUSE DE 48 cm (19 po) INC.,...
- Page 17 Garantie ...i Mesures de sécurité...1 Assemblage ...2 Fonctionnement ...4 Entretien...6 Entreposage ...7 Liste de dépannage...8 Pièces de rechange ...9 Commande de pièces...11 Il existe en Amérique du Nord des normes de sécurité relatives à la conception des tondeuses destinées aux consommateurs.
-
Page 18: Mesures De Sécurité
AVERTISSEMENT : Afin de réduire les risques d’incendie, de secousses électriques ou de blessures lorsque vous utilisez des outils électriques, il faut toujours respecter les mesures de sécurité suivantes. AVERTISSEMENT : Le produit renferme des produits chimiques, dont du plomb. Selon l’état de la Californie, ce produit chimique peut causer le cancer ainsi que des malformations congénitales, et il présente d’autres dangers au système reproductif humain. -
Page 19: Assemblage
• DEMEURER VIGILANT. Travailler avec vigilance et faire preuve de bon sens. Ne pas se servir de l'outil lorsqu'on est fatigué ou après avoir ingéré des drogues ou de l’alcool. • VÉRIFIER LES PIÈCES ENDOMMAGÉES. Avant d'utiliser de nouveau l'outil, bien vérifier un protecteur endommagé... - Page 20 MONTAGE DU SAC À HERBE (FIGURES 3A, 3B, 3C ET 3D) 1. DÉBRANCHER L’OUTIL ET ATTENDRE L’IMMOBILISATION COMPLÈTE DE LA LAME. 2. Avant de monter le sac sur le cadre, vérifier le sac et le cadre pour s’assurer qu’ils correspondent à ceux illustrés à la figure 3A. 3.
-
Page 21: Fonctionnement
CONNAISSEZ BIEN VOTRE TONDEUSE. LISEZ LE PRÉSENT GUIDE D’UTILISATION ET LES MESURES DE SÉCURITÉ AVANT DE VOUS SERVIR DE LA TONDEUSE. Comparez les illustrations à la tondeuse afin de vous familiariser avec l’emplacement des différents dispositifs de réglage et de commande. Conservez le présent guide à titre de référence. INTERRUPTEUR SAC À... - Page 22 LORSQUE VOUS VOUS SERVEZ D’UNE TONDEUSE, DES OBJETS PEUVENT ÊTRE PROJETÉS DANS VOS YEUX ET VOUS BLESSER GRIÈVEMENT. PORTEZ TOUJOURS DES LUNETTES DE SÉCURITÉ AVANT DE COMMENCER À TONDRE ET PENDANT LA TONTE. NOUS VOUS RECOMMANDONS DE PORTER UN MASQUE PROTECTEUR PAR DESSUS VOS LUNETTES OU DES LUNETTES DE SÉCURITÉ...
-
Page 23: Entretien
RÉGLAGE DE LA HAUTEUR DES ROUES (FIGURE 8) 1. AVANT DE RÉGLER L’OUTIL, METTRE LA TONDEUSE HORS TENSION, LA DÉBRANCHER ET ATTENDRE L'IMMOBILISATION COMPLÈTE DE LA LAME. 2. La tondeuse est dotée du système monotouche de réglage de la hauteur des roues de Sears. -
Page 24: Entreposage
INSTALLATION ET RETRAIT DE LA LAME (FIGURES 9, 10 ET 11) 1. RELÂCHER LE LEVIER DE L’INTERRUPTEUR POUR ARRÊTER LA TONDEUSE, ATTENDRE L’IMMOBILISATION DE LA LAME ET DÉBRANCHER LA TONDEUSE! 2. Utiliser un morceau de bois de 10 cm sur 60 cm (2 po X 4 po) d'une longueur d’environ 10 cm (2 pi) afin d'empêcher la lame de tourner lorsqu'on retire l'écrou de la lame. -
Page 25: Liste De Dépannage
LISTE DE DÉPANNAGE PROBLÈME SOLUTION - Impossibilité de démarrer - Vérifier le fusible ou le disjoncteur de la prise pour s’assurer que celle-ci fonctionne. - Essayer la rallonge avec un autre outil pour la vérifier. - Contacter le service clientèle Sears ou tout autre centre de service qualifié. - Page 26 PICTURE OF UNIT WITH CALLOUTS...
- Page 27 PARTS LIST...
-
Page 28: Pièces De Rechange
Guide d’utilisation Modèle C935-355190 LE SERVICE À VOTRE SERVICE Le numéro de modèle se trouve sur la plaque signalétique à l’arrière du châssis de la tondeuse. Consignez ce numéro dans un endroit sûr à titre de référence. SEARS CANADA INC., COMMENT COMMANDER DES PIÈCES DE RECHANGE...
Need help?
Do you have a question about the C935-355190 and is the answer not in the manual?
Questions and answers