Advertisement
Service - Manual
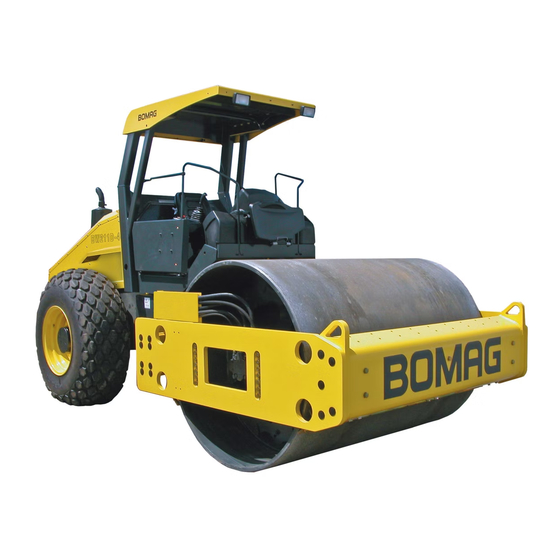
BW 211 / 212 / 213 D-40
BW 211 / 212 / 213 PD-40
S/N 101 582 42 . . . . S/N 101 582 43 . . . . S/N 101 582 44 . . . .
S/N 861 583 00 . . . . S/N 101 583 02 . . . . S/N 101 583 03 . . . . S/N 101 582 55 . . . .
S/N 101 582 47 . . . . S/N 101 582 48 . . . . S/N 101 582 49 . . . .
Catalogue number.
008 911 63
Single drum roller
03/2008
Advertisement
Table of Contents

Summary of Contents for Bomag BW 213 PD-40
- Page 1 Service - Manual BW 211 / 212 / 213 D-40 BW 211 / 212 / 213 PD-40 S/N 101 582 42 ..S/N 101 582 43 ..S/N 101 582 44 ..S/N 861 583 00 .
- Page 3 Fundamental electrics 7.1 Understanding circuit diagrams 7.2 Terminal designations 7.3 Current and voltage 7.4 CAN-Bus 7.5 Resistance 7.6 Series / parallel connection 7.7 Ohm's law 7.8 Electrical energy 7.9 Formula diagram 7.10 Metrology 7.11 Diodes, relays, fuses 008 911 63 BOMAG...
- Page 4 7.19 Deutsch plug, series DT and DTM 7.20 Plugs and terminals in spring clamping technology 7.21 Electric modules Special tools, electrics 8.1 Special tools, electrics Electronic modules 9.1 BEM, BOMAG Evib-meter 9.2 Electric module K04 9.3 Heating/air conditioning control Speedometer Module 10.1 Speedometer module Service Training 11.1 Service Training...
- Page 5 15.4 Repairing the drum 15.5 Disassembling and assembling the change-over weight 15.6 Changing the rubber buffers and adjusting the pretension Oscillating articulated joint 16.1 Special tools, oscillating articulated joint (BW177 to BW 216) 16.2 Repair overview oscillating articulated joint 008 911 63 BOMAG...
- Page 6 17.5 Axle drive motor 17.6 Axle Circuit diagrams 18.1 Hydraulic diagram 581 202 10 18.2 Hydraulic diagram 581 202 11 18.3 Wiring diagram 582 702 09 18.4 Wiring diagram 582 702 29 18.5 Wiring diagram 582 702 41 1013 008 911 63 BOMAG...
- Page 7 1 General 008 911 63 BOMAG...
- Page 8 It is highly recommended to have repairs to critical systems, such as steering, brakes and travel drive, sole carried out by a BOMAG workshop. Untrained persons should NEVER UN- TERTAKE SUCH REPAIR WORK.
-
Page 9: Safety Regulations
Repair work shall only performed by appropriately during repair work. trained personnel or by the after sales service of Tools, lifting gear, lifting tackle, supports and other BOMAG. ● auxiliary equipment must be fully functional and in Any suggestions, safety precautions and warn- safe condition. - Page 10 Wear protective clothes and safety gloves, if possi- ● ble. If there is a risk of eye contact you should protect ● your eyes appropriately, e.g. chemistry goggles or 008 911 63 BOMAG...
- Page 11 Screw the filler cap back on, until Cover all electric components properly before wet ● the tank is finally emptied. cleaning. Synthetic rubber Many O-rings, hoses and similar parts, which are ap- parently made of natural rubber, are actually made of 008 911 63 BOMAG...
- Page 12 Burning cigarettes, flames or sparks can cause ex- ● ● facture and testing of these pressure vessels is gov- plosion of the accumulator erned by the pressure vessel directive. (New edition Keep ignition sources away from the battery. ● 008 911 63 BOMAG...
-
Page 13: Special Safety Regulations
When mixing battery fluid always pour acid into wa- ● ter, never vice-versa. Special safety regulations Use only genuine BOMAG spare parts for repair ● purposes. Original parts and accessories have been specially designed for this machine. We wish to make explicitly clear that we have not ●... -
Page 14: General Repair Instructions
Do not disconnect or connect battery or generator ● while the engine is running. Do not operate the main battery switch under load. ● 008 911 63 BOMAG... - Page 15 Caution Switch off the main battery switch, doisconnect the generator and pull the plug out on the control unit before starting welding work. 008 911 63 BOMAG...
-
Page 16: Hydraulic System
Fill new hydraulic units with hydraulic oil before ● starting operation. After changing a component thoroughly flush and ● bleed the entire hydraulic system. Perform measurements at operating temperature of ● the hydraulic oil (approx. 40 ¯C). 008 911 63 BOMAG... -
Page 17: Air Conditioning System
Before opening all components should have ● elements is not predictable. The use of leak detec- warmed up to ambient temperature, to avoid that 008 911 63 BOMAG... -
Page 18: Fuel Hoses
● layer. In case of a separation the hose needs to be of time with high engine speeds without a sufficient replaced. amount of refrigerant in the system. This could probably cause overheating and internal damage. 008 911 63 BOMAG... - Page 19 Slide the seal over the shaft, with the lip facing to- ● wards the fluid to be sealed. Note If possible, use an assembly sleeve 1 (Fig. 2), to pro- tect the lip from being damaged by sharp edges, 008 911 63 BOMAG...
-
Page 20: Ball And Roller Bearings
Move the outer race gently to and fro while holding ● it by the inner race; check for resistance while rotat- ing and replace the bearing if it does not work cor- rectly. Lubricate the bearing with an appropriate lubricant ● before reinstalling. 008 911 63 BOMAG...


Need help?
Do you have a question about the BW 213 PD-40 and is the answer not in the manual?
Questions and answers