
Related Manuals for Bomag BW 900-2


Summary of Contents for Bomag BW 900-2
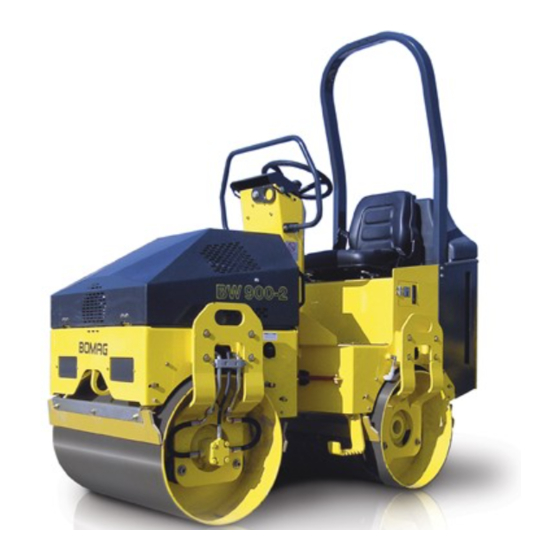
- Page 1 Operating instructions Maintenance instructions BW 900-2 S/N 901 800 00 ..> S/N 861 800 02 ..> Tandem Vibratory Roller Catalogue number 10/2002 008 152 91...
- Page 3 BOMAG dealer against the serial avoid malfunctions caused by operating er- number of your machine. rors. Your BOMAG dealer will also supply you with in- Compliance with the maintenance instructions will formation about the correct use of our machines in soil and asphalt construction.
- Page 4 Fill in the above listed data when receiving the ma- chine. Upon receipt of the machine our organization will instruct you about correct operation and mainte- nance. Please observe strictly all safety regulations and notes on potential dangers! Fig. 2 Fig. 3 BW 900-2 B O M A G...
-
Page 5: Table Of Contents
5 . 2 2 C l e a n i n g , c h a n g i n g t h e d r y a i r f i l t e r BW 900-2 B O M A G... - Page 6 T r o u b l e s h o o t i n g 6 . 1 G e n e r a l n o t e s 6 . 2 E n g i n e f a u l t s BW 900-2 B O M A G...
- Page 7 1 Technical Data BW 900-2 B O M A G...
- Page 8 T e c h n i c a l D a t a Fig. 4 Dimensions in O1/O2 W 1143 1620 2340 2080 BW 900-2 BW 900-2 Weights Operating weight CECE 1326 Mean static linear load kg/cm CECE Dimensions Working width...
- Page 9 T e c h n i c a l D a t a BW 900-2 Drive Engine manufacturer/type Honda GX 620 Cooling Number of cylinders Rated power ISO 9249 kW (PS) 14,9 (20,3) Rated speed 1 rpm 3000 Battery V/AH 12/..
- Page 10 T e c h n i c a l D a t a BW 900-2 B O M A G...
- Page 11 2 Safety regulations BW 900-2 B O M A G...
- Page 12 General Unintended use Dangers may, however, arise from the machine if This BOMAG machine is built in accordance it is used by untrained personnel in an unprofes- with the latest technical standard and the valid sional way or if it is used for purposes other than technical rules and regulations.
- Page 13 Use only safe lifting gear of sufficient load bearing grease, oils, fuels, dirt, snow and ice capacity. the engine compartment hood is closed and Attach the lifting gear only to the specified lifting locked points. BW 900-2 B O M A G...
- Page 14 Change to when reversing, check that there are not any per- the lower speed range before approaching the sons or obstructions in the endangered area. slope. BW 900-2 B O M A G...
- Page 15 Do not spill any fuel. Catch running out fuel, do not Always catch and dispose of biodegradable hy- let it seep into the ground. draulic oils separately. Wipe off spilled fuel. Keep dirt and water away from fuel. BW 900-2 B O M A G...
- Page 16 Working on the fuel system nection. Only genuine replacement hydraulic Do not inhale any fuel fumes. hoses from BOMAG ensure that the correct No open fire, do not smoke, do not spill any fuel. hose type (pressure range) is used at the right location.
- Page 17 Test Depending on the type of application and the op- erating conditions vibratory equipment has to be examined by a specialist whenever required, but at least once every year. BW 900-2 B O M A G...
- Page 18 S a f e t y r e g u l a t i o n s BW 900-2 B O M A G...
- Page 19 3 Indicators and Controls BW 900-2 B O M A G...
- Page 20 I n d i c a t o r s a n d C o n t r o l s Fig. 5 BW 900-2 B O M A G...
- Page 21 14 Ball valve for water sprinkling system Warning light for seat contact switch 15 Fuel level gauge Rotary switch for flashing beacon 16 Choke lever Rotary switch for working lights 17 Fuses Optional equipment BW 900-2 B O M A G...
-
Page 22: General Notes
Actuate only in events of emergency during operation, do not use as service brake. Restart the machine only after the danger that caused the actuation of the emergency stop switch has been eliminated. BW 900-2 B O M A G... - Page 23 = after starting the engine. form trouble shooting and have the fault cor- rected. Fig. 9 No. 4 = Parking brake warning light Fig. 11 No. 6 = Warning light for seat contact switch BW 900-2 B O M A G...
- Page 24 The ignition switch is designed with a lock to pre- vent repetitive starting. For a new starting attempt the ignition key must first be turned back to posi- tion "0". Optional equipment BW 900-2 B O M A G...
- Page 25 Always drive and vibrate with max. engine speed! Control the travel speed only with the travel lever. Fig. 17 No. 12 = Travel lever press through po- sition "0" to the right parking brale applied, starting of engine possible. BW 900-2 B O M A G...
- Page 26 (B) 25A = (F111) Regulator No. 15 = Fuel level gauge shows the fuel level in the fuel tank. Fig. 23 Main fuse for battery Fig. 21 = Main fuse for battery No. 16 = Choke lever BW 900-2 B O M A G...
- Page 27 I n d i c a t o r s a n d C o n t r o l s Fig. 24 No. 18 = Water level gauge BW 900-2 B O M A G...
- Page 28 I n d i c a t o r s a n d C o n t r o l s BW 900-2 B O M A G...
-
Page 29: Operation
4 Operation BW 900-2 B O M A G... -
Page 30: General Notes
Hydraulic oil level, if necessary fill up Hydraulic oil filter contamination indicator Danger Fire hazard! Do not refuel in closed rooms. Fuel level, if necessary fill up. Water level in sprinkler system, if necessary fill Scrapers, if necessary adjust. BW 900-2 B O M A G... -
Page 31: Starting The Engine
Always close the choke if the engine is cold or has cooled down. Always open the choke when the engine is warm. Fig. 29 Check, whether the emergency stop switch (Fig. 29) is unlocked. BW 900-2 B O M A G... - Page 32 10 min- Fig. 31 utes. Turn the ignition key (Fig. 31) to position "II", the starter will crank the engine. As soon as the engine ignites return the igni- tion key to position "I". BW 900-2 B O M A G...
-
Page 33: Starting With Jump Leads
Shift the throttle lever (Fig. 35) to position "MAX". Note During operation the throttle lever must always be maintained in full engine speed position. Control the travel speed only with the travel lever. BW 900-2 B O M A G... -
Page 34: Stopping The Machine, Op- Erating The Parking Brake
Position "I" = max. speed in forward Position "II" = max. speed in reverse Fig. 38 Push the travel lever (Fig. 38) to the right into parking brake position. BW 900-2 B O M A G... -
Page 35: Switching The Vibration On Or Off
Actuate the vibration push button (Fig. 41). Switching the vibration on Switching the vibration off Fig. 39 Always shift the throttle lever (Fig. 39) to posi- Fig. 42 tion "MAX". Actuate the vibration push button (Fig. 42) again. BW 900-2 B O M A G... -
Page 36: Switching The Gravity Sprin- Kler System On Or Off
Fig. 44 Fig. 46 Switch the cock valve to position "II" (Fig. 44). The gravity sprinkler system is switched off. Push the travel lever (Fig. 46) to the right into parking brake position. BW 900-2 B O M A G... - Page 37 Operate lever 3 (Fig. 50) to adjust the seat to Secure the machine against unauthorized use, the weight of the operator. pull the ignition key off. Mark machines, which could be in the way, with a clearly visible sign. BW 900-2 B O M A G...
-
Page 38: O W I N G
Turn both plugs back in (Fig. 51). Fig. 52 Push both screws (Fig. 52) in against the springs. Tighten both screws alternately and step by step to 35 Nm (25.7 ftlb). BW 900-2 B O M A G... - Page 39 After driving the machine on the transport ve- hicle swing the articulation lock 1 (Fig. 54) out of its receptacle to the front. Insert the pin (2) and secure it with the cotter pin (3). BW 900-2 B O M A G...
- Page 40 O p e r a t i o n Loading weight: See technical data After transport Fig. 57 After transport release the articulation lock again and store it in the receptacle. BW 900-2 B O M A G...
-
Page 41: Maintenance
5 Maintenance BW 900-2 B O M A G... -
Page 42: General Notes On Mainte- Nance
Always use the filling and filtering unit The lifetime of your engine depends to a great ex- (BOMAG part-no. 007 610 01) to fill the hy- tent on the cleanliness of the fuel. draulic system. This unit is fitted with a fine fil-... -
Page 43: Fuels And Lubricants
1 months. If the fol- lowing oil change intervals are not reached over a period of 1 months, the oil change should be per- formed at least every 3 months, irrespective of the operating hours reached. BW 900-2 B O M A G... -
Page 44: Fuels, Lubricants And Filling Capacities
Sprinkler system water anti-freeze mixture as required water** 180 litres (48 USgal) Oscillating articulated joint high pressure grease (lithium saponified) as required **Mix water an anti-freeze agent according to the specifications of the manufacturer BW 900-2 B O M A G... -
Page 45: Running-In Instructions
After the running-in period it is sufficient to check the oil level only once every day. Check bolted connections on the machine, retighten if necessary. Check for leaks. BW 900-2 B O M A G... -
Page 46: Maintenance Table
2 years As required 5.25 Water sprinkler system, maintenance in case of frost 5.26 Tightening torques for screws with metric unified thread 5.27 Engine conservation *Also in case of repairs in the hydraulic system. BW 900-2 B O M A G... -
Page 47: Checking The Engine Oil Lev- El
Check the oil level again after running the en- Open the filler cap on the fuel tank. gine for approx. 1 minute. If necessary fill in fuel. For quality of fuel refer to the table of fuels and lubricants. BW 900-2 B O M A G... -
Page 48: Checking The Hydraulic Oil Level
"fuels and lubricants". pears green. Note If, during the daily inspection of the oil level the hy- draulic oil level is found to have dropped, check all lines, hoses and components for leaks. BW 900-2 B O M A G... -
Page 49: R E A S I N G T H E A R T I C U L A T E D J O I N T
If there is a risk of frost observe the special service instructions under "water sprinkler system, main- tenance in case of frost". Make sure that the ventilation bore in the filler cap is free. BW 900-2 B O M A G... - Page 50 E v e r y 1 0 o p e r a t i n g h o u r s 5.12 Cleaning the cooling air in- take opening Fig. 66 Note Dirt in the cooling air intake openings reduces the cooling effect. Clean the cooling air intake openings (Fig. 66). BW 900-2 B O M A G...
-
Page 51: Checking, Cleaning The Dry Air Filter
Do not use gasoline or any hot fluids to clean the filter cartridge. Fig. 68 Remove the cover and take the air filter car- tridge with foam insert (Fig. 68) out of the air fil- ter housing cover. BW 900-2 B O M A G... - Page 52 Do not hold the pressure air nozzle closer than housing and lock it with the hooks. 3 cm to the filter Always blow along the inside creases. Replace a damaged dry air filter immediately. BW 900-2 B O M A G...
-
Page 53: Changing The Engine Oil
Check the electrode gap with a feeler gauge, if necessary adjust the gap to 0,7 to 0,8 mm (.03 to .032 in). BW 900-2 B O M A G... - Page 54 Screw the drain plug back in with a new seal ring. Fig. 77 Fill in new engine oil (Fig. 77). For quality and quantity of oil refer to the table of "fuels and lubricants". Screw the cap on the oil filler neck. BW 900-2 B O M A G...
-
Page 55: Changing The Engine Oil Filter.
Wipe the sealing face on the engine clean. Fig. 80 Apply some clean oil to the rubber seal of the new filter cartridge (Fig. 80). BW 900-2 B O M A G... -
Page 56: Changing The Fuel Pre-Filter
Reinstall the water filter, tighten the spigot nut. Pull the fuel filter out of the top and bottom hoses. Fig. 83 Install the new fuel filter and observe the flow direction (Fig. 83). BW 900-2 B O M A G... - Page 57 Loosen (b) the hose clamp (1) and pull the hose of the sprinkler tube (2). Pull the sprinkler tubes out and flush them thoroughly. Insert the sprinkler tubes and fill the water tank. BW 900-2 B O M A G...
- Page 58 Clean battery and battery compartment. Clean battery poles and terminal clamps and grease them with pole grease (Vaseline). Tighten the terminal clamps. Check the fastening of the battery. Serviceable batteries: Clean battery and battery compartment. BW 900-2 B O M A G...
- Page 59 The piston of cylinder 1 is in top dead center posi- tion. The T-mark on the right hand side of the fan cover is only of relevance for cylinder 1. Check the valves marked black, adjust if nec- essary. BW 900-2 B O M A G...
- Page 60 Turn the flywheel 270° in clockwise direction (Fig. 93). The T-marks on cooling fan and on the left hand side of the fan cover (cylinder 2) must be aligned. Check the valves marked black, adjust if nec- essary. BW 900-2 B O M A G...
-
Page 61: Cleaning, Changing The Dry Air Filter
(Fig. 94) out of the air fil- ter housing cover. Caution Do not use gasoline or any hot fluids to clean the filter cartridge. Before inserting the cartridge check the seal- ing faces on the dry air filter. BW 900-2 B O M A G... -
Page 62: Bomag/
Lay the foam insert into the air filter cartridge into the air filter housing cover and then install the air filter cartridge (Fig. 97). Attach the air filter housing cover to the air filter housing and lock it with the hooks. BW 900-2 B O M A G... -
Page 63: Changing The Hydraulic Oil
Fig. 98 Unscrew the leak oil line from the vibration mo- tor and catch the old oil (Fig. 98). Connect the leak oil hose again. BW 900-2 B O M A G... -
Page 64: Changing The Hydraulic Oil Filter Element
If the filter has to be changed together with the hy- draulic oil, the filter must only be changed after the oil change and after the test run. Fig. 100 Unscrew the filter bowl (Fig. 100) from the filter housing. BW 900-2 B O M A G... - Page 65 The compliance with the specified tightening tor- ques is checked with torque wrenches. The specified tightening torques do not apply when using a MoS lubricant. Note Self locking nuts must always be replaced after they have been unscrewed. BW 900-2 B O M A G...
-
Page 66: N G I N E C O N S E R V A T I O N
Unscrew both spark plugs and spray anti-cor- rosion oil through the spark plug openings. Crank the engine several times and install the spark plugs again. Close air intake on air filter and exhaust open- ing tightly. BW 900-2 B O M A G... -
Page 67: Trouble Shooting
6 Trouble shooting BW 900-2 B O M A G... -
Page 68: General Notes
T r o u b l e s h o o t i n g 6.1 General notes The following work must only be carried out by qualified and trained personnel or by the BOMAG sales service. Please observe strictly the safety regulations in chapter 2 of these operating and mainte- nance instructions. -
Page 69: Engine Faults
Air filter dirty clean, replace if necessary Poor compression due to burned or bro- Have compression rings and pistons ken piston rings or incorrect valve clear- checked by a specialist, adjust the valve ance clearance BW 900-2 B O M A G... - Page 70 Fill up lubrication oil to the top mark shut down im- on the oil dipstick. mediately! Engine oil of wrong SAE-class Change engine oil BW 900-2 B O M A G...
Need help?
Do you have a question about the BW 900-2 and is the answer not in the manual?
Questions and answers
El equipo no funciona en retroceso y adelante
The Bomag BW 900-2 may not function in reverse or forward if the travel lever is not in the correct position. Ensure the travel lever is moved out of the "0"-position and shifted to the desired travel direction. Additionally, check for any issues listed in the troubleshooting section, such as insufficient fuel supply, clogged fuel lines, or engine faults that could affect operation.
This answer is automatically generated