Table of Contents

Subscribe to Our Youtube Channel
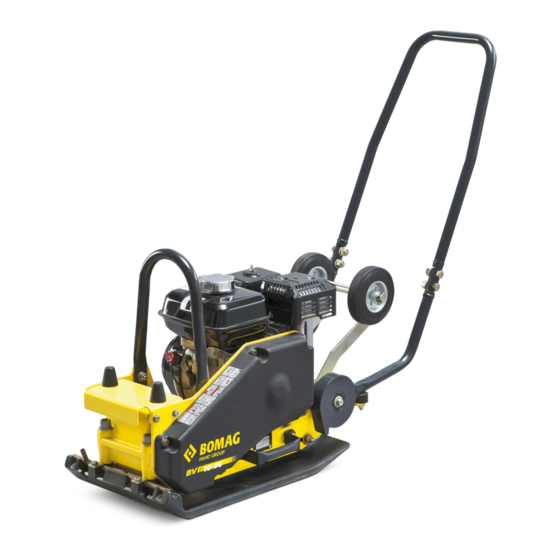
Related Manuals for Bomag BVP 10/36


Summary of Contents for Bomag BVP 10/36
- Page 1 Operating instructions Maintenance instructions Original operating instructions BVP 10/36 / BVP 18/45 S/N 861 834 03 ..> / S/N 861 834 04 ..> Forward marching vibratory plate www.discount-equipment.com Catalogue No. 12/2010 008 062 61...
- Page 2 Lull, Skytrak, Tsurumi, Husquvarna Target, Stow, Wacker, Sakai, Mi-T-M, Sullair, Basic, Dynapac, MBW, Weber, Bartell, Bennar Newman, Haulotte, Ditch Runner, Menegotti, Morrison, Contec, Buddy, Crown, Edco, Wyco, Bomag, Laymor, EZ Trench, Bil-Jax, F.S. Curtis, Gehl Pavers, Heli, Honda, ICS/PowerGrit, IHI, Partner, Imer, Clipper, MMD, Koshin, Rice, CH&E, General Equipment ,Amida, Coleman, NAC, Gradall, Square Shooter, Kent,...
- Page 4 BOMAG dealer against the serial chine. number of your machine. Using these instructions will Your BOMAG dealer will also supply you with in- formation about the correct use of our machines in help you to become familiar with the machine. soil and asphalt construction.
- Page 5 Fill in the above listed data when receiving the ma- chine. Upon receipt of the machine our organization will instruct you about correct operation and mainte- nance. Please observe strictly all safety regulations and notes on potential dangers! Fig. 2 Fig. 3 BOMAG BVP 10/36, BVP 18/45...
-
Page 6: Table Of Contents
5.19 Changing the oil in the vibrator housing 5.20 Check the rubber buffers 5.21 Change the air filter 5.22 Flushing the water sprinkler system 5.23 Tightening the screws 5.24 Engine conservation Trouble shooting 6.1 General Troubleshooting Instructions BVP 10/36, BVP 18/45 BOMAG... - Page 7 Table of Contents 6.2 Engine Troubleshooting Chart BOMAG BVP 10/36, BVP 18/45...
-
Page 8: Technical Data
1 Technical Data BVP 10/36, BVP 18/45 BOMAG... - Page 9 Working speed max. m/min Max. gradability (depending on soil) Drive Engine manufacturer Honda Honda Type GX 120 GX 160 Cooling Working cycles Number of cylinders Rated power ISO 9249 Rated speed 3600 3600 Drive system mech. mech. BOMAG BVP 10/36, BVP 18/45...
- Page 10 Technical Data BVP 10/36 BVP 18/45 Vibration system Frequency Centrifugal force Filling capacities Fuel (gasoline) Water tank (water sprinkling system) Engine oil The right for technical modifications remains reserved BVP 10/36, BVP 18/45 BOMAG...
- Page 11 ISO 5349 and EN 500 BVP 18/45: a = 7.8m/sec on crushed rock determined acc. to ISO 5349 and EN 500 Caution Observe the daily vibration load (Industrial safety acc. to 2002/44/EEC). BOMAG BVP 10/36, BVP 18/45...
-
Page 12: Safety Regulations
2 Safety regulations BVP 10/36, BVP 18/45 BOMAG... - Page 13 General Any danger caused by intended use is the sole re- sponsibility of the customer or driver/operator, the This BOMAG machine has been built in com- manufacturer cannot be made liable. pliance with the latest technical standard and Examples for unintended use are:...
- Page 14 Use only machines which are serviced at regular intervals. Note Do not use any starting aids like start pilot or ether. Paragraphs marked like this contain technical in- formation for the optimal economical use of the machine. BVP 10/36, BVP 18/45 BOMAG...
- Page 15 Keep unauthorized persons away from the ma- Information and safety stickers/decals chine. on the machine Do not perform maintenance work while the motor Keep safety stickers in good and legible condition is running. (see parts manual) and comply with their meaning. BOMAG BVP 10/36, BVP 18/45...
- Page 16 Safety regulations Replace damaged and illegible stickers/decals. BVP 10/36, BVP 18/45 BOMAG...
- Page 17 Safety regulations Fig. 5 Stickers and decals BVP 10/36, BVP 18/45 Information sticker "Guaranteed sound capac- ity level" Instruction sticker "Wear ear defenders" Maintenance sticker Information sticker "Gasoline" Brief operating instructions BOMAG BVP 10/36, BVP 18/45...
- Page 18 Safety regulations Fig. 6 Information sticker "Read operating instruc- tions" Fig. 7 Information sticker "Open choke and fuel valve" Fig. 8 Information sticker "Throttle lever" BVP 10/36, BVP 18/45 BOMAG...
- Page 19 Safety regulations BOMAG BVP 10/36, BVP 18/45...
-
Page 20: Indicators And Controls
3 Indicators and Controls BVP 10/36, BVP 18/45 BOMAG... -
Page 21: General Notes
Position "right" = Choke open No. 2 = Fuel cock Position "left" = Fuel tap closed. Position "right" = Fuel tap open Fig. 10 No. 3 = Ignition switch Position "0" = Ignition off Position "I" = Ignition on BOMAG BVP 10/36, BVP 18/45... - Page 22 Indicators and Controls Fig. 11 No. 4 = Recoil starter Fig. 12 No. 5 = Throttle lever Fig. 13 No. 6 = Shut-off tap for water sprinkling sys- Optional equipment BVP 10/36, BVP 18/45 BOMAG...
- Page 23 Indicators and Controls BOMAG BVP 10/36, BVP 18/45...
-
Page 24: Operation
4 Operation BVP 10/36, BVP 18/45 BOMAG... -
Page 25: General
Note For a description of the following tasks refer to the chapter "Daily maintenance". Engine oil level, top up if necessary Fuel level, top up if necessary. Fill the sprinkler system water tank Optional equipment BOMAG BVP 10/36, BVP 18/45... -
Page 26: Mounting The Steering Bow
Danger Loss of hearing! Wear your personal noise protection means (ear defenders) before starting operation. Fig. 15 Open the fuel cock (Fig. 15) by turning in direc- tion of arrow to the end stop. BVP 10/36, BVP 18/45 BOMAG... - Page 27 Slightly pull the starter handle (Fig. 19), until resistance can be felt (compression pressure), but do not pull out completely. Guide the starter rope back by hand. Fig. 17 Set the throttle lever (Fig. 17) to 1/3 throttle po- sition. BOMAG BVP 10/36, BVP 18/45...
- Page 28 As the engine warms up open the lever (Fig. 21) of the choke bit by bit. Fig. 23 If the engine stops again after approx. 3 to 5 seconds, close the choke again with the lever (Fig. 23) and repeat the starting process. BVP 10/36, BVP 18/45 BOMAG...
-
Page 29: Work/Operation
Screw the spark plug back in and plug the spark plug socket back on. Repeat the starting procedure. Fig. 24 Shift the throttle lever (Fig. 24) in direction of arrow to full load position. The vibratory plate works with highest frequency. BOMAG BVP 10/36, BVP 18/45... -
Page 30: Switching On The Water Sprinkling System
Set the handle of the shut-off valve (Fig. 25) in flow direction. Fig. 26 Move the throttle lever (Fig. 26) back to idle speed position. Fig. 27 Turn the ignition switch to position OFF (Fig. 27), the engine will stop. Optional equipment BVP 10/36, BVP 18/45 BOMAG... -
Page 31: Loading/Transport
Fig. 29 Always attach the lifting gear (rope) to the mo- tor protection frame to load the vibratory plate on a transport vehicle (Fig. 29). BOMAG BVP 10/36, BVP 18/45... -
Page 32: Maintenance
5 Maintenance BVP 10/36, BVP 18/45 BOMAG... -
Page 33: General Notes On Maintenance
Maintenance consult the customer service of BOMAG or the 5.1 General notes on mainte- customer service of the engine manufacturer. nance Frequent causes of faults When performing maintenance work ensure strict Operating errors compliance with the respective safety instructions Incorrect, inadequate maintenance... -
Page 34: Fuels And Lubricants
Temperature related lubrication oil changes can be avoided by using multi-purpose oils. The follow- ing oil change intervals apply also when using mul- ti-purpose oils. BVP 10/36, BVP 18/45 BOMAG... -
Page 35: Table Of Fuels And Lubricants
+30 °C) SAE 40 (+25 °C to SAE 20W/20 (-10 °C to +45 °C) +10 °C) - Fuel Gasoline (unleaded) BVP 10/36: 2.5 l BVP 18/45: 3.6 l Water tank Water Water with anti-freeze agent Vibrator shaft housing as engine oil 0.25 l... -
Page 36: Running-In Instructions
Retighten the fastening screws on air filter ex- haust, fuel tank and other attachments. Retighten the bolted connections on the ma- chine. Check the vibration drive V-belts. Check the oil level in the vibrator housing. BVP 10/36, BVP 18/45 BOMAG... -
Page 37: Maintenance Table
Change the oil in the exciter housing at least every 500 operating hours 5.20 Check the rubber buffers 5.21 Change the air filter at least every year 5.22 Flush the water sprinkler system 5.23 Tighten all bolted connections 5.24 Engine conservation BOMAG BVP 10/36, BVP 18/45... -
Page 38: Cleaning The Machine
(bottom edge of oil fill- carburettor (1) (Fig. 31), starter/air intake (2) er neck). Do not overfill. and the ignition switch (3). After wet cleaning run the engine warm to evaporate all water residues and to avoid cor- rosion. BVP 10/36, BVP 18/45 BOMAG... -
Page 39: Check The Fuel Level
Catch running out fuel, do not let it seep into the ground. Fig. 33 Clean the area around the filler cover, unscrew the filler cover (Fig. 33). Fill in fuel through a funnel with screen. Close the tank again. Optional equipment BOMAG BVP 10/36, BVP 18/45... -
Page 40: Cleaning The Air Filter
Clean the foam insert (5) in warm soapy water, rinse it and let it dry thoroughly. Soak the foam insert in clean engine oil. Then squeeze out excess oil. Fig. 35 Unscrew wing nut (1) (Fig. 35) and remove the housing cover (2). BVP 10/36, BVP 18/45 BOMAG... - Page 41 Wartung wöchentlich BOMAG BVP 10/36, BVP 18/45...
-
Page 42: Clean The Cooling Fins And The Cooling Air Intake Openings
Do not guide the water jet directly into the cooling air openings of the recoil starter, into the dry air filter and on electrical equipment. On a oil contaminated engine use a cold cleansing agent for cleaning. BVP 10/36, BVP 18/45 BOMAG... - Page 43 Maintenance every month BOMAG BVP 10/36, BVP 18/45...
-
Page 44: Change The Engine Oil
Tilt the machine towards the guide handle. Fig. 38 Unscrew the oil drain plug (Fig. 38), let the old oil run out and catch it. Turn the oil drain plug back in with a new seal ring. BVP 10/36, BVP 18/45 BOMAG... -
Page 45: Checking, Cleaning The Spark Plug
Check the spark plug visually and clean it if necessary (Fig. 41). Note In case of excessive combustion residues, burned off electrodes or torn insulator replace the spark plug. Caution Make sure to use a spark plug with correct heat value. BOMAG BVP 10/36, BVP 18/45... -
Page 46: Cleaning The Fuel Sludge Filter
For quality and quantity of oil refer to the table of fuels, lubricants and filling capacities. Turn the fuel sludge filter in tightly and mind the O-ring (2). Screw the drain plug tightly back in. BVP 10/36, BVP 18/45 BOMAG... -
Page 47: Checking The V-Belt, Tightening, Replacing If Necessary
Changing the V-belt Fig. 45 Slightly loosen two fastening screws (1) (Fig. 45) on both sides of the engine carrier. Push the motor carrier forward and take the V- belt off. Install the new V-belt. BOMAG BVP 10/36, BVP 18/45... -
Page 48: Checking, Adjusting The Valve Clearance
Adjust hexagon nut (4) on the rocker arm so that the feeler gauge fits between rocker arm and valve shaft (1) with noticeable resistance after retightening counter nut (3). Install the valve cover with a new gasket and tighten the screws evenly. BVP 10/36, BVP 18/45 BOMAG... -
Page 49: Cleaning The Fuel Screen
Fig. 53 Fig. 51 Disassemble the fuel tank, for this purpose un- Open the fuel tap (Fig. 51) by turning in direc- screw hexagon nuts (1) (Fig. 53) and hexagon tion of arrow. screw (2). BOMAG BVP 10/36, BVP 18/45... -
Page 50: Changing The Oil In The Vibrator Housing
Fig. 55 Unscrew the drain plug (Fig. 55) and catch the old oil. Screw the drain plug tightly back in. Stand the machine horizontally. Fig. 56 Unscrew the plug (Fig. 56) and fill with engine oil. BVP 10/36, BVP 18/45 BOMAG... -
Page 51: Check The Rubber Buffers
Check all rubber buffers (Fig. 58) for tight fit, Note cracks and damage and replace immediately if The oil level must reach the lower edge of the bore damaged. (Fig. 57). Screw the plugs back in (Fig. 56). BOMAG BVP 10/36, BVP 18/45... -
Page 52: Change The Air Filter
Soak the new foam rubber insert (5) in clean engine oil. Then squeeze out excess oil. Pull the foam rubber element (5) over the new paper element (4). Insert the air filter correctly and tighten it with the wing nut (3). BVP 10/36, BVP 18/45 BOMAG... -
Page 53: Flushing The Water Sprinkler System
In case of frost drain the water tank complete- The compliance with the tightening torques is to be checked with torque wrenches. The tightening torques are not applicable when us- ing MoS lubricants. Optional equipment BOMAG BVP 10/36, BVP 18/45... -
Page 54: Engine Conservation
Drain the fuel from the tank. Fig. 64 For this purpose align triangle mark (1) (Fig. 64) on the starter disc to the top bore (2). Fig. 62 Open the fuel tap (1) (Fig. 62) in direction of ar- row. BVP 10/36, BVP 18/45 BOMAG... - Page 55 Note Depending on weather conditions these conserva- tion measures will protect the machine for approx. 6 to 12 months. Caution A machine with conserved engine must be clearly marked by attaching a clear warning tag. BOMAG BVP 10/36, BVP 18/45...
-
Page 56: Trouble Shooting
6 Trouble shooting BVP 10/36, BVP 18/45 BOMAG... -
Page 57: General Troubleshooting Instructions
On the following pages you will find a selection of fault remedies. It goes without saying that not all causes of faults can be listed. BOMAG BVP 10/36, BVP 18/45... - Page 58 Clean or exchange filter cartridge speed Engine defective Exchange engine/ Have damaged re- paired Carburettor defective Exchange carburettor Engine runs at Centrifugal clutch defective Exchange centrifugal clutch high speed, but V-belt cracked Exchange V-belt no vibration BVP 10/36, BVP 18/45 BOMAG...
- Page 59 Trouble shooting BOMAG BVP 10/36, BVP 18/45...
- Page 60 Lull, Skytrak, Tsurumi, Husquvarna Target, Stow, Wacker, Sakai, Mi-T-M, Sullair, Basic, Dynapac, MBW, Weber, Bartell, Bennar Newman, Haulotte, Ditch Runner, Menegotti, Morrison, Contec, Buddy, Crown, Edco, Wyco, Bomag, Laymor, EZ Trench, Bil-Jax, F.S. Curtis, Gehl Pavers, Heli, Honda, ICS/PowerGrit, IHI, Partner, Imer, Clipper, MMD, Koshin, Rice, CH&E, General Equipment ,Amida, Coleman, NAC, Gradall, Square Shooter, Kent,...
Need help?
Do you have a question about the BVP 10/36 and is the answer not in the manual?
Questions and answers