
Related Manuals for Hameg HMO2524


Summarization of Contents
General information regarding the CE marking
1. Data connection
Information on data and screen connection between instruments and external devices.
2. Signal cables
Guidelines for signal cables connection between test point and instrument.
3. Influence on measurements
Impact of external electric fields on measurement accuracy.
4. RF immunity of oscilloscopes
Guidance on immunity of oscilloscopes to radio frequency fields.
4.1 Electromagnetic RF field
Discusses the impact of electromagnetic RF fields on oscilloscope performance.
4.2 Electrical fast transients / electrostatic discharge
Covers protection against electrical fast transients and ESD.
Technical Data
Display
Details about the oscilloscope's display screen, resolution, and curves.
Vertical System
Configuration options for vertical settings like coupling, input impedance, and sensitivity.
Horizontal System (Time Base)
Settings for horizontal positioning, time base, and zoom functions.
Trigger System
Configuration of trigger modes, sources, and slope settings.
Display of signals
Description of signal display features like persistence and signal integrity.
Measurements
Overview of measurement capabilities, including cursor and automatic measurements.
1 Installation and safety instructions
1.1 Setting up the instrument
Instructions for connecting and preparing the oscilloscope for operation.
1.2 Safety
Essential safety precautions and warnings for operating the oscilloscope.
1.3 Correct operation
Guidelines for the intended use and proper handling of the instrument.
1.4 Ambient conditions
Recommended operating temperature and humidity levels.
1.5 Warranty and repair
Information regarding product warranty and authorized repair services.
1.6 Maintenance
Procedures for maintaining the oscilloscope's performance and longevity.
1.7 CAT I
Details on the instrument's measurement category and safety standards.
1.8 Mains voltage
Information on power supply requirements and mains voltage compatibility.
2 Familiarize yourself with your new HAMEG Digital Storage Oscilloscope
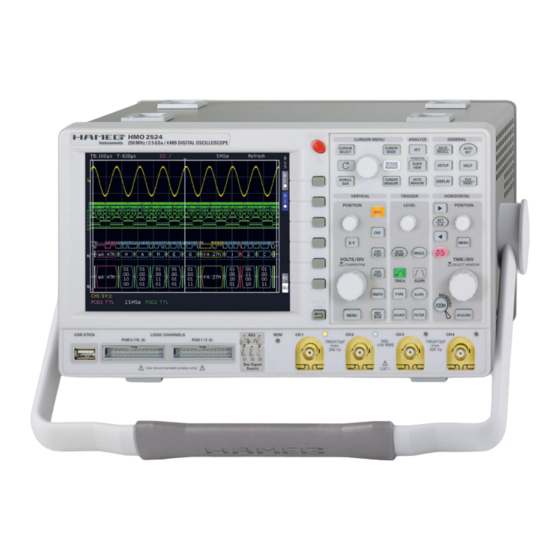
2.1 Front view
Overview of the front panel, controls, and connectors.
2.2 Control panel
Detailed explanation of the front panel controls and their functions.
2.3 Rear view
Description of the rear panel connectors and ports.
2.4 General concept of instrument operation
Explains the basic operating principles and logic of the oscilloscope.
2.5 Basic settings and integrated help
Guide to initial setup and accessing the instrument's help system.
2.6 General concept of instrument operation
Details on the instrument's operational logic and user interaction.
2.7 Basic settings and integrated help
Covers initial configuration and utilizing the onboard help features.
2.8 Bus Signal Source
Defines the source for bus signal analysis and related settings.
2.9 Update for the instrument settings and interface firmware and the help functions
Updating instrument settings, interface firmware, and help functions.
2.10 Upgrade with software options
Information on upgrading the oscilloscope with optional software.
3 A quick introduction
3.1 Setting up the instrument and turning on the instrument
Steps for initial setup and powering on the oscilloscope.
3.2 Connection of a probe and signal capture
Guide to connecting probes and capturing signals.
3.3 Display of signal details
Explanation of how signal details are presented on the display.
3.4 Cursor measurements
Introduction to using cursors for signal measurements.
3.5 Automatic measurements
Overview of the oscilloscope's automatic measurement features.
3.6 Mathematical functions
Introduction to mathematical functions for signal analysis.
3.7 Storing data
Instructions for saving measurement data and settings.
4 Vertical System
4.1 Coupling
Selection of coupling modes: AC, DC, GND for signal input.
4.2 Sensitivity, Y-Positioning, and Offset
Adjusting vertical sensitivity, position, and offset for signals.
4.3 Bandwidth Limit and Signal Inversion
Using bandwidth limit and signal inversion features.
4.4 Attenuation
Setting signal attenuation levels for probes.
5 Horizontal System (Time Base)
5.1 Capturing modes RUN and STOP
Explanation of RUN and STOP modes for signal acquisition.
5.2 Time base adjustments
Adjusting the time base for accurate signal display.
5.3 Capture modes
Details on different capture modes like Normal, Peak Detect.
5.4 ZOOM function
Using the zoom function to analyze signal details.
5.5 Marker function
Utilizing markers for precise time and voltage measurements.
6 Trigger System
6.1 Trigger modes Auto, Normal, Single
Setting trigger modes: Auto, Normal, and Single.
6.2 Trigger sources
Selecting trigger sources from analog and logic channels.
6.3 Slope trigger
Configuring triggers based on signal slope (rising or falling).
6.4 Pulse trigger
Setting pulse width and edge triggers.
6.5 Video trigger
Using video trigger for specific video signal analysis.
7 Display of signals
7.1 Display settings
Adjusting display settings like resolution, contrast, and brightness.
7.2 Use of the virtual screen area
Navigating and utilizing the virtual screen area for signal display.
7.3 Signal intensity and persistence functions
Controlling signal intensity and persistence for signal visualization.
8 Measurements
8.1 Cursor measurements
Utilizing cursors for precise signal parameter measurement.
8.2 Auto measurements
Automatic measurement functions for quick signal analysis.
Pulse Width (Negative)
Measures the duration of a negative pulse edge.
Positive Duty Cycle Measurement
Measures the ratio of positive pulse time to total period.
Negative Duty Cycle Measurement
Measures the ratio of negative pulse time to total period.
Pulse Width (Positive)
Measures the duration of a positive pulse edge.
Frequency and Period Measurements
Measures signal frequency and period.
Rise and Fall Time Measurement
Measures the signal transition times.
Amplitude and Level Measurements
Measures signal amplitude and voltage levels.
9 Analysis
9.1 Quick mathematics
Introduction to quick mathematical functions and operations.
9.2 Formula editor
Using the formula editor to create custom mathematical functions.
9.3 Frequency analysis (FFT)
Performing frequency analysis using the FFT function.
9.4 Quickway measurements
Utilizing quickway measurements for signal analysis.
9.5 PASS/FAIL test based on masks
Implementing PASS/FAIL testing using masks.
10 Documentation, storing and recalling
10.1 Instrument settings
Saving and recalling instrument settings and configurations.
10.2 References
Managing and using reference curves for comparison.
10.3 Curves
Storing and recalling signal curve data.
10.4 Screenshots
Capturing and saving screen images of the oscilloscope display.
10.5 Sets of formulas
Managing and importing/exporting formula sets.
10.6 Definition of the FILE/PRINT key
Configuring the FILE/PRINT key for storing and printing.
11 Mixed Signal Operation (optional)
11.1 Logic trigger
Setting up logic triggers for digital signals.
11.2 Display functions of the logic channels
Configuring display settings for logic channels.
11.3 Cursor measurements for the logic channels
Performing cursor measurements on logic channels.
12 Serial bus analysis (optional)
12.1 I2C bus
Definition and configuration of the I2C serial bus.
12.2 I2C Bus configuration
Setting up the I2C bus for data acquisition and analysis.
12.3 I2C bus triggering
Configuring triggers for I2C bus events.
12.4 SPI bus
Definition and configuration of the SPI serial bus.
12.5 SPI bus definition
Setting up parameters for SPI bus decoding.
12.6 SPI bus triggering
Setting up triggers for SPI bus events.
12.7 UART/RS-232 bus
Definition and configuration of the UART/RS-232 serial bus.
12.8 UART/RS-232 bus definition
Setting up parameters for UART/RS-232 bus decoding.
12.9 UART/RS-232 bus triggering
Setting up triggers for UART/RS-232 bus events.
13 Remote control via interface
13.3 Ethernet (Option H0730)
Configuring Ethernet interface for remote control.
13.4 IEEE 488.2 / GPIB (Option H0740)
Setting up IEEE 488.2/GPIB interface for remote control.
14 Appendix
14.1 List of pictures
An index of all figures and their corresponding page numbers.
14.2 Glossary
Definitions of technical terms used in the manual.
Need help?
Do you have a question about the HMO2524 and is the answer not in the manual?
Questions and answers