Table of Contents
Advertisement
Quick Links
Advertisement
Chapters
Table of Contents

Subscribe to Our Youtube Channel
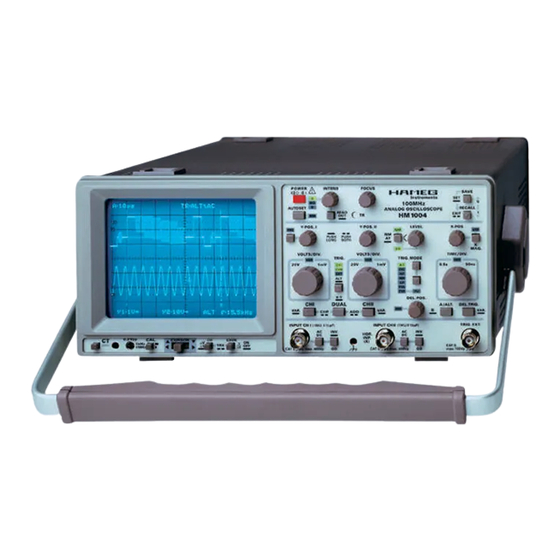
Related Manuals for Hameg HM1004


Summary of Contents for Hameg HM1004
- Page 1 ® Instruments Oscilloskop HM1004 SERVICE-MANUAL HM1004...
-
Page 2: Table Of Contents
Service Manual Circuit Diagrams Adjustment Procedure HM1004/1505 HM1004 Block diagram ..........4 HM1004 Block diagram ..........5 AT-Board ................. 6 AT-Board ................. 7 AT-Board ................. 8 AT-Board (Topside) ............9 AT-Board (Bottomside) ..........10 MB-Board ..............11 MB-Board ..............12 MB-Board .............. - Page 3 HAMEG instruments fulfill the regulations of the EMC directive. The conformity 2. Signal cables test made by HAMEG is based on the actual generic- and product standards. In cases where different limit values are applicable, HAMEG applies the severer Basically test leads for signal interconnection between test point and instrument standard.
- Page 4 X–Y- Phasendifferenz: <3° unter 120kHz. erlaubt sowohl die naturgetreue Darstellung von impulsartigen Signalen, wie Bedienung / Steuerung auch Aufzeichnungen mit dem HM1004 bis in den Frequenzbereich um 200MHz Manuell über Bedienungsknöpfe und dem HM1505 bis über 250MHz. Ebenso exzellent ist die Triggerung beider Auto Set (automatische Parametereinstellung) Geräte.
-
Page 5: Hm1004 Block Diagram
HM1004 Block diagram Subject to change without notice... -
Page 6: Hm1004 Block Diagram
HM1004 Block diagram Subject to change without notice... -
Page 7: At-Board
AT-Board att14.sch-1 - Tue Oct 29 12:14:03 1996 Subject to change without notice... -
Page 8: At-Board
AT-Board Subject to change without notice... -
Page 9: At-Board
AT-Board Subject to change without notice... -
Page 10: At-Board (Topside)
AT-Board (Topside) Subject to change without notice... -
Page 11: At-Board (Bottomside)
AT-Board (Bottomside) Subject to change without notice... -
Page 12: Mb-Board
MB-Board Subject to change without notice... -
Page 13: Mb-Board
MB-Board Subject to change without notice... -
Page 14: Mb-Board
MB-Board Subject to change without notice... -
Page 15: Mb-Board
MB-Board Subject to change without notice... -
Page 16: Mb-Board
MB-Board Subject to change without notice... -
Page 17: Mb-Board
MB-Board Subject to change without notice... -
Page 18: Mb-Board
MB-Board Subject to change without notice... -
Page 19: Mb-Board (Topside)
MB-Board (Topside) Subject to change without notice... -
Page 20: Mb-Board (Bottomside)
MB-Board (Bottomside) Subject to change without notice... -
Page 21: Yf-Board
YF-Board Subject to change without notice... -
Page 22: Yf-Board (Top And Bottomside)
YF-Board (Top and Bottomside) Subject to change without notice... -
Page 23: Readout-Board
Readout-Board Subject to change without notice... -
Page 24: Readout-Board
Readout-Board rd1004.sch-2 - Wed Sep 25 11:50:19 1996 Subject to change without notice... -
Page 25: Readout-Board (Bottomside)
Readout-Board (Bottomside) J7012 Subject to change without notice... -
Page 26: Readout-Board (Topside)
Readout-Board (Topside) Subject to change without notice... -
Page 27: Fc-Board
FC-Board key1007.sch-1 - Wed Sep 25 11:51:53 1996 Subject to change without notice... -
Page 28: Fc-Board
FC-Board key1007.sch-2 - Wed Sep 25 11:52:15 1996 Subject to change without notice... -
Page 29: Fc-Board (Topside)
FC-Board (Topside) Subject to change without notice... -
Page 30: Processor-Board
Processor-Board Subject to change without notice... -
Page 31: Fc-Board (Bottomside And Processor-Board)
FC-Board (Bottomside and Processor-Board) Subject to change without notice... -
Page 32: If-Board
IF-Board Note: IF304 = IF1004/1505 Subject to change without notice... -
Page 33: If-Board (Top And Bottomside)
IF-Board (Top and Bottomside) Subject to change without notice... -
Page 34: Crt-Board
CRT-Board Subject to change without notice... -
Page 35: Crt-Board (Bottom And Topside)
CRT-Board (Bottom and Topside) Subject to change without notice... -
Page 36: Ps-Board
PS-Board Subject to change without notice... -
Page 37: Ps-Board (Topside)
PS-Board (Topside) Subject to change without notice... -
Page 38: Ps-Board (Bottomside)
PS-Board (Bottomside) Subject to change without notice... -
Page 39: Timebase Control
Timebase control Timebase A: C-SW1 C-SW2 IA*2 IA*5 IA*10 IA*100 500ms 200ms 100ms 50ms 20ms 10ms 500µs 200µs 100µs 50µs 20µs 10µs 5µs 2µs 1µs 500ns 200ns 100ns 50ns Timebase B: C-SW1 C-SW2 IB*2 IB*5 IB*10 IB*100 20ms 10ms 500µs 200µs 100µs 50µs... -
Page 40: Name, Meaning And Type Of Signal
Name, Meaning and Type of signal Name Type of signal Board Meaning \EXT-SW analog MB, AT signal from external trigger unit \INTBON digital control signal for timebase B intensity \V1-TRG digital trigger mode switch CH1 \V2-TRG digital trigger mode switch CH2 5V CPU 5V stabil. - Page 41 Name, Meaning and Type of signal Name Type of signal Board Meaning START-A digital start timebase generator A START-B digital start timebase generator B START-HO digital start holdoff time SWEEP-A analog timebase generator A output SWEEP-B analog timebase generator B output SYS-REF 2.5V MB, AT...
-
Page 42: Adjustment Procedure
Adjustment Procedure HM1004/1505 Subject to change without notice... - Page 43 „Operating Instructions“. • should only be performed by suitable qualified and experienced service personnel, or should be referred to one of the HAMEG companies listed on the rear cover of the manual. Test Instruments required: Scope Tester HZ 60-2.
-
Page 44: Basic Settings
Table of Contents Basic settings ......................43 2) R1066: +12 Volt supply..................45 3) VR8003: Trace Rotation Check................45 4) R6013: CRT minimum intensity................45 5) R6024: Astigmatism correction................45 6) VR9009: Y-Final Amplifier Balance................. 45 7) R7004: Mean Readout Y-Plate Potential. - Page 45 MB-Board PS-Board J4400 CRT-Board Front Panel HM1004 YF-Board Subject to change without notice...
-
Page 46: R1066: +12 Volt Supply
ADJUSTMENT PROCEDURE Locate and identify R1059 (1) on PS-Board (screened section). Locate connector J4400 ( 8pole Molex) on MB-Board and identify pin 1. Adjust R1059 (1) for exactly +115 Volts (± 0.1 Volt) at J4400 pin 1 with respect to chassis. 2) R1066: +12 Volt supply. - Page 47 Readout-Board (Detail) MB-Board (Detail) YF-Board AT-Board Subject to change without notice...
-
Page 48: R7004: Mean Readout Y-Plate Potential
7) R7004: Mean Readout Y-Plate Potential. Locate and identify R7004 (7) on Readout-Board. Press channel I GD pushbutton to ground the input (readout: „CH1:ground symbol“). Set trace to the horizontal center line of the graticule. Locate and identify the ceramic (double) resistor R9037 with the connections 7A and 7B. Connect a 10:1 probe to the Y-input of the control oscilloscope. - Page 49 YF-Board MB-Board (Detail) AT-Board Subject to change without notice...
-
Page 50: C3061 (F),C3100 (G),C3049 (H): Main-Board
13) R9001 (A),C9001 (B),R9004 (C),C9014 (D),R9010 (E): Y-Final Amplifier. C3061 (F),C3100 (G),C3049 (H): Main-Board Connect a 1MHz square wave signal of 25mVpp via 50Ω cable and 50Ω throughtermination to input CH I. Set time base to 0.05µs/div. for overshoot and 0.2µs/div. for adjustments of the top. Locate and identify the adjustment points R9001 (13A), C9001 (13B), R9004 (13C), C9014 (13D), R9010 (13E) on YF-Board and C3061 (13F), C3100 (13G) on Main-Board. - Page 51 High-Light Display select DOWN ENTER MB-Board Subject to change without notice...
-
Page 52: Calibration Menue
Note: The oscilloscope must first be switched to the adjustment mode for the next 12 points. Switch the oscilloscope OFF. Switch the oscilloscope ON. Press and hold the AUTO SET pushbutton after the HAMEG Logo appears. Release the AUTO SET pushbutton after the Calibration Menue is on screen. For error messages see 35). - Page 53 MB-Board Subject to change without notice...
-
Page 54: B-Time Base Adjustment
Move trace with X-Pos. control so that the first time mark coincides with the first left graticule line of the screen. Rotate VAR. 2.5:1 (TIME/DIV) (24) until the 11th time mark coincides with the last right graticule line. If only 10 time marks are visible, set the 10th time mark on the last but one (next to the last) right graticule line. - Page 55 YF-Board Readout-Board (Detail) MB-Board (Detail) Readout-Board (Detail) Pin 14 Pin 1 Subject to change without notice...
-
Page 56: R9008: Y-Gain Ch I
27) R9008: Y-Gain CH I. press Cursor Down pushbutton once. Y1/2-GAIN is highlight, press CURSOR ON/OFF pushbutton. Locate and identify R9008 (27) on YF-Board. Connect a 25mVpp/1kHz square wave signal via 50Ω cable and 50Ω through terminator to input channel I. Set time base to 1ms/div. -
Page 57: Trigger Filter Check
Now approximately 2 signal periods should be visible on the screen. Press 1kHz/1MHz pushbutton (in!). Set time base to 0.5µs position. Check 1MHz calibrator signal. Please note: Neither the calibrator frequency nor the pulse duty factor are specified. 32) Trigger Filter Check. Set time base to 1ms/div. -
Page 58: Error Code Tabelle
35) Error Code Tabel: The data field is internally checked for logical errors which are protocolled in the RETURNCODE. The following RETURNCODEs are implemented: 0 = no error 1 = syntax error 2 = data error 3 = buffer overlow 4 = bad data set 5 = adjustment error Explanation of the calibration menu... - Page 59 4. Automatic IC3009B (main board) check. ERROR = 14 is displayed if the output voltage at IC3009B pin 7 exceeds the limits. CH1/2 AMP 1. Manual Y-Position Adjustment. ERROR = 14. Y-Position control voltage exceeds the normally required value for this position setting. The error message appears if the voltage difference indicates a + or - 5 division (voltage) deviation caused by a defective component in the Y position control circuit.
- Page 60 ® Germany HAMEG GmbH Instruments Industriestraße 6 63533 Mainhausen Tel. (06182) 8909 - 0 Telefax (06182) 8909 - 30 Oscilloscopes E-mail: sales@hameg.de HAMEG Service Multimeters Kelsterbacher Str. 15-19 60528 FRANKFURT am Main Tel. (069) 67805 - 24 Telefax (069) 67805 - 31...
Need help?
Do you have a question about the HM1004 and is the answer not in the manual?
Questions and answers