Advertisement
Quick Links
®
DR
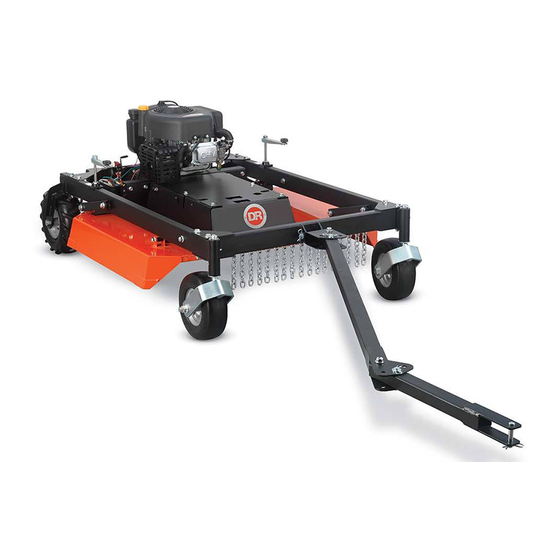
TOW-BEHIND FIELD and BRUSH MOWER
SAFETY & OPERATING INSTRUCTIONS
Models:
PREMIER 44T
PRO 44T
PRO-XL 44T
Serial No.
Order No.
Read and understand this manual and all instructions before operating the TOW BEHIND DR TOW-BEHIND FIELD
and BRUSH MOWER.
DR Power Equipment
Toll-free phone: 1-800-DR-OWNER (376-9637)
Website: www.DRpower.com
Advertisement

Related Manuals for DR PRO 44T


Summary of Contents for DR PRO 44T
- Page 1 SAFETY & OPERATING INSTRUCTIONS Models: PREMIER 44T PRO 44T PRO-XL 44T DR Power Equipment Serial No. Toll-free phone: 1-800-DR-OWNER (376-9637) Order No. Website: www.DRpower.com Read and understand this manual and all instructions before operating the TOW BEHIND DR TOW-BEHIND FIELD and BRUSH MOWER.
-
Page 2: Table Of Contents
Table of Contents Chapter 1: General Safety Rules ................................3 Chapter 2: Setting Up the DR TOW-BEHIND FIELD and BRUSH MOWER ..................6 Chapter 3: Operating the DR TOW-BEHIND FIELD and BRUSH MOWER ..................12 Chapter 4: Maintaining the DR TOW-BEHIND FIELD and BRUSH MOWER ..................19 Chapter 5: Troubleshooting .................................. -
Page 3: Chapter 1: General Safety Rules
Labels Your TOW BEHIND DR TOW-BEHIND FIELD and BRUSH MOWER carries prominent labels as reminders for its proper and safe use. Shown below are copies of all the Safety and Information labels that appear on the equipment. Take a moment to study them and make a note of their location on your Mower as you set up and before you operate the unit. - Page 4 Use ear protectors or ear plugs. Allow only responsible adults who are familiar with these safety rules and operating instructions to use your DR TOW- BEHIND FIELD and BRUSH MOWER. Keep your hands and feet away from the blades, belt, pulley, and concealed areas while the engine is running.
- Page 5 Safe operation of the DR TOW-BEHIND FIELD and BRUSH MOWER is necessary to prevent death or serious injury. Always take the following precautions when operating this machine: The DR TOW-BEHIND FIELD and BRUSH MOWER is designed to mow grass and brush. Do not use it for any other purpose. ...
-
Page 6: Chapter 2: Setting Up The Dr Tow-Behind Field And Brush Mower
Chapter 2: Setting Up the DR TOW-BEHIND FIELD and BRUSH MOWER It may be helpful to familiarize yourself with the controls and features of your DR TOW-BEHIND FIELD and BRUSH MOWER by If you have any questions at all, please feel free to contact us at reviewing Figure 2 before beginning these procedures. - Page 7 DR TOW-BEHIND FIELD and BRUSH MOWER Controls and Features (Premier Model) Air Filter Cover DR 13.3 TQ Engine Oil Fill (10.5 HP Engine Fuel Fill Cap/Dipstick Looks Different Than Shown) Fuel Filter Oil Drain Tube Hand Crank Height Adjusters Left Side...
- Page 8 Specifications PREMIER 44T Model (10.3HP) PRO 44T Model (16.5HP) PRO XL 44T Model (20HP) Engine See your Engine Manual for oil See your Engine Manual for oil See your Engine Manual for oil capacity and other Engine capacity and other Engine capacity and other Engine specifications.
- Page 9 Assembling the DR TOW-BEHIND FIELD and BRUSH MOWER Hardware Supplied in Product Package (Figure 3 and Table below): Item # Part # Description 1 ..... 187371 ..Pin, Clevis, 1/2" OD X 4.5" LG ....1 2 ..... 255491 ..Pin, Clevis, 1/2" X 2-1/2", TRT ....3 3 .....
- Page 10 - The machine should be on a level surface. Oil Fill - The dipstick SHOULD be screwed down on Briggs Engines. - The dipstick SHOULD NOT be screwed down on DR Engines. Fuel Fill Note: See the Engine Owner’s Manual for more detailed information.
- Page 11 Connecting the DR TOW-BEHIND FIELD and BRUSH MOWER to your Tow Vehicle The Pin type Hitch that comes standard on the DR TOW-BEHIND FIELD and BRUSH MOWER Tow Bar is quick and easy to attach to Tow Vehicles with a hole in the Hitch Plate.
-
Page 12: Chapter 3: Operating The Dr Tow-Behind Field And Brush Mower
Never operate your DR TOW-BEHIND FIELD and BRUSH MOWER on slopes greater than 20º using any type of Tow Vehicle. If your Tow Vehicle will not travel by itself over the terrain you plan to use it with the DR TOW-BEHIND FIELD and BRUSH MOWER, then it will not be suitable as a Tow Vehicle over that terrain. - Page 13 Make sure there are no people or animals in the area around the DR TOW-BEHIND FIELD and BRUSH MOWER. 1. Check the oil level every time you use the machine. See your Engine Owner’s Manual.
- Page 14 (Figure 15). 3. Remove the Key for safety. Note: Close the Fuel Shut-Off Valve on PRO and Pro XL models when transporting or storing the DR TOW-BEHIND FIELD and BRUSH MOWER (Figure 13). Engaging the Blades Blade 1. Engage the Blades by pulling up on the Blade Control Switch (Figure 16a or...
- Page 15 Height Adjuster Handle Note: The DR TOW-BEHIND FIELD and BRUSH MOWER Deck cutting Height ranges from a minimum of 4" to a maximum of 7.5". 1. Remove the Locking Pin from the Height Adjuster (Figure 17).
- Page 16 Offset Mowing The Tow Bar allows you to offset the cutting path of the DR TOW-BEHIND FIELD and BRUSH MOWER up to 46" from the center of the Tow Vehicle. The provided offset positions are “No Offset” (in line with Tow Vehicle), “Middle Offset” (27-1/2" from center of Tow Vehicle) or “Full Offset”...
- Page 17 Changing the Tow Bar Offset Direction Blade Engage/Disengage Remote Control The Tow Bar can be installed for offsetting to the right or left depending on which side of the tow vehicle you choose to mow. The following steps describe installing the Offset Bracket to allow offsetting to the left side of the Tow Vehicle.
- Page 18 When operating the DR TOW-BEHIND FIELD and BRUSH MOWER over uneven terrain or slopes, use extreme caution not to tip over the machine. Never use the DR TOW-BEHIND FIELD and BRUSH MOWER on slopes greater than 20 degrees. Doing so could result in serious injury or damage to your machine. ...
-
Page 19: Chapter 4: Maintaining The Dr Tow-Behind Field And Brush Mower
Chapter 4: Maintaining the DR TOW-BEHIND FIELD and BRUSH MOWER This chapter covers regular maintenance procedures that will ensure the best performance and long life of your DR TOW-BEHIND FIELD and BRUSH MOWER. For Engine maintenance, please refer to the Engine Owner’s Manual that came with your machine. - Page 20 Height Adjuster Threads Tools and Supplies Needed: Wire Brush and Rags Super Lube 1. Raise the Deck to its highest position. 2. Clean any dirt or debris from the Height Adjuster threads with a Wire Brush and Rags (Figure 29). Height 3.
- Page 21 9/16" Wrench Fuel 5/16" Nut Driver Line Cable Guide Use only DR belts on your machine. They have been thoroughly tested and proven for many hours of use. Fuel Shut-Off Cable Valve Closed Clamp Removing the Belt 1. PRO XL model: Turn the Fuel Shut-Off Valve to the Closed position (Figure 32).
- Page 22 Wear gloves and use caution when pushing or pulling the wrench next to the blade. If the wrench slips off the bolt you may be seriously injured. 1. Disconnect the Tow Behind DR TOW-BEHIND FIELD and BRUSH MOWER from the Tow Vehicle.
- Page 23 Replacing the Carbon Canister (PRO and PRO-XL Models) Carbon Canister Cable Ties Tools needed: Tank Wire Cutters Hose Pliers 1. Remove the Gas tank Plate as described in section “Removing and Replacing the Drive Belt” in this Chapter. Purge 2.
- Page 24 Operate the Mower Engine for at least 45 minutes to maintain proper Battery charge. If the Battery loses its charge, you'll need to use a trickle Charger (like the DR Battery Charger) to recharge it. The Charger should have an output of 12 volts at no more than 2 amps.
-
Page 25: Chapter 5: Troubleshooting
45 minutes at a time, the Battery may need to be periodically charged. See the “Battery Care” section in Chapter 4. If the Battery is charged and the DR TOW-BEHIND FIELD & BRUSH MOWER still will not start, visit our website at www.DRpower.com. - Page 26 When performing any adjustment or maintenance, you must first shut off the engine, wait five (5) minutes to allow parts to cool and disconnect the spark plug wire(s), keeping it away from the spark plug(s). Troubleshooting Table (Continued) YMPTOM OSSIBLE AUSE ...
- Page 27 CONTACT US AT www.DRpower.com...
-
Page 28: Chapter 6: Parts Lists And Schematic Diagrams
Chapter 6: Parts Lists and Schematic Diagrams Parts List – Frame Assembly Note: Part numbers listed are available through DR Power Equipment. Ref# Part# Description Ref# Part# Description 354941 Brace, Sway 365721 Bolt, Hex, Flange, 1/2-13 X 3.5″, GR5 362891... - Page 29 Schematic – Frame Assembly CONTACT US AT www.DRpower.com...
- Page 30 Parts List – Deck Assembly Note: Part numbers listed are available through DR Power Equipment. Ref# Part# Description Ref# Part# Description 363121 Rod, Acme Thread, Height Adjust 352811 Bolt, Hex, Flange, TL, 3/8-16 X 3/4″ 10000032164 Bolt, HH Tap Blt W/ Loctite Patch, 365741 Shim, Nylon, 0.76″...
- Page 31 Schematic – Deck Assembly CONTACT US AT www.DRpower.com...
- Page 32 Parts List – Drive Assembly Note: Part numbers listed are available through DR Power Equipment. Ref# Part# Description Ref# Part# Description 396331 Mount, Motor A0000275458 Wire, Battery Ground 391101 Plate, Gas Tank - w/Label 191231 Switch, Push/Pull TPDT 221421 Spacer, Clutch...
- Page 33 Schematic – Drive Assembly CONTACT US AT www.DRpower.com...
- Page 34 TOW-BEHIND FIELD and BRUSH MOWER is fit for ordinary purposes for which a product of this type is used. DR Power Equipment however, limits the implied warranties of merchantability and fitness in duration to a period of two (2) years in consumer use, ninety (90) days for any other use except all emission related components.
- Page 35 Notes: CONTACT US AT www.DRpower.com...
- Page 36 If your DR TOW-BEHIND FIELD and BRUSH MOWER will be idle for more than 30 days, we recommend using a gas stabilizer. This will prevent sediment from gumming up the Carburetor. If there is dirt or moisture in the gas or tank, remove it by draining the tank.
Need help?
Do you have a question about the PRO 44T and is the answer not in the manual?
Questions and answers