Download Print this page
DR SP26 Safety & Operating Instructions Manual

DR SP26 Safety & Operating Instructions Manual

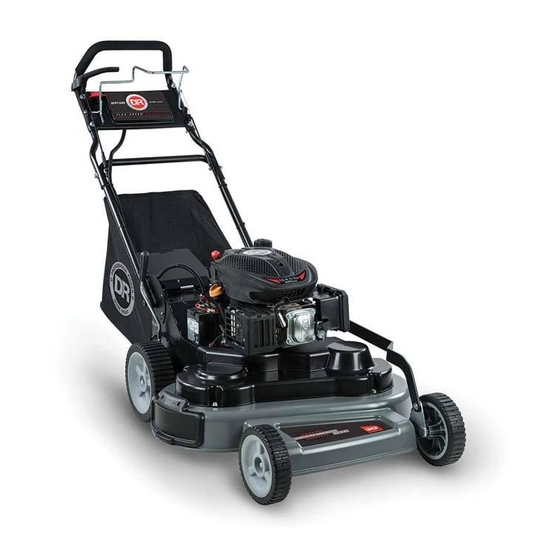
Wide-cut lawn mower

Advertisement

DR
®
WIDE-CUT LAWN MOWER
Safety & Operating Instructions
Models:
SP26
SP30
Serial No.
Order No.
Read and understand this manual and all instructions before operating the DR WIDE-CUT LAWN MOWER
DR Power Equipment
Toll-free phone: 1-800-DR-OWNER (376-9637)
Fax: 1-802-951-8497
Website: www.DRpower.com
Advertisement

loading
Need help?

Need help?

Do you have a question about the SP26 and is the answer not in the manual?

Questions and answers

Subscribe to Our Youtube Channel

Summary of Contents for DR SP26

  • Page 1 WIDE-CUT LAWN MOWER Safety & Operating Instructions Models: SP26 SP30 DR Power Equipment Toll-free phone: 1-800-DR-OWNER (376-9637) Serial No. Fax: 1-802-951-8497 Order No. Website: www.DRpower.com Read and understand this manual and all instructions before operating the DR WIDE-CUT LAWN MOWER...
  • Page 2 ® WIDE-CUT LAWN MOWER...
  • Page 3: Table Of Contents

    Additional Information and Potential Changes DR Power Equipment reserves the right to discontinue, change, and improve its products at any time without notice or obligation to the purchaser. The descriptions and specifications contained in this manual were in effect at printing. Equipment described within this manual may be optional.
  • Page 4: Chapter 1: General Safety Rules

    Labels Your DR WIDE-CUT LAWN MOWER carries prominent labels as reminders for its proper and safe use. Shown below are copies of all the Safety and Information labels that appear on the equipment. Take a moment to study them and make a note of their location on your Mower as you set up and before you operate the unit.
  • Page 5 Protecting Yourself and Those Around You This is a high-powered machine, with moving parts operating with high energy. You must operate the machine safely. Unsafe operation can create a number of hazards for you, as well as anyone else in the nearby area. Always take the following precautions when using this machine: ...
  • Page 6 Stop the blade when crossing surfaces other than grass, and when transporting the lawnmower to and from the area to be mowed.  See manufacturer’s instructions for proper operation and installation of accessories. Only use accessories approved by DR Power Equipment. ...
  • Page 7 Under California law, and the laws of some other states, you are not permitted to operate an internal combustion engine using hydrocarbon fuels without an engine spark arrester. This also applies to operation on US Forest Lands. All DR WIDE-CUT LAWN MOWERS shipped to California, New Mexico, Oregon, and Arizona are equipped with spark arresters.
  • Page 8: Chapter 2: Setting Up The Dr Wide-Cut Lawn Mower

    Chapter 2: Setting Up the DR WIDE-CUT LAWN MOWER It may be helpful to familiarize yourself with the controls and features of your DR WIDE-CUT LAWN MOWER as shown in Figure 1 If you have any questions at all, please feel free to contact us at www.DRpower.com.
  • Page 9 Pictogram Descriptions Avoid steep slopes when using this Keep bystanders 50 feet away from mower. Use caution on all slopes. Mow your work area at all times. Debris across slopes rather than up and down. exits the machine at great speeds. To be safe, do not operate the machine Do not use the Mower on slopes greater near small children or pets, and never...
  • Page 10 Wheel Size 8" x 2" Front, 10" x 3" Rear 67" L x 28" W x 42" H (SP26), 72" L x 32" W x 42" H (SP30) Dimensions 30" E/S - 125lbs, 30" M/S - 117lbs, 26" E/S - 111lbs, 26" M/S - 101lbs...
  • Page 11 Tip: To avoid confusion, we recommend leaving the caps on the Fuel and Oil Oil Fill/ Fills until you are ready to pour either gasoline or oil into the correct Fill. Dipstick Note: You will need approximately 17 to 20 ounces of high detergent oil depending on Engine type.
  • Page 12: Chapter 3: Operating The Dr Wide-Cut Lawn Mower

    Switch Starting the Engine Figure 8 Note: Your DR Engine has a fixed Throttle position and is equipped with an Auto- Choke. No Throttle or Choke adjustment is required by the operator. Manual Start 1. Turn the Key to the “RUN” position (Figure 8).
  • Page 13 When you release the blade engage bail bar the blade should stop within 3 Lever seconds. If it does not stop properly, shut the mower off immediately and contact us at www.DRpower.com or call toll-free 1-800-DR-OWNER (376- Figure 11 9637).
  • Page 14 Setting up for rear Bagger discharge 1. Lift the Rear Flap Guard (Figure 14). 1. Remove the Mulching Plug (Figure 15). 1. Hold the Discharge Guard in the upright position as you place the tabs of the Bagger Assembly into the slots in the rear Frame on both sides (Figure 16).
  • Page 15 For best performance, install a new blade before the cutting season begins.  Replace the blade when necessary with a DR Power Equipment replacement blade.  For demanding jobs, such as thick wet grass, Side Discharge mode is recommended to reduce clogging.
  • Page 16: Chapter 4: Maintaining The Dr Wide-Cut Lawn Mower

    Chapter 4: Maintaining the DR WIDE-CUT LAWN MOWER Regular maintenance is the way to ensure the best performance and long life of your machine. Please refer to this manual and the engine manufacturer's owner's manual for maintenance procedures. Service intervals listed in the checklist below supersede those listed in the engine manufacturer's owner's manual.
  • Page 17 Replacing the Oil Oil Fill/ Dipstick Tools and Supplies needed:  SAE 30: above 40 degrees F; 10w-30: 10-90 degrees F; 5w-30: 40 degrees F or below (refer to your Engine Owner’s Manual for quantity required)  Small Engine Oil Extractor ...
  • Page 18 Removing the Blades for Replacement or Sharpening Tools and Supplies Needed:  3/4" Socket  Ratchet with Extension  Torque Wrench  Block of Wood  Gloves The blade is sharp; contacting the blade can result in serious personal injury. Wear gloves when servicing the blade. Wood IMPORTANT: You will need a torque wrench to install the blade properly.
  • Page 19 Belt Guide ONLY USE DR BELTS ON THE DR MOWER. The Belts have been tested and are designed specifically to work with the Blade Braking system. Use of other Belts could damage the machine and cause serious injury to the operator.
  • Page 20 Replacing the Traction Drive Belt Figure 33 Traction Drive Belt ONLY USE DR BELTS ON THE DR MOWER. The Belts have been tested and Spring are designed specifically to work with the Blade Braking system. Use of other Belts could damage the machine and cause serious injury to the operator.
  • Page 21 4. Double Check that the Belt wraps tightly around the Pulleys when Bail Bar is Cable Rotate Center engaged and that the Brake fully engages the Pulley when the Bail Bar is Section released Figure 33 . Tighten/loosen the Cable as needed by the following Clockwise to Tighten steps.
  • Page 22 Operate the mower Engine for at least 45 minutes to maintain proper Battery charge. If the Battery loses its charge, you will need to use a trickle charger (like the DR Battery Charger) to recharge it. The Charger should have an output of 12 volts at no more than 2 amps.
  • Page 23: Chapter 5: Troubleshooting

    Spark Plug hole and pull the Recoil Cord several times to blow out any oil in the Cylinder, then wipe off the Spark Plug and reinsert it.  If the Engine still will not start, visit our web site at www.DRPower.com or call 1-800-DR- OWNER (376-9637) for assistance.
  • Page 24  Check that the Engine has the right amount of oil.  If your Engine still lacks power, visit our web site at www.DRPower.com or call 1-800-DR- OWNER (376-9637) for assistance.  Remove the blades and check for balance. Repair or replace as needed.
  • Page 25 YMPTOM OSSIBLE AUSE The grass is not cut  Check the blades for sharpness. Sharpen the blades as needed. even.  Check for a bent or broken blade. A DAMAGED BLADE IS DANGEROUS AND MUST BE REPLACED.  Check the blade adapter. Replace a broken blade adapter. ...
  • Page 26: Chapter 6: Parts Lists And Schematic Diagrams

    Chapter 6: Parts Lists and Schematic Diagrams Parts List – Deck Assembly Note: Part numbers listed are available through DR Power Equipment. Ref# Part# Description Ref# Part# Description 362801 Spindle Assembly, Finish 144091 Pulley, V-Belt, 2-5/8" 395701 Blade, 15.13", High Lift (SP 30)
  • Page 27 Schematic – Deck Assembly CONTACT US AT www.DRpower.com...
  • Page 28 Parts List - Drive Assembly Note: Part numbers listed are available through DR Power Equipment. Ref# Part# Description Ref# Part# Description 10000041169 Spring, Torsion, Discharge Guard 395441 Axle, Rear A0000210405 Spring, Extension, Blade Brake 395551 Handle, Height Adjust 395531 Bushing, Idler, Blade Brake...
  • Page 29 Schematic – Drive Assembly CONTACT US AT www.DRpower.com...
  • Page 30 Parts List - Handlebar Assembly Note: Part numbers listed are available through DR Power Equipment. Ref# Part# Description Ref# Part# Description 395601 Lever, Handlebar Adjust 333331 Nut, Nylon Lock, Flanged, 3/8-16 A0000296271 Bracket, Handlebar Adjust w/labels 333311 Nut, Nylon Lock, Flanged, 1/4-20...
  • Page 31 Schematic – Handlebar Assembly CONTACT US AT www.DRpower.com...
  • Page 32 Shut off the engine and wait 5 minutes for parts to cool. Remove the spark plug wire, keeping it away from the spark plug and disconnect the negative battery wire to prevent accidental starting. To help maintain your DR WIDE-CUT LAWN MOWER for optimum performance, we recommend you follow this checklist each time you use your Mower.

This manual is also suitable for:

Sp30