Advertisement
Advertisement

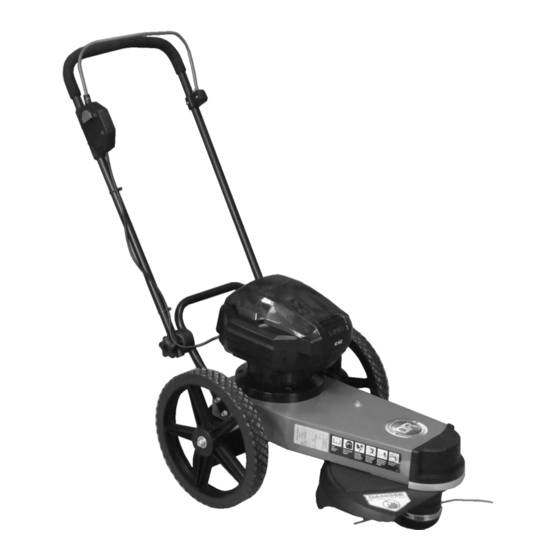
Related Manuals for DR PULSE Series


Summary of Contents for DR PULSE Series
- Page 1 ® PULSE TRIMMER/MOWER™ SAFETY & OPERATING INSTRUCTIONS DR Power Equipment Toll-free phone: 1-800-DR-OWNER (376-9637) Serial No. Fax: 1-802-877-1213 Order No. Website: www.DRpower.com Read and understand this manual and all instructions before operating the DR PULSE TRIMMER/MOWER.
-
Page 2: Table Of Contents
Additional Information and Potential Changes DR Power Equipment reserves the right to discontinue, change, and improve its products at any time without notice or obligation to the purchaser. The descriptions and specifications contained in this manual were in effect at printing. -
Page 3: Chapter 1: General Safety Rules
Keep bystanders at least 50 feet away from your work area at all times. The tips of the cutting cords on the DR PULSE TRIMMER/MOWER can throw sticks, small stones, gravel, and bits of debris over long distances at great velocity. Do not travel over loose materials such as gravel or mulch with the trimmer head spinning. - Page 4 Don’t Overreach – Keep proper footing and balance at all times. Don’t Force the DR PULSE TRIMMER/MOWER – It will do the job better and with less likelihood of a risk of injury at the rate for which it was designed.
- Page 5 ® ® Use only the DR 62V Charger with DR 62V Battery Packs. Do not use the DR 62V Charger with Battery Packs from other manufacturers. Use of a different Charger may cause a fire or explosion. Never attempt to alter or open the Battery Pack or Charger. There are no customer serviceable parts inside. Released electrolyte is corrosive and may cause damage to the eyes or skin.
- Page 6 No list of warnings and cautions can be all-inclusive. If situations occur that are not covered by this manual, the operator must apply common sense and operate this DR PULSE TRIMMER/MOWER in a safe manner. Contact us at www.DRpower.com or call 1-800-DR-OWNER (376-9637) for assistance.
-
Page 7: Chapter 2: Setting Up The Dr Pulse Trimmer/Mower
Chapter 2: Setting Up The DR PULSE TRIMMER/MOWER It may be helpful to familiarize yourself with the controls and features of your DR PULSE TRIMMER/MOWER as shown in Figure 1 If you have any questions at all, please feel free to contact us at www.DRpower.com. - Page 8 Charge the Battery Pack before your first use The DR PULSE Trimmer/Mower uses a sealed, Lithium-Ion Battery Pack. You MUST charge the Battery Pack for at least 90 minutes before you use the Mower for the first time. If you do not charge it before using the Mower, the Battery Pack’s charging capacity may decrease.
- Page 9 Notches The Handlebar folds down for easy storage and the DR PULSE Lined Up TRIMMER/MOWER is shipped to you with them folded. Note: Ensure that the teeth of the Handlebar Adjusters mesh correctly as you tighten the Knobs in the following step.
-
Page 10: Chapter 3: Operating The Dr Pulse Trimmer/Mower
Chapter 3: Operating the DR PULSE TRIMMER/MOWER The design of your machine is for trimming and mowing grass, weeds, and other growth as specified in this manual. Do not use it for any other purpose as it could cause serious injury. - Page 11 Head Height Adjustment Note: The following steps change the cutting height by 3/4" increments. The Screw Driver middle cutting height is shown in Figure 9. The highest setting is shown in Figure 10. The lowest setting is shown in Figure 11. Tools and Supplies Needed: ...
- Page 12 Dealing with obstacles in the terrain is easy with your new DR PULSE TRIMMER/MOWER. The following section explains how to approach most common obstacles. Tip: The DR PULSE TRIMMER/MOWER discharges cut material to the right. Always try to cut and trim with the uncut tall grass or weeds on the left.
- Page 13 Wet Conditions DO NOT use the DR Trimmer/Mower in rain or in wet/damp conditions. The machine may be damaged and wet conditions are hazardous for the operator. Very Dry Conditions When trimming and mowing in very dry conditions, be extra cautious of cut grass, chaff, weeds, seeds, etc., accumulating on the Motor, especially around the air vent openings at the sides and bottom of the Motor.
-
Page 14: Chapter 4: Maintaining The Dr Pulse Trimmer/Mower
* Cleaning the top of the Motor during use is critical for proper air flow. Keeping the Motor clear of debris is necessary for optimum performance. Replacing Trimmer Cords Use DR Power Equipment .095" Cord provided with your DR Pulse Trimmer/Mower for best results. Use of larger Cord or different materials will reduce Battery run time. ... - Page 15 ® Replacing the Mow-Ball or Quick-Lock™ parts Tools and Supplies Needed: Phillips head Screwdriver with at least a 6" shank Gloves Disassembly Molded Quick Lock Spacers 1. Align the hole in the Anti Wrap Canister with the hole in the internal housing at the location shown (Figure 13).
- Page 16 Replacing the Trimmer Belt Use only DR belts on your machine. Do not use hardware store variety belts. Tools and Supplies needed: Bolts and 3/8" Wrench Flat Washers Trimmer 1. Tip the machine back to access the underside. Cord Trimmer 2.
- Page 17 Checking Battery Charge Battery 1. Check the charge percentage of your 62V Battery by pushing the Indicator Button on the front of the Battery (Figure 17). The number of Green LED indicators will tell you the % of power left in the battery. 1 LED = 25%, 2 LEDs = 50%, 3 LEDs = 75% and 4 LEDs = 100%.
- Page 18 ® ® Use only the DR 62V Charger with DR 62V Battery Packs. Do not try to use the DR 62V Charger with Battery Packs from other manufacturers. Make sure the Charger Power Supply is plugged into a normal household voltage, 120volts, 60Hz, AC only.
-
Page 19: Chapter 5: Troubleshooting
Most problems are easy to fix. Consult the Troubleshooting Table below for common problems and their solutions. If you continue to experience problems, contact us at www.DRpower.com or call toll-free 1-800-DR-OWNER (376-9637) for support. Before performing any maintenance procedure or inspection, release the bail bar to stop the motor and remove the battery and safety key to prevent accidental starting. - Page 20 A piece of Cord or debris may still be lodged in the Quick Lock mechanism. difficult to install. The Cord is too large. Use the recommended DR Power Equipment .095" Cord in the Trimmer. The cutting Cords are ...
- Page 21 CONTACT US AT www.DRpower.com...
-
Page 22: Chapter 6: Parts Lists And Schematic Diagrams
Chapter 6: Parts Lists and Schematic Diagrams Parts List – Main Frame Assembly Note: Part numbers listed are available through DR Power Equipment. Ref# Part# Description Ref# Part# Description A0000115854 Frame, Trimmer w/Labels 376241 Spindle A0000116959 Electric Powerhead w/Label, 62V,... - Page 23 Schematic – Main Frame Assembly CONTACT US AT www.DRpower.com...
- Page 24 Parts List – Handlebar and Axle Assembly Note: Part numbers listed are available through DR Power Equipment. Ref# Part# Description Ref# Part# Description 311171 Bolt, HWH, 1/4 - 20 X .75", Taptite 143931 Spring, C, .75OD, .063 Wire, .63L, ZP...
- Page 25 Schematic – Handlebar and Axle Assembly CONTACT US AT www.DRpower.com...
- Page 26 ® PULSE TRIMMER/MOWER...
- Page 27 to perform tasks normally performed by the DR PULSE TRIMMER/MOWER. SOME STATES DO NOT ALLOW THE EXCLUSION OR LIMITATION OF INCIDENTAL OR CONSEQUENTIAL DAMAGES, SO THE ABOVE LIMITATIONS MAY NOT APPLY TO YOU.
- Page 28 Before performing any maintenance procedure or inspection, release the bail-bar to stop the motor, and remove the battery and safety key to prevent accidental starting. When not in use, your DR PULSE TRIMMER/MOWER should be stored out of the reach of children and inside at a dry location. ...
Need help?
Do you have a question about the PULSE Series and is the answer not in the manual?
Questions and answers