Advertisement
PREMIER DR
SAFETY & OPERATING INSTRUCTIONS
Serial No.
Order No.
Read and understand this manual and all instructions before operating this PREMIER DR FIELD AND BRUSH MOWER.
®
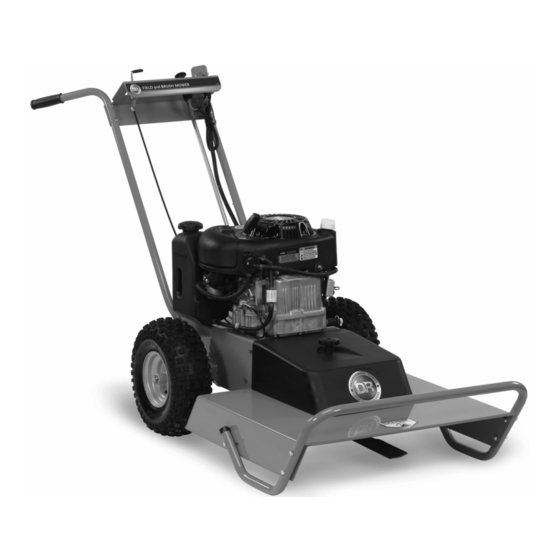
FIELD AND BRUSH MOWER
®
DR
Power Equipment
Toll-free phone: 1-800-DR-OWNER (376-9637)
Fax: 1-802-877-1213
Web site: www.DRpower.com
Advertisement

Related Manuals for DR Premier Field


Summary of Contents for DR Premier Field
- Page 1 FIELD AND BRUSH MOWER SAFETY & OPERATING INSTRUCTIONS ® Power Equipment Toll-free phone: 1-800-DR-OWNER (376-9637) Serial No. Fax: 1-802-877-1213 Order No. Web site: www.DRpower.com Read and understand this manual and all instructions before operating this PREMIER DR FIELD AND BRUSH MOWER.
-
Page 2: Table Of Contents
Additional Information and Potential Changes DR Power Equipment reserves the right to discontinue, change, and improve its products at any time without notice or obligation to the purchaser. The descriptions and specifications contained in this manual were in effect at printing. Equipment described within this manual may be optional. -
Page 3: Chapter 1: General Safety Rules
Labels Your PREMIER DR FIELD and BRUSH MOWER carries prominent labels as reminders for its proper and safe use. Shown below are copies of all the Safety and Information labels that appear on the equipment. Take a moment to study them and make a note of their location on your Mower as you set up and before you operate the unit. - Page 4 The exhaust area on the engine becomes very hot with use. Allow the engine to cool before doing maintenance or making adjustments. • Never tamper with safety devices. Check their proper operation regularly. • To reduce fire hazard, keep the engine and muffler free of debris build-up. ® PREMIER DR FIELD AND BRUSH MOWER...
-
Page 5: Slope Operation
Slope Operation Slopes are a major factor related to slip and fall accidents, which can result in severe injury. All slopes require caution. If you feel uneasy on a slope, do not mow it. Always take the following precautions when using this machine on slopes: ALWAYS: •... - Page 6 No list of warnings and cautions can be all-inclusive. If situations occur that are not covered by this manual, the operator must apply common sense and operate this Mower in a safe manner. Contact us at www.DRpower.com or call 1 (800) DR-owner (376- 9637) for assistance.
-
Page 7: Chapter 2: Setting Up Your Premier Dr Field And Brush Mower
Chapter 2: Setting Up Your PREMIER DR FIELD and BRUSH MOWER It may be helpful to familiarize yourself with the controls and features of your PREMIER DR FIELD and BRUSH MOWER as shown If you have any questions at all, please feel free to contact us at in Figure 1 before beginning these procedures. - Page 8 Dry Weight 215 lbs. Operating Weight 220 lbs. SHIPPING SPECIFICATIONS Shipping Weight 285 lbs. Shipping Dimensions 82"L, 36"W, 46"H Unpacking the PREMIER DR FIELD and BRUSH MOWER Tools and Supplies Needed: • Screwdriver • Metal Shears • Utility Knife •...
- Page 9 Wear gloves and be very careful when handling the deck. The blade is very sharp, and may spin as you maneuver the deck. 5. Remove the Blade Protector from the Blade. (See CAUTION note above). Adding Oil and Gasoline • You must add oil before starting the engine.
- Page 10 2. If the pressure is too low, add air through the Valve Stem with an air hose. Figure 3 3. Replace the Valve Stem Protective Cap when finished. ® PREMIER DR FIELD AND BRUSH MOWER...
-
Page 11: Chapter 3: Operating Your Premier Dr Field And Brush Mower
The Pre-Start Safety Check Your PREMIER DR FIELD and BRUSH MOWER is fitted with an Operator Presence System to prevent the blade from turning without an operator in the proper position at the controls. In addition, normal wear and tear can bring about the need for adjustment to some running parts to insure that they function properly in terms of safe operation. - Page 12 4. Grasp the recoil starter handle and slowly pull until you feel resistance. Let the cord retract a little bit, then pull the cord rapidly to start the engine. One or two pulls usually starts the PREMIER DR FIELD and BRUSH MOWER.
- Page 13 NOTE: If you pull up on the Blade Control Knob before holding down the Operator Presence Control Lever, the engine will shut off. Always disengage the blade of the PREMIER DR FIELD and BRUSH MOWER before shifting into reverse. Stopping the Blade 1.
- Page 14 • Never use the PREMIER DR FIELD AND BRUSH MOWER on slopes greater than 20 degrees (figure 6). Doing so could result in serious injury or damage to your machine. 1. If you have to mow on sloping terrain, mow across the slope, not up and down, for better control.
-
Page 15: Chapter 4: Maintaining Your Premier Dr Field And Brush Mower
Shut down the engine, remove the spark plug wire and wait 5 minutes before performing any maintenance procedure or inspection on the Mower. Your PREMIER DR FIELD and BRUSH MOWER was lubricated at the Factory. The Spindle and Transaxle are lubricated for life and sealed at the factory. The... - Page 16 Shut down the engine, remove the spark plug wire and wait 5 minutes before performing any maintenance procedure or inspection on the Mower. Use only DR belts on your machine. They have been thoroughly tested and proven for many hours of use To Replace the Blade Belt Tools and Supplies Needed: •...
- Page 17 Shut down the engine, remove the spark plug wire and wait 5 minutes before performing any maintenance procedure or inspection on the Mower. Electric Deck Clutch Use only DR belts on your machine. They have been thoroughly tested and Pulley proven for many hours of use. Figure 10 Tools Needed: Bolts and •...
- Page 18 4. Mount the new Blade, Large Flat Washer, Lock Washer, and Bolt. Block NOTE: Be sure to position the Blade with the fins pointing up towards the Deck for Figure 15 it to work properly. ® PREMIER DR FIELD AND BRUSH MOWER...
- Page 19 Removing the Wheels Tools needed: • Needle Nose Pliers 1. Block the machine so the Wheel you are removing is off the ground. 2. Remove the Retaining Ring with the Pliers. 3. Remove the Shim and slide the Wheel off the Axle (Figure 16). 4.
-
Page 20: Chapter 5: Troubleshooting
Most problems are easy to fix. Consult the Troubleshooting Table below for common problems and their solutions. If you continue to experience problems, contact us at www.DRpower.com or call 1-800-DR-OWNER (376-9637) for support. Shut down the engine, remove the spark plug wire and wait 5 minutes before performing any maintenance procedure or inspection on the Mower. - Page 21 Troubleshooting Table (Continued) Shut down the engine, remove the spark plug wire and wait 5 minutes before performing any maintenance procedure or inspection on the Mower. YMPTOM OSSIBLE AUSE Engine smokes. ⇒ Check the oil level and adjust as needed. ⇒...
-
Page 22: Chapter 6: Parts Lists, Schematic Diagrams And Warranty
Chapter 6: Parts Lists, Schematic Diagrams And Warranty Parts List - HANDLEBAR ASSEMBLY NOTE: Part numbers listed are available through DR Power Equipment. Ref# Part# Description Ref# Part# Description 165201 Switch, Snap-in m/s 164971 Guard, Switch Magura 157201 Key, Ignition Switch... - Page 23 Schematic – HANDLEBAR ASSEMBLY CONTACT US AT www.DRpower.com...
- Page 24 Parts List – TRANSAXLE AND WHEEL ASSEMBLY NOTE: Part numbers listed are available through DR Power Equipment. Ref# Part# Description Ref# Part# Description 110761 Nut, Nylon Lock, 5/16-18 247361 Arm, Shift, Lower 112411 Washer 247381 Linkage, Shift 247421 Guide, Belt...
- Page 25 Schematic – TRANSAXLE AND WHEEL ASSEMBLY CONTACT US AT www.DRpower.com...
- Page 26 Parts List – BRUSH DECK ASSEMBLY NOTE: Part numbers listed are available through DR Power Equipment. Ref# Part# Description Ref# Part# Description 257051 Cover, Deck, w/ Labels 256391 Housing, Spindle 143661 Knob, handlebar, 5/16-18 112381 Washer, Flat, 1/4, USS 110751...
- Page 27 Schematic – BRUSH DECK ASSEMBLY CONTACT US AT www.DRpower.com...
- Page 28 Parts List – ENGINE AND CLUTCH ASSEMBLY NOTE: Part numbers listed are available through DR Power Equipment. Ref# Part# Description Ref# Part# Description 256401 Engine, 12.5Hp, B&S m/s IntekVert 223241 Bolt, HCS, 7/16-20 x 2.75, Gr8, yzp 110761 Nut, Nylon Lock, 5/16-18 191301 Washer, Flat, .469ID x 1.62OD, .25L, Gr5...
- Page 29 Schematic – ENGINE AND CLUTCH ASSEMBLY CONTACT US AT www.DRpower.com...
- Page 30 Notes: ® PREMIER DR FIELD AND BRUSH MOWER...
- Page 31 FIELD and BRUSH MOWER is fit for ordinary purposes for which a product of this type is used. DR Power Equipment however, limits the implied warranties of merchantability and fitness in duration to a period of two (2) years in consumer use, ninety (90) days for any other use.
- Page 32 • If your Engine has a Fuel Filter, replace it. • If your PREMIER DR FIELD and BRUSH MOWER will be idle for more than 30 days, we recommend using a gas stabilizer. This will prevent sediment from gumming up the Carburetor. If there is dirt or moisture in the gas or tank, remove it by draining the tank.
Need help?
Do you have a question about the Premier Field and is the answer not in the manual?
Questions and answers