Table of Contents
Advertisement
Advertisement
Table of Contents

Related Manuals for AERMEC CWX350W


Summary of Contents for AERMEC CWX350W
- Page 1 INSTALLATION AND USER MANUAL CWX250W CWX350W CWX500W CWX700W 1806 - 6396456_00...
-
Page 2: Trasporto • Transport • Transport • Transport • Transporte
TRASPORTO • TRANSPORT • TRANSPORT • TRANSPORT • TRANSPORTE NICHT nass machen. NON bagnare. Tenere al KEEP DRY. Keep out of NE PAS mouiller. Tenir à NO mojar. Conservar Vor Regen geschützt riparo dalla pioggia. the rain. l’abri de la pluie. protegido de la lluvia. -
Page 3: Table Of Contents
Dear customer, Thank you for choosing an AERMEC product. It is the fruit of many years of experience and special design studies and has been made of the highest grade materials and with cutting edge technology. The CE marking indicates that the products comply with the essential requirements of the applicable European Community direc- tives. -
Page 4: Packaging
Pay particular AERMEC S.p.A. accepts no liability for attention to the instructions for For any irregularities not foreseen any damage due to improper use use accompanied by the words... -
Page 5: Maintenance
SPECIAL MAINTENANCE The ordinary maintenance can be carried out by the user and Special maintenance can only be performed by Aermec consists of a series of simple operations, which will ensure that After-Sales Services or by people with the technical and the fan coil unit operates at full efficiency. -
Page 6: Important Information
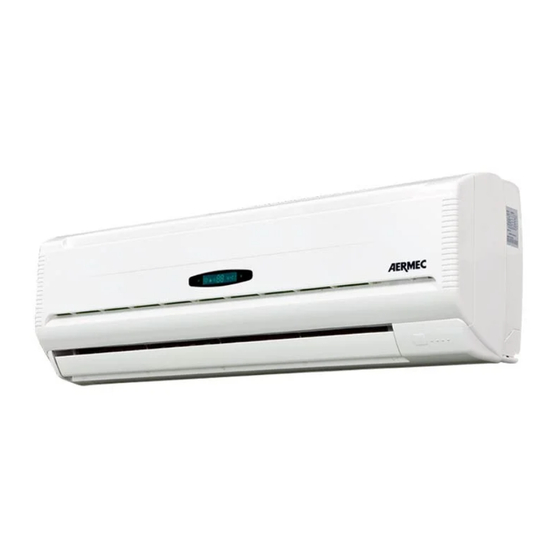
IMPORTANT INFORMATION ATTENZIONE: il ventilconvettore è OUTLETS comfort. collegato alla rete elettrica, un intervento Only adjust the vertical blades by hand. Do not put anything at all in the air outlet da parte di personale non provvisto In the versions with microprocessor con- slots. - Page 7 MAIN COMPONENTS Front panel Auxiliary emergency switch Horizontal air discharge blades Electric terminal connections Vertical air discharge blades Front case Air filter Frame Heat exchanger coil 10 Display DESCRIPTION OF COMPONENTS FRONT PANEL AIR FILTER AUXILIARY EMERGENCY SWITCH The air intake is via the slots. Lifting the panel Washable air filter that can easily be removed The auxiliary emergency switch, only for ver- gives access to the air filter and the internal...
-
Page 8: Cwx_W With Microprocessor Controller - Front Panel Display
DIRECTION OF THE AIR FLOW The blades on the air discharge are arranged to direct the air in two directions: – vertical blades, to be adjusted manually – motorised horizontal blades, to be adjusted only by means of the remote control. ADJUSTING THE VERTICAL BLADES –... - Page 9 INFRA-RED REMOTE CONTROL IMPORTANT - The two control types, remote control , can be used at the same time on the same fan coil unit. – If the fan coil is off, all the previous settings made are kept in the memory except for the TIMER setting and SLEEP mode. –...
- Page 10 LIQUID CRYSTAL DISPLAY With the remote control on (ON), the display shows the settings of the unit, with the remote control off (OFF) the display is off and only displays the timer for the programmed activation (if active). 1 - TEMPERATURE (°C) OR (°F) Displays the set point temperature value in °C or °F.
-
Page 11: Clock Setting (Clock)
COOLING PROGRAMME (COOL) The programme requires the system to circulate chilled water. 1) PRESS THE ON/OFF KEYS The fan coil unit comes on. The fan coil unit automatically starts in cooling mode. 2) PRESS THE MODE Press the MODE key repeatedly until the word COOL appears on the display 3) PRESS THE KEYS TO CONTROL THE TEMPERATURE –... - Page 12 DEHUMIDIFICATION PROGRAMME (DRY) The programme requires the system to circulate chilled water. 1) PRESS THE ON/OFF The fan coil comes on and the display is switched on. 2) PRESS THE KEY MODE Press the MODE key repeatedly until the word DRY appears on the display . 3) PRESS THE KEYS TO CONTROL THE TEMPERATURE –...
-
Page 13: Fan Programme (Fan)
FAN PROGRAMME (FAN) 1) PRESS THE ON/OFF KEYS The fan coil comes on and the display is switched on. 2) PRESS THE MODE Press the MODE key repeatedly until the word FUN appears on the display 3) PRESS THE FAN When the FAN key is pressed repeatedly, the system can move to the minimum speed (F1), medium speed (F2) and high speed (F3) or to the (FA) speed controlled by the microprocessor. - Page 14 TURN ON PROGRAMMED BY THE TIMER 1) TURN ON WITH – Set the required conditions (MODE, FAN, TEMP) on the remote control that you want active when starting the unit. – Turn off with keys 2) ACTIVATE THE TIMER ON WITH 3) SET THE TIMER ON WITH KEYS –...
-
Page 15: Energy Saving Program (Econo)
ENERGY SAVING PROGRAM (ECONO) 1) ENERGY SAVING PROGRAM The fan coil operates and the display on the unit lights up. 2) PRESS THE ECONO BUTTON Can only be activated with the COOL, HEAT, AUTO programs. The ECONO icon appears on the display and the temperature set point and fan speed disappears. -
Page 16: Dimensions [Mm]
DIMENSIONS [mm] CWX_W222V CWX_W223V CWX_W22VL CWX_W322V CWX_W323V CWX_W32VL CWX_W422V CWX_W423V 1170 CWX_W42VL FCW 22 FCW 32 FCW 42 CWX_W 222V - 223V - 22VL Ø70 322V - 323V - 32VL Ø70 422V - 423V - 42VL 1170 Ø70... -
Page 17: Installation Of The Unit
INSTALLATION OF THE UNIT WARNING: before carrying out any Instructions essential for the proper For connections through the wall make work ensure the individual has the installation of the equipment are shown a hole with a diameter of 70 mm, appropriate personal protection. - Page 18 ø70 5 ÷ 10 180° Øi 16mm Screws Screw covers...
- Page 19 NOTES REFRIGERANT CONNECTIONS Maximum pressure of use: ø refrigeration lines The emassimo pressure value during use is 1.72 MPa (250 psig). (R410A) mm(inch) Liquid Line insulation: 250W 6,35(1/4”) 9,52 (3/8”) • The connection fitting to the indoor unit must be wrapped in thermal 350W 6,35(1/4”) 12,7 (1/2”)
- Page 20 Electrical connections Front panel Power supply terminal board Basement WARNING: before carrying out any work, BREAKER) with minimum contact opening Make sure that the wiring is done in make sure that the power supply is distance of 3mm. accordance with the laws and regulations switched off.
-
Page 21: Wiring Diagram Cwx250W - Cwx350W
WIRING DIAGRAM (COOL ONLY) WIRING DIAGRAM CWX250W - CWX350W FOR MODEL: CWX250W & CWX350W AUX. P2 P1 INDOOR UNIT COLOR CODE: LEGEND: AUX. AUXILIARY SWITCH BLUE GREEN CAP. FAN CAPACITOR BLACK DISPLAY BOARD BROWN YELLOW INDOOR COIL THERMISTOR INDOOR FAN... -
Page 22: Wiring Diagram Cwx500W - Cwx700W
WIRING DIAGRAM (COOL ONLY) WIRING DIAGRAM CWX500W - CWX700W FOR MODEL: CWX500W & CWX700W AUX. P2 P1 INDOOR UNIT COLOR CODE: LEGEND: AUX. AUXILIARY SWITCH BLUE GREEN CAP. FAN CAPACITOR BLACK DISPLAY BOARD BROWN YELLOW INDOOR COIL INDOOR FAN MOTOR CON: THERMISTOR INDOOR FAN MODEL: CWX500W... - Page 24 Papier AERMEC S.p.A. Via Roma, 996 37040 Bevilacqua (VR) - Italia Tel. + 39 0442 633111 Fax +39 0442 93577 marketing@aermec.com www.aermec.com Aermec reserves the right to make all the modifications deemed necessary for improving the product.
Need help?
Do you have a question about the CWX350W and is the answer not in the manual?
Questions and answers