Table of Contents
Advertisement
Quick Links
Advertisement
Table of Contents

Related Manuals for Thermo Scientific Heraeus Cryofuge 16


Summary of Contents for Thermo Scientific Heraeus Cryofuge 16
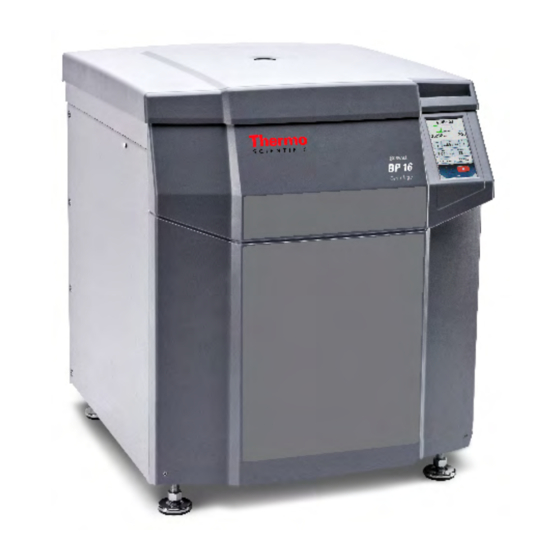
- Page 1 Thermo Scientific Centri-Touch User Interface for Thermo Scientific Sorvall BP 8 / 16, Heraeus Cryofuge 8 / 16, Sorvall BIOS 16, Heavy Duty and Heavy Duty Water Cooled Centrifuges Instruction Manual 50150733-d 2019-10 Visit us online to register your warranty:...
-
Page 2: Table Of Contents
Runs 6.2.1 Programs 6.2.2 Run Log 6.2.3 Rotor Log Configuration 6.3.1 Users 6.3.2 Settings 6.3.3 Device 6.3.4 Contact Thermo Scientific Centri-Vue Application Requirements Quick Guide Connectivity Plug-In (Touchscreen User Interface) 7.3.1 Remote Settings 7.3.2 Access Control Settings 2 of 73... - Page 3 Centri-Vue App 7.4.1 Overview Menu 7.4.2 Discovery Menu 7.4.3 Detail View 7.4.4 Adding a Centrifuge 7.4.5 Edit Centrifuge Entry 7.4.6 Remote Control REST-Webserver Resource Overview Detailed description of the resources: 3 of 73...
-
Page 4: The Main Screen
The Main Screen 1 The Main Screen The main screen is divided into three sections: Status, current values and progress Set value entry area Centrifuge control, menu and help 4 of 73... -
Page 5: Current Values And Progress Indicator
The Main Screen 1.1 Current Values and Progress Indicator The top part of the main screen shows the status, current values and progress of centrifugation. 1. Status and time remaining 2. Progress 3. Current temperature 4. Current speed 1- Status and Time Remaining Shows the time remaining until stop during a centrifugation. -
Page 6: Set Value Entry
The Main Screen 2- Progress Shows the current phase of the run, divided into three sections: Acceleration, centrifugation and deceleration. Acceleration Centrifugation Deceleration 3- Current Temperature Displays the current chamber temperature. 4- Current Speed Displays the current rotating speed of the rotor. 1.2 Set Value Entry In this area of the screen set values can be changed, provided that the required user authorizations are available. -
Page 7: Time
The Main Screen 1.2.1 Time The run time can be changed via the Time button. Here, you can enter a run time in hours and minutes. (You can also activate an input for seconds by making the appropriate change in the settings.) There are three different modes for the run time. -
Page 8: Speed
The Main Screen 3- Accumulated Centrifugal Effect (ACE) Input as X, Y * 10 X: Pre-decimal digits Y: Decimal places Z: Exponent of power of ten 1.2.2 Speed The rotation speed can be entered either in revolutions per minute (rpm) or as relative centrifugal force (RCF). Acceleration cannot continue beyond the maximum speed of the rotor currently in use. -
Page 9: Acceleration And Deceleration Profile
The Main Screen 1.2.4 Acceleration and Deceleration Profile The acceleration profile specifies how fast the centrifuge reaches the set rotation speed or comes to rest. Values are displayed as profiles from 1 to 10. If a different profile set is active in the settings, the available values may be different. - Page 10 Minimum acceleration Maximum deceleration The centrifuge has the ability to facilitate a protocol conversion from another Thermo Scientific centrifuge model using the Centri-Cross function. The Centri-Cross function emulates the accelaration and decelaration profiles of the legacy Thermo Scientific Sorvall RC3 BP+, Thermo Scientific Sorvall RC 12 BP+, Thermo Scientific Heraeus Cryofuge 6000i or Thermo Scientific Heraeus Cryofuge 8500i.
-
Page 11: Program
The Main Screen 1.2.5 Program Displays either the name of the program currently selected or the Select Program button. Pressing this button displays the program list (see Programs section). 1.2.6 Rotor Displays either the name of the rotor currently inserted or the Install Rotor button. Pressing the Install Rotor button, or inserting a rotor, causes the information about the rotor to be displayed. -
Page 12: Serial Numbers
The Main Screen 1.2.7 Serial Numbers If the Enter all Serial Numbers option is enabled in the settings, the serial numbers for rotor and bucket can also be entered in the Rotor window or scanned in with a barcode reader. Assigning a serial number enables the cycles to be captured and saved for specific rotors and buckets. - Page 13 The Main Screen The arrows near the top of the window allow you to toggle between the rotor and the different individual buckets. Once a serial number has been read in by barcode reader, the screen jumps to the next element that can be scanned.
- Page 14 The Main Screen The Info ID button is enabled if serial numbers have been assigned for the rotor type and bucket type currently inserted. Pressing the Info ID button allows you to view and change the serial numbers of the rotor and bucket. The number of cycles of the individual elements is displayed.
-
Page 15: Centrifuge Control Elements
The Main Screen 1.3 Centrifuge Control Elements The bottom area of the main screen can be used to control the centrifuge. User login Configuration Context-sensitive help Centrifuge control elements Various buttons can be displayed in the centrifuge control area: The green Start button starts the centrifuge using the current set values, provided that the door is closed and a rotor is inserted. -
Page 16: Menu
The Main Screen 1.4 Menu symbol is used to call up the menu. The menu provides additional functions. 1.5 User Login Different items are displayed in the bottom section, depending on the Protected by User PIN setting. • Key symbol If the Protected by User PIN option is disabled in the settings, the key symbol appears. - Page 17 The Main Screen Example (the Temperature button): This function can be disabled via the button. 17 of 73...
-
Page 18: Lighthouse Mode
Lighthouse Mode 2 Lighthouse Mode If no entry is made via the main screen in 30 seconds, the unit changes to lighthouse mode. In this mode, the status, current values and progress display are displayed larger. Normal Mode Lighthouse Mode The set value entry fields disappear and the progress display occupies their space. -
Page 19: Usb Import/Export
USB Import/Export 3 USB Import/Export Run logs, rotor logs, programs and users can be exported onto a USB stick. Programs and users can also be imported. Only data that has been exported using the same language setting and the same profile set can be imported. The file format for export is CSV. -
Page 20: Power Over Ethernet (Poe)
Power over Ethernet (PoE) 4 Power over Ethernet (PoE) This function can be used if the centrifuge is connected to a PoE-capable device within the network. If this is the case, the centrifuge screen is supplied with power via the network connection even if the centrifuge is switched off. -
Page 21: Gmp Mode
GMP Mode 5 GMP Mode If GMP mode is enabled in the settings, the user is guided through a workflow. Here, a barcode reader can be used to select users and programs. Additionally, the serial numbers of the blood bags can be recorded either manually or using a barcode reader. - Page 22 GMP Mode Only programs that have already been assigned a barcode in the program management area can be selected by means of a barcode (see Programs section). 3. Product Identification Once the program has been selected, the serial numbers of the blood bags are entered. 22 of 73...
- Page 23 GMP Mode Once all serial numbers have been captured, exit the data entry mode by scanning the predefined 'END' barcode. 4. Closing the Door and Starting Centrifugation Once all serial numbers have been scanned in, the door can be closed and centrifugation can begin. 5.
- Page 24 GMP Mode This step is used to identify the user who removes the blood bags from the centrifuge. Following this step, the workflow recommences from the beginning. The workflow sequence is shown in graphical form below: User ID Centrifugation Program ID User ID Blood bag ID Run result...
-
Page 25: Predefined Barcodes
GMP Mode 5.2 Predefined Barcodes To facilitate operation with a barcode reader, two predefined barcodes are provided: • This barcode must be scanned once scanning of the blood bag serial numbers is completed. • Cancel Scanning this barcode resets the current step in the GMP workflow. 25 of 73... -
Page 26: Menu
Menu 6 Menu The menu is divided into three sections: Help, Runs and Configuration. Each section contains another level with submenus. To quit the menu and return to the main screen, either press the Menu button again or click at the top of the screen, either on the symbol or in the title area to the left. -
Page 27: Help
Menu 6.1 Help 6.1.1 Training Videos The Training Videos submenu contains instructions on various aspects of using the centrifuge. Video selection list Video Previous Pause video video Play video Next video 27 of 73... -
Page 28: Instruction Manual
Menu 6.1.2 Instruction Manual The instruction manual submenu contains text articles on the use of the centrifuge. Topic selection Topic text 28 of 73... -
Page 29: Calculator
Menu 6.1.3 Calculator The calculator helps ensure that the same results are obtained using different rotors. The calculator can calculate a time that allows the same overall forces to be applied to the sample using the currently set speed as was applied by a compared rotor with its specified values of speed and time. Rotor selection Rotor information Value conversion... -
Page 30: Runs
Menu 6.2 Runs 6.2.1 Programs In the Programs submenu, users can save combinations of set values as programs. When a program is loaded, the stored values are set as the current set values. Two predefined programs are always present in this submenu: •... - Page 31 Menu Detail View Type on the name of a user-defined program to display the detail view. Here, all information related to the selected program can be viewed. If this program is currently active, the symbol appears beside the name. In this screen, you can activate timed starts for user-defined programs. Timed Start This mode displays a time at which the centrifuge is due to start with the selected program.
- Page 32 Menu Current time Planned start time Set entry to 00:00:00 Set to current time New/Edit Pressing one of these buttons opens the program editor. Here, you can specify the set values of a program (see Program Editor section). The Edit button is available when an existing user-defined program is selected and the user currently logged in has the required authorization.
- Page 33 Menu In the program editor, two buttons appear below the set value entry fields: Enter Name and Select Rotor . Pressing Enter Name opens a window in which you can enter the program name using an on-screen keyboard. 33 of 73...
- Page 34 Menu Below the keyboard, you can assign a barcode and a color to the program . The barcode can be used in GMP mode to select the program using a barcode scanner. The selected color appears in the program overview and in the detail view.
- Page 35 Menu Stepruns Stepruns are centrifugation runs that comprise multiple steps. Different set values can be given for each step; the steps are performed one after another. To create a steprun, press Create Steprun in the Program Editor. Pressing Create Steprun also makes further options available. 35 of 73...
- Page 36 Menu Each step has its own values for time and speed. Where one step has a lower speed than the next, an acceleration profile can be chosen. Where the previous step is at a higher speed than the next, a deceleration profile can be chosen.
- Page 37 Menu The current step is highlighted. You can select any step by pressing on it directly Next step Previous step step Delete current step Current step/Total number of steps The curve displayed in the progress display is determined by the speeds specified for the individual steps. The higher the curve, the higher is the speed.
- Page 38 Menu Pre-cooling To prevent samples being damaged by temperatures that are too high or too low, a pre-tempering program is provided. This brings the rotor chamber to the temperature specified as the set value. Only the temperature parameter can be changed in the set value entry for this.
- Page 39 Menu During execution of a QC run, a check is made whether the set values of the individual programs can be achieved. The functionality is tested and any potential malfunctions are detected. If the temperature is not reached by the end of a program or a step in a steprun, the program or step is repeated. If by the end of a program or a step in a steprun the required speed is not achieved, the QC run is abandoned.
- Page 40 Menu If the set values are achieved by the end of a program, the QC run moves on to the next valid program. This continues until an error occurs or until all valid programs have been executed. On completion of the QC run the user is informed of the result. 40 of 73...
-
Page 41: Run Log
Menu 6.2.2 Run Log The run log lists all runs in chronological sequence. A maximum of 120 runs can be stored. If this number is exceeded, the oldest entry is deleted. Program name Name of user Date and time of Status of that performed completion of... - Page 42 Menu Selecting an entry causes a detail view of the run to be displayed with its set values. Any serial numbers of blood bags recorded for the run are also shown. If the set values were changed during the run, the symbol appears beside the rotor name.
- Page 43 Menu 43 of 73...
-
Page 44: Rotor Log
Menu 6.2.3 Rotor Log Information regarding the rotor and buckets to be used are stored in the rotor log. symbol appears beside the rotor currently inserted. In addition to the rotor data, the number of runs previously performed with this rotor in this centrifuge is displayed. Rotor protocols can be exported to a USB stick connected to the device using the Export List button ➀. -
Page 45: Configuration
Menu 6.3 Configuration 6.3.1 Users To control access to the centrifuge, users can be created. If either Protected by User PIN is set or User ID Logging is set to Mandatory User Logging or Optional User Logging in the settings, such created users are necessary. Access Level The access level determines the options available to a user in the operating software. - Page 46 Menu 1. New Creates a new user a. Protected by User PIN disabled Only the username can be changed. b. Protected by User PIN enabled Username, PIN code, barcode and user level can all be modified. 46 of 73...
- Page 47 Menu 2. Delete Deletes individual users 3. Log In The selected user is logged in once the PIN code is entered. This button is only available where Protected by User PIN is enabled. 4. Import/Export User data can be exported onto a USB stick and imported from this. 47 of 73...
-
Page 48: Settings
Menu 6.3.2 Settings Here, the behavior of the centrifuge and the operating software can be modified. To change a setting, the master passcode must first be entered. The factory preset master passcode is 12345. Once this has been entered, all further changes can be performed without entering the master passcode again until the menu is closed. - Page 49 Menu 7. Master Passcode The master passcode for protecting the centrifuge can be changed here. It must be entered twice to prevent errors in entering the code. Energy Options Three options are available here. 1. Green mode 2. Balanced mode 3.
- Page 50 Menu 5. English 6. Estonian 7. Finnish 8. French 9. Greek 10. Italian 11. Japanese 12. Korean 13. Croatian 14. Latvian 15. Lithuanian 16. Dutch 17. Norwegian 18. Polish 19. Portuguese 20. Romanian 21. Russian 22. Swedish 23. Slovak 24. Slovenian 25.
-
Page 51: Device
Menu 6.3.3 Device This contains information and network settings for the centrifuge unit. Device information Software information User's device name and device location IP address obtained via DHCP or entered manually To change network settings the master passcode is required (see Settings section). 51 of 73... -
Page 52: Contact
Menu 6.3.4 Contact Contact details can be viewed and entered here. Owner Details Contact details of manufacturer The Owner Details section includes fields for the owner's name, telephone number and e-mail address. The master passcode is required to change this information. This information is only displayed on this machine. Should a fault occur, the person named here can be informed. -
Page 53: Thermo Scientific Centri-Vue Application
Thermo Scientific Centri-Vue Application 7 Thermo Scientific Centri-Vue Application 7.1 Requirements • Thermo Scientific centrifuge with Thermo Scientific Centri-Touch User Interface software • Thermo Scientific ™ Centri-Vue ™ application • Local Area Network (LAN) 7.2 Quick Guide This quick guide describes the steps how to connect the centrifuge with the Centri-Vue application. - Page 54 Thermo Scientific Centri-Vue Application 7. Open the New Discovered Devices list in the discovery menu to search for new centrifuges in the network (Step 1 and 2). 8. Centrifuges with installed Connectivity Plug-In will be identified automatically in the same LAN (Step 3).
- Page 55 Thermo Scientific Centri-Vue Application 12. Select the added centrifuge entry to switch to detail view. 13. For remote control select Request Remote in detail view. 14. Generate a new Remote ID. Select Generate new ID in the settings screen.
-
Page 56: Connectivity Plug-In (Touchscreen User Interface)
Thermo Scientific Centri-Vue Application 15. In the request remote access screen of the Centri-Vue application you can enter the ID by hand or by scanning the QR-Code. 16. Select Verify . 17. If you have remote access to the centrifuge the start button is green . -
Page 57: Access Control Settings
Thermo Scientific Centri-Vue Application 1. Remote Control: Checkbox to general allow/deny remote control. (Master passcode required) 2. Authentication: Selecting Generate new ID generates a new code (ID) for a remote session. Depending on the setup a user authentication may be required. -
Page 58: Centri-Vue App
Thermo Scientific Centri-Vue Application 7.4 Centri-Vue App The Centri-Vue application can discover available centrifuges in the LAN and create a list of local centrifuges with optional additional user information. This information can be used to add location information to the local centrifuge entry. -
Page 59: Discovery Menu
Thermo Scientific Centri-Vue Application • "ACCELERATING (if the centrifuge accelerates) • "RUNNING (if the centrifuge is running) • "STOPPING (if the centrifuge decelerates) • "COMPLETE (when a run has been completed successful) • "STOPPED (If a run get canceled) •... -
Page 60: Detail View
Thermo Scientific Centri-Vue Application 7.4.3 Detail View To enter the detail view of a locally stored centrifuge, select a centrifuge entry. The detail view is very similar to the main screen of the touchscreen user interface software and shows the current values of the centrifuge (at a refresh rate of one second). -
Page 61: Adding A Centrifuge
Thermo Scientific Centri-Vue Application Detail View during Error If an error occurs to the centrifuge, a message will pop up in the detail view. The message opens every time you switch to the detail view until the error is fixed. Selecting the big red cross in the detail view opens up the message manually. - Page 62 Thermo Scientific Centri-Vue Application 5. Add device: selecting this button adds the centrifuge in the overview menu. If saved succesful, the application switches to the overview menu and shows the added centrifuge. Add Manually If the IP address of the centrifuge is known (after selecting the found device), the centrifuge can be manually saved in the overview menu: Select New in the overview menu.
-
Page 63: Edit Centrifuge Entry
Thermo Scientific Centri-Vue Application Error Adding Centrifuges If a centrifuge cannot be added to the overview menu, there are two possible reasons: 1. A centrifuge with the same IP address is already stored in the local list. A pop-up message indicates the error. - Page 64 Thermo Scientific Centri-Vue Application If Edit is selected, an "Edit Device" menu opens. 1. Select Cancel to return to the overview menu. 2. Name: the name of the centrifuge can only be changed directly at the centrifuge and is therefore not editable.
-
Page 65: Remote Control
Thermo Scientific Centri-Vue Application 7.4.6 Remote Control Prerequisites: The centrifuge was enabled for remote access. Request Remote Access Menu The “Request Remote Access“ menu opens when Request Remote Access is selected in the detail view. 1. Select Cancel to return to the overview menu. - Page 66 Thermo Scientific Centri-Vue Application Input by QR-Code 1. Generate a new remote ID in the centrifuge. Select Scan QR-Code in the “Request Remote Access“ menu. 2. The integrated QR scanner opens. 3. Scan the QR-code on the centrifuge with the QR scanner 4.
- Page 67 Thermo Scientific Centri-Vue Application • Centrifuge without User login: If the centrifuge door has been opened, 5 minutes without interaction in the application on the smartphone or the centrifuge. • Centrifuge with User login: If the current user is logged off (manually or automatically, depending on the selection of the combo box in the configuration menu) The session management for the smartphone is directly attached to the user management of the centrifuge.
-
Page 68: Rest-Webserver
REST-Webserver 8 REST-Webserver Port of REST-Webservers: 800 (TCP). The data is exchanged via defined JSON objects. 8.1 Resource Overview In the table below, the REST-interface provided methods are listed. Method allowed Description <device ip>:<port>/getall Information and data about the current state of the centrifuge <device ip>:<port>/getstate Brief information, only state and name of the centrifuge... - Page 69 REST-Webserver "rpm": <rotation speed in rpm>, "temperature": <temperature in °C>, "time": <time in hh::mm::ss> "user": <user name> <error object>: "code": <error code>, "description": <error description in gui language> "title": <error title / type of error> "time": <error occurrence time in year/month/day hh:mm:ss> If a value is not available, the value is set to zero.
- Page 70 REST-Webserver "program": "", "rotorName": "F10-4x1000 LEX", "setValues": { "accelerationProfile": 9, "ace": null, "decelerationProfile": 9, "rcf": null, "rpm": 500, "temperature": 0, "time": "00:02:00" "user": "Centrifuge User" Centrifuge in Hold-RCF-Mode: "actualValues": { "ace": null, "powerDown": false "rcf": 0, "rpm": null, "state": "STOPPED", "temperature": 0, "time": "00:00:38"...
- Page 71 REST-Webserver Centrifuge in ACE-RPM-Mode: "actualValues": { "ace": "0.00E00", "powerDown“ : false "rcf": null, "rpm": 0, "state": "STOPPED", "temperature": 0, "time": null "error": null, "name": "My Centrifuge", "program": "", "rotorName": "F10-4x1000 LEX", "setValues": { "accelerationProfile": 9, "ace": "2.22E02", "decelerationProfile": 9, "rcf": null, "rpm": 500, "temperature": 0, "time": null...
- Page 72 REST-Webserver GET <device ip>:<port>/getstate Query status and name of the centrifuge. Request: No data Response: "name": <centrifuge name>, "powerDown" : <true or false> "state": <state identifier> Example "name": "My Centrifuge ", "powerDown" : false "state": "STOPPED" 72 of 73...
- Page 73 Specifications, terms and pricing are subject to change. Not all products are available in all countries. Please consult your local sales representative for details. Shown pictures within the manual are examples and may differ considering the set parameters and language. Pictures of the Thermo Scientific Centri-Touch interface within the manual are showing the English version as example.
Need help?
Do you have a question about the Heraeus Cryofuge 16 and is the answer not in the manual?
Questions and answers