Table of Contents
Advertisement
Advertisement
Table of Contents

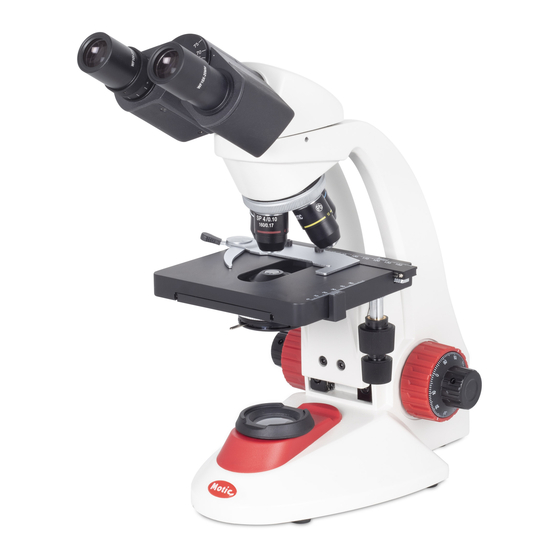
Summary of Contents for Motic RED 230
- Page 1 RED200 SERIES Instructions Manual English Motic Incorporation Ltd.
-
Page 3: Table Of Contents
CONTENT Chapter Page Safety instructions 1.1 General safety instructions 1.2 Instrument safety 1.3 Unpacking, transportation & storage 1.4 Waste disposal 1.5 Operation 1.6 Quality warranty Instrument description 2.1 General views 2.2 Part names 2.3 Application 2.4 Instrument and its major features First time use &... -
Page 5: Safety Instructions
1. SAFETY INSTRUCTIONS 1.1 General safety instructions • Please be sure to read these instructions before using the biological microscope. • Additional information is available upon request from our maintenance department or authorized agency. • To ensure safe operation and guarantee good performance of the microscope please pay attention to the precau- tions and warnings specified in the Operation Instructions. -
Page 6: Operation
If there is any electrical failure (of the fuse system, ground protection or transformer), turn off and unplug the unit immediately. Make sure the microscope is set aside so it will not be used again and contact the Motic service department or a Motic microscope repair agency to have it repaired. -
Page 7: Quality Warranty
1.6 Quality Warranty The RED200 Series biological microscope and the attached accessories are only allowed to be used for microscope examination as described in this manual. The manufacturer takes no responsibility for any other use. • The manufacturer guarantees that the product is free from any defect in material or workmanship on the date of delivery. •... -
Page 8: Instrument Description
RED200 SERIES 2. INSTRUMENT DESCRIPTION 2.1 General Views Binocular Head RED220/223 Trinocular Head 10x/20 10x/18 Eyepiece RED230/233... -
Page 9: Part Names
2.2 Part names RED230 1. Eyepiece 7. Condenser adjusting screw 2. Interpupillary distance scale 8. Condenser fastening screw 3. Binocular head 9. Body tube lock screw 4. Quadruple Nosepiece 10. Arm and base (a single piece) 5. 4X/10X/40X/100X objectives 11. Stage adjustment knob (X-axis) 6. - Page 10 RED200 SERIES RED230 & RED233 13. Condenser focus knob 17. Condenser aperture diaphragm adjustment handle 14. Coarse and fine focus knob 18. Collector (RED230 / RED233) 15. Brightness control 16. Condenser (RED230 / RED233)
- Page 11 RED220 & RED223 19. Condenser (RED220 / RED223) 20. Collector (RED220 / RED223)
-
Page 12: Application
RED200 SERIES 2.3 Application The RED200 Series biological microscope is designed for microscopic observation of thin specimens with transmitted, visible light. 2.4 Instrument and its major features Major features of the instrument include: • Built-in LED illumination with brightness adjustment. •... -
Page 13: First Time Use & Operation
3. FIRST TIME USE & OPERATION 3.1 First time use Before installing and using the biological microscope, make sure to read the Safety Instructions (See Chapter 1) carefully. When unpacking and handling, please do not touch the optical surfaces. Figure 1 Figure 2 •... -
Page 14: Operation Of The Biological Microscope
RED200 SERIES 3.2 Operation of the biological microscope 3.2.1 Interpupillary distance adjustment • While looking through the microscope, grasp the eyetubes and move them on their hinges until the two circular fields in the observation field coincide with each other. (Figure 5) •... - Page 15 3.2.3 Centering the condenser (Models RED230 and 233) • Fully open the field of view diaphragm and condenser aperture diaphragm. • Set the specimen on the stage with the cover glass facing up. • Bring the specimen image into focus, using the 10X objective. •...
-
Page 16: Modification Of Biological Microscope
RED200 SERIES 3.3 Modification of biological microscope Unplug the biological microscope before making any modifications. 3.3.1 Replace the eyepiece tubes Figure 10a Figure 10b • Unscrew the head lock screw and take out the existing eyepiece tubes.(Figure 10a) • Insert the new eyepiece tubes and its swallowtail ring slightly obliquely into the bottom of the two supports for the main unit.) •... - Page 17 3.3.3 Installation of camera (Models RED223 / 233 with trinocular head) A camera with standard C-type threads can be con- nected to the photo port of the biological microscope using an adapter (a 0.5X adapter is supplied). • Screw the adapter onto the camera. •...
-
Page 18: Maintenance & Troubleshooting
RED200 SERIES 4. MAINTENANCE & TROUBLESHOOTING 4.1 Maintenance The biological microscope is limited to the following maintenance only: • Turn off the power switch after use, and put on the dustproof cover after the microscope has cooled down. • Do not operate the microscope in a room with humidity higher than 75%. •... -
Page 19: Appendix
5. APPENDIX 5.1 Technical Parameters Dimension (W x L x H) ≈ 183x355x362mm Biological microscope main unit w/ binocular tube Biological microscope main unit w/ trinocular tube ≈ 183x355x362mm Weight 5 KG RED200 Series biological microscope w/ trinocular tube Environmental Conditions Transport (within package) : Permissible environment temperature -40 ~ +70°C... - Page 20 RED200 SERIES Light Sources LED illumination: Color temperature 6000K – 7000K Diameter 5mm Even illumination of field Applicable objective 4X to 100X Opto-mechanical parameters Coaxial focus adjustment mechanism: Coarse focus adjustment 42mm/rotation 0.2mm/rotation Fine focus adjustment Stroke 15mm Nosepiece: Manual quadruple nosepiece Objective: Thread pitch 0.8”...
- Page 22 Motic Incorporation Ltd. 130 - 4611 Viking Way. Richmond, BC V6V 2K9 Canada Motic Incorporation Limited Copyright © 2002-2015. All Rights Reserved. Tel: 1-877-977 4717 | Fax: 1-604-303 9043 Design Change: The manufacturer reserves the right to make changes in...


Need help?
Do you have a question about the RED 230 and is the answer not in the manual?
Questions and answers