Table of Contents
Advertisement
Quick Links
HUSSONG MANUFACTURING CO., INC.
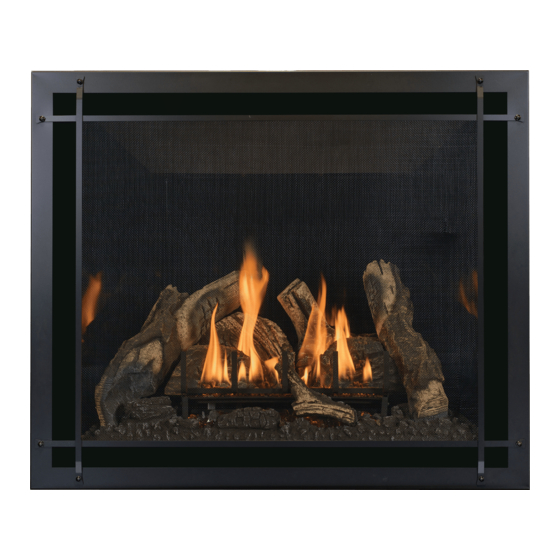
B A Y P O R T - 3 6 - L O G
B A Y P O R T - 3 6 - B W
Models #BAY-36-L & #BAY-36-BW
Direct Vent Gas Fireplace
English and French installation manuals are available through your
local dealer. Visit our website www.kozyheat.com.
Les manuels d'installation en français et en anglais sont disponibles
chez votre détaillant local. Visitez www.kozyheat.com .
WARNING:
FIRE OR EXPLOSION HAZARD
Failure to follow safety warnings exactly
could result in serious injury, death, or
property damage.
ͷ Do not store or use gasoline or other
flammable vapors and liquids in the vicinity
of this or any other appliance.
ͷ WHAT TO DO IF YOU SMELL GAS
• Do not try to light any appliance.
• Do not touch any electrical switch; do
not use any phone in your building.
• Leave the building immediately.
• Immediately call your gas supplier from
a neighbor's phone. Follow the gas
supplier's instructions.
• If you cannot reach your gas supplier,
call the fire department.
ͷ Installation and service must be performed
by a qualified installer, service agency or
the gas supplier.
Hussong Mfg. Co., Inc. • BAY-36-L & BAY-36-BW
INSTALLER: Leave this manual with the appliance.
CONSUMER: Retain this manual for future reference.
INSTALLATION AND
OPERATION MANUAL
This
appliance
an
aftermarket,
manufactured home (USA only) or mobile
home, where not prohibited by local codes.
This appliance is only for use with the type
of gas indicated on the rating plate. This
appliance is not convertible for use with other
gases, unless a certified kit is used.
DANGER
A barrier designed to reduce the risk of burns
from the hot viewing glass is provided with this
appliance and shall be installed for the protection
of children and other at-risk individuals.
Report No: 19-507 • Rev. 08, July 2019
may
be
installed
permanently
located,
HOT GLASS WILL
CAUSE BURNS
DO NOT TOUCH GLASS
UNTIL COOLED
NEVER ALLOW CHILDREN
TO TOUCH GLASS
in
Advertisement
Table of Contents

Related Manuals for kozy heat BAY-36-L


Summarization of Contents
1.0 Introduction
1.1 Appliance Certification
Lists certification standards and testing laboratory for the appliance.
1.2 California Proposition 65 Warning
Warns about potential exposure to chemicals known to cause birth defects or reproductive harm.
1.3 Massachusetts Requirements
Outlines specific installation rules for Massachusetts regarding CO detectors and signage.
2.0 Specifications
2.1 Heating Specifications
Details input ratings, manifold pressures, and orifice sizes for Natural Gas and Propane.
2.2 Electrical Specifications
Specifies voltage, frequency, and amperage requirements for the appliance's junction box.
3.0 Framing
3.1 Appliance Placement Considerations
Guides on positioning the fireplace for safety, venting, and aesthetics.
3.2 Floor Support and Protection
Specifies requirements for floor support and protection, including hearth extensions.
3.7 Vent Termination Framing
3.7.1 Vertical Terminations
Specifies clearances and requirements for vertical vent cap locations.
3.7.2 Horizontal Terminations
Details requirements for horizontal vent runs, including slope and clearances.
3.8 Outdoor Covered Fireplace Installation
3.8.1 Safety Screen Barriers
Recommends black painted safety barriers for outdoor installations.
3.8.2 Requirements
Outlines operating temperature range and installation requirements for outdoor covered areas.
4.0 Facing and Finishing
4.1 Standard Installation Facing and Finishing Requirements
Guidelines for mantels, sidewall clearances, and finishing recommendations.
4.1.1 Mantel Requirements
Specifies clearances for combustible and non-combustible mantels above the appliance.
4.1.2 Adjacent Sidewall Requirements
Defines clearance requirements for sidewalls next to the fireplace.
4.1.3 Finishing Recommendations
Tips for preventing sheetrock cracking and finishing surfaces.
4.1.4 Non-Combustible Zone
Details the dimensions and placement of the supplied non-combustible material.
4.4 Safety Barrier Installations
4.4.1 Inside Fit - Recessed Installation
Instructions for installing safety barriers with an inside fit.
4.4.2 Overlap Fit - Hanging Installation
Instructions for installing safety barriers with an overlap fit.
5.0 Gas Line Connection
5.1 Gas Conversion (sold separately)
Notes on converting the appliance for propane use.
5.2 Gas Line Installation
Instructions and cautions for connecting the gas supply line.
6.0 Termination Locations
6.1 Vertical Vent Cap Termination
Specifies minimum height requirements for vertical vent caps based on roof pitch.
7.0 Venting
7.1 Rear Vent Conversion Instructions
Steps to convert the appliance for rear venting.
7.1.1 Remove Top Vent Collars
Instructions for removing top vent collars.
7.1.2 Remove Back Vent Combustion Air Intake and Exhaust Collars
Instructions for removing rear vent collars.
7.6 Coaxial Rigid Pipe Venting Configurations
7.6.1 Top Venting
Details configuration for top venting with coaxial rigid pipe.
7.6.2 Rear Venting
7.6.2.1 Natural Gas Installations
Venting configurations for natural gas rear installations.
7.6.2.2 Propane Installations
Venting configurations for propane rear installations.
7.7 Class A Chimney Conversion
7.7.1 4" Flex Pipe Venting Configurations
Details allowable configurations for flex pipe through Class A chimneys.
7.8 Coaxial to Co-Linear Chimney Conversion
7.8.1 Coaxial to Co-Linear Venting Configurations
Venting configurations for coaxial to co-linear chimney conversion.
7.9 #700-2 Series Direct Vent Termination Kit(s)
7.9.1 Assembly and Installation
Step-by-step instructions for assembling and installing the termination kit.
7.10 Vent Heat Shield Assembly Installation
7.10.1 Vertical Vent Heat Shield Installation
Instructions for installing the vertical vent heat shield.
7.10.2 Minimum Horizontal Venting
Instructions for installing the horizontal vent heat shield.
8.0 Fireplace Setup
8.1 Glass Frame Assembly
Instructions for removing and installing the glass frame assembly.
8.2 Light Kit
Instructions for installing the optional light kit.
8.3 Bottom Frame Removal and Installation
Steps to remove and reinstall the bottom frame for access.
8.6 Control Board Removal and Installation
8.6.1 Control Board Removal
Step-by-step guide for removing the control board.
8.6.2 Control Board Installation
Step-by-step guide for installing the control board.
9.0 Electrical Information
9.1 Electrical Specifications
Details the appliance's electrical requirements and grounding.
9.2 Wiring Requirements
Information on power supply and battery backup for the IFC system.
10.0 Operating Instructions
FOR YOUR SAFETY READ BEFORE OPERATING
Essential safety precautions before operating the appliance.
OPERATING INSTRUCTIONS
Step-by-step guide for starting up and shutting down the fireplace.
TO TURN OFF GAS TO APPLIANCE
Specific procedure for safely turning off the gas supply.
10.6 IFC Module Ignition Sequence
10.6.1 Reset IFC Module after Lockout
Procedures to reset the IFC module after a lockout condition.
10.8 Remote Control Operation
10.8.1 Temperature Display
How to view and change temperature units (°F/°C) on the remote.
10.8.2 Key Lock
Functionality to lock/unlock remote control keys to prevent unauthorized use.
10.8.3 Pilot Ignition Selection (IPI/CPI)
Options for selecting pilot ignition mode (IPI or CPI).
10.8.6 Remote Control Flame Adjustment
10.8.6.1 Deactivate Flame Modulation
Steps to deactivate flame modulation for manual control.
10.8.7 Remote Control Thermostat Operation
10.8.7.1 Room Thermostat
Setting the remote as a room thermostat to control comfort level.
10.8.7.2 Smart Thermostat
Adjusting flame height based on room temperature for smart thermostat function.
10.8.7.3 Deactivate Remote Control Thermostat Operation
Steps to deactivate the thermostat function.
10.8.9 Accent Light Kit (if applicable)
10.8.9.1 Deactivate Light Kit Modulation
Steps to deactivate accent light modulation.
11.0 Adjustment
11.1 Pressure Testing
Procedures for testing inlet and manifold gas pressures.
11.1.1 Inlet Pressure Test
Detailed steps for testing the incoming gas pressure.
11.1.2 Manifold Pressure Test
Detailed steps for testing the gas pressure at the manifold.
11.2 Flame Appearance Adjustments
11.2.1 Burner Venturi
Adjusting air shutter settings to optimize flame appearance.
11.2.1.1 Venturi Adjustment
Steps to adjust the burner venturi for desired flame.
11.2.2 Vent Restriction (after installation)
11.2.2.1 Restrictor Installation
Instructions for installing the vent restrictor for draft control.
11.2.2.2 Restrictor Modification
Steps to modify the restrictor for optimal flame appearance.
12.0 Troubleshooting
Pilot will not light
Common causes and solutions for pilot ignition failures.
Pilot will not stay lit
Common causes and solutions for pilot flame extinguishing.
Pilot flame always on, or will not extinguish
Causes and solutions for continuous pilot flame.
Main burner flame will not light
Causes and solutions for main burner ignition issues.
13.0 Maintenance
13.1 Firebox
Annual maintenance actions for the firebox.
13.2 Fan
Maintenance for the fan, including electrical safety.
13.3 Vent System
Annual inspection of the vent system for airflow.
13.4 Glass Assembly
Procedures for cleaning and inspecting the glass assembly.
LIMITED LIFETIME WARRANTY
Warranty Coverage
Details what the warranty covers and for how long.
30 Days: Parts & Labor*
Specific coverage for the first 30 days of ownership.
Year 1: Parts & Labor*
Coverage for parts and labor during the first year.
Years 2 through Lifetime: Parts Only
Coverage for parts only from year 2 through lifetime.
EXCLUSIONS AND LIMITATIONS
Lists conditions and circumstances not covered by the warranty.
Need help?
Do you have a question about the BAY-36-L and is the answer not in the manual?
Questions and answers