Advertisement
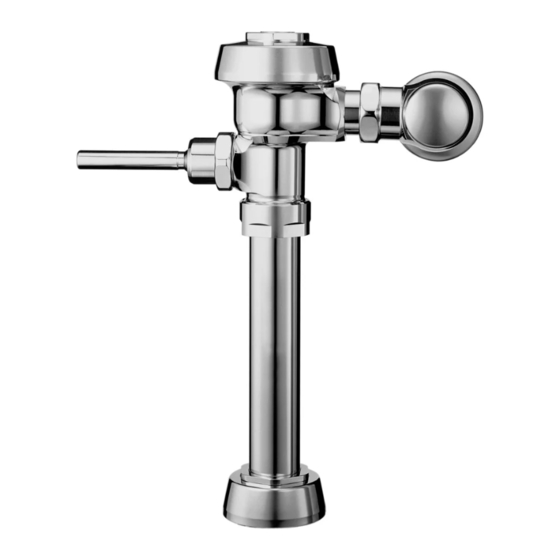
Installation of the Sloan OPTIMA™ equipped Flushometer provides the ultimate
in sanitary protection and automatic operation plus the water economy that
makes it the most advanced flushing system ever. There are no handles to trip
or buttons to push. The Flushometer uses adaptive infrared technology to sense
the user's presence and initiates the flushing cycle once the user steps away.
The OPTIMA equipped Flushometer is designed for easy installation and
maintenance and comes complete with the EL-1500-L OPTIMA sensor, cover
plate and attachment kit (with override button), 24 VAC solenoid operator,
Sloan Valve Company warrants its ES-S Sensor Operated Royal Flushometers to be made of first class materials, free from defects of material or workmanship
under normal use and to perform the service for which they are intended in a thoroughly reliable and efficient manner when properly installed and serviced, for
a period of three years (1 year for special finishes) from date of purchase. During this period, Sloan Valve Company will, at its option, repair or replace any part
or parts which prove to be thus defective if returned to Sloan Valve Company, at customer's cost, and this shall be the sole remedy available under this warranty.
No claims will be allowed for labor, transportation or other incidental costs. This warranty extends only to persons or organizations who purchase Sloan Valve
Company's products directly from Sloan Valve Company for purpose of resale.
THERE ARE NO WARRANTIES WHICH EXTEND BEYOND THE DESCRIPTION ON THE FACE HEREOF. IN NO EVENT IS SLOAN VALVE COMPANY
RESPONSIBLE FOR ANY CONSEQUENTIAL DAMAGES OF ANY MEASURE WHATSOEVER.
INSTALLATION INSTRUCTIONS
®
Bak-Chek
control stop with vandal resistant stop cap, adjustable tailpiece,
vacuum breaker flush connection and spud coupling, and wall and spud flanges
(for exposed piping). Specify transformer separately. One Sloan EL-154
transformer can operate up to ten OPTIMA Flushometers.
The following instructions will serve as a guide when installing the OPTIMA
equipped Flushometer. As always, good safety practices and care are
recommended when installing your new Flushometer. If further assistance is
required, contact your nearest Sloan Representative office.
LIMITED WARRANTY
OPTIMA™ SYSTEMS
SENSOR OPERATED
ROYAL FLUSHOMETER
CONCEALED & EXPOSED
CLOSET INSTALLATIONS
Exposed Closet Flushometer
1-1/2" Top Spud
Model 110/111 ES-S
Model 115 ES-S
Model 116 ES-S
Concealed Closet Flushometer
1-1/2" Exposed Back Spud
Model 140 ES-S
1-1/2" Exposed Top Spud
Model 153 ES-S
1-1/2" Concealed Back Spud
Model 152 ES-S
Made in the U.S.A.
Listed
Certified
EL-1500-L l.l.
Code No. 0816165
Rev. 2
Advertisement
Table of Contents

Summarization of Contents
Installation Instructions
Limited Warranty
Details the warranty coverage and limitations for Sloan Flushometers.
Prior to Installation
Sensor Location and Positioning
Emphasizes critical placement of sensor electrical boxes for proper function.
Solenoid Operator Location
Specifies correct placement for the solenoid operator electrical box.
Tools Required for Installation
Lists essential tools needed for installing the flushometer.
Installation Steps
Control Stop and Vacuum Breaker Installation
Guides on installing control stop, supply flange, and vacuum breaker.
Flushometer and Tailpiece Installation
Instructions for installing the flushometer body and adjustable tailpiece.
Solenoid Operator and Electrical Hook-Up
Details connecting the solenoid operator and wiring the system components.
Sensor Mounting and Start-Up Procedure
Covers mounting the sensor, yoke, cover plate and initial system start-up.
Flush Line, Adjust Stop, and Final Checks
Procedures for flushing the line, adjusting the control stop, and final checks.
Operation and Maintenance
Vandal Resistant Control Stop Cap
Instructions for installing and removing the vandal-resistant control stop cap.
Flushometer Operation and Detection
Explains sensor detection, flushing activation, and user interaction.
Troubleshooting Guide
Valve Function and Water Flow Issues
Provides solutions for common valve malfunctions and water flow problems.
Parts List
Component Identification
Lists all parts with their corresponding numbers and descriptions.


Need help?
Do you have a question about the 111 ES-S and is the answer not in the manual?
Questions and answers