
Related Manuals for ZENEC ZE-MR1020-DVD


Summary of Contents for ZENEC ZE-MR1020-DVD
- Page 1 MODEL NO: MODEL NO: ZE-DVBT1 0 1 CH DVB-T TUNER DVD-PLAYER WITH 10.2" TFT LCD MONITOR INSTRUCTION MANUAL...
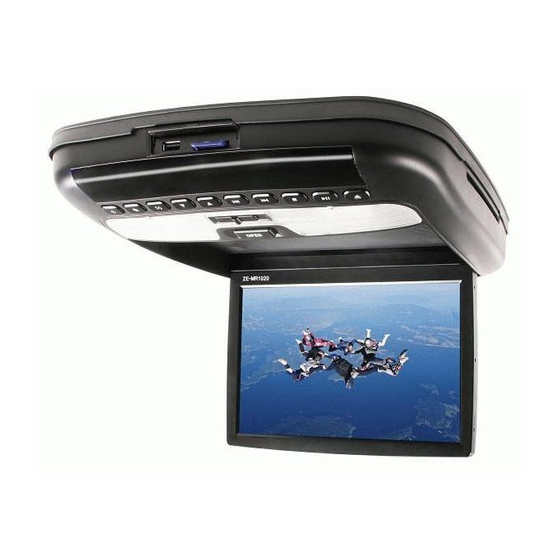
- Page 2 ZE-MR1020-DVD Vielen Dank für den Kauf dieses ZENEC-Produktes! Mit dem Kauf des ZE-MR1020-DVD haben Sie sich für ein technisch ausgereiftes Produkt entschieden, das Ihnen durch die Verwendung von hochwertigen Materialien und Bauteilen eine lange Lebensdauer garantiert. Bei dem ZE-MR1020-DVD von ZENEC handelt es sich um einen 10.2“/16:9 TFT-LCD Aktiv-Matrix Deckenmonitor mit integriertem DVD-Laufwerk, SD-Karten Slot sowie einem USB1.1-Port.
-
Page 3: Table Of Contents
DEUTSCH DEUTSCH BESONDERHEITEN 10.2“/16:9 Display und integriertes DVD-Laufwerk: Der ZE-MR1020-DVD verfügt über ein 10.2“ Aktiv-Matrix TFT-LCD Farbdisplay im 16:9 Format und ein integriertes DVD-Laufwerk. Das hochauflösende Display verfügt über 384‘000 Bildpunkte für perfekt aufgelöste Bilddetails mit hoher Leuchtintensivität. Kompatibilität: Dieser Monitor ist mit den Videoformaten PAL und NTSC kompatibel und verfügt über eine interne Videoelektronik mit automatischer Formatumschaltung. -
Page 4: Sicherheitshinweise
Flüssigkeit in Kontakt kommen, sollten Sie gegebenenfalls einen Arzt aufsuchen. Alle Gegenstände die ebenfalls mit der LCD-Flüssigkeit in Kontakt gekommen sind, sollten sorgfältig mit Wasser gereinigt werden. 12. Wenn Sie Fragen oder Probleme bei der Installation haben, wenden Sie sich bitte an einen ZENEC-Händler oder an den jeweiligen Landesvertrieb. -
Page 5: Die Fernbedienung
DEUTSCH DEUTSCH DIE FERNBEDIENUNG DiE EinzELnEn tAStEn 1. [powEr]-taste ■ Drücken Sie die [POWER]-Taste um das Gerät ein- und auszuschalten. 2. [SEtup]-taste ■ Drücken Sie die [SETUP]-Taste um das Setup des Gerätes aufzurufen. 3. [mutE]-taste REMOTE CONTROL ■ Drücken Sie die [MUTE]-Taste um den Ton des Gerätes stummzuschalten. - Page 6 10. [SKip bAcK]-taste ■ Drücken Sie wiederholt die [SKIP BACK]-Taste um den schnellen Rücklauf zu starten. Mit jedem Tastendruck verändert sich die Geschwindigkeit wie folgt: 2 → 4 → 8 → 16 → 32. 11. [rAnDom]-taste ■ Drücken Sie die [RANDOM]-Taste um die Tracks einer Disk in einer nicht linearen Reihenfolge wiederzugeben.
-
Page 7: Benutzen Der Fernbedienung
DEUTSCH DEUTSCH 22. [VoL+]-taste ■ Drücken Sie die [VOL +]-Taste um die Lautstärke zu erhöhen. ■ Drücken Sie die [VOL +]-Taste um den Wert des ausgewählten Menüpunktes zu er- höhen. [VoL–]-taste ■ Drücken Sie die [VOL –] -Taste um die Lautstärke zu verringern. ■... -
Page 8: Der Deckenmonitor
bittE bEAchtEn Entfernen Sie die Batterie wenn sie leer ist oder die Fernbedienung längere Zeit nicht ■ gebraucht wird. Sollte es trotzdem einmal passieren dass die Batterie ausläuft, müssen Sie mit einem ■ Tuch die Flüssigkeit im Batteriefach entfernen und anschließend eine neue Batterie einlegen. - Page 9 DEUTSCH DEUTSCH 5. [A/V input]-tasten ■ Drücken Sie die A/V Input-Taste um zwischen den folgenden Eingangsquellen zu wählen: DVD → A/V-in1 → A/V-in2. ■ Drücken Sie im DVD-Betrieb die SRC-Taste für ca. zwei Sekunden, um in den Speicherkarten- resp. USB-Modus zu gelangen. Bitte beachten Sie, das nur ein Speichermedium eingesteckt werden darf.
-
Page 10: Bitte Beachten
ÖFFnEn unD SchLiESSEn DES DEcKEnmonitorS ÖFFnEn DES DEcKEnmonitorS 1. Drücken Sie die [OPEN]-Taste um die Verriegelung des Bildschirms zu lösen. 2. Ziehen Sie den Bildschirm nach unten bis der von Ihnen gewünschte Winkel erreicht ist. [opEn]-taste bittE bEAchtEn Achten Sie darauf, dass der Öffnungswinkel nicht größer als 120° ist. ■... -
Page 11: Allgemeine Bedienung
DEUTSCH DEUTSCH ALLGEMEINE BEDIENUNG Ein- unD AuSSchALtEn DES gErätES ■ Drücken Sie die -Taste auf der Fernbedienung oder auf dem Bedienteil des Gerätes um das Gerät einzuschalten. Die folgende OSD Anzeige erscheint auf dem Bildschirm: DVD-in Eingangsquelle ntSc Videoformat bittE bEAchtEn ■... - Page 12 wiEDErgAbE EinEr DiSK 1. Drücken Sie die A/V-Taste auf der Fernbedienung oder auf dem Bedienteil um die Wiedergabequelle “DVD-IN“ auszuwählen. Solange sich keine Disk im Laufwerk befindet ist der Bildschirmschoner aktiv. 2. Legen Sie eine Disk in das Laufwerk ein. ■...
- Page 13 DEUTSCH DEUTSCH Auswahl von verschiedenen untertiteln während der wiedergabe einer DVD 1. Drücken Sie die SubtitLE-Taste um während der Wiedergabe zwischen den ver- schiedenen Untertiteln zu wählen. Die Nummer des aktuellen Untertitels, die Gesamt- anzahl der vorhandenen Untertitel sowie die Sprache des gerade angezeigten Untertitels werden entsprechend in einem OSD-Menü...
- Page 14 cD-wiEDErgAbEoptionEn Anzeige von wiedergabeinformationen Drücken Sie während der Wiedergabe einer Disk die DiSpLAy-Taste um die aktuellen Wiedergabeinformationen aufzurufen. wiederholung eines tracks oder der ganzen cD Drücken Sie während der Wiedergabe die rEpEAt-Taste um eine der folgenden Funktionen auszuwählen: ■ track: Wiederholung des gerade wiedergegebenen Tracks. ■...
- Page 15 space. This player can play CD-R/RW disc that contain music MP3 files. Playing MP3 CDs space. This player can play CD-R/RW disc that contain music MP3 files. DEUTSCH When a MP3 disc is inserted into the player, the menu screen appears DEUTSCH MP3 is a format for storing digital audio.
-
Page 16: Hauptmenü
System setup Changing the picture quality and setting the frequency of FM transmitter HAUPTMENÜ Access the menu To adjust the picture, use the menu button to select the features you would like to adjust. Adjustment selections are as follows. Aufrufen des hauptmenüs 1. -
Page 17: System Setup
DEUTSCH DEUTSCH SYSTEM SETUP Aufrufen des System Setups 1. Drücken Sie die SEtup-Taste auf der Fernbedienung um das Setup des Gerätes aufzurufen. Menüeinstellungen Beschreibung TV DISPLAY Wählen Sie je nach DVD eine der unterschiedlichen Bildformate (NORMAL/PS, NORMAL/LB oder WIDE). De- bzw. aktivieren der Angle Mark Funktion. Wenn ANGLE MARK eine DVD bzw. - Page 18 AnpASSung DEr grunDEinStELLungEn Allgemeine Einstellungen verändern (gEnErAL) 1. Drücken Sie die SETUP Taste der Fernbedienung um das Grundmenü des Gerätes zu öffnen. 2. Drücken Sie die [3] / [4] Tasten um zu den allgemeinen Einstellungen zu gelangen. Die Liste öffnet sich automatisch. 3.
-
Page 19: Installation Des Gerätes
DEUTSCH DEUTSCH INSTALLATION DES GERÄTES Anschlussdiagramm (Gelb) A/V-Eingang 1 (Rot) Masse (Schwarz) Türkontakt (Grün) Polarisationsschalter USB und SD/MMC/MS Slot... - Page 20 1. batterie-Anschlusskabel (gelb) Schließen Sie dieses Kabel direkt an Batterie an. 2. zündplus-Anschlusskabel (rot) Schließen Sie dieses Kabel an den Zündplus des Fahrzeugs an. 3. masse-Anschlusskabel (Schwarz) Verbinden Sie dieses Kabel direkt mit der Fahrzeugkarosserie. 4. türkontakt-Anschlusskabel (grün) Verbinden Sie dieses Kabel mit der automatischen Innenraumbeleuchtung des Fahrzeugs. 5.
-
Page 21: Montage Des Gerätes
DEUTSCH DEUTSCH MONTAGE DES GERÄTES hinweis: Die Montage sollte nur durch fachkundige Personen durchgeführt werden, um Schäden an Personen, am Fahrzeug oder am Gerät zu vermeiden. Schritt 1: Befestigen Sie die Montageplatte unter Berücksichtigung der richtigen Schraubenlänge ■ (Lieferumfang ST 4.2 x 16) am Dach Ihres Fahrzeuges (siehe folgende Skizze). Beachten Sie, dass die Öffnung der originalen Innenraumbeleuchtung durch die Montageplatte nicht verdeckt wird. - Page 22 Schritt 5: Verbinden Sie die A/V-Eingänge mit einer geeigneten A/V-Quelle. ■ Schritt 6: Verbinden Sie das mitgelieferte Anschlusskabel (+12V, ACC und GND) mit einer ge- ■ eigneten Stromquelle in Ihrem Fahrzeug. Schritt 7: Verbinden Sie die Anschlusskabel der originalen Innenraumbeleuchtung des Fahrzeuges ■...
-
Page 23: Fehlersuche
DEUTSCH DEUTSCH FEHLERSUCHE problem ursache Lösung Überprüfen Sie ob die Disk mit Die Disk wurde falsch herum dem Label nach oben eingelegt eingelegt. wurde. Die Wiedergabe einer Disk ist Das Format der Disk wird nicht Überprüfen Sie das Format der nicht möglich. -
Page 24: Spezifikationen
SPEZIFIKATIONEN Spannungsversorgung: +10.5V − +16V (DC) Mechanismus: Manuell Kippwinkel: > 120° Stromverbrauch: < 2 A Beleuchtung: Betriebstemparatur: -5° C bis +50° C Lagertemparatur: 20° C bis +70° C Abmessungen (H x B x T): 304 x 320 x 58 mm Gewicht (g): 2357 ■... - Page 25 CONTENTS Thank you for your purchase of this ZENEC product! With the ZE-MR1020-DVD monitor, you have chosen a technically mature high quality product that will give you a long service life and very high reliability, since this product has been assembled using only high quality parts.
-
Page 26: Safety Information
SAFETY INFORMATION ■ Do not operate the unit in any way other than described in this manual. Failure to follow the instructions within the manual will invalidate your warranty. ■ SAFETY FIRST! Do not install the display where it may obstruct the driver’s vision, impair the performance of any of the vehicle’s operating systems or safety features, including airbags, or impair the driver’s ability to safely operate the vehicle. -
Page 27: Dvd Player Features
ENGLISH ENGL I SH DVD PLAYER FEATURES This player is a roof mount 10.2“ TFT-LCD color display with DVD player that can be used as a stand-alone display, or can be integrated into a mobile multimedia system. This player offers the following features: ■... - Page 28 P3 Playback s unit can play back CD-R/CD-RW discs on which MP3 music data h orded. About cD Extra discs A CD Extra disc is a disc in which a total of two sessions have been recorded. The first session is audio session and the second is the data session. Your personally-created CDs gion Numbers with more than 2 data sessions recorded cannot be played on this DVD video player.
- Page 29 ENGLISH ENGL I SH ■ Press the [SRC–] button for 2 seconds when you are in the DVD-mode to reach the SD/ MMC/MS or the USB mode. You can plug it just one medium. When you plug in both, the unit will find no medium. 6.
-
Page 30: Remote Control
REMOTE CONTROL REMOTE CONTROL 1. [powEr] button Item Name Function or control ■ Press the [POWER] button to turn the player on or off. Press to turn the player on or off. Power 2. [SEtup] button Press to access the setup menu to modify the Setup ■... - Page 31 ENGLISH ENGL I SH 11. [rAnDom] button ■ Press the [RANDOM] button to play chapters or tracks in random order. 12. [A-b] button ■ Press the [A-B] button to repeat playback from point A to point B. 13. [Src] button ■...
-
Page 32: Setting Up Your Dvd Player
SETTING UP YOUR DVD PLAYER contEntS parts name Quantity Monitor IR remote control with battery A/V cable ST4.2x16 screws CM 4x8 screws Metal mounting plate User’s manual Rubber gasket cAution: ■ Use only the contents of this package to install and use the DVD player. Use of any accessories not provided with this player may result in damage to the player. -
Page 33: Installation + Wiring
ENGLISH ENGL I SH INSTALLATION + WIRING notE: Do not attempt to install or service your player by yourself. Installation or servicing of the player by persons without experience in electronic equipment and automotive accessories may be dangerous and could expose you to the risk of electric shock or other hazards. (Yelllow) A/V-Input 1 (Red) - Page 34 1. battery + (yellow) ■ To be connected to the positive terminal of the car battery. 2. Acc power (red) ■ To ACC power lead powered when engine key position is ACC. 3. ground (black) ■ Connect the lead to a good chassis ground on the car. Make sure the connection is made to bare metal and is securely fastened, using the sheet metal screw provided.
- Page 35 ENGLISH ENGL I SH to inStALL thE pLAyEr notE: Do not attempt to install or service your player by yourself. Installation or servicing of the player by persons without experience in electronic equipment and automotive accessories may be dangerous and could expose you to the risk of electric shock or other hazards.
- Page 36 4. Pull out the original dome light power wire and signal/power cable through the original dome light opening. 5. Connect RCA input and output cables. 6. Connect the wire harness in the following order: ground wire, battery wire, ACC wire and door wire.
-
Page 37: Using Your Dvd Player
ENGLISH ENGL I SH USING YOUR DVD PLAYER ADJuSting thE DVD pLAyEr to open the DVD player 1. Press the opEn button to unlock the LCD panel. opEn button 2. Swing the LCD panel downward to the desired angle. cAution: ■... - Page 38 1. Pull out the battery holder. Using remote control Follow the arrow 1 slide it to the right toward the battery while Using remote control time pull the battery holder away from the remote control. 1. Pull out the battery holder. uSing rEmotE controL Follow the arrow 1 slide it to the right toward the battery while at th 1.
-
Page 39: Basic Operation
ENGLISH ENGL I SH BASIC OPERATION turning on thE pLAyEr Press the button on the remote control or on the front panel. The player turns on, and the input source and format are displayed on the screen: DVD-in Input source name. ntSc The system of the input source detected automatically. - Page 40 pLAying DVDs to access the DVD root menu Press the mEnu button during the playback to display the menu. A DVD is divided into sections called titles and chapters. When you play a DVD, a root menu of the disc appears on the screen of your monitor.
- Page 41 ENGLISH ENGL I SH using repeat playback To repeat a chapter, a title, or both: During playback, press the REPEAT button repeatedly to cycle through the available settings: ■ chapter: Repeats the current chapter. ■ title: Repeats the current title. ■...
- Page 42 playing audio cD’s to display playing time and the current track: During CD playback, press the DiSpLAy button to display the disc type, the current time, the current track number and the total number of the tracks are displayed on the screen. repeat part or the entire cD During playback, press the REPEAT button repeatedly to cycle through the available set- tings:...
- Page 43 2. To cancel the repeat playback and resume normal playback, press Playing MP3 CDs A-B again. MP3 is a format for storing digital audio. An audio track is compressed into the ENGLISH ENGL I SH MP3 format with little loss of audio quality, while taking up much less disc MP3 is a format for storing digital audio.
-
Page 44: System Setup
SYSTEM SETUP chAnging thE picturE QuALity Access the menu ■ To adjust the picture, use the mEnu button to select the features you would like to adjust. Adjustment selections are as follows: 1. Press and hold the mEnu button on the remote control for more than one second. The operation menu opens. -
Page 45: Using The Osd Menu
ENGLISH ENGL I SH uSing thE oSD mEnu Press the SETUP button on the remote control to enter the OSD menu. Menu Description General setup page TV DISPLAY: modifies the display if it doesn’t match the width to height ratio the DVD uses. You can select from the following: ·... - Page 46 PASSWORD: Lets you change the 4-digit password using the number keys on the remote control. The default password is 3308, but no longer works after you change the password. DEFAULT: Resets all settings to the factory defaults. notE: ■ After you input some pictures to the player as LOGO picture, select Captured in LOGO TYPE menu, then you can use SUBTITEL key on the remote control to change the start LOGO picture one by one.
-
Page 47: Troubleshooting
ENGLISH ENGL I SH TROUBLESHOOTING If operation freezes, the screen goes black or the unit should otherwise not function properly, try turning the unit on and off. If the unit does not respond, press the reset switch on the front panel. problem cause Solution... -
Page 48: Specifications
SPECIFICATIONS Power Source Vehicle battery (+10.5V ~ +16V (DC)) Mechanism Manual Open/Close Display Angle > 120° Operating current <2000mA (Typical VDD=14V) Dome Light Operation Temperature –5 °C to +50 °C Storage Temperature –20 °C to +70 °C Size (HxWxD) 304 x 320 x 58 mm Weight (g) 2357 ■... -
Page 49: Maintenance
tenance nance ENGLISH g discs ENGL I SH a disc clean, do not touch the play side (non-label side) o MAINTENANCE attach paper or tape to the disc. ning discs discs handling discs ■ To keep a disc clean, do not touch the play side (non-label side) of the disc. eep a disc clean, do not touch the play side (non-label sid a disc clean, do not touch the play side (non-label side) of ■... -
Page 50: Garantie
2 YEARS LIMITED WARRANTY Dear customer Thank you for purchasing this ZENEC product. It is advisable to keep the original packing material for any future transporting of the product. Should your ZENEC product require warranty service, please return it to the retailer from whom it was purchased or the distributor in your country. - Page 51 WARRANTY/GARANTIE WARRANTY ZENEC MODEL: ZE-MR1020-DVD Serial number: ..........................Date of purchase: ......................... Name: ............................Home address: ..........................City: .............................. State: ........ZIP or postal code ................ Country: ............................Dealer’s address & stamp...
- Page 52 MODEL NO: ZE-DVBT1 0 1 CH DVB-T TUNER...
Need help?
Do you have a question about the ZE-MR1020-DVD and is the answer not in the manual?
Questions and answers