Advertisement
Quick Links
Advertisement

Subscribe to Our Youtube Channel
Related Manuals for ZENEC Z-E2055


Summary of Contents for ZENEC Z-E2055
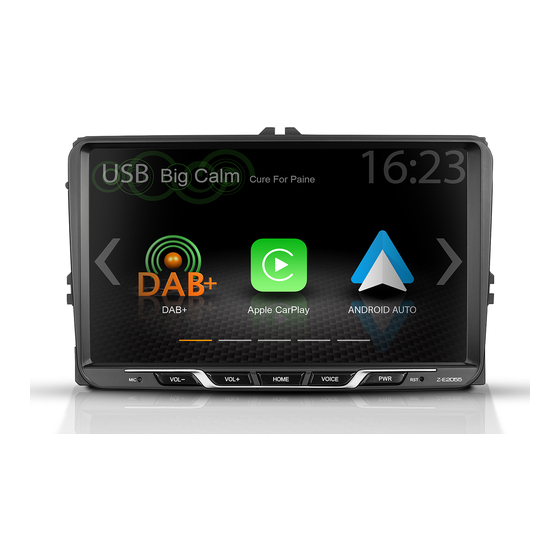
- Page 1 Z-E2055 Z-E2055 INFOTAINER USER MANUAL...
- Page 2 BLUETOOTH MENU ........................... 42 PHONEBOOK............................43 If you sell your vehicle with the ZENEC system still fitted, please ensure that this operating manual CALL LISTS ............................44 stays with the vehicle, and that any personal data like a phonebook stored in the device is deleted.
- Page 3 Switching on the ignition will activate the ZENEC system. The boot process can take up to 1.5 GRUNDSÄTZLICHE BEDIENUNG CAUTION minutes. This may result in some delay until the system is ready. The ZENEC system is shut down by EIN-/AUSSCHALTEN switching off the ignition, or removing the ignition key.
- Page 4 MULTIFUNCTION STEERING WHEEL Z-E2055 (FRONT PANEL) Device Front Panel Control Options Item Icon Function Item Icon Function Reduce volume Internal Bluetooth microphone Increase volume Press, or press and hold to decrease the playback volume...
- Page 5 MAIN MENU ICONS MEDIA AUDIO SOURCES You can navigate through main menu pages by swiping or tapping on the orange page markers in You can access / enter connected internal or external sources by tapping on the main icon according to the following list.
- Page 6 INPUT SOURCES STATUS BAR (”INFO BAR”) Screenshot fehlt To select and open external sources like HDMI, Camera, AV/IN, CarPlay or Android Auto, they need The „info bar in the upper hand screen area shows TA, volume and time but also contains two to be paired or physically connected to the device.
- Page 7 SEARCH AND INPUT FUNCTION UKW (FM) RADIO The keyboard for search and input is based on the Linux OS system layout. The system language The FM RDS source menu offers a control-/operating section on the right hand side, for fast and selection will automatically assign QUERTY or QWERTZ layout.
- Page 8 FM BAR GRAPH MODE MANUAL FM STATION SEARCH The FM setup mode (press gear icon) allows to assign two different operation modes to both station When you tap to the frequency display area, the numeric input keyboard opens for a direct station frequency arrows: manual steps in 100kHz, or auto scan (stopping at next station).
- Page 9 UKW SETUP (FM) DAB+ RADIO SETUP The DAB+ source menu offers a control- + operating section on the right side of the display, allowing Here you can set important FM RDS based settings such are AF and REG. for simple and convenient direct adjustments in the playback menu. Function Icon Operation...
- Page 10 DAB+ ENSEMBLE AND STATION LIST DAB+ SETUP Once the first DAB+ band scan has completed, device will show all DAB+ Ensembles and radio The setup page for the DAB+ tuner allows to define important functions such as DAB<>DAB service stations of sufficient signal strength. The ensemble list and content can be updated via using the scan following.
- Page 11 USB / BT A2DP / iPOD (AUDIO) MEDIA DAB+ STATIONS-PRESETS Various types of information shown in the source menu of the audio playback by (USB, BT A2DP, Select a previously stored DAB+ radio station by tapping on the station preset button. iPOD, etc.).
- Page 12 USB / BT A2DP / iPOD (AUDIO) MEDIA CONTROL AND OPERATION BAR BT MUSIC (A2DP) The control and operation bar on the right side of the audio playback media menu continues to play The A2DP RVC interface offers Play, Pause and Skip control of previously paired smartphones in lists, favorites, and external USB memory.
- Page 13 iPOD (AUDIO) PLAYLIST (AUDIO) The order of the Artist display of is given by the sorting sequence on the mobile Apple device and There are different playlists. We generally differentiate between the standard and special playlists can not be changed or adapted in any way. (Smart Playlist and Favorites Playlist).
- Page 14 SMART PLAYLIST (AUDIO) FAV PLAYLIST (AUDIO) This playlist feature allows you to add a song easily and quickly to a fixed favorite playlist. This function allows you to manage the playlists which created by the Smart Playlist function. The playlists can be renamed. Function Icon Operation...
- Page 15 VIDEO MEDIA: HARDDISK PLAYLIST (VIDEO) For video playback via USB, parking cable must be connected during the device installation. Without Playlist (Video) displays the video files on the USB data carrier with their file name. In this list sliding this connection, the screen remains black. up or down is easily possible.
- Page 16 HDMI CAMERA Tap to the HDMI icon starts the A / V source, if a compatible HDMI source connected, for example a Tapping the camera icon starts the manual camera mode, if a CVBS capable camera is connected videogame, smartphone, tablet, notebook. to the camera input of the unit.
- Page 17 1. For the initial operation, the vehicle must not be in motion and the hand brake must be put on. 2. Tap to the Android Auto icon in the main menu of the ZENEC device to choose the Android Auto source.
- Page 18 1. For the initial operation, the vehicle must not be in motion and the hand brake must be put on. 2. Tap to the CarPlay icon in the main menu of the ZENEC device to choose the CarPlay source. 3. After the initial operation has been completed successfully, the CarPlay user interface appears on iPhone status information the screen of the ZENEC device.
- Page 19 CAUTION Using the mobile phone with the hand while driving is not permitted. Only enter data or make changes via the ZENEC system when the traffic situation allows such actions. CAUTION The vertical control and operation bar on the right area of the Bluetooth page serves to invoke device Network coverage depends on a number of factors –...
- Page 20 The BT function on the device must be activated to invoke connection process. Please pay attention To connect a smartphone to the Zenec device via Bluetooth, first step is to successfully complete the to the smartphone manufacturer's instructions regarding device pairing.
- Page 21 Microphone Tap to set the Mic. gain from 0 to 12 Gain DIAL A CALL USING NUMERIC PAD Bluetooth Unique ZENEC BT device address. In the control-/operation panel touch the numeric pad. Adress Key in the desired phone number in full using the numeric pad. To set up the connection, touch...
- Page 22 BLUETOOTH MENU PHONEBOOK Contacts Function Icon Operation Touch to pass the call from the hands-free system to the Discrete mobile phone or vice versa Mute Voice output muted/- unmuted conversation Tap to show the numeric pad Numeric pad Necessary in case asked to enter a further number during the call (telephone call center etc.) Back Tap to jump back to the previous level...
- Page 23 CALL LISTS FAVORITES On this page you can link eight or more phone numbers to become favorites. You can select any of If a compatible mobile phone is connected, call lists from the mobile phone will be synchronized with the BT hands-free system (process can take some minutes, depending on the number of the phone numbers in the phonebook and save them as Favorites;...
- Page 24 With the display icon, the LCD TFT screen picture brightness can be dimmed or switched off (standby) that settings or changed parameters can have a direct influence on the everyday use of the ZENEC in two steps. This is done by tapping the icon.
- Page 25 SETUP OF SOURCES MISC SETUP In the Misc menu page, you can configure diverse settings for the display mode with 3 or 6 icons, When you tap the setup icon, you will enter this setup source page, which offers six different sources ON/OFF of the beep sound, as well as the LED color of the lighting of the buttons or sensor buttons you can adjust for personal preferences.
- Page 26 AUDIO SETUP VOLUME SETUP In the Audio menu -> Media Volume, you can customize the basic settings of each source In the Audio menu page, you can adjust settings around the sound, e.g. Volume of the sources, loudness, bass and treble, etc.. The "Expert Mode" view extends the setting options by few points. individually.
- Page 27 QUICK AUDIO SETUP (BAL / FAD / SUBWOOFER / LOUDNESS / BASS BOOST) AUDIO SETUP: EXPERT MODE In this menu, you can adjust the Balance / Fader, Loudness and Subwoofer level of the speakers in In the Audio Setup menu page with the Expert Mode set to “ON”, you can change audio relevant the vehicle.
- Page 28 AUDIO VOLUME – BASE LEVEL SETUP BALANCE / FADER In the audio menu, you can adjust the basic volume values of the various audio sources. In this Expert Mode menu page, you can adjust the balance and faders. Press and hold the green dot of the crosshair to move sound center position into any desired position.
- Page 29 EQUALIZER X-OVER SETUP In this Expert Mode menu page, you can set the 8-band graphical equalizer. Press and hold the indivi- In this Expert Mode menu, you can adjust the High-pass transition frequencies of the front and rear dual band level sliders to move it up or down for a level change. speakers.
- Page 30 SUBWOOFER SETUP TIME ALIGNMENT In this menu you can set the time delay correction for the loudspeakers in your vehicle. In this Expert Mode menu, you can adjust Phase, Gain, and Low-pass transition frequencies of the subwoofer. The default settings are Phase 0 °, GAIN "0", LPF OFF. Function Icon Operation...
- Page 31 CAR (VEHICLE) SETUP In the TFT Setup menu you can make screen settings that control the day/night brightness of the In the Car Setup menu, you can set how the ZENEC device interacts with optional components such TFT LCD display screen.
- Page 32 The effective range of functions is depending on the vehicle manufacturer, vehicle type and Air conditioning Air conditioning switched on or off vehicle configuration. The ZENEC system supports all listed functions above. Differences from this information, features or functions cannot be used for claims. Recirculating air...
- Page 33 SW Versions Tap to access detailed software version information Info Brightness 0 ~ 24 Load Factory Tap and confirm to reset the ZENEC system to factory default Contrast 0 ~ 24 Clock Time Tap to adjust clock time Setup Saturation...
- Page 34 The CAR information (vehicle status)page shows several special values, operations and informations The vehicle door status page visually shows several special operations and information of the vehicle, by the ZENEC system. of the doors, lights, car-trunk and engine bonnet, by the ZENEC system. Function Icon...
- Page 35 CLOCK TIME SOFTWARE VERSION In the System Setup menu page under SW version, you will see the currently installed software In the System Setup menu page under Clock Time, you can set the format, change the displayed time versions with detailed version info for MCU, OS and AP, inclusive a simple Short Software Version. and select the time sync source (system time or DAB) for the time display.
- Page 36 ● The ZENEC system is not compatible with vehicles, which are equipped with a hybrid or electro drive ex factory. ● The ZENEC Z-E2055 is equipped with an integrated DAB+ receiver. To make use of this you will need a suitable DAB antenna (not included in kit) that must be connected to the ZENEC system.
- Page 37 No. Article Main power Main harness Quadlock II for VW USB1: USB2: CAN BUS connection cable for ZENEC interface • Apple CarPlay, Apple MFI and Google Android Auto • USB Media Playback • USB Media Playback, Software Updates • Power charging ~1000mA ZENEC CAN BUS Interface •...
- Page 38 CONNECTION DIAGRAM Z-E2055 (PAGE 2) GENERAL ABBREVIATIONS Abbreviation Description Manufacturer-independent Bluetooth® technology allowing audio signals to be A2DP transmitted (Advanced Audio Distribution Profile) Z-E2055 Alternative frequency The CAN bus (Controller Area Network) is a serial bus system for the CAN-Bus...
- Page 39 The limited Warranty (the “Warranty”) applies to ZENEC products purchased from an authorized ZENEC will repair or replace products, only if they are covered by the terms of this Warranty. ZENEC dealer by end customers in the European Economic Area or Switzerland (“Territorial Scope”).
- Page 40 Z-N528: E9 10R-05 16981 Hereby, ACR Brändli + Vögeli AG declares that the type of radio equipment ZENEC Z-E2055 complies with the 2014/53/EU Directive. The full text of the EU Declaration of Conformity is available at the following Internet address: http://www.zenec.com...
- Page 41 © Copyright 2021 RevC / copy deadline: Q3-2021 English Manufacturer: ACR AG ∙ Bohrturmweg 1 ∙ CH-5330 Bad Zurzach ∙ Switzerland EU Legal Representative: ACR S & V GmbH ∙ Industriestraße 35 ∙ D-79787 Lauchringen ∙ Germany...
Need help?
Do you have a question about the Z-E2055 and is the answer not in the manual?
Questions and answers