Sign In
Upload
Download
Table of Contents
Contents
Add to my manuals
Delete from my manuals
Share
URL of this page:
HTML Link:
Bookmark this page
Add
Manual will be automatically added to "My Manuals"
Print this page
×
Bookmark added
×
Added to my manuals
Manuals
Brands
FLIR Manuals
Network Hardware
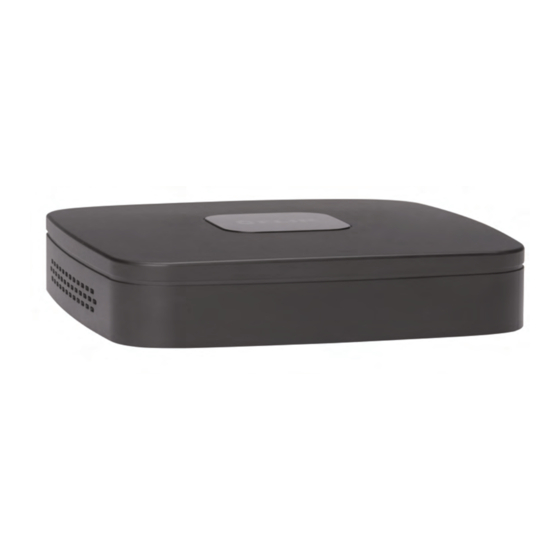
DNR218
Instruction manual
FLIR DNR218 Instruction Manual
Dnr210 series
Hide thumbs
1
2
3
4
Table Of Contents
5
6
7
8
9
10
11
12
13
14
15
16
17
18
19
20
21
22
23
24
25
26
27
28
29
30
31
32
33
34
35
36
37
38
39
40
41
42
43
44
45
46
47
48
49
50
51
52
53
54
55
56
57
58
59
60
61
62
63
64
65
66
67
68
69
70
71
72
73
74
75
76
77
78
79
80
81
82
83
84
85
86
87
88
89
90
91
92
93
94
95
96
97
98
99
100
101
102
103
104
105
106
107
108
109
110
111
112
113
114
115
116
117
118
119
120
121
122
123
124
125
126
127
128
129
130
131
132
133
134
135
136
137
138
139
140
141
142
143
144
145
146
147
148
149
150
151
152
153
154
155
156
157
158
159
160
161
162
163
164
165
166
167
168
169
170
171
172
173
174
175
176
177
178
179
180
181
182
183
184
185
186
187
188
189
190
191
192
193
194
195
196
197
198
199
200
201
202
203
204
205
206
207
208
209
210
211
212
213
214
215
216
217
218
219
220
page
of
220
Go
/
220
Contents
Table of Contents
Troubleshooting
Bookmarks
Table of Contents
Table of Contents
1 Important Safeguards
General Precautions
Installation
Service
Use
2 Getting Started
3 Top Panel
4 Back Panel
5 Basic Setup
Step 1: Connect the Network Cameras
Step 2: Connect the Mouse
Step 3: Connect the Ethernet Cable
Step 4: Connect the Monitor
Step 5: Connect to Power
STEP 6: Create a Secure Password
Step 7: Upgrade Firmware to Latest Version (if Available)
Step 8: Verify Camera Image
Camera Installation Tips
Step 9: Set the Time
Quick Access to System Information
Default System Password & Port Numbers
Connect to Your NVR over the Internet
Connecting Cameras to the Local Area Network (LAN)
6 Mouse Control
7 Using the NVR On-Screen Display
Using the Quick Menu
Adjusting Camera Image Settings
Configuration Profiles
Setting a Day and Night Schedule
Using the Navigation Bar
Using the Camera Tool Bar
Using Instant Playback
Using Zoom in Live Display
Using Real-Time Backup
Using the Virtual Keyboard
Adjusting Camera Zoom & Focus
8 Setting the Time
9 Recording
Video Recording Types
Main Stream and Sub Stream
Setting up Scheduled or Manual Recording
Configuring Hard Drive Overwrite
10 Playback
Using Playback
Video Playback Controls
Playing Back from a USB Drive
Using Smart Search
11 Search & Backup
Formatting the USB Flash Drive
Backing up Video
Using Video Clip Backup
Viewing Backup Files
Viewing Backup Files on PC
Viewing Backup Files on Mac
12 Managing Passwords and User Accounts
Changing Passwords
Adding Users
Modifying Users
Deleting Users
Account Groups
Adding Groups
Modifying Groups
Deleting Groups
13 Using the Main Menu
Camera Setting
Remote Device
Viewing Camera Status
Viewing Camera Firmware Versions
Upgrading Camera Firmware
Recording
Configuring Recording Quality
Configuring Audio Recording
Configuring Snapshot Recording Settings
Creating Custom Channel Names
System Information
HDD Info
Record Info
Version
Event
Online Users
Load
Test
Bps
Log
Setting
Network
Selecting DHCP or Static IP Address (TCP/IP)
Configuring System Ports (Connection)
Configuring DDNS Settings
Configuring Email Alerts
Configuring Switch Settings (Advanced)
Event
Configuring Motion Detection
Configuring Video Loss Settings
Configuring Tampering Settings
Configuring Hard Drive Warnings
Configuring Network Warnings
Storage
Configuring the Video Recording Schedule
Configuring Pre-Recording
Configuring the Snapshot Schedule
Configuring Holidays
Formatting the Hard Drive
Configuring Hard Drive Type
Configuring General System Settings
Changing the Nvr's Output Resolution
Saving Your System Configuration to a USB Flash Drive
Restoring Default Settings
Upgrading Firmware from a USB Flash Drive
Shutdown
14 Connecting to Your System over the Internet on PC or Mac
System Requirements
Step 1 of 3: Connect Your System to Your Router
Step 2 of 3: Obtain the System's Device ID
Step 3 of 3: Connect to the System over the Internet
15 Using FLIR Cloud™ Client for PC or Mac
Home Page
Live View
Live View Controls
Opening Live View in Multiple Monitors
Controlling PTZ Cameras
PTZ Presets
PTZ Tours
PTZ Pattern
PTZ Scan
PTZ Pan
Playback
Playback Controls
Downloading Video to Your Computer Hard Drive
Alarm
Log
E-Map
Devices
Device Config
Alarm CFG
Tour & Task
Account
Managing User Accounts
Managing Roles
General
Basic
File
Alarm Prompt
Version
16 Connecting to Your System Using Smartphone or Tablet Apps
Iphone / Ipad
Prerequisites
Connecting to Your System on Iphone / Ipad
Live View Interface
Controlling PTZ Cameras
Viewing Snapshots and Videos with Local Files
Using Playback Mode on Iphone / Ipad
Enabling Push Notifications
Using the Event List
Using Favorites
Using the E-Map
Device Manager
Adding Devices Using an IP or DDNS Address (Advanced)
Android
Prerequisites
Connecting to Your System on Android
Live View Interface
Controlling PTZ Cameras
Viewing Snapshots and Videos with Local Files
Using Playback Mode on Android
Enabling Push Notifications
Using the Event List
Using Favorites
Using the E-Map
Device Manager
Adding Devices Using an IP or DDNS Address (Advanced)
17 Remote Viewing on Internet Explorer
Prerequisites
IE Live Display Overview
Using Search Mode in IE (Playback)
18 RTSP Streaming (Advanced)
19 DDNS Setup (Advanced)
Accessing Your System Within a Local Network (LAN)
Step 1 of 3: Connect Your System to Your Router
Step 2 of 3: Obtain the System's Local IP Address
Step 3 of 3: Connect to the System's Local IP Address
DDNS Setup-Access Your System Remotely over the Internet
Step 1 of 4: Port Forwarding
Step 2 of 4: Create a DDNS Account
Step 3 of 4: Enable DDNS on the System
Step 4 of 4: Connect to the System's DDNS Address
20 Connecting PTZ Cameras to the NVR
Controlling a PTZ Camera (Local NVR)
Advanced PTZ Controls
Presets
Tours
Pattern
Auto Scan
21 Hard Drive Installation
Removing the Hard Drive
Installing a Hard Drive
Formatting Hard Drives
22 Troubleshooting
23 Technical Specifications
System
Inputs/Outputs
Display
Recording
Playback and Backup
Storage & Archive
Connectivity
General
24 Notices
FCC Class a Notice
Advertisement
Quick Links
1
Getting Started
2
Step 1: Connect the Network Cameras
Download this manual
Instruction Manual
DNR210 Series
Table of
Contents
Previous
Page
Next
Page
1
2
3
4
5
Advertisement
Table of Contents
Need help?
Do you have a question about the DNR218 and is the answer not in the manual?
Ask a question
Questions and answers
Related Manuals for FLIR DNR218
Network Hardware FLIR DNR100 SERIES Instruction Manual
(136 pages)
Network Hardware FLIR DNR100 SERIES Instruction Manual
(172 pages)
Network Hardware FLIR DNR200V Series Instruction Manual
Network video surveillance recorder 4/8 1080p view & record cms mobile apps hdmi h.264 (121 pages)
Network Hardware FLIR Digimerge DNR200V Series Quick Connection Manual
Network video surveillance recorder (2 pages)
Network Hardware FLIR DIGIMERGE DNR316P1 Instruction Manual
Network video surveillance recorder 8/16 1080p view & record cms mobile apps hdmi h.264 (122 pages)
Network Hardware FLIR DNR400 Series Quick Mobile Manual
(2 pages)
Network Hardware FLIR DNR214 Instruction Manual
Dnr210 series (220 pages)
Network Hardware FLIR LOREX NR810 Series Instruction Manual
(226 pages)
Network Hardware FLIR Horizon Series Quick Installation Manual
Nvr raid server 1u (2 pages)
Network Hardware FLIR VIEWCOM/E MAX+ Setup Manual
(23 pages)
Network Hardware FLIR Horizon Series Quick Installation Manual
Nvr raid server 2u (2 pages)
Table of Contents
Save PDF
Print
Rename the bookmark
Delete bookmark?
Delete from my manuals?
Login
Sign In
OR
Sign in with Facebook
Sign in with Google
Upload manual
Upload from disk
Upload from URL


Need help?
Do you have a question about the DNR218 and is the answer not in the manual?
Questions and answers