Sign In
Upload
Download
Table of Contents
Contents
Add to my manuals
Delete from my manuals
Share
URL of this page:
HTML Link:
Bookmark this page
Add
Manual will be automatically added to "My Manuals"
Print this page
×
Bookmark added
×
Added to my manuals
Manuals
Brands
NEC Manuals
Telephone System
DP-D-1D
Hardware manual
NEC DP-D-1D Hardware Manual
Hide thumbs
1
2
Table Of Contents
3
4
5
6
7
8
9
10
11
12
13
14
15
16
17
18
19
20
21
22
23
24
25
26
27
28
29
30
31
32
33
34
35
36
37
38
39
40
41
42
43
44
45
46
47
48
49
50
51
52
53
54
55
56
57
58
59
60
61
62
63
64
65
66
67
68
69
70
71
72
73
74
75
76
77
78
79
80
81
82
83
84
85
86
87
88
89
90
91
92
93
94
95
96
97
98
99
100
101
102
103
104
105
106
107
108
109
110
111
112
113
114
115
116
117
118
119
120
121
122
123
124
125
126
127
128
129
130
131
132
133
134
135
136
137
138
page
of
138
Go
/
138
Contents
Table of Contents
Bookmarks
Table of Contents
Table of Contents
Regulatory
Chapter 1 Introduction
Section 1 GENERAL INFORMATION
Figure 1-1 System Configuration
Section 2 EQUIPMENT LIST
KSU and Optional Unit
IP4WW-Battery Box
Ip4[ ]-1228M-B Ksu
Trunk/Extension/Isdn Expansion Interface Cards
Ip4Ww-000E-B1
Ip4Ww-080E-B1
Ip4Ww-4Coidb-B1
Ip4[ ]-008E-B1
Ip4Ww-1Priu-C1
Ip4Ww-2Bridb-C1
Optional Interface Cards
Ip4Ww-Voipdb-C1
Ip4[ ]-Memdb-C1
Table 1-1 Memory Capacity of MEMDB-C1
Ip4Ww-Cfvms-C1
Pz-Vm21
Multiline Telephones and Optional Equipment
Ip4Ww-12Txh-B Tel
Ip4Ww-24Txh-B Tel
Dp-D-1D
Ip4Ww-60D Dss-B
Ip4[ ]-24Tixh-C Tel
Section 3 SYSTEM CAPACITY
System Capacity
Table 1-2 System Capacity
KSU Capacity
Expandability of Trunk and Extension (Without PRI)
Figure 1-2 System Image
Figure 1-3 Maximum KSU Capacity - Expandability of Trunk and Extension (Without PRI)
Expandability of Trunk and Extension (with PRI)
Figure 1-4 Maximum KSU Capacity - Expandability of Trunk and Extension
Chapter 2 Installation
Section 1 INSTALLING the MAIN KSU
Before Installing the KSU
Environmental Requirements
General Precautions
Preparations
Site Requirements
Unpacking
Installing the Main KSU (1228M-B KSU)
Table 2-1 KSU Packing List
Table 2-2 Items on the CPU Card
Figure 2-1 CPU Card Location
Wall-Mounting the KSU
Figure 2-2 Dimension of the Main KSU
KSU Dimensions
Wall Installation of KSU
Figure 2-3 Wall Mount of KSU
Figure 2-4 Wall-Mounting Template
Mounting Procedure of KSU
Figure 2-5 Screw Positions
Figure 2-6 Sub-Cover Slide-Out
Figure 2-7 Removing the Sub-Cover
Figure 2-8 Sub-Cover Open Position
Figure 2-9 Mounting the KSU
Grounding and AC Cabling
AC Power Requirement
Figure 2-10 ETH Lug
Grounding the KSU
Table 2-3 Power Requirement
AC Power Cord
Trunk/Extension Cabling
Figure 2-11 AC Power Cord
General
Extension Cabling
Precautions for Cabling
Trunk Cabling
Figure 2-12 Digital Extension Cabling
Figure 2-13 Analog Extension Cabling
Cable Routing and Clamping
Figure 2-14 Cabling
Table 2-4 RJ61 Cable Connector Pin-Outs (J101-J103)
Figure 2-15 Sub-Cover
Section 2 INSTALLING the EXTERNAL BACKUP BATTERY
General
Unpacking
Table 2-5 IP4WW-Battery Box Packing List
Battery Box Dimensions
Battery Specifications
Battery Installation
Table 2-6 Battery Specifications
Figure 2-16 Dimension of the IP4WW-Battery Box
Figure 2-17 Removing the Front Cover
Figure 2-18 Disconnect Battery Connection Cable
Figure 2-19 Batt Stopper
Figure 2-20 Pulling out the Battery Tray
Figure 2-21 Remove the Battery Tray Bracket
Figure 2-22 Battery Installation
Figure 2-23 Connecting the Battery Cables
Figure 2-24 Installation of Battery Tray Cover
Figure 2-25 Inserting the Battery Tray
Figure 2-26 Secure Batt Stopper Bracket
Mounting the IP4WW-Battery Box
Figure 2-27 Connecting the Battery Connection Cable
Figure 2-28 Installation of Front Cover
Floor-Mounting the IP4WW-Battery Box
Figure 2-29 Bases and Support of the Battery Box
Figure 2-30 Floor-Mount Spacing Guide
Figure 2-31 Mounting the Battery Box
Figure 2-32 Securing the Battery Box
Wall-Mounting the IP4WW-Battery Box
Figure 2-33 Assemble Battery Box Base
Figure 2-34 Wall-Mount Spacing Guide
Figure 2-35 Removing the Front Cover
Figure 2-36 Mounting the Battery Box
Figure 2-37 Securing the Battery Box
Figure 2-38 Removing the Front Cover
Mounting One KSU on the Battery Box
Figure 2-39 Removing the L-Bracket
Figure 2-40 Securing the L-Bracket and WM Hook
Figure 2-41 Attaching the KSU
IP4WW-Battery Box to KSU Connection
Figure 2-42 KSU Mounting on Battery Box
Figure 2-43 Sub-Cover Open and Hold
IP4WW-Battery Box Fuse Replacement
Figure 2-44 Connecting Battery Cable
Figure 2-45 Removing the Front Cover
Figure 2-46 Disconnecting the Battery Connection Cable
Figure 2-47 Loosen the Fuse Unit Screw
Figure 2-48 Replacing the Fuse
Figure 2-49 Install the Fuse Unit
Figure 2-50 Securing the Fuse Unit
Figure 2-51 Connect Battery Connection Cable
Figure 2-52 Installation of the Front Cover
Cards
General
Unpacking
Table 2-7 Expansion Cards
Table 2-8 Expansion Card Packing List
Mounting the Expansion Interface Card
Figure 2-53 Removing the Sub-Cover
Mounting the 080E-B1/008E-B1/000E-B1/1PRIU-C1 Pcbs
Figure 2-54 Removing the Main-Cover
Figure 2-55 Mounting the 1St Expansion Interface Card
Figure 2-56 Mounting the 2Nd Expansion Interface Card
Figure 2-57 Mounting Two Expansion Interface Cards
Figure 2-58 Plastic Knockouts
Figure 2-59 Replacing the Main-Cover
Figure 2-60 Plastic Knockouts on 084M-B1/080E-B1/008E-B1/000E-B1
Figure 2-61 Installing the 4COIDB-B1
Mounting the 4COIDB PCB
Figure 2-62 Mounting the 4COIDB-B1 into the KSU
Figure 2-63 Replacing the Main-Cover
Figure 2-64 Plastic Knockouts on 084M-B1/080E-B1/008E-B1/000E-B1
Figure 2-65 Installing the 2BRIDB-C1
Mounting the 2BRIDB PCB
Cabling and Setting the Expansion Interface Card
Figure 2-66 Mounting the 2BRIDB-C1 into the KSU
Figure 2-67 Replacing the Main-Cover
Cabling IP4WW-080E-B1
Figure 2-68 Connectors of 080E-B1
Cabling IP4[ ]-008E-B1
Figure 2-69 Connectors of 008E-B1
Table 2-9 RJ-61 Digital Connector Pin-Outs (J101, J102)
Cabling and Setting IP4WW-4COIDB-B1
Cabling IP4WW-000E-B1
Figure 2-70 Connectors of 4COIDB-B1
Table 2-10 RJ-61 Analogue Pin-Outs (J101, J102)
Cabling and Setting IP4WW-2BRIDB-C1
Figure 2-71 Connectors of 2BRIDB-C1
Table 2-11 RJ-61 CO/PF Pin-Outs (J2, J3)
Figure 2-72 Switches Location of 2BRIDB-C1
Table 2-12 RJ-61 BRI Pin-Outs (S-Bus, T-Bus)
Table 2-13 Switch Setting of 2BRIDB-C1
Cabling and Setting IP4WW-1PRIU-C1
Pri 1
Figure 2-73 Connector of 1PRIU-C1
Table 2-14 RJ-45 PRI Pin-Outs (S-Bus, T-Bus)
Table 2-15 Switch Setting of 1PRIU-C1
Figure 2-74 Switches and Leds Location of 1PRIU-C1
Table 2-16 LED Indication
General
Power Failure Transfer (4COIDB-B1 Only)
Section 4 INSTALLING the OPTIONAL INTERFACE CARDS
Installing the Expansion Memory Card (MEMDB-C1)
Figure 2-75 Removing the Sub-Cover
General
Installing the MEMDB PCB
Table 2-17 MEMDB-C1 Packing List
Unpacking
Figure 2-76 Removing the Main-Cover
Figure 2-77 Removing the CPU Card
Figure 2-78 Installing the MEMDB PCB
Figure 2-79 Installing the CPU Card
Voip Card (VOIPDB-C1)
Figure 2-80 Replacing the Main-Cover
General
Installing the VOIPDB-C1 PCB
Table 2-18 VOIPDB-C1 Packing List
Unpacking
Figure 2-81 Removing the Sub-Cover
Figure 2-82 Removing the Main-Cover
Figure 2-83 Removing the CPU Card
Figure 2-84 Installing the VOIPDB-C1 PCB
Figure 2-85 Installing the CPU Card
Figure 2-86 Removing the Plastic Knockout and Replacing the Main-Cover
Figure 2-87 Connecting a LAN Cable
Figure 2-88 Location of Leds
LED Indication
Table 2-19 VOIPDB LED Indications
Vrs/Voice Mail Card (PZ-VM21)
General
Installing the PZ-VM21 PCB
Table 2-20 Operation of VOIPDB LED Indications
Table 2-21 PZ-VM21 Packing List
Unpacking
Figure 2-89 Removing the Sub-Cover
Figure 2-90 Removing the Main-Cover
Figure 2-91 Removing the CPU Card
Figure 2-92 Installing the PZ-VM21 PCB
Installing the CF Card (CFVMS)
Figure 2-93 Installing the CPU Card
Figure 2-94 Replacing the Main-Cover
Figure 2-95 Installing the CF Card
And Optional Terminals
Installing the Multiline Telephones
Figure 2-96 Multiline Telephone (12TXH/24TXH/24TIXH (IP))
Location of Controls
Table 2-22 Multiline Telephone Functions (12TXH/24TXH/24TIXH (IP))
Figure 2-97 Leg Setting for Low Position
Figure 2-98 Cabling of Multiline Telephone
Multiline Telephone Legs Adjustment
Figure 2-100 Leg Setting for High Position
Figure 2-99 Setting for High Position
Figure 2-101 Cabling for Wall-Mount
Figure 2-102 Wall-Mount Unit - 24TIXH-C
Wall-Mounting the Multiline Telephone
Figure 2-103 Hook-Switch Hanger
Figure 2-104 Wall-Mount Screw Guide
Figure 2-105 Mounting the Multiline Telephone
Install the IP Multiline Telephone (IP4WW-24TIXH-C1 TEL)
Figure 2-106 IP Multiline Telephone Connection
Figure 2-107 IP Multiline Telephone Connectors
Installing the IP Multiline Telephone
System Connection
Applying Power to the IP Multiline Telephone
Installing the DSS Console
DSS Console Leg Adjustment
Figure 2-108 Low Position Setting
Figure 2-109 Cabling of DSS
Figure 2-110 Leg Stopper of DSS Console
Figure 2-111 High Position Setting
Figure 2-112 Cabling for Wall-Mount
Wall-Mounting the DSS Console
Installing the Headset
Figure 2-113 Wall-Mount Screw Guide
Figure 2-114 Mounting the DSS
Installing the Doorphone Box
Figure 2-115 Headset Socket (2-Wire Multiline Telephone)
Figure 2-116 Headset Socket (IP Multiline Telephone)
Wall-Mounting the Doorphone
Figure 2-117 Doorphone Box and Bracket
Figure 2-118 Doorphone
Connecting the Doorphone
Doorphone Interface Specifications
Installing the Door Unlock Devices
Table 2-23 Doorphone Interface Specifications
Figure 2-119 Connecting the Doorphone
Table 2-24 RJ-61 General Purpose/Door Unlock Relay Control Connector (J7)
Table 2-25 General Purpose/Door Unlock Relay Specifications
Figure 2-120 Connecting the Door Unlock Device
Installing the External Paging Speaker/External MOH/BGM Sources
Connecting the Audio Equipment
External Paging Output Specifications
Figure 2-121 Connecting Audio Equipment
Table 2-26 External Paging Output Specifications
Bgm/External MOH Source Input Specifications
SMDR (Station Message Detail Recording)
Figure 2-122 Connecting a PC for SMDR
General
Table 2-27 Bgm/External MOH Source Input Specifications
Chapter 3 System Start up
Before Starting up the System
Starting up the System
Table 3-1 Start up Method
Figure 3-1 Lithium Battery Protection Sheet
Section 1 SYSTEM START up
Perform a Cold Start
Figure 3-2 Power Switch Location
Figure 3-3 Load Button (S1) Location
Perform a Hot Start
Figure 3-4 Status LED (D5) and RUN LED Location
Figure 3-5 Display Indication (Idle)
Section 2 PROGRAMMING MODE
Entering the Programming Mode
Exiting the Programming Mode
Saving (Backup) the Customer Data
Loading the Customer Data
Figure 3-10 Inserting the CF Card
Figure 3-11 PRG90-03 Display
Figure 3-12 PRG90-04 Display
Figure 3-13 Inserting the CF Card
Figure 3-14 PRG90-04 Display
Figure 3-15 Next PRG Display
Section 3 SYSTEM SHUT down
Powering off the System
Resetting the System
Figure 3-16 Power Switch Location
Advertisement
Quick Links
1
Table of Contents
2
Section 1 General Information
3
Figure 1-1 System Configuration
4
Ip4Ww-12Txh-B Tel
5
Entering the Programming Mode
6
Chapter 4 Maintenance
Download this manual
See also:
Feature Manual
,
Hardware Manual
Hardware Manual
A50-031693-004 AU
ISSUE 4.1 (R5.1)
January 2015
Table of
Contents
Previous
Page
Next
Page
1
2
3
4
5
Advertisement
Table of Contents
Need help?
Do you have a question about the DP-D-1D and is the answer not in the manual?
Ask a question
Questions and answers
Related Manuals for NEC DP-D-1D
Telephone System NEC DSX Brochure
(8 pages)
Telephone System NEC DSX Quick Reference
A companion to the dsx basic online training course (32 pages)
Telephone System NEC DSX PRODUCT DESCRIPTION Manual
(162 pages)
Telephone System NEC DSX-160 Hardware Manual
(88 pages)
Telephone System NEC DSX Software Manual
(984 pages)
Telephone System NEC DS1000 Correspondence Course Workbook
(174 pages)
Telephone System NEC 1090030 - DSX Systems PHONE SuperDisp Phone BLAC Hardware Manual
Hardware manual (82 pages)
Telephone System NEC Electra Elite IPK II System User Manual
(1190 pages)
Telephone System NEC DSX INTRAMAIL FEATURE Handbook
Intramail feature (94 pages)
Telephone System NEC Dterm I Series User Manual
Neax 2000 ips (59 pages)
Telephone System NEC Dterm Series I User Manual
(52 pages)
Telephone System NEC dX-Z Series User Manual
Isdn business communication system (31 pages)
Telephone System NEC DXE Series Instructions For The Customer
Registering a dect handset (19 pages)
Telephone System NEC Univerge SV9500 User Manual
(95 pages)
Telephone System NEC Electra Elite IPK II System Hardware Manual
(642 pages)
Telephone System NEC QuSL1100 Quick Reference Manual
Ip4ww-12/24 series desktop digital terminals with voicemail (9 pages)
Summarization of Contents
Chapter 1 Introduction
Section 1 GENERAL INFORMATION
Overview of the SL1100 system's capabilities and design.
Section 2 EQUIPMENT LIST
Comprehensive list of all SL1100 system equipment.
Section 3 SYSTEM CAPACITY
Details the system capacity, including port and channel limits.
Chapter 2 Installation
Section 1 INSTALLING THE MAIN KSU
Instructions for installing the main KSU unit.
Section 2 INSTALLING THE EXTERNAL BACKUP BATTERY
Guide for installing the external backup battery box.
Section 3 INSTALLING THE EXPANSION INTERFACE CARDS
Steps to install expansion interface cards.
Section 4 INSTALLING THE OPTIONAL INTERFACE CARDS
Instructions for installing optional interface cards.
Section 5 INSTALLING THE MULTILINE TELEPHONES AND OPTIONAL TERMINALS
Procedures for installing multiline telephones and other terminals.
Chapter 3 System Start Up
Section 1 SYSTEM START UP
Steps for starting up the SL1100 system.
Section 2 PROGRAMMING MODE
How to enter and exit the system programming mode.
Section 3 SYSTEM SHUT DOWN
Procedures for powering off and resetting the system.
Chapter 4 Maintenance
Section 1 FUSE REPLACEMENT
Instructions for replacing system fuses.
Section 2 LITHIUM BATTERY REPLACEMENT
Procedures for replacing the lithium battery.
Section 3 MAIN SOFTWARE UPGRADING
Steps to upgrade the system's main software.
Section 4 LED INDICATIONS
Explains the meaning of various LED indicators.
Chapter 5 Specifications
Section 1 SYSTEM CAPACITY
Details the system capacity for various components and features.
Section 2 SYSTEM SPECIFICATIONS
General system specifications and precautions.
2.9 IP Terminal Power Chart
Power requirements for IP terminals.
2.12 Mechanical Specifications
Mechanical specifications for equipment.
2.20 Cabling Requirements
General cabling requirements and precautions.
2.21 Cable Requirements
Specific cable types and lengths.
Regulatory
BATTERY DISPOSAL
Information and regulations for disposing of batteries.
IMPORTANT SAFEGUARDS FOR BATTERY DISPOSAL
Warnings and guidelines for safe battery disposal.
BATTERY INFORMATION
General information about batteries used in the system.
AUSTRALIAN REGULATORY INFORMATION
Regulatory compliance information for Australia.
HEARING AID COMPATIBILITY
Information on hearing aid compatibility.
SERVICE REQUIREMENTS
Requirements for service and maintenance personnel.
COMPLIANCE INFORMATION
General compliance and safety warnings.
UL REGULATORY INFORMATION
UL certification and compliance details.
VOICE ANNOUNCEMENT/MONITORING
Legal advice on voice recording and monitoring.
Introduction
SECTION 1 GENERAL INFORMATION
Overview of the SL1100 system's capabilities and design.
SECTION 2 EQUIPMENT LIST
Comprehensive list of all SL1100 system equipment.
2.1 KSU and Optional Unit
Details of the main KSU unit and its included components.
2.2 Trunk/Extension/ISDN Expansion Interface Cards
Details of various expansion interface cards.
2.3 Optional Interface Cards
Information on optional interface cards like memory and VoIP.
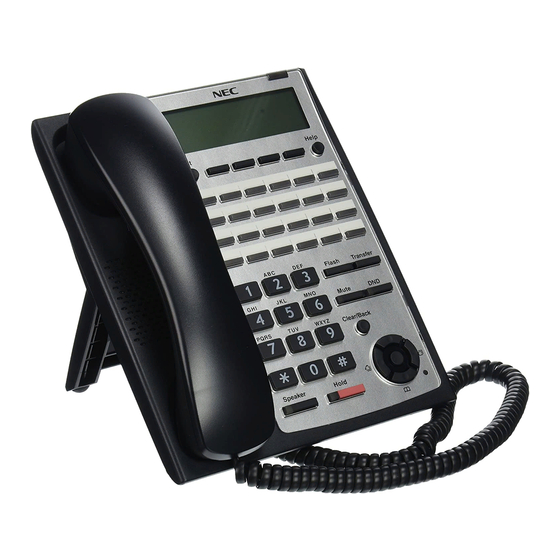
2.4 Multiline Telephones and Optional Equipment
Features and installation of multiline telephones and terminals.
2.4.3 IP4[ ]-24TIXH-C TEL
Features of the IP multiline telephone.
2.4.4 IP4WW-60D DSS-B
Details of the 60-button DSS console.
2.4.5 DP-D-1D
Description of the Doorphone Box.
SECTION 3 SYSTEM CAPACITY
3.1 System Capacity
Table detailing system capacity for various components and features.
3.2 KSU Capacity
Explains KSU capacity and system image.
Installation
SECTION 1 INSTALLING THE MAIN KSU
Instructions for installing the main KSU unit.
1.3 Wall-Mounting the KSU
Guidance on mounting the KSU on a wall.
1.4 Grounding and AC Cabling
Grounding and AC power connection details.
1.5 Trunk/Extension Cabling
Information and precautions for trunk and extension cabling.
1.5.5 Cable Routing and Clamping
Guidance on routing and clamping cables.
SECTION 2 INSTALLING THE EXTERNAL BACKUP BATTERY
2.1 General
General overview of the external backup battery.
2.5 Battery Installation
Steps to install batteries into the battery box.
2.6 Mounting the IP4WW-Battery Box
Guide for mounting the IP4WW-Battery Box.
2.7 IP4WW-Battery Box to KSU Connection
Steps to connect the battery box to the KSU.
2.8 IP4WW-Battery Box Fuse Replacement
Procedure for replacing the fuse in the battery box.
SECTION 3 INSTALLING THE EXPANSION INTERFACE CARDS
3.1 General
Overview of expansion interface card installation.
3.3 Mounting the Expansion Interface Card
General procedure for mounting expansion cards.
3.3.1 Mounting the 080E-B1/008E-B1/000E-B1/1PRIU-C1 PCBs
Specific steps for mounting these PCBs.
3.3.2 Mounting the 4COIDB PCB
Procedure for mounting the 4COIDB PCB.
3.3.3 Mounting the 2BRIDB PCB
Procedure for mounting the 2BRIDB PCB.
3.4 Cabling and Setting the Expansion Interface Card
Cabling and setting procedures for expansion cards.
3.4.1 Cabling IP4WW-080E-B1
Cabling instructions for the 080E-B1 card.
3.4.2 Cabling IP4[ ]-008E-B1
Cabling instructions for the 008E-B1 card.
3.4.4 Cabling and Setting IP4WW-4COIDB-B1
Cabling and setting for the 4COIDB-B1 card.
3.4.5 Cabling and Setting IP4WW-2BRIDB-C1
Cabling and setting for the 2BRIDB-C1 card.
3.4.5.2 Switch Setting
Switch settings for the 2BRIDB-C1 card.
3.4.6 Cabling and Setting IP4WW-1PRIU-C1
Cabling and setting for the 1PRIU-C1 card.
3.4.6.2 Switch Setting
Switch settings for the 1PRIU-C1 card.
3.4.6.3 LED Indication
LED indications for the 1PRIU-C1 card.
SECTION 4 INSTALLING THE OPTIONAL INTERFACE CARDS
4.1 Installing the Expansion Memory Card (MEMDB-C1)
Steps for installing the memory expansion card.
4.2 VoIP Card (VOIPDB-C1)
Overview of the VoIP card.
4.2.3 Installing the VOIPDB-C1 PCB
Procedure for installing the VOIPDB-C1 PCB.
4.2.4 LED Indication
LED indications for the VOIPDB-C1 board.
4.3 VRS/Voice Mail Card (PZ-VM21)
Overview of the VRS/Voice Mail card.
4.3.3 Installing the PZ-VM21 PCB
Procedure for installing the PZ-VM21 PCB.
4.4 Installing the CF Card (CFVMS)
Steps for installing the Compact Flash card.
SECTION 5 INSTALLING THE MULTILINE TELEPHONES AND OPTIONAL TERMINALS
5.1 Installing the Multiline Telephones
Guide for installing the different types of multiline telephones.
5.1.1 Location of Controls
Identifies controls on the multiline telephone.
5.1.2 Multiline Telephone Legs Adjustment
Adjusting the telephone legs for optimal viewing angle.
5.1.3 Wall-Mounting the Multiline Telephone
Guide for wall-mounting the multiline telephone.
5.2 Install the IP Multiline Telephone (IP4WW-24TIXH-C1 TEL)
Steps for installing the IP multiline telephone.
5.3 Installing the DSS Console
Guide for installing the DSS console.
5.3.2 Wall-Mounting the DSS Console
Guide for wall-mounting the DSS console.
5.4 Installing the Headset
Instructions for installing a headset.
5.5 Installing the Doorphone Box
Guide for installing the doorphone box.
5.5.2 Connecting the Doorphone
How to connect the doorphone.
5.6 Installing the Door Unlock Devices
Guide for installing door unlock devices.
5.7 Installing the External Paging Speaker/External MOH/BGM Sources
Guide for installing external audio sources.
5.8 SMDR (Station Message Detail Recording)
Information on SMDR setup.
System Start Up
SECTION 1 SYSTEM START UP
Procedures for starting up the system.
1.1 Before Starting Up the System
Checks to perform before starting the system.
1.2 Starting Up the System
Details the two system startup methods.
1.2.1 Perform a Cold Start
Step-by-step guide for performing a cold start.
1.2.2 Perform a Hot Start
Step-by-step guide for performing a hot start.
SECTION 2 PROGRAMMING MODE
2.1 Entering the Programming Mode
How to access the system's programming mode.
2.2 Exiting the Programming Mode
How to exit the system's programming mode.
2.3 Saving (Backup) the Customer Data
Procedures for saving customer data to a CF card.
2.4 Loading the Customer Data
Procedures for loading customer data from a CF card.
SECTION 3 SYSTEM SHUT DOWN
3.1 Powering Off the System
Steps for safely powering off the system.
3.2 Resetting the System
How to reset the system.
Maintenance
SECTION 1 FUSE REPLACEMENT
Instructions for replacing system fuses.
SECTION 2 LITHIUM BATTERY REPLACEMENT
Procedures for replacing the lithium battery.
SECTION 3 MAIN SOFTWARE UPGRADING
Overview and steps for system software upgrading.
SECTION 4 LED INDICATIONS
Information on the meaning of various LED indicators on the CPU.
Table of Contents
Save PDF
Print
Rename the bookmark
Delete bookmark?
Delete from my manuals?
Login
Sign In
OR
Sign in with Facebook
Sign in with Google
Upload manual
Upload from disk
Upload from URL
Need help?
Do you have a question about the DP-D-1D and is the answer not in the manual?
Questions and answers