
Related Manuals for SICK V200


Summary of Contents for SICK V200
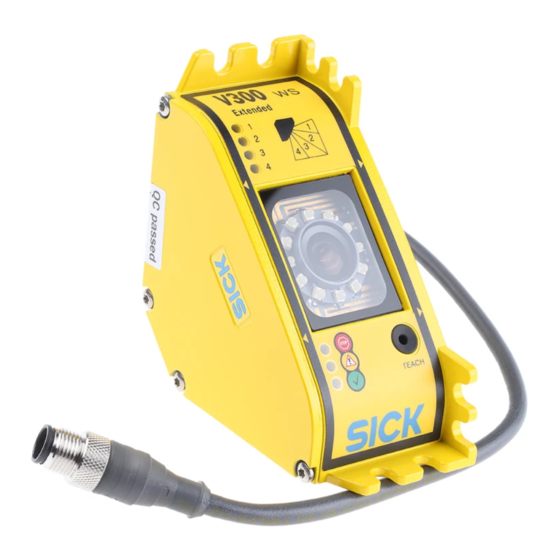
- Page 1 O P E R A T I N G I N S T R U C T I O N S V200 Work Station Extended, V300 Work Station Extended Safety camera system...
- Page 2 This document is protected by the law of copyright, whereby all rights established therein remain with the company SICK AG. Reproduction of this document or parts of this document is only permissible within the limits of the legal determination of Copyright Law. Alteration or abridgement of the document is not permitted without the explicit written approval of the company SICK AG.
-
Page 3: Table Of Contents
System connection M12 × 8 ................32 Connecting the V200/V300 without external device monitoring (EDM), without internal restart interlock and without external key-operated pushbutton for teach-in ..................33 8012227/YT87/2016-03-29 © SICK AG • Industrial Safety Systems • Germany • All rights reserved Subject to change without notice... - Page 4 Compliance with EU directives............... 60 13.2 Checklist for the manufacturer ..............61 13.3 List of tables ....................62 13.4 List of illustrations..................62 © SICK AG • Industrial Safety Systems • Germany • All rights reserved 8012227/YT87/2016-03-29 Subject to change without notice...
-
Page 5: About This Document
Target group These operating instructions are addressed to planning engineers, machine designers and operators of plants and systems which are to be protected by one or several V200/V300 safety camera systems. It also addresses people who integrate the V200/V300 into a machine, initialise its use, or who are in charge of servicing and maintaining the device. -
Page 6: Scope
Operating Instructions V200/V300 Scope This document is an original document. These operating instructions are only applicable to the V200/V300 safety camera system Notes with one of the following entries on the type label in the field Operating Instructions: • 8012225 XF85 •... - Page 7 • machine movements • electrical conductors • visible or invisible radiation • a combination of several risks and hazards 8012227/YT87/2016-03-29 © SICK AG • Industrial Safety Systems • Germany • All rights reserved Subject to change without notice...
-
Page 8: On Safety
V200/V300 On safety This chapter deals with your own safety and the safety of the equipment operators. ⋅ Please read this chapter carefully before working with the V200/V300 or with the machine protected by the V200/V300. Qualified safety personnel The V200/V300 safety camera system must only be installed, commissioned and serviced by qualified safety personnel. -
Page 9: Applications Of The Device
0.60 × 0.60 1.50 × 1.50 The device is a Type 3 ESPE (V300 Work Station Extended) or a Type 2 (V200 Work Station Extended) according to IEC 61 496-1 and IEC/TR 61 496-4 and is therefore allowed for use with controls in category 3 according to EN ISO 13 849-1. -
Page 10: General Safety Notes And Protective Measures
• The operating instructions must be made available to the operator of the machine where the V200/V300 safety camera system is fitted. The machine operator is to be instructed in the use of the device by qualified safety personnel and must be instructed to read the operating instructions. -
Page 11: Environmental Protection
Metal recycling (aluminium) Electronic recycling Circuit boards, cable, connector and electrical connecting pieces Packaging Cardboard, paper Paper/cardboard recycling Polyethylene packaging Plastic recycling 8012227/YT87/2016-03-29 © SICK AG • Industrial Safety Systems • Germany • All rights reserved Subject to change without notice... -
Page 12: Product Description
Protective field The V200/V300 safety camera system comprises a camera as well as a reflective tape with which the contour to be monitored is defined. The camera monitors the area bounded by its field of view and the reflective tape – the protective field –... -
Page 13: Application Examples
V200/V300, placement at corner (right figure) The V200/V300 safety camera system operates correctly as a protective device only if the following conditions are met: • The control of the machine must be electrical. • It must be possible to achieve a safe state on the machine at any time. -
Page 14: Configurable Functions
Chapter 3 Operating Instructions V200/V300 Configurable functions This section describes the functions of the V200/V300 safety camera system that can be configured. Test the protective device after any changes! After each modification to the protective device or its connection, you must check the whole protective device for effectiveness (see section 7.1 “Test notes”... -
Page 15: External Device Monitoring (Edm)
Always configure the application with restart interlock! Ensure that there is always a restart interlock. The V200/V300 is unable to verify if the restart interlock of the machine is connected. If you deactivate both the internal and the WARNING external restart interlock, the users and operators of the machine will be at acute risk of injury. -
Page 16: Status Indicators
5.3 on page 33. The configuration of the external device monitoring is described in chapter 8 “Configuration” on page 44. Status indicators The light emitting diodes (LEDs) on the V200/V300 signal its operating status. 3.5.1 Status LEDs of the V200/V300 Fig. 7: Status LEDs... -
Page 17: Diagnostics Leds Of The V200/V300
⌠Ε Warning (see chapter 10 “Fault diagnosis” on page 50) ⌠Ι Error (see chapter 10 “Fault diagnosis” on page 50) ⌠ϑ 8012227/YT87/2016-03-29 © SICK AG • Industrial Safety Systems • Germany • All rights reserved Subject to change without notice... -
Page 18: Mounting
• The ratio of the lengths of the sides of a protective field monitored must not exceed 2:1. • If you require a larger protective field than is possible with a single V200/V300, you can mount two V200/V300 in parallel in opposite directions. In this way you can generate two overlapping protective fields (see 6.2 “Application with two V200/V300”... -
Page 19: Protective Field Dimensions Allowed At A Resolution Of 24 Mm
Example 2: The shorter side is 0.78 m long. Then the longer side must be at least 0.78 m and is allowed to be a maximum of 1.50 m long. 8012227/YT87/2016-03-29 © SICK AG • Industrial Safety Systems • Germany • All rights reserved Subject to change without notice... -
Page 20: Determining The Minimum Distance
⋅ Your SICK-subsidiary will be pleased to assist you with the implementation of special applications. © SICK AG • Industrial Safety Systems • Germany • All rights reserved 8012227/YT87/2016-03-29 Subject to change without notice... -
Page 21: Minimum Distance According To En Iso 13 855 And En Iso 13 857
Response time of the V200/V300 after light path interruption = 20 ms Detection capability (resolution) d of the V200/V300 = 20 mm Note You will find the values for the response time and the resolution of the V200/V300 in chapter 11 “Technical specifications” on page 52. 8012227/YT87/2016-03-29 ©... - Page 22 • Step 5: Check the value of S. S > 500 mm. For this reason 544 mm must be used as the minimum distance. © SICK AG • Industrial Safety Systems • Germany • All rights reserved 8012227/YT87/2016-03-29 Subject to change without notice...
-
Page 23: Minimum Distance If Osha And Ansi Are Applicable
Minimum distance according to ANSI B11.19:2003-0-4, Annex D and Code of Federal Regulations, Volume 29, Part 1910.217 … (h) (9) (v). 8012227/YT87/2016-03-29 © SICK AG • Industrial Safety Systems • Germany • All rights reserved Subject to change without notice... -
Page 24: Avoiding Unmonitored Areas
Avoiding unmonitored areas Provide separate protection for unmonitored areas! During the installation of the V200/V300 safety camera system, incorrect mounting or mutual interference between several systems may result in areas that are not monitored WARNING and through which an operator could reach the hazardous point. - Page 25 Prevent the mutual interference of systems mounted in close proximity! If two V200/V300 are so arranged that they entirely or partially look at the same reflective tape, the two cameras may interfere with each other. This can disrupt the protective WARNING function of the system.
-
Page 26: Steps For Mounting The Safety Camera System
– Affix the information label “Important Information” to the system in close proximity to the safety camera system. © SICK AG • Industrial Safety Systems • Germany • All rights reserved 8012227/YT87/2016-03-29 Subject to change without notice... -
Page 27: Mounting On A Frame
⋅ Align the camera such that the housing markings are aligned with the inside of the frame profile. (The protective field stretches between the housing markings and the ends of the reflective tape.) 8012227/YT87/2016-03-29 © SICK AG • Industrial Safety Systems • Germany • All rights reserved Subject to change without notice... -
Page 28: Mounting In A Frame
Protect unmonitored areas using mechanical guards! ⋅ Take organisational measures to protect the un-monitored areas (see section 4.3 “Avoiding unmonitored areas” on page 24). WARNING © SICK AG • Industrial Safety Systems • Germany • All rights reserved 8012227/YT87/2016-03-29 Subject to change without notice... -
Page 29: Mounting The Reflective Tape
Only the longest contiguous section of the reflective tape is taught-in by the V200/V300. If there are gaps in the reflection, the safety camera system will ignore the shorter section of the reflective tape. Fig. 16: Correct arrangement... - Page 30 ⋅ Press the reflective tape firmly and ensure the edges are firmly sealed. In this way you will prevent dirt and liquids getting under the reflective tape. © SICK AG • Industrial Safety Systems • Germany • All rights reserved 8012227/YT87/2016-03-29...
-
Page 31: Electrical Installation
(EMC) for industrial use (interference suppression class A). When used in residential areas it can cause radio interferences. • To ensure full electromagnetic compatibility (EMC), functional earth (FE) must be connected. 8012227/YT87/2016-03-29 © SICK AG • Industrial Safety Systems • Germany • All rights reserved Subject to change without notice... -
Page 32: System Connection M12 × 8
Suitable power supplies are available as accessories from SICK (see section 12.2 “Accessories” on page 59). System connection M12 × 8 Fig. 20: System connection V200/V300 The V200/V300 has a hard-wired cable (length: approx. 30 cm) with a cable plug M12 × 8. Tab. 10: Pin assignment Colour Signal Function... -
Page 33: Connecting The V200/V300 Without External Device Monitoring (Edm), Without Internal Restart Interlock And Without External Key-Operated Pushbutton For Teach-In
Connecting the V200/V300 without external device monitoring (EDM), without internal restart interlock and without external key-operated pushbutton for teach-in If you use the V200/V300 without the internal restart interlock, then you must implement Note the restart interlock externally, i.e. machine-side. Fig. 21: Connecting the... - Page 34 (see section 8.4 “Locking the internal teach-in key” on page 48). • If you use two V200/V300 in an application, then both systems use the same external key-operated pushbutton for teach-in (see Fig. 23 on page 35).
-
Page 35: Two V200/V300 With Synchronisation
OSSD1 OSSD2 If two V200/V300 are so arranged that they entirely or partially look at the same reflective tape, the two cameras may interfere with each other. To prevent this situation occurring, you must synchronise the two cameras. How to synchronise two V200/V300: ⋅... -
Page 36: Connection Diagrams
I3 I4 A2 Q1 Q2 Q3 Q4 EN Principle of operation When the light path on the V200/V300 is clear and the input conditions on the UE410 are valid, the system is ready for switch on and waits for an input signal/switch on signal. The system’s corresponding logic path is enabled by pressing and releasing the related button... -
Page 37: V200/V300 On Ue10-3Os With External Device Monitoring (Edm) And Internal Restart Interlock
If the light path is clear and there are no errors in the quiescent state of the UE10-3OS, the status LED ∪ ⌠Ε on the V200/V300 flashes (Reset required). The system is ready for switch on and waits for an input signal/switch on signal. The system is enabled by pressing and releasing the button S1. -
Page 38: Application Examples
Application with one V200/V300 If the necessary protective field dimensions can be realised using a single V200/V300, then mount the camera on a corner of the frame or in a corner of the frame. Apply the reflective tape to the opposite sides. -
Page 39: Application With Two V200/V300
V200/V300, or the hazardous point is to be protected in an ergonomic manner, you can mount two V200/V300 in parallel in opposite directions (see Fig. 27) or at the corners (see Fig. 28). In this way you can realise two overlapping protective fields. -
Page 40: Application With Safe Access On Three Sides (Ergonomic Workplace Design)
For this reason mark the contour of the monitored area on the working area if this marking is not already provided by the reflective tape. © SICK AG • Industrial Safety Systems • Germany • All rights reserved 8012227/YT87/2016-03-29 Subject to change without notice... -
Page 41: Application With Automatic Material Transport To The Workstation
Protect the material transport using other measures! The V200/V300 does not monitor the material transportation with this mounting method. WARNING ⋅ Protect the unmonitored areas on both sides of the material transport using mechanical guards. -
Page 42: Commissioning
Commissioning requires a thorough check by qualified safety personnel! Before you operate a system protected by the V200/V300 safety camera system for the first time, make sure that the system is first checked and released by qualified safety WARNING personnel. -
Page 43: Tests Of The Protective Device By A Specialist Or Authorised Personnel
⋅ Check that personnel or body parts can only intrude into the hazardous area through the protective field of the V200/V300 (e.g. if a mechanical guard has been removed). ⋅ Check whether the protective device is effective for the set operating mode. -
Page 44: Configuration
In the default delivery status, these functions are deactivated. • The V200/V300 detects the protective field based on the reflective tape. In the default delivery status, the V200/V300 has no protective field configured. - Page 45 Operating Instructions Chapter 8 V200/V300 The V200/V300 now teaches-in the current configuration and shape of the protective field. The process takes approx. 30 seconds. During the teach-in the flashing diagnostics LEDs indicate the configuration detected: Tab. 12: Meaning of the...
-
Page 46: Internal Restart Interlock
⋅ Check the effectiveness of the protective device as described in section 7.1 “Test notes” on page 42. © SICK AG • Industrial Safety Systems • Germany • All rights reserved 8012227/YT87/2016-03-29 Subject to change without notice... -
Page 47: External Device Monitoring
⋅ Check the effectiveness of the protective device as described in section 7.1 “Test notes” on page 42. 8012227/YT87/2016-03-29 © SICK AG • Industrial Safety Systems • Germany • All rights reserved Subject to change without notice... -
Page 48: Locking The Internal Teach-In Key
⋅ Switch on the V200/V300. ⋅ Perform a teach-in procedure using the key-operated pushbutton for teach-in. The V200/V300 locks the internal teach-in key and saves this configuration in the device. Teach-in can now only be performed using the key-operated pushbutton for teach-in. -
Page 49: Care And Maintenance
Care and maintenance The V200/V300 safety camera system is maintenance-free in operation. The front screen on the V200/V300 as well as the reflective tape should be cleaned regularly and also cleaned immediately in case of soiling. ⋅ Do not use aggressive cleaning agents. -
Page 50: Fault Diagnosis
To place the device back in operation: ⋅ Rectify the cause of the fault following the information given in this chapter. ⋅ Switch the power supply for the V200/V300 off and on again (e.g. by unplugging the system plug and reinserting it). -
Page 51: Warnings And Error Messages Of The Leds
The procedure for troubleshooting varies for warnings ⌠Ι and errors ⌠ϑ only in the last step: If there is an error, you must re-start the V200/V300 after rectification. Status LEDs Diagnostics LEDs... -
Page 52: Technical Specifications
Shock resistance 10 g, 16 ms (EN 60 068-2-27) For detailed information on the safety design of your machine/system, please contact your local SICK representative. For V200 Work Station Extended the following applies: Between two demands for a safety-related reaction from the device, at least 100 internal or external tests must be performed. - Page 53 (SELV) must be able to bridge a brief mains failure of 20 ms. Power supplies according to EN 60 204-1 satisfy this requirement. Suitable power supplies are available as accessories from SICK (see section 12.2 “Accessories” on page 59).
- Page 54 Resistance HIGH 2 kΩ Capacitance 15 nF Voltage HIGH 11 V 24 V 30 V Static current 6 mA 15 mA © SICK AG • Industrial Safety Systems • Germany • All rights reserved 8012227/YT87/2016-03-29 Subject to change without notice...
- Page 55 When active, the outputs are tested cyclically (brief LOW). When selecting the downstream controllers, make sure that the test pulses do not result in deactivation when using the above parameters. 8012227/YT87/2016-03-29 © SICK AG • Industrial Safety Systems • Germany • All rights reserved Subject to change without notice...
-
Page 56: Dimensional Drawings
11.2 Dimensional drawings 11.2.1 Dimensional drawing V200/V300 Fig. 31: Dimensional drawing 93.9 V200/V300 (mm) 62.8 45° Cable plug M12 × 8 11.9 26.9 © SICK AG • Industrial Safety Systems • Germany • All rights reserved 8012227/YT87/2016-03-29 Subject to change without notice... -
Page 57: Dimensional Drawing, Mounting Kit
Dimensional drawing, mounting kit Fig. 32: Dimensional drawing, mounting kit (mm) 1 × 45° ⊕17 0.8 × 45° Part number 2045375 8012227/YT87/2016-03-29 © SICK AG • Industrial Safety Systems • Germany • All rights reserved Subject to change without notice... -
Page 58: Ordering Information
Resolution set for 30 mm resolution 2051339 Ordering example A V300 is to be used in your application with a resolution of 20 mm. Then you must order the following: 1041542 • V300 Work Station Extended (Cat. 3, PL d according to EN ISO 13 849-1) •... -
Page 59: Accessories
Printed operating instructions, format DIN A4, in the language … German 8012226 English 8012227 French 8012228 Italian 8012229 Spanish 8012230 Japanese 8012453 8012227/YT87/2016-03-29 © SICK AG • Industrial Safety Systems • Germany • All rights reserved Subject to change without notice... -
Page 60: Annex
Complete EU declaration of conformity for download: www.sick.com © SICK AG • Industrial Safety Systems • Germany • All rights reserved 8012227/YT87/2016-03-29 Subject to change without notice... -
Page 61: Checklist For The Manufacturer
18. Has the information label for the daily check been attached so that it is easily visible for the operator? This checklist does not replace the initial commissioning, nor the regular inspection by qualified safety personnel. 8012227/YT87/2016-03-29 © SICK AG • Industrial Safety Systems • Germany • All rights reserved Subject to change without notice... -
Page 62: List Of Tables
Example: mounting with sliding nuts on different thickness profiles ....27 Fig. 14: Example: mounting with clamping lugs on different thickness profiles....27 Fig. 15: Mounting in a frame................... 28 © SICK AG • Industrial Safety Systems • Germany • All rights reserved 8012227/YT87/2016-03-29 Subject to change without notice... - Page 63 Daily test of the protective device with the test rod..........43 Fig. 31: Dimensional drawing V200/V300 (mm).............56 Fig. 32: Dimensional drawing, mounting kit (mm) ............57 8012227/YT87/2016-03-29 © SICK AG • Industrial Safety Systems • Germany • All rights reserved Subject to change without notice...
- Page 64 Phone +386 (0)1-47 69 990 E-Mail ghk@sick.com.hk E-Mail office@sick.si Hungary South Africa Phone +36 1 371 2680 Phone +27 11 472 3733 More representatives and agencies E-Mail office@sick.hu E-Mail info@sickautomation.co.za at www.sick.com SICK AG | Waldkirch | Germany | www.sick.com...
Need help?
Do you have a question about the V200 and is the answer not in the manual?
Questions and answers