Table of Contents
Advertisement
Quick Links
Advertisement
Chapters
Table of Contents

Related Manuals for SICK ICR880 Generation 3


Summary of Contents for SICK ICR880 Generation 3
- Page 1 O P E R A T I N G I N S T R U C T I O N S ICR880/890 Generation 3 Camera systems...
- Page 2 The German version 8 011 324/ZKW6 of this document is an original document of SICK AG. SICK AG does not assume liability for the correctness of a non-authorized translation. In case of doubt, contact SICK AG or your local dealer.
-
Page 3: Table Of Contents
Placement on the conveyor system ........38 Mounting and adjustment ..............40 8011325/18IM/2020-07-02|SICK O P E R A T I N G I N S T R U C T I O N S | ICR880/890 Subject to change without notice... - Page 4 Maintaining the cleaning unit fan .......... 83 Replacing a camera system or component .......... 84 O P E R A T I N G I N S T R U C T I O N S | ICR880/890 8011325/18IM/2020-07-02|SICK Subject to change without notice...
- Page 5 8.2.2 System information ..............94 8.2.3 Status log ................. 94 SICK Support ..................95 Technical data..................... 96 Data sheet for ICD880/ICD890 camera ..........96 Data sheet for the ICI890-0x / ICI890-1x illumination unit ....98 Data sheet for ICI890-2x / ICI890-3x / ICI890-4x illumination unit . 100 Deflector mirror data sheet ..............
-
Page 6: About These Operating Instructions
• Technical data and dimensional drawings Description of software status Software/Tool Function Status ICR880/890 system SICK firmware From V. 3.x SOPAS-ET*) Configuration software (Windows-based) From V. 2.38 *) Can run on a PC with a WindowsTM operating system Tab. 1:... -
Page 7: Target Group
The official and legal regulations for operating the camera systems must be observed. Additional information on the camera systems, volume measurement systems and 1D/ 2D code readers is available from SICK AG online at www.sick.com. 8011325/18IM/2020-07-02|SICK O P E R A T I N G I N S T R U C T I O N S | ICR880/890... -
Page 8: Abbreviations Used
Read-only memory (read-only, nonvolatile memory) Secure digital card (digital, replaceable memory card) Sensor Integration Cabinet (SIC2000) SICK Open Portal for Application and Systems Engineering Tool (PC software for Windows SOPAS-ET for configuration of the ICR880/890 system and the controller unit) - Page 9 Illumination MSC800 modular system controller Controller unit SIC2000 Sensor Integration Cabinet SICK Open Portal for Application and SOPAS-ET configuration software Systems Engineering Tool 1D codes generally designate bar codes, also referred to as “linear codes”. 2D codes generally designate stacked codes and matrix codes.
-
Page 10: Symbols Used
Information relating to the SOPAS-ET configuration software is indicated by the program symbol. This symbol refers to supplementary technical documentation. O P E R A T I N G I N S T R U C T I O N S | ICR880/890 8011325/18IM/2020-07-02|SICK Subject to change without notice... -
Page 11: Safety
(e.g., conveying line) Tab. 3: Qualified safety personnel 8011325/18IM/2020-07-02|SICK O P E R A T I N G I N S T R U C T I O N S | ICR880/890 Subject to change without notice... -
Page 12: Intended Use
Note camera or the illumination unit, even as part of the mounting or electrical installation process, or any other usage of or modification to SICK software, any claims against SICK AG under the warranty will be rendered void. However, in order to quickly replace devices, the system components of the camera and illumination unit can be separated from one another. -
Page 13: General Safety Notes And Protective Measures
Denotes a potential risk of damage or functional impairment of the device or the devices connected to it. 8011325/18IM/2020-07-02|SICK O P E R A T I N G I N S T R U C T I O N S | ICR880/890... -
Page 14: General Safety Notes
• Maintenance and repair work must only be done by trained and authorized SICK AG service technicians or qualified safety personnel of the customer. WARNING The device is not a safety device for human protection and therefore does not fulfill any safety standards. -
Page 15: Potential Sources Of Danger
▸ Report any damaged cables to the maintenance team without delay. 8011325/18IM/2020-07-02|SICK O P E R A T I N G I N S T R U C T I O N S | ICR880/890 Subject to change without notice... -
Page 16: Fig. 1: Led Light Beams From The Illumination Unit
The entire window area of the front screen is the outlet opening of the LED light beam. Fig. 1: LED light beams from the illumination unit O P E R A T I N G I N S T R U C T I O N S | ICR880/890 8011325/18IM/2020-07-02|SICK Subject to change without notice... - Page 17 • The illumination timeout can either be set or switched off in the range of 3 s ... 25 h. For safety reasons, the maximum switch-on time of the illumination is 3 seconds. 8011325/18IM/2020-07-02|SICK O P E R A T I N G I N S T R U C T I O N S | ICR880/890...
- Page 18 Do not open the device housing. If the device is opened, any warranty claims against SICK AG will be void. O P E R A T I N G I N S T R U C T I O N S | ICR880/890...
-
Page 19: Fig. 2: Position Of The Optional Usb Connection On The Side Of The Camera
In read mode, the cover of the USB connection must be screwed down when operating the camera in order to comply with the EMC concept. 8011325/18IM/2020-07-02|SICK O P E R A T I N G I N S T R U C T I O N S | ICR880/890... -
Page 20: Protecting The Environment
Always act in an environmentally responsible manner at work. For this reason, please note the following information regarding disposal. Disposal after final decommissioning SICK AG does not take back devices that are unusable or irreparable. ▸ Always dispose of unusable or irreparable devices in an environmentally safe manner in accordance with the relevant national waste disposal regulations. -
Page 21: Product Description
For additional information on the controller unit, please see the relevant operating instructions for the MSC800 or SIC2000. 8011325/18IM/2020-07-02|SICK O P E R A T I N G I N S T R U C T I O N S | ICR880/890... -
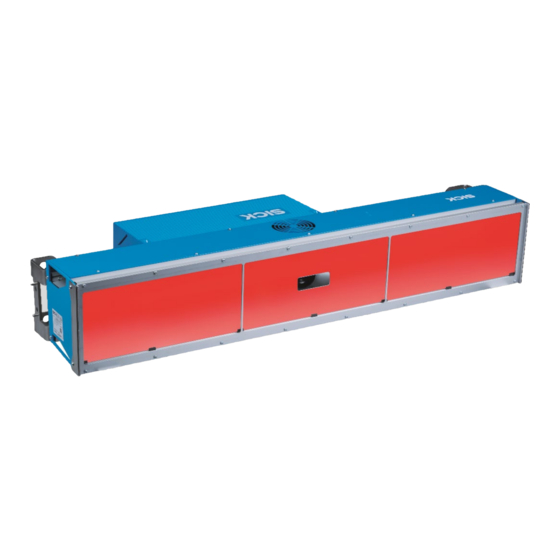
Page 22: Device View
Electrical connections of the ICD880/890 camera Bracket for mounting bracket (2 x) O P E R A T I N G I N S T R U C T I O N S | ICR880/890 8011325/18IM/2020-07-02|SICK Subject to change without notice... -
Page 23: Fig. 7: View Of Camera (From Below)
View of ICD890-xxxxxxxS03 camera (from below) Meaning Gbit connections with M12 plug connectors (3 x) 8011325/18IM/2020-07-02|SICK O P E R A T I N G I N S T R U C T I O N S | ICR880/890 Subject to change without notice... -
Page 24: Scope Of Delivery
Optional (application-specific) Tab. 5: Components for integrating the ICR880/890 camera system Only use memory cards approved by SICK to ensure the reliable functioning of the Note SD memory card. O P E R A T I N G I N S T R U C T I O N S | ICR880/890... -
Page 25: Device Types
Available device types of the camera are listed on the online product page. Associated illumination units (ICI890-0x, ICI890-1x, ICI890-2x, ICI890-3x, ICI890-4x) are listed on the product page in the accessories area: • www.sick.com/ICD88x • www.sick.com/ICD89x When combined, the following camera systems are available:... -
Page 26: System Requirements
Simple mounting of the camera system on the mounting frame (example) O P E R A T I N G I N S T R U C T I O N S | ICR880/890 8011325/18IM/2020-07-02|SICK Subject to change without notice... -
Page 27: Electrical Installation Requirements
• Required maintenance or service work indicated via LED and system notification • Camera or illumination unit can be individually replaced within ten minutes 8011325/18IM/2020-07-02|SICK O P E R A T I N G I N S T R U C T I O N S | ICR880/890... - Page 28 • Gbit Ethernet: industrial-standard M12 plug connectors (only for ICD890-xxxxxxxS03) • Voltage supply: Harting plug connectors O P E R A T I N G I N S T R U C T I O N S | ICR880/890 8011325/18IM/2020-07-02|SICK Subject to change without notice...
-
Page 29: Operating Principle Of The Reading System
Fig. 11: Function of external sensors (read cycle, object distance, and conveyor speed) 8011325/18IM/2020-07-02|SICK O P E R A T I N G I N S T R U C T I O N S | ICR880/890... -
Page 30: Reading Configuration
Fig. 12: Diagram of illumination unit with illumination area O P E R A T I N G I N S T R U C T I O N S | ICR880/890 8011325/18IM/2020-07-02|SICK Subject to change without notice... -
Page 31: Position And Alignment
The conveyor speed is derived from the number of pulses and the resolution of the external incremental encoder. 8011325/18IM/2020-07-02|SICK O P E R A T I N G I N S T R U C T I O N S | ICR880/890... -
Page 32: Image Request
Ethernet network. O P E R A T I N G I N S T R U C T I O N S | ICR880/890 8011325/18IM/2020-07-02|SICK Subject to change without notice... -
Page 33: Data Interfaces
You can learn how to connect to SOPAS-ET and configure the camera system in chapter 6 Commissioning and configuration). 8011325/18IM/2020-07-02|SICK O P E R A T I N G I N S T R U C T I O N S | ICR880/890 Subject to change without notice... -
Page 34: Operating Elements And Displays
Removed cover SD memory card Slot for the SD memory card O P E R A T I N G I N S T R U C T I O N S | ICR880/890 8011325/18IM/2020-07-02|SICK Subject to change without notice... -
Page 35: Camera Leds
Lights up permanently when the camera has detected the SD card. Tab. 9: Meaning of the LEDs 8011325/18IM/2020-07-02|SICK O P E R A T I N G I N S T R U C T I O N S | ICR880/890 Subject to change without notice... -
Page 36: Mounting
NOTE Claims under the warranty rendered void Do not open the housing of the camera or illumination unit. If the device is opened, any warranty claims against SICK AG will be void. Preparing for the mounting procedure 4.2.1 Getting the components and accessories ready... -
Page 37: Tools And Auxiliary Equipment
Terminal compartment required: L x W x H: 496 mm x 250 mm x 210 mm 8011325/18IM/2020-07-02|SICK O P E R A T I N G I N S T R U C T I O N S | ICR880/890... -
Page 38: Placement On The Conveyor System
O P E R A T I N G I N S T R U C T I O N S | ICR880/890 8011325/18IM/2020-07-02|SICK Subject to change without notice... -
Page 39: Fig. 21: Underside Reading: Placement Of The Camera System Underneath The Conveyor
Fig. 22: Cleaning unit for underside reading Meaning Vent duct with end-to-end vent slot Pipe 8011325/18IM/2020-07-02|SICK O P E R A T I N G I N S T R U C T I O N S | ICR880/890 Subject to change without notice... -
Page 40: Mounting And Adjustment
Distance from the illumination unit and camera to the deflector mirror Illumination unit with camera O P E R A T I N G I N S T R U C T I O N S | ICR880/890 8011325/18IM/2020-07-02|SICK Subject to change without notice... -
Page 41: Mounting Brackets
It is advisable to secure the clamping screws opposite to each other (offset by 180°). 8011325/18IM/2020-07-02|SICK O P E R A T I N G I N S T R U C T I O N S | ICR880/890... -
Page 42: Mounting The Deflector Mirror
2. Secure the deflector mirror to both 180° mounting brackets using two fixing screws each. Fig. 27: Mounting the deflector mirror: inserting the deflector mirror O P E R A T I N G I N S T R U C T I O N S | ICR880/890 8011325/18IM/2020-07-02|SICK Subject to change without notice... -
Page 43: Mounting The Camera System
Ask a second person to hold the components during mounting. Wear safety shoes. 8011325/18IM/2020-07-02|SICK O P E R A T I N G I N S T R U C T I O N S | ICR880/890 Subject to change without notice... -
Page 44: Fig. 29: Mounting The Camera System: Securing The 180° Mounting Bracket
2. Secure the illumination unit to the two 180° brackets using two fixing screws in each case. Fig. 31: Mounting the camera system: securing the illumination unit O P E R A T I N G I N S T R U C T I O N S | ICR880/890 8011325/18IM/2020-07-02|SICK Subject to change without notice... -
Page 45: Fig. 32: Mounting The Camera System: Inserting The Camera
0°, i.e., parallel to the conveyor. 3. Tighten the clamping screws. 8011325/18IM/2020-07-02|SICK O P E R A T I N G I N S T R U C T I O N S | ICR880/890 Subject to change without notice... -
Page 46: Dismantling
Follow the instructions in chapter 7.3 Disposal for environmentally friendly disposal on final decommissioning. O P E R A T I N G I N S T R U C T I O N S | ICR880/890 8011325/18IM/2020-07-02|SICK Subject to change without notice... -
Page 47: Electrical Installation
You can find detailed information about the connections on the controller unit in the operating instructions for the MSC800 and SIC2000. 8011325/18IM/2020-07-02|SICK O P E R A T I N G I N S T R U C T I O N S | ICR880/890... -
Page 48: Connecting Several Camera Systems To A Controller Unit
Server for image representation (optional) Tab. 11: Connection principle of several camera systems (multi-side reading) O P E R A T I N G I N S T R U C T I O N S | ICR880/890 8011325/18IM/2020-07-02|SICK Subject to change without notice... -
Page 49: Connecting Several Camera Systems In Line Topology
Server for image representation (optional) Tab. 12: Connection principle of several camera systems (multi-side reading) 8011325/18IM/2020-07-02|SICK O P E R A T I N G I N S T R U C T I O N S | ICR880/890 Subject to change without notice... -
Page 50: Electrical Connections And Cables
Fig. 37: Camera – position of the electrical connections (standard system) O P E R A T I N G I N S T R U C T I O N S | ICR880/890 8011325/18IM/2020-07-02|SICK Subject to change without notice... -
Page 51: Fig. 38: Camera - Icd890-Xxxxxxxs03 Electrical Connections
SOPAS-ET via Ethernet GBIT 3 ETHERNET Image data output, channel 1 and 3 8011325/18IM/2020-07-02|SICK O P E R A T I N G I N S T R U C T I O N S | ICR880/890 Subject to change without notice... -
Page 52: Electrical Connections On The Ici890 Illumination Unit
8-pin M12 female Open IP 65 (RS-232, TPU/PUR outer sheath connector RS-422/485) O P E R A T I N G I N S T R U C T I O N S | ICR880/890 8011325/18IM/2020-07-02|SICK Subject to change without notice... - Page 53 8-pin M12 female RJ-45 male Ethernet, CAT6 connector connector ICR to controller unit 8011325/18IM/2020-07-02|SICK O P E R A T I N G I N S T R U C T I O N S | ICR880/890 Subject to change without notice...
- Page 54 5.3.9 Pin assignment of wire colors of assembled cables with open end. see chapter O P E R A T I N G I N S T R U C T I O N S | ICR880/890 8011325/18IM/2020-07-02|SICK Subject to change without notice...
-
Page 55: Performing The Electrical Installation
Connect the M12 connection of the ICI890-xxx1x illumination to the Harting HanQ connection of the camera via an adapter (part number: 2098253). 8011325/18IM/2020-07-02|SICK O P E R A T I N G I N S T R U C T I O N S | ICR880/890... - Page 56 2. Push the other end of the cable onto the corresponding 8-pin M12 male connector for the illumination unit and secure the plug connector. O P E R A T I N G I N S T R U C T I O N S | ICR880/890 8011325/18IM/2020-07-02|SICK Subject to change without notice...
-
Page 57: Connecting The Camera System To The Controller Unit's Voltage Supply
Note The supply voltage remains switched off for further installation work. 8011325/18IM/2020-07-02|SICK O P E R A T I N G I N S T R U C T I O N S | ICR880/890 Subject to change without notice... -
Page 58: Aux" Data Interface
5.3.9 Pin assignment of wire colors of assembled cables with open end. O P E R A T I N G I N S T R U C T I O N S | ICR880/890 8011325/18IM/2020-07-02|SICK Subject to change without notice... -
Page 59: Can 1-In"/"Can 1-Out" Data Interface
“CAN 1-IN”/“CAN 1-OUT” data interface General requirements of the CAN interface The SICK-specific CAN-SENSOR network is based on the CAN bus. It is set up in line topology. The following table shows the maximum permitted length of the CAN bus depending on the data transmission rate selected. -
Page 60: Fig. 42: Wiring The "Can 1-In"/"Can 1-Out" Data Interface
The signals for the read cycle and increment are transmitted by the controller unit to the Note connected sensors via the CAN bus. O P E R A T I N G I N S T R U C T I O N S | ICR880/890 8011325/18IM/2020-07-02|SICK Subject to change without notice... -
Page 61: Wiring The "Host Ethernet" Ethernet Interface
• To connect the camera systems to one another in line topology, a cable with two M12 plug connectors is used. 8011325/18IM/2020-07-02|SICK O P E R A T I N G I N S T R U C T I O N S | ICR880/890... -
Page 62: Special Devices: Connecting A Dongle
If the dongle is removed from the camera when the power is off, the status symbol is grayed out the next time it is booted up. O P E R A T I N G I N S T R U C T I O N S | ICR880/890 8011325/18IM/2020-07-02|SICK Subject to change without notice... -
Page 63: Pin Assignment Of The Connecting Cables
Shielding Tab. 26: Pin assignment of the 8-pin M12 “AUX” (A-coded) male connector 8011325/18IM/2020-07-02|SICK O P E R A T I N G I N S T R U C T I O N S | ICR880/890 Subject to change without notice... -
Page 64: Pin Assignment Of Wire Colors Of Assembled Cables With Open End
Shield Tab. 30: Wire colors of cable for “AUX” connection (standard) O P E R A T I N G I N S T R U C T I O N S | ICR880/890 8011325/18IM/2020-07-02|SICK Subject to change without notice... - Page 65 Green-yellow Tab. 33: Wire colors of cable for “POWER IN” connection (ICI890-3xxxxxx) 8011325/18IM/2020-07-02|SICK O P E R A T I N G I N S T R U C T I O N S | ICR880/890 Subject to change without notice...
-
Page 66: Commissioning And Configuration
The Device Ready LED on the camera system lights up green after the self-test. Fig. 46: Checking the operational readiness O P E R A T I N G I N S T R U C T I O N S | ICR880/890 8011325/18IM/2020-07-02|SICK Subject to change without notice... -
Page 67: Connecting The Configuration Pc
▸ If not, change the IP address of the configuration PC accordingly. 8011325/18IM/2020-07-02|SICK O P E R A T I N G I N S T R U C T I O N S | ICR880/890 Subject to change without notice... -
Page 68: Installing Sopas-Et
COMMISSIONING AND CONFIGURATION 6.2.2 Installing SOPAS-ET Install the latest version of the configuration software from the SICK homepage on the configuration PC. 1. Open the www.sick.com website in the browser. 2. Enter SOPAS-ET in the search field and start the search. -
Page 69: Starting Sopas-Et
2. Select the Device family oriented search option and click Next to confirm. 8011325/18IM/2020-07-02|SICK O P E R A T I N G I N S T R U C T I O N S | ICR880/890... - Page 70 5. Confirm the following pages of the wizard by pressing Next each time and click Complete to finish configuring the search settings. O P E R A T I N G I N S T R U C T I O N S | ICR880/890 8011325/18IM/2020-07-02|SICK Subject to change without notice...
-
Page 71: Transferring The Camera System To A Sopas Project
If the number ranges for the configuration PC and the camera system correspond, then the camera systems are detected and displayed in the device list on the right-hand side. The camera systems use two ports (like all SICK devices). Ports are part of the network Note address and can be used to establish various connections between the devices. -
Page 72: Loading Device Drivers Into The Sopas Project
PC but is not yet connected to the system, meaning that it is still offline. O P E R A T I N G I N S T R U C T I O N S | ICR880/890 8011325/18IM/2020-07-02|SICK Subject to change without notice... -
Page 73: Changing The Ip Address
SOPAS project by clicking Add. The transferred camera system is displayed in the left-hand window as a tile. 8011325/18IM/2020-07-02|SICK O P E R A T I N G I N S T R U C T I O N S | ICR880/890... -
Page 74: Setting The Camera System To Online
The standard parameters are transferred from the camera system into the SOPAS project. Online appears in the tile. The LED lights up green. O P E R A T I N G I N S T R U C T I O N S | ICR880/890 8011325/18IM/2020-07-02|SICK Subject to change without notice... -
Page 75: Configuring The Camera System In Sopas-Et
The parameters that were previously shown grayed out in the windows are now accessible. 8011325/18IM/2020-07-02|SICK O P E R A T I N G I N S T R U C T I O N S | ICR880/890 Subject to change without notice... -
Page 76: Configuring The Parameters
O P E R A T I N G I N S T R U C T I O N S | ICR880/890 8011325/18IM/2020-07-02|SICK Subject to change without notice... -
Page 77: Saving The Parameters Permanently
In order to save the current parameter set as a PDF, go to the Device menu bar and select the Print/Save as PDF file command. 8011325/18IM/2020-07-02|SICK O P E R A T I N G I N S T R U C T I O N S | ICR880/890... -
Page 78: Restoring The Default
1. In the menu bar under ICR8xx, select the Parameter Load factory default command. 2. Press Yes to confirm the prompt. O P E R A T I N G I N S T R U C T I O N S | ICR880/890 8011325/18IM/2020-07-02|SICK Subject to change without notice... -
Page 79: Maintenance And Care
Claims under the warranty rendered void Do not open the device housing. If the device is opened, any warranty claims against SICK AG will be void. Checking the incremental encoder When using an incremental encoder, the position of the friction gear on the drive technology must be checked regularly. - Page 80 Do not use abrasive cleaning agents. ▸ Avoid scratching and chafing motion on the front screen. O P E R A T I N G I N S T R U C T I O N S | ICR880/890 8011325/18IM/2020-07-02|SICK Subject to change without notice...
-
Page 81: Cleaning The Air Inlets And Outlets
Clean the front screen. Static charges cause dust particles to stick to the front screen. Recommendation You can reduce this effect by using a SICK anti-static plastic cleaner and a SICK lens cloth. ▸ Switch off the device during cleaning. -
Page 82: Cleaning The Deflector Mirror
Only touch the reflector surface when this is absolutely necessary, and only partially, if possible. ▸ Do not use already-used lens cloths to clean the deflector mirror. We recommend using the SICK lens cloth (part number 4003353) or a camel-hair brush. Recommendation NOTE Damage to the optical effective area of the deflector mirror Using the wrong cleaning technique or aggressive cleaning agents can damage the deflector mirror, thus impairing the reading performance of the camera system. -
Page 83: Maintaining The Cleaning Unit Fan
3. Remove the air filter mat and replace it. 4. Mount the air mesh and tighten the wing bolt. 8011325/18IM/2020-07-02|SICK O P E R A T I N G I N S T R U C T I O N S | ICR880/890... -
Page 84: Replacing A Camera System Or Component
NOTE Claims under the warranty rendered void Do not open the device housing. The devices are sealed. If the device is opened, any warranty claims against SICK AG will be void. 7.2.1.1 Replacing camera system components Faulty or damaged components of the camera system must be dismantled and replaced with new components or components repaired by SICK. -
Page 85: Fig. 51: Camera System Replacement - Removing Connecting Cables On The Camera System
Fig. 53: Camera system replacement – removing the camera from the illumination unit 8011325/18IM/2020-07-02|SICK O P E R A T I N G I N S T R U C T I O N S | ICR880/890... -
Page 86: Fig. 54: Camera System Replacement - Pulling The Illumination Unit From The 180° Mounting Brackets
2. Place the memory card into the empty opening of the replacement device and close the opening with the cover. O P E R A T I N G I N S T R U C T I O N S | ICR880/890 8011325/18IM/2020-07-02|SICK Subject to change without notice... -
Page 87: Fig. 56: Camera System Replacement - Assembling Components Following Component Replacement
After initialization of the parameter set saved on the SD memory card, the camera system adopts this set in the permanent device memory. 8011325/18IM/2020-07-02|SICK O P E R A T I N G I N S T R U C T I O N S | ICR880/890... -
Page 88: Fig. 58: Replacing The Deflector Mirror - Loosening The Clamping Screws
Fig. 59: Replacing the deflector mirror – removing the mirror from the bracket 5. Remove the deflector mirror from the 180° mounting brackets. O P E R A T I N G I N S T R U C T I O N S | ICR880/890 8011325/18IM/2020-07-02|SICK Subject to change without notice... -
Page 89: Fig. 60: Replacing The Deflector Mirror (Underneath The Conveyor) - Components
Fig. 60: Replacing the deflector mirror (underneath the conveyor) – components Meaning Base support Mirror holder 8011325/18IM/2020-07-02|SICK O P E R A T I N G I N S T R U C T I O N S | ICR880/890 Subject to change without notice... -
Page 90: Fig. 61: Replacing The Deflector Mirror (Underneath The Conveyor) - Unlocking The Mirror
Fig. 62: Replacing the deflector mirror (underneath the conveyor) – removing the mirror O P E R A T I N G I N S T R U C T I O N S | ICR880/890 8011325/18IM/2020-07-02|SICK Subject to change without notice... -
Page 91: Fig. 63: Replacing The Cleaning Unit Fan
4. Plug the connecting cable into the female connector of the cable connection and screw the M12 plug connector into place. 8011325/18IM/2020-07-02|SICK O P E R A T I N G I N S T R U C T I O N S | ICR880/890... -
Page 92: Disposal
Unusable or irreparable devices must be dismantled and disposed of in an environ- mentally safe manner in accordance with the relevant national waste disposal regulations. SICK AG is not currently able to take back devices that are irreparable or can no longer be used. -
Page 93: Troubleshooting
The LED display can indicate possible errors or faults. Further information on this can be found in the “System information” section. 8011325/18IM/2020-07-02|SICK O P E R A T I N G I N S T R U C T I O N S | ICR880/890... -
Page 94: System Information
ICR8xx Service System Status. Note Please contact SICK Support for a more detailed analysis of the fault situation. O P E R A T I N G I N S T R U C T I O N S | ICR880/890... -
Page 95: Sick Support
Where a fault cannot be rectified, please contact the SICK Service department: • In Germany: technical hotline for SICK Vertriebs-GmbH Tel. +49 211 5301 301, fax. + 49 211 5301 302, e-mail: kundenservice@sick.de. • Abroad: responsible SICK branch or SICK subsidiary. -
Page 96: Technical Data
Read cycle Via MSC800 Tab. 34: Technical specifications for the ICD880/ICD890 camera O P E R A T I N G I N S T R U C T I O N S | ICR880/890 8011325/18IM/2020-07-02|SICK Subject to change without notice... - Page 97 2) Including decoder Tab. 35: Technical specifications for the ICD880/ICD890 camera (continued) 8011325/18IM/2020-07-02|SICK O P E R A T I N G I N S T R U C T I O N S | ICR880/890 Subject to change without notice...
-
Page 98: Data Sheet For The Ici890-0X / Ici890-1X Illumination Unit
See 9.6 Dimensional drawing of the ICR880/890 camera systems Weight Approx. 23.5 kg Approx. 19 kg Approx. 15 kg O P E R A T I N G I N S T R U C T I O N S | ICR880/890 8011325/18IM/2020-07-02|SICK Subject to change without notice... -
Page 99: Technical Specifications For Ici890-0X/Ici890-1X Illumination Units
3) In the case of an ambient temperature of 20 °C Tab. 36: Technical specifications for ICI890-0x/ICI890-1x illumination units 8011325/18IM/2020-07-02|SICK O P E R A T I N G I N S T R U C T I O N S | ICR880/890... -
Page 100: Data Sheet For Ici890-2X / Ici890-3X / Ici890-4X Illumination Unit
In accordance with IEC 68-2-27: 2008-02, equivalent to EN 60068-2-27: 2009 O P E R A T I N G I N S T R U C T I O N S | ICR880/890 8011325/18IM/2020-07-02|SICK Subject to change without notice... -
Page 101: Deflector Mirror Data Sheet
Light blue (RAL 5012) Tab. 38: Technical specifications for deflector mirror 8011325/18IM/2020-07-02|SICK O P E R A T I N G I N S T R U C T I O N S | ICR880/890 Subject to change without notice... -
Page 102: Specifications Diagrams
750 mm) reaches a reading field height of ±300 mm and therefore covers a conveyor track width of 600 mm. O P E R A T I N G I N S T R U C T I O N S | ICR880/890 8011325/18IM/2020-07-02|SICK Subject to change without notice... -
Page 103: Fig. 65: Reading Ranges Of The Camera System 2: Icd890 Camera With Ici890- X1Xxx / Ici890-X4Xxx Illumination Unit
Fig. 66: Reading ranges of the camera system 3: ICD890 with ICI890-x0xxx / ICI890-x3xxx illumination unit 8011325/18IM/2020-07-02|SICK O P E R A T I N G I N S T R U C T I O N S | ICR880/890... -
Page 104: Dimensional Drawing Of The Icr880/890 Camera Systems
Dimensional drawing of the ICR880/890 camera systems Fig. 67: Dimensions of the ICR880/890 camera system O P E R A T I N G I N S T R U C T I O N S | ICR880/890 8011325/18IM/2020-07-02|SICK Subject to change without notice... -
Page 105: Fig. 68: Overall Dimensions Of The Icr880/890 Camera System And Required Terminal Compartment
TECHNICAL DATA Fig. 68: Overall dimensions of the ICR880/890 camera system and required terminal compartment 8011325/18IM/2020-07-02|SICK O P E R A T I N G I N S T R U C T I O N S | ICR880/890 Subject to change without notice... -
Page 106: Dimensional Drawing Of The Deflector Mirror
Dimensional drawing of the deflector mirror Fig. 69: Dimensional drawing of the deflector mirror O P E R A T I N G I N S T R U C T I O N S | ICR880/890 8011325/18IM/2020-07-02|SICK Subject to change without notice... -
Page 107: Fig. 70: Dimensional Drawings Of The Mirror Module Mounted Underneath The Conveyor
Dimensional drawings of the mirror module mounted underneath the conveyor Fig. 70: Dimensional drawings of the mirror module mounted underneath the conveyor 8011325/18IM/2020-07-02|SICK O P E R A T I N G I N S T R U C T I O N S | ICR880/890... -
Page 108: Fig. 71: Dimensional Drawing Of The Base Support (Mirror Module Mounted Underneath The Conveyor)
Fig. 71: Dimensional drawing of the base support (mirror module mounted underneath the conveyor) O P E R A T I N G I N S T R U C T I O N S | ICR880/890 8011325/18IM/2020-07-02|SICK Subject to change without notice... -
Page 109: Compliance With Eu Directives
You can call up the EU declaration of conformity and the current operating instructions for the protective device by entering the item number in the search field at www.sick.com (part number: see the type label entry in the Ident. no. field). -
Page 110: Figures And Tables
Wire colors of cable for “POWER IN” connection (standard) ....65 O P E R A T I N G I N S T R U C T I O N S | ICR880/890 8011325/18IM/2020-07-02|SICK Subject to change without notice... - Page 111 Technical specifications for deflector mirror ........101 Tab. 39: Reading conditions for specifications programs ........102 8011325/18IM/2020-07-02|SICK O P E R A T I N G I N S T R U C T I O N S | ICR880/890 Subject to change without notice...
-
Page 112: List Of Figures
Fig. 35: Connection principle of several camera systems (multi-side reading) . 48 O P E R A T I N G I N S T R U C T I O N S | ICR880/890 8011325/18IM/2020-07-02|SICK Subject to change without notice... - Page 113 Reading ranges of the camera system 3: ICD890 with ICI890-x0xxx / ICI890-x3xxx illumination unit ............... 103 8011325/18IM/2020-07-02|SICK O P E R A T I N G I N S T R U C T I O N S | ICR880/890...
- Page 114 Dimensional drawing of the base support (mirror module mounted underneath the conveyor) ..............108 O P E R A T I N G I N S T R U C T I O N S | ICR880/890 8011325/18IM/2020-07-02|SICK Subject to change without notice...
- Page 115 Phone +386 591 78849 Hungary South Africa Phone +36 1 371 2680 Phone +27 10 060 0550 India South Korea Phone +91-22-6119 8900 Phone +82 2 786 6321/4 Further locations at www.sick.com SICK AG | Waldkirch | Germany | www.sick.com...
Need help?
Do you have a question about the ICR880 Generation 3 and is the answer not in the manual?
Questions and answers