Table of Contents
Advertisement
Quick Links
•
480 and 550 TV Line versions
•
True Day/Night function available
•
Flush or Surface Mount
•
UTP interface, IP Integration, and Heater / Blower Options
Available
•
Dual Voltage 12VDC & 24VAC
•
Infinity Ball Mount for Any Viewing Angle
•
Indoor and Vandal Proof IP 68 Rated Models Available
•
Lens options include: 2.9-10mm & 9-22mm
•
Available in off white or black color
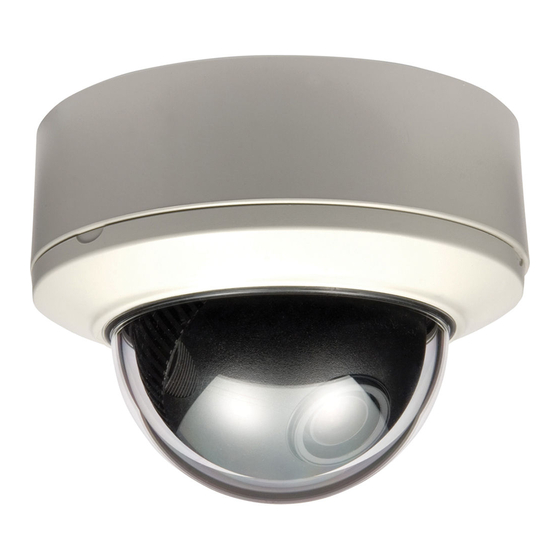
Mighty Dome
Color Dome Camera Series
Advertisement
Table of Contents

Related Manuals for Vitek MIGHTY DOME


Summary of Contents for Vitek MIGHTY DOME
- Page 1 Mighty Dome Color Dome Camera Series • 480 and 550 TV Line versions • True Day/Night function available • Flush or Surface Mount • UTP interface, IP Integration, and Heater / Blower Options Available • Dual Voltage 12VDC & 24VAC •...
-
Page 2: Box Contents
BOX CONTENTS 1) Dome Camera 2) Mounting Accessories 3) Instruction Manual & Mounting Template MOUNTING ACCESSORIES Torx Wrench - (Vandal & IR Versions Only) Type #: T20 Length: 63mm / Diameter: 4mm Qty: 1 Phillips head Screws - (Vandal & IR Versions Only) For attaching the dome cover to the flush housing. -
Page 3: Available Models / Accessories
VT-MD-2VOC: Secondary Video Output Cable for Mighty Domes Heater/Blower Option: Heater/Blower Option for Mighty Domes UTP Option: UTP Option for Mighty Domes IP Module: IP Option for Mighty Domes VT-MD/WMT: Mighty Dome Wall Mount VT-MD/CMT: Mighty Dome Pedestal Ceiling Mount... -
Page 4: Mighty Dome Layout
MIGHTY DOME LAYOUT 1) Lens 8) Dome Cover Ring 2) Power Input Connector(12VDC / 9) Flush Mount Base 24VAC) 10) Surface Mount Plate 3) Video Output Connector - BNC 11) Assembly Screws - Torx M4x9 4) Camera Holder and 2nd Video... -
Page 5: Installation
INSTALLATION 1) Dome Cover 1.1 Vandal Proof Domes - Use the provided Torx wrench to unscrew the vandal proof screws and remove the dome cover. 1.2 Indoor Domes - Turn the dome cover to the left to remove the dome cover. 2) Flush Mount Installation: Using four St4x30 screws, attach the flush mount base to a sturdy surface. -
Page 6: Junction Box Installation
JUNCTION BOX INSTALLATION Mighty Domes can easily be flush or surface mounted to an electrical junction box (J-Box) using the pre-drilled mounting holes on either the surface mount housing or the the flush mount base. -
Page 7: Open Gimbal Cover
OPEN GIMBAL COVER To adjust the zoom and the focus, the gimbal needs to be removed temporarily from its base. 1) Remove the ball gimbal from its socket, and hold the base firmly with one hand. 2) Gently squeeze Point A and B and pull away from the base until the gimbal is removed from the base. - Page 8 CONNECTIONS • Power connection: 12VDC and 24VAC dual input. • All Mighty Dome cameras come standard with a secondary video output. Please contact your distributor or the VITEK Sales Department for availability of the optional secondary video cable (VT-MD-2VOC).
-
Page 9: Lens Adjustment
LENS ADJUSTMENT 1) Remove the Gimbal cover from the Gimbal base. 2) Loosen Zoom & Focus screws and make necessary adjustments as shown. Field of view: Telephoto(T) to Wide(W) Focus: Near(N) to infinity( ) 3) DC Level: Adjust left or right if the picture is too dark. 4) Dip Switches. - Page 10 DIP SWITCH ADJUSTMENTS Indoor & Vandal-Proof Mighty Domes (Non-Day/Night): Factory Default: Function ELC/ALC Back Light Control (BLC) Auto Gain Control (AGC) Normal Turbo Day/Night & IR Mighty Domes: Factory Default: Function ELC/ALC Back Light Control (BLC) Auto Gain Control (AGC) Normal Turbo Flickerless...
-
Page 11: Axis Gimbal Adjustment
3-AXIS GIMBAL ADJUSTMENT The Gimbal mechanism yields maximum rotation and placement as shown below. -
Page 12: Heater / Blower Specifications
HEATER / BLOWER SPECIFICATIONS Specifications Power Supply 24 VAC Power Consumption 10W (Heater) / .7W (Blower) Heater On: at 41ºF / Off at 59ºF Blower Continuous 24 Hour Operation EXTERNAL DIMENSIONS... -
Page 13: Indoor Mighty Dome Specifications
INDOOR MIGHTY DOME SPECIFICATIONS Specifications VTD-MH VTD-MX Image Sensor 1/3” Super HAD CCD Sync System Internal Scanning system 2:1 Interlace Lens Options 2.9-10mm or 9-22mm Horizontal Resolution 480 TV Lines 550 TV Lines Min. Illumination 0.2Lux (F1.2@40IRE) S/N Ratio More than 52dB AGC OFF at 50IRE Video Output 1.0Vp-p composite, 75 Ohms... -
Page 14: Vandal Mighty Dome Specifications
VANDAL MIGHTY DOME SPECIFICATIONS Specifications VTD-MVH VTD-MVX VTD-MVH(DN) VTD-MVX(DN) Image Sensor 1/3” Super HAD CCD 1/3”True Day/Night Super HAD CCD Sync System Internal Scanning system 2:1 Interlace Lens Options 2.9-10mm or 9-22mm Horizontal Resolution 480 TV Lines 550 TV Lines... -
Page 15: Ir Mighty Dome Specifications
IR MIGHTY DOME SPECIFICATIONS Specifications VTD-MVH (L35) VTD-MVX (L35) Image Sensor 1/3” Super HAD CCD Sync System Internal Scanning system 2:1 Interlace Lens Options 2.9-10mm or 9-22mm Horizontal Resolution 480 TV Lines 550 TV Lines Min. Illumination Day/Night: 0.02Lux (F1.2@40IRE) / Standard: 0.2Lux (F1.2@40IRE) - Page 16 WDR MIGHTY DOME SPECIFICATIONS VTD-MX (WDR) VTD-MVX (WDR) Specifications Image Sensor 1/3" RGB Color DPS SENSOR (Pixim Orca D1500 series) Gamma 0.45 Sync System Internal Scanning system 2:1 Interlace Lens Options 2.9-10mm / 9-22mm / 18-50mm Horizontal Resolution 550 TV Lines Min.
- Page 17 Appendix: WDR Mighty Dome With CMOS image sensor, - Provides the best quality image without any blooming or vertical smear even under the spot light. With Pixim’s DPS technology, Offers unparalleled image quality across lighting conditions especially high-contrast environments such as indoor and outdoor elements combined in the same field of view, or other extreme bright &...
- Page 18 Appendix: WDR Mighty Dome WDR SETUP Menu 1) In the menu buttons to move menu, buttons to change the settings and press button short to select or enter. button stands for MENU or ENTER button. 2) Entering menu Press button longer than 2 sec on the back of camera.
- Page 19 Appendix: WDR Mighty Dome 4) EXPOSURE menu EXPOSURE menu is provided to help the settings with the possible parameters obtained and Presets are configured by factory tests for most commonly encountered environments. EXPOSURE presets may not be the best optimized settings for the actual installations.
- Page 20 Appendix: WDR Mighty Dome 6) ZONE ADJ. Menu Adjusts the size and the location of the metering zone for the dynamic range control. Dynamic range control is very sensitive to the size and the location of the zone. The default window size is SAFE AREA.
- Page 21 Appendix: WDR Mighty Dome 8) DAY / NIGHT menu DAY/NIGHT Descriptions IR Cut filter is switched OUT/IN at night/day time automatically. <AUTO BW> At night mode, camera outputs the B/W video without the color burst signal. IR Cut filter is stuck and is NOT switch OUT.
- Page 22 Appendix: WDR Mighty Dome 10) SHUTTER LIMIT menu SHUTTER Descriptions LIMIT The longest shutter is limited to 2X of 1/60(NTSC)/1/50(PAL) seconds when the <2X scene illumination becomes dim. > Video refresh rate at 2X ESS is 15(NTSC)/12.5(PAL)frames/sec. The longest shutter is limited to 4X~32X of 1/60(NTSC)/1/50(PAL) sec when the 4X ESS ~ scene illumination becomes dim.
- Page 23 Appendix: WDR Mighty Dome 12) MANUAL WHITE BALANCE menu (in PITURE CONTROL menu) To enter MANUAL WHITE BALANCE menu, press button at <MANUAL...> of WHITE BALANCE menu. View plain white paper or a gray card and adjust either KELVIN or R/B so that the color on the monitor becomes the most white.
- Page 24 Appendix: WDR Mighty Dome 14) LENS SELECT menu DC auto iris lens or MAUAL lens can be used for this camera but DC auto iris lens must be used FL-LIGHT and EFR presets and strongly recommended in other presets when the scene is very bright.
-
Page 25: Video Standard
Appendix: WDR Mighty Dome 16) SAVE / RESTORE / EXIT menu MENU-2 Descriptions SAVE AND EXIT Exits menu after saving the parameters. EXIT NO CHANGES Exits menu with discarding any changes. RESTORE Restores and saves all parameters of factory settings. - Page 26 Appendix: WDR Mighty Dome 17) Setup Menu Tree...
- Page 27 NOTES...
- Page 28 The product must not have been tampered with in any way then the guarantee will be considered null and void. This guarantee does not affect your statutory rights. Contact VITEK directly for all servicing. 28492 CONSTELLATION ROAD VALENCIA, CA 91355 WWW.VITEKCCTV.COM | 888-VITEK-70...
Need help?
Do you have a question about the MIGHTY DOME and is the answer not in the manual?
Questions and answers